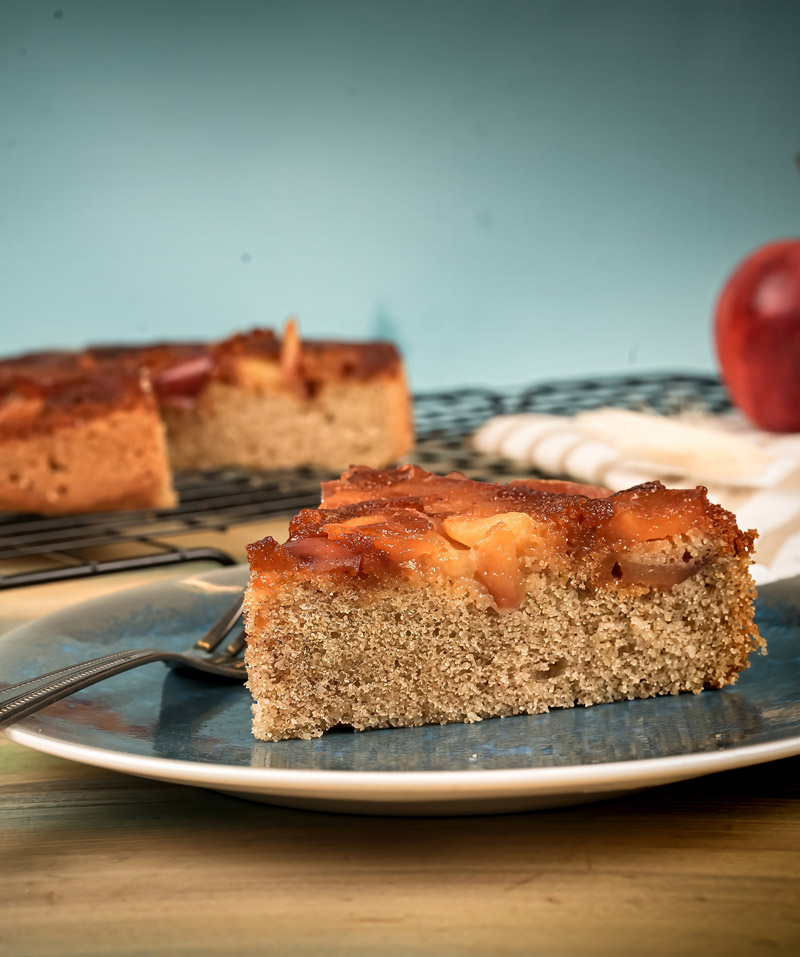
There’s just something about apples and caramel together, right? It makes me think of cozy fall afternoons and that amazing smell filling the kitchen. We’re going to capture all that yumminess in a cake that’s delicious but also not crazy hard to make.
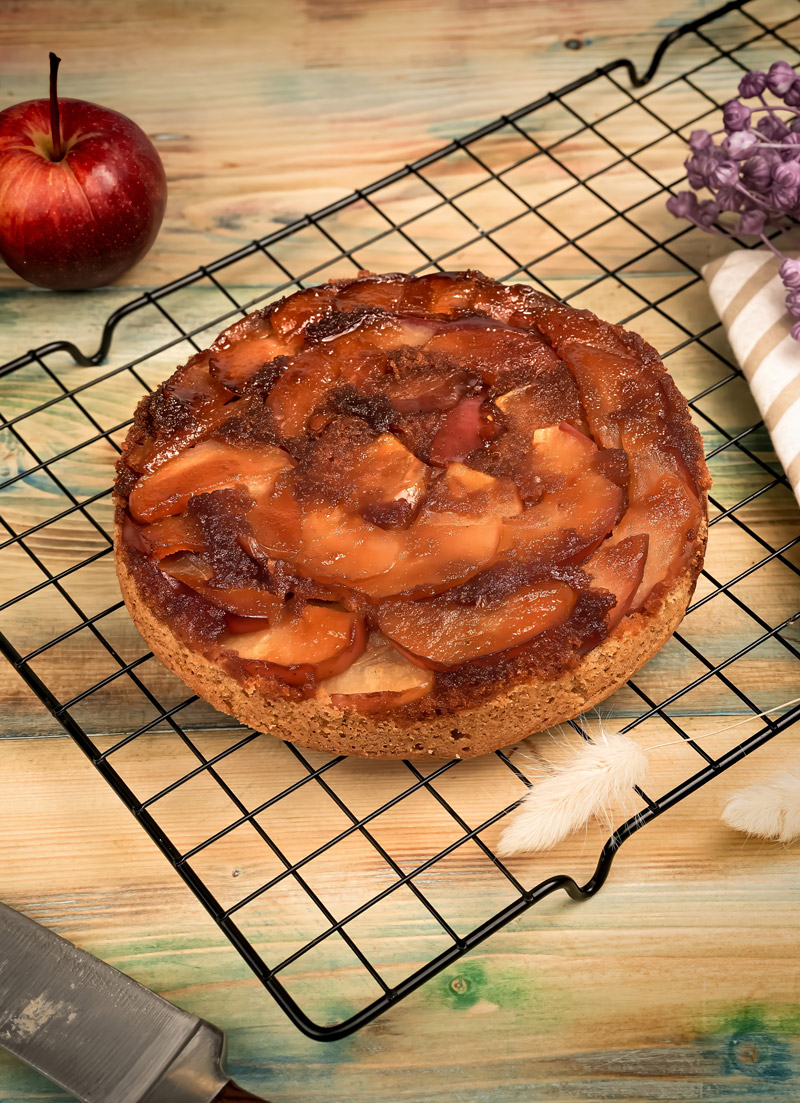
This cake is an upside-down kind. You know, where the yummy topping ends up on top after you flip it? Super cool. We’ll make a soft, buttery cake with a hint of cinnamon. That gets baked right over sweet apples swimming in caramel. Flip it over, and boom! Pure deliciousness.
It’s like those fancy Caramel Apple Upside Down Cakes, but way simpler. An Easy apple caramel cake, for real. What we want is that perfect Moist apple caramel cake feel – soft, rich, just melts in your mouth. Think BUTTERY SOFT Caramel Apple Cake. Sound good? Let’s get baking!
Quick Look at What We’re Making
Here’s the lowdown so you know what you’re getting into:
- How Long Will This Take? Plan on about 25-30 minutes to get everything ready (peeling apples, mixing the batter). Then, 25-30 minutes in the oven. Super important: You gotta let it cool in the pan for 15-20 minutes before the big flip. Then maybe a bit longer to cool before slicing. Patience, grasshopper!
- How Much Cake Does It Make? This recipe fits perfectly in a 9-inch round or square pan. You’ll get about 8-10 slices out of it. The original note mentioned 12-14 servings – yikes! For that many people, you’d probably need to double everything, use a bigger pan (like 9×13 inches), and bake it much longer (maybe 45-55 mins).
- Tiny Cake Tip: Want a smaller cake? Just cut all the ingredients in half and use a 6-inch pan. Bake time might be a little less.
- Is It Hard? Nah. I’d say Easy to Medium. The cake part? Super simple. The caramel and the flip are the only bits that need a little extra care, but don’t sweat it! I’ll walk you right through it. Using store-bought caramel makes it extra easy.
- Stuff You’ll Need:
- A 9-inch round or square cake pan (metal ones work great for caramel!)
- Mixing bowls (a big one and a medium one)
- Electric mixer (handheld or stand) or a whisk and some muscle!
- Rubber spatula or wooden spoon
- Whisk (for the dry stuff)
- Measuring cups and spoons
- Knife & cutting board
- Apple peeler
- A thin spatula or knife (helps loosen the cake later)
- A serving plate (bigger than your pan!)
- Can I Make It Ahead? This cake is best the day you bake it, especially warm. But yeah, you can totally make the caramel sauce ahead if you’re doing homemade. You can also peel and slice the apples maybe an hour early – just toss them with a tiny squeeze of lemon juice so they don’t turn brown, cover ’em, and stick ’em in the fridge. The baked cake is still good for a day or two later.
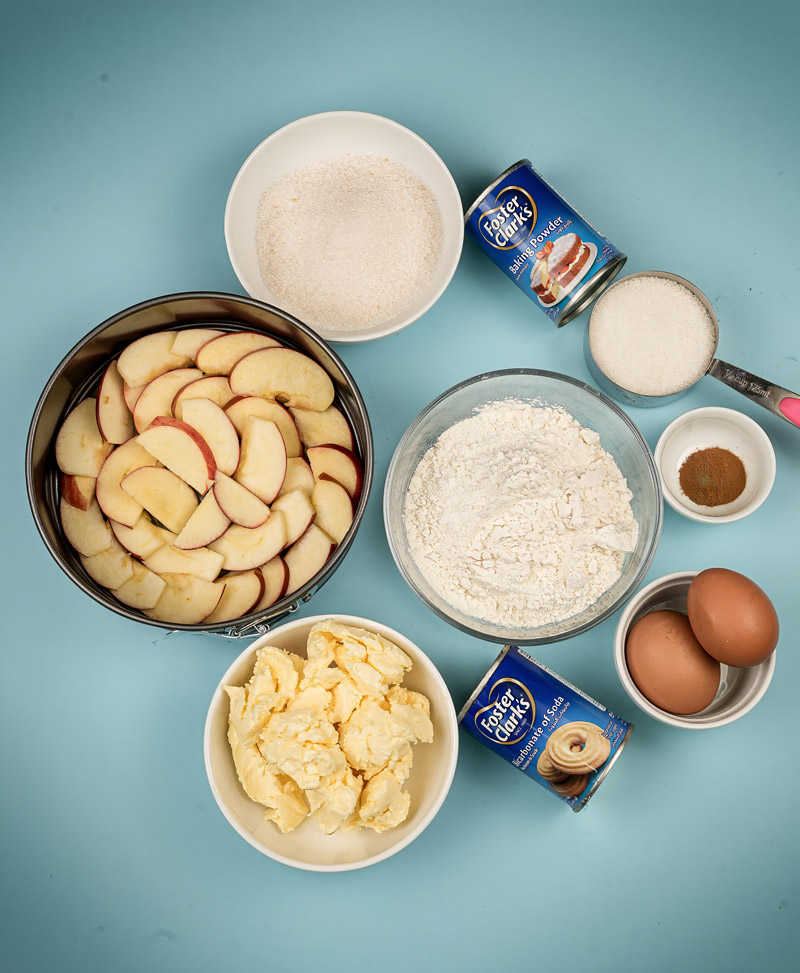
What You’ll Need: The Tasty Bits
Okay, ingredient time! Good stuff makes a good cake, but don’t stress if you need to swap things.
For the Shiny Apple Topping:
- Apples: Grab 2 medium ones. You want apples that are firm and a little tart – they hold up when baking and taste great with the sweet caramel. Think Granny Smith, Honeycrisp (my fave!), Braeburn, or Pink Lady. Peel ’em, cut out the core, and slice ’em about ¼-inch thick. Try to make the slices kinda the same thickness so they cook evenly.
- Caramel Sauce: You need 1/3 cup. Honestly, using a good store-bought caramel sauce is totally fine and saves time. Look for the thicker kind in a jar, not the runny stuff for ice cream. Feeling adventurous? Homemade caramel (just sugar, butter, cream) is amazing too!
For the BUTTERY SOFT Cake:
- Butter: Get 125 grams of unsalted butter (that’s about half a cup plus a tablespoon). Super important: It needs to be soft, like room temperature soft. Not melted! This is key for a tender cake.
- Sugar: You’ll need 110 grams of granulated sugar (just over 1/2 cup).
- Eggs: Grab 2 large eggs. Let them sit out for a bit to get to room temp, if you can remember. They mix in better that way.
- Vanilla: A teaspoon of warmth! Use 1 teaspoon of vanilla essence (or pure extract if you’re fancy).
- Flour: We need 100 grams of all-purpose flour (that’s about 3/4 cup plus 1 tablespoon). See how it’s not a ton of flour compared to the butter and eggs? That’s the secret to keeping it moist!
- Flavor & Lift: Add 1 teaspoon of ground cinnamon, 1 teaspoon of baking powder (makes it rise!), and 1/2 teaspoon of baking soda.
- Salt: If your butter is unsalted, add a little pinch (like 1/4 teaspoon) to make all the flavors pop. Sifting these dry bits together is smart – gets rid of lumps!
- Quick Swaps & Ideas:
- Butter: Only got salted? Just leave out the extra pinch of salt. Easy peasy.
- Sugar: Want a deeper flavor? Swap maybe 1/4 cup of the white sugar for light brown sugar.
- Apples: Pears would be amazing here too!
- Flour: Cake flour works if you want it extra tender. For gluten-free, use a good 1-to-1 GF baking mix that has xanthan gum.
- Spices: Love spices? Add a tiny pinch of nutmeg or ginger with the cinnamon.
- Caramel: Like I said, store-bought is your friend! If you make your own, do it first so it can cool down a bit.
Let’s Bake This Thing: Step-by-Step
Alright, let’s do this!
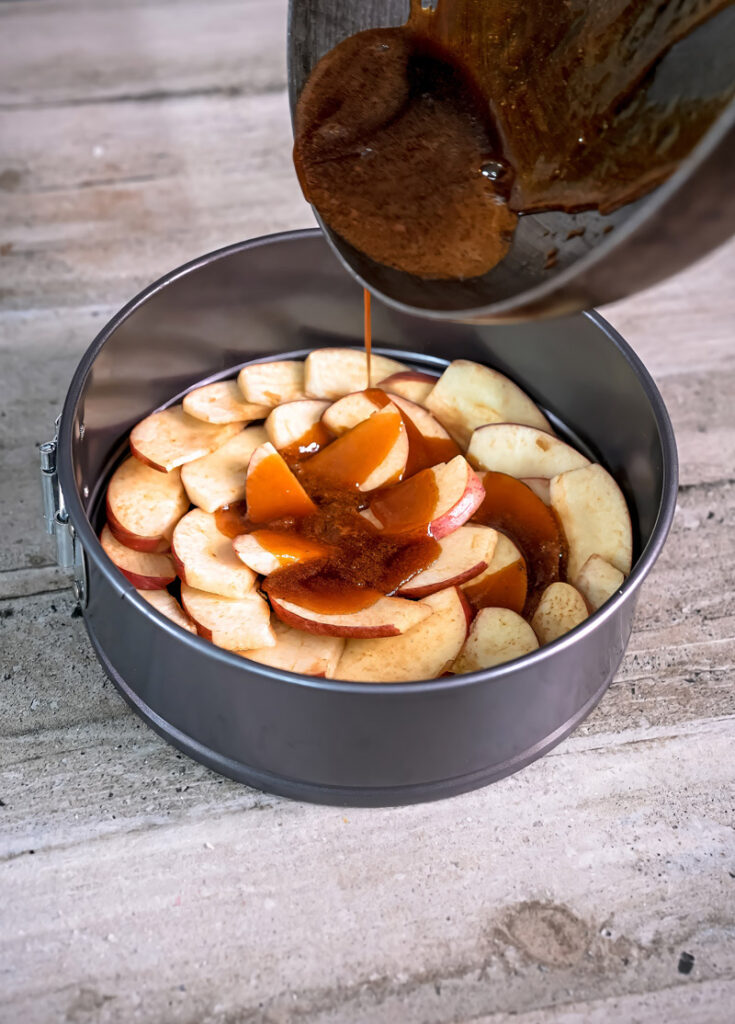
Get Your Pan & Apples Ready: First things first! Crank your oven up to 350°F (175°C). Find that 9-inch pan. We’re doing this upside down, so no need to grease the pan itself. Take your 1/3 cup caramel sauce.
If it’s thick (especially if it was in the fridge), warm it just a tiny bit (like 10 seconds in the microwave) so it’s pourable, but not hot. Pour that golden goodness right into the bottom of the pan. Swirl it around so it covers the whole bottom.
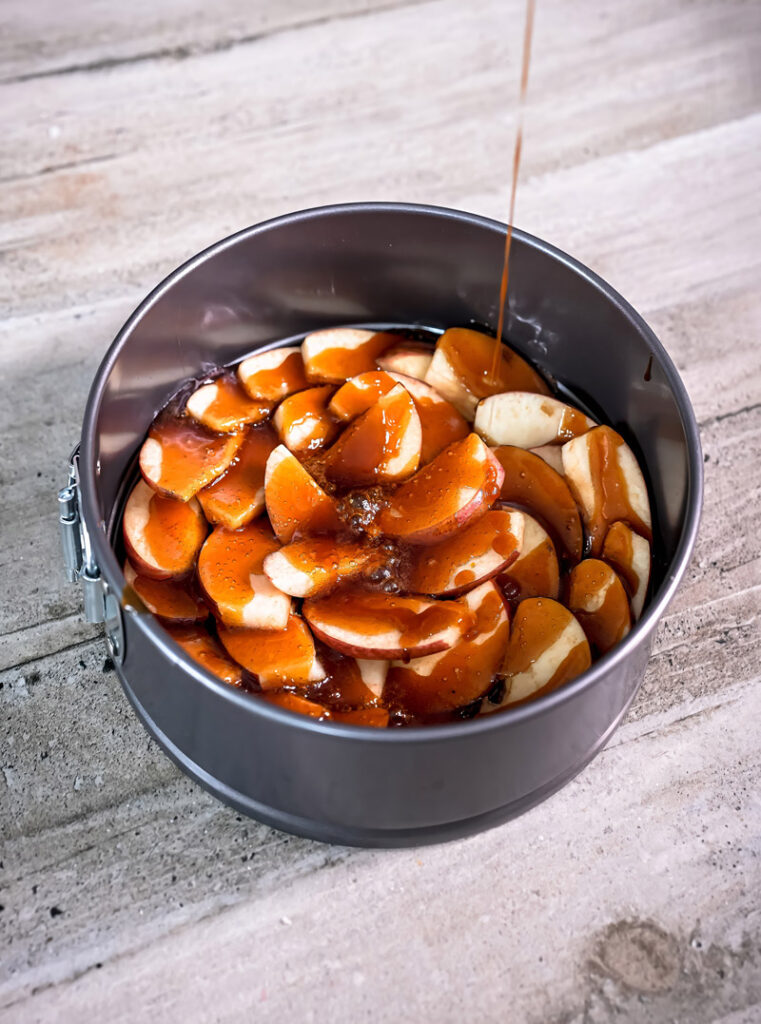
Now for the apple slices! Arrange them however you like on top of the caramel. You can make a pretty pattern in circles, or just snuggle them in close together in one layer. Make it look nice! This will be the top of your cake. Set that pan aside for now.
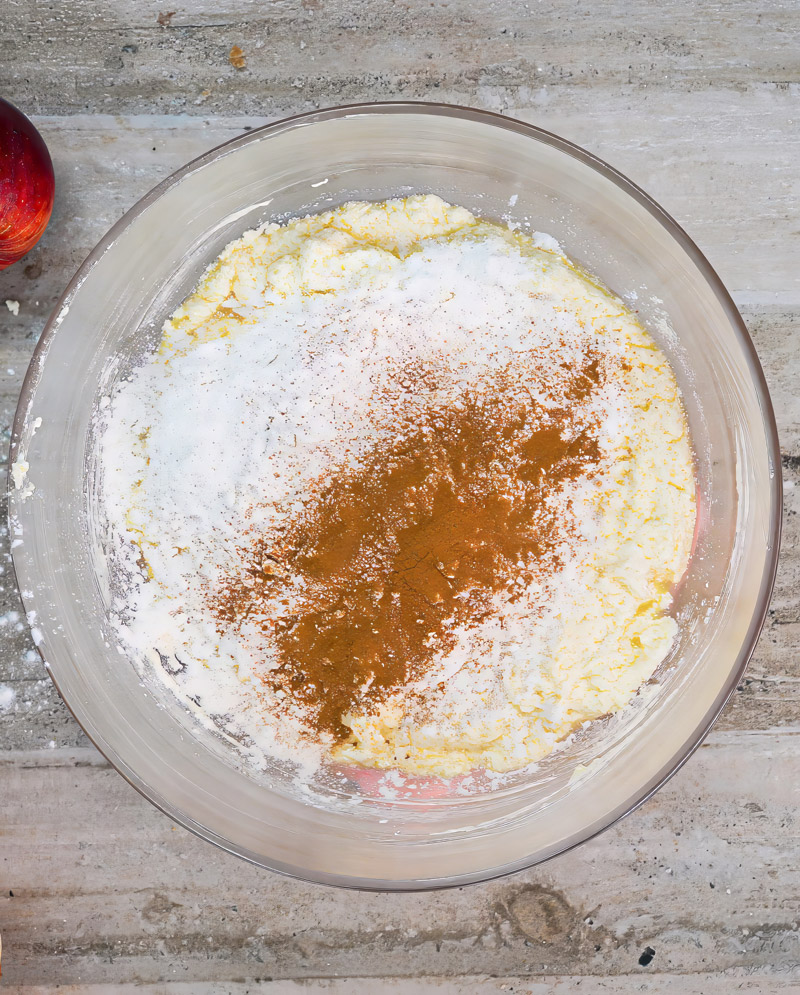
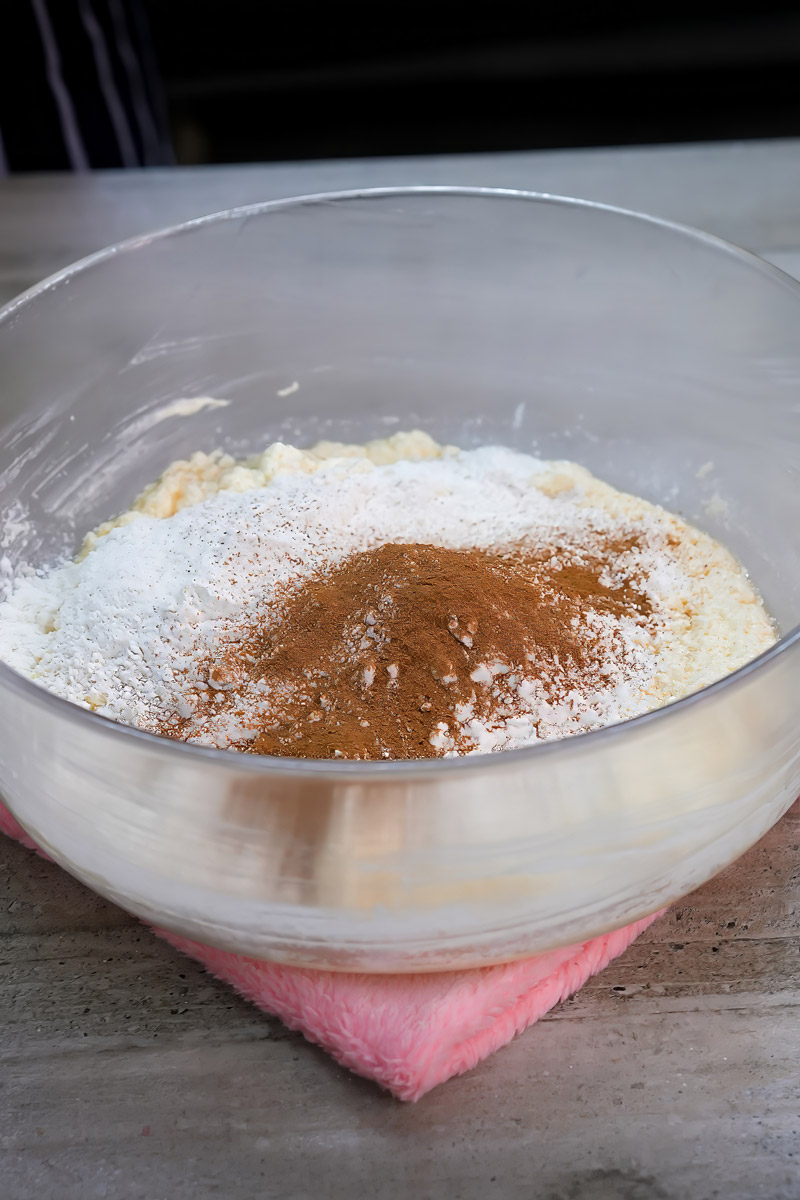
Mix the Dry Stuff: Okay, grab a medium bowl. Put in the 100g flour, 1 tsp cinnamon, 1 tsp baking powder, and 1/2 tsp baking soda. If you used unsalted butter, toss in that 1/4 tsp salt now. Whisk it all together really well. You want that cinnamon and the leaveners mixed evenly – no surprise clumps! Sniff it. Smells good, right? Set this bowl aside too.
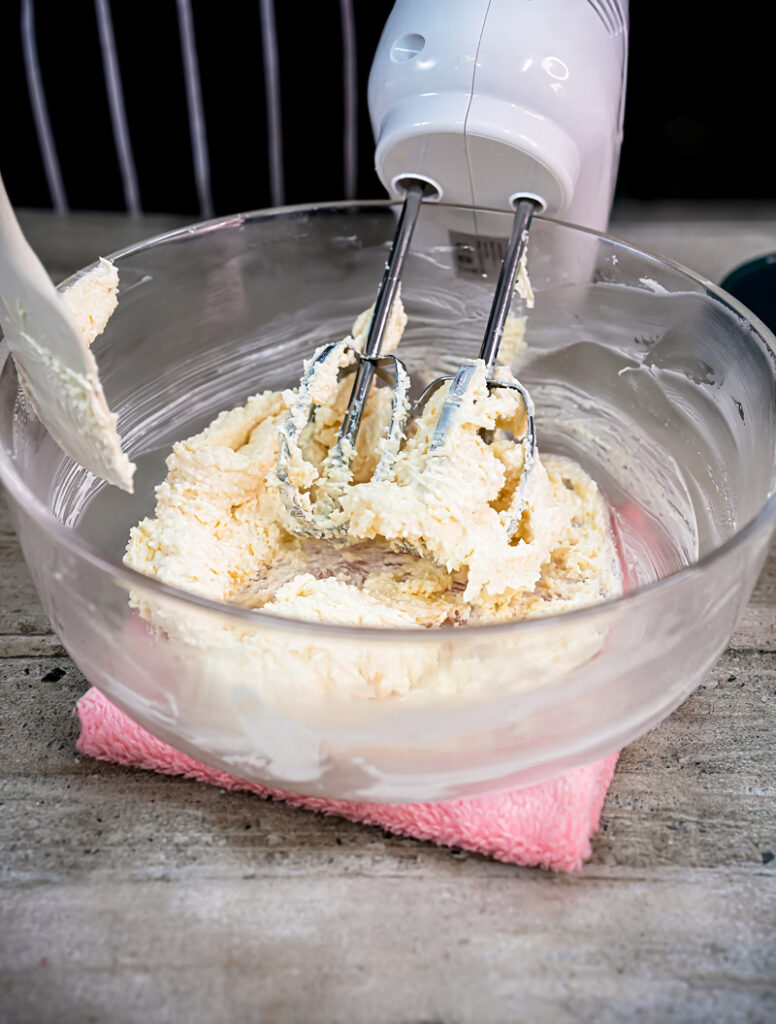
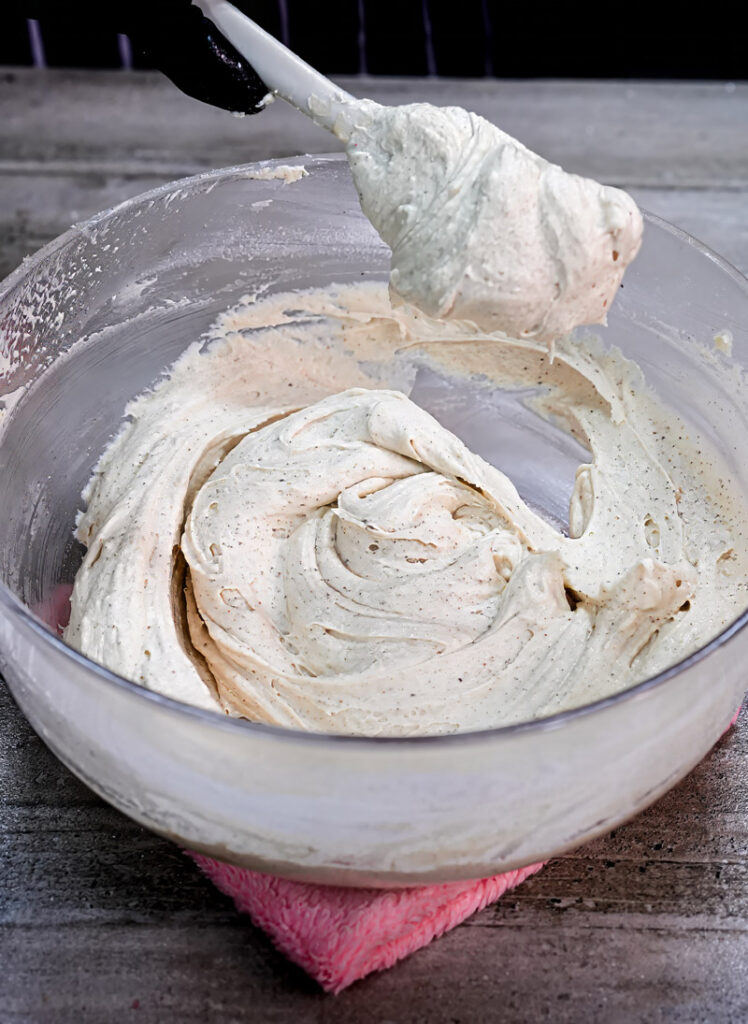
Cream the Butter & Sugar: This is where the magic happens for that BUTTERY SOFT texture. In your big mixing bowl, put the 125g softened butter. Seriously, make sure it’s soft! Use your electric mixer (or a whisk and some serious arm work!) and beat the butter until it’s smooth and creamy, kind of like thick mayo. Now, slowly pour in the 110g sugar. Turn the mixer up to medium-high and let it go for a good 3 or 4 minutes.
You’re whipping air into it! This is key for that soft cake. Watch it get lighter in color (almost white) and way fluffier. Like a little cloud! Stop once or twice and scrape down the sides of the bowl with your spatula so everything gets mixed in.
Add Eggs & Vanilla: Time for the 2 large eggs. Add them one at a time. Beat well after the first egg until it’s mixed in, then add the second and beat again. Doing it one by one helps everything mix together smoothly. Don’t panic if it looks a little curdled or separated – it sometimes does, and the flour will fix it. Pour in the 1 tsp vanilla and mix quickly one last time. Smells amazing now, right?
Combine Wet & Dry (Gently!): Dump the bowl of dry ingredients into the wet ingredients. Now, be gentle! Use the mixer on its lowest speed, or even better, switch to your spatula. Mix just until you don’t see any more white flour streaks. Seriously, do not overmix! If you beat it too much now, the cake gets tough.
We want a Moist apple caramel cake, remember? The batter will be pretty thick, almost like cookie dough. That’s totally normal!
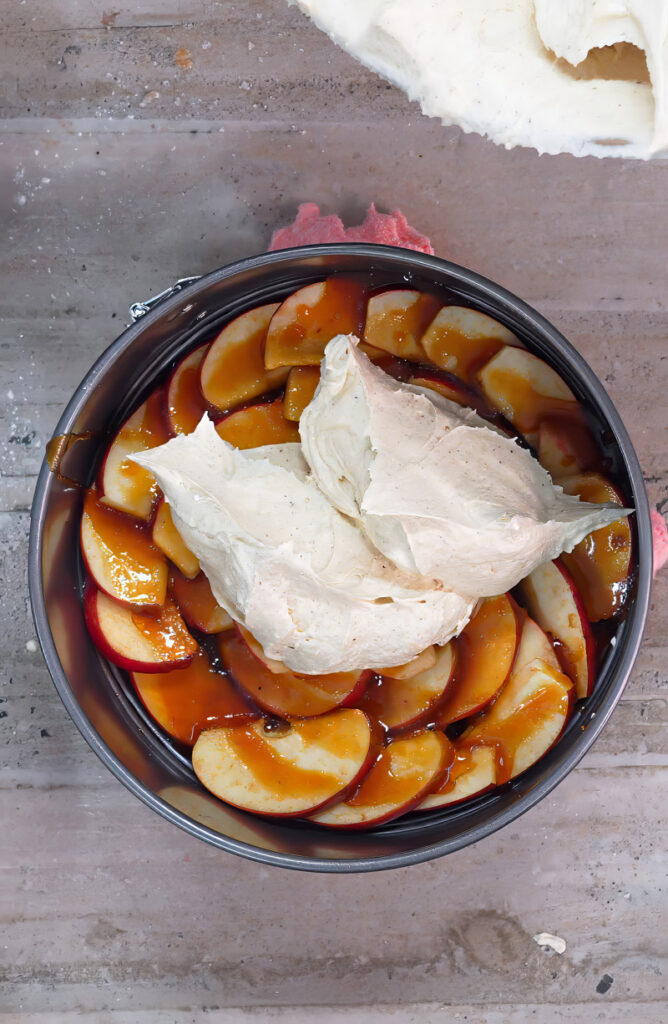
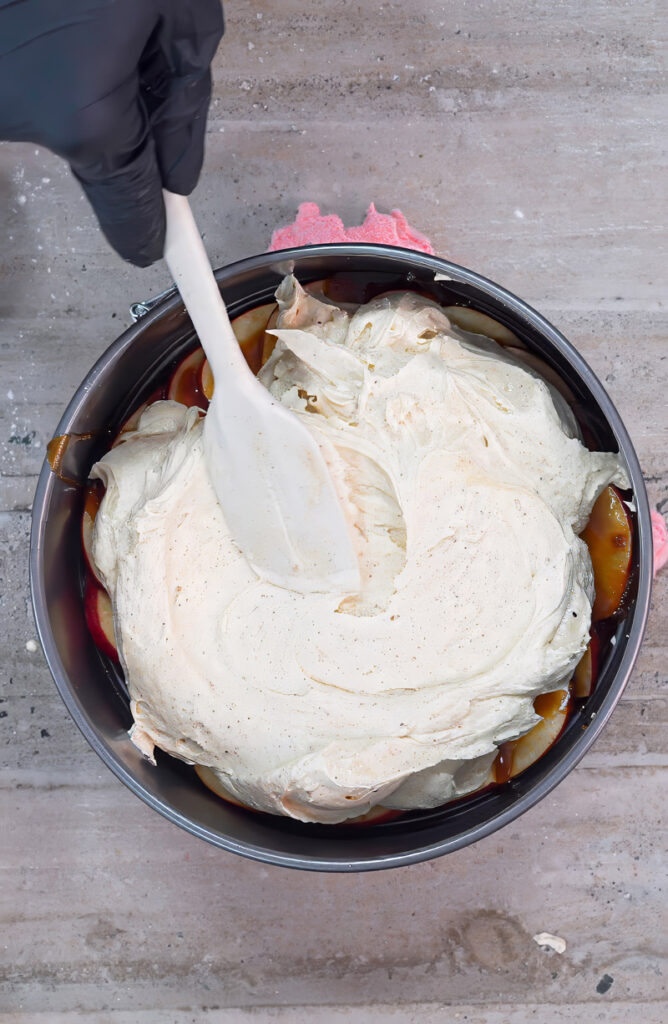
Build the Cake: Go get your pan with the apples and caramel. Spoon dollops of the thick batter evenly over the apples. Try not to dump it all in one spot or you might mess up your pretty apple design. Once all the batter is in, carefully spread it out to the edges with your spatula or the back of a spoon.
Smooth the top. You’re basically tucking the apples under a cake blanket. Be gentle so you don’t mix the batter into the apples.
Bake Time!: Carefully put the pan in the middle of your hot oven. Let it bake for 25-30 minutes. Try really hard not to open the oven door for the first 20 minutes – letting cold air in can make the cake sink. Your kitchen is going to smell incredible. How do you know it’s done?
- It should look golden brown on top.
- The edges might be pulling away from the pan just a little.
- Gently touch the center. Does it spring back? Good sign!
- The best test: Stick a toothpick or wooden skewer into the cake part in the center (try not to hit the caramel!). If it comes out clean, or with just a few moist crumbs (no wet batter), it’s ready!
The Flip! (Don’t Be Scared!): Use oven mitts! Take the hot pan out of the oven and put it on a wire rack. Okay, deep breath. You MUST let it cool in the pan for 15-20 minutes. This is super important. It lets the cake set up a bit so it doesn’t fall apart, and lets the caramel thicken just enough so it sticks to the cake, but not so much that it glues the cake to the pan.
After the wait, run a thin knife or spatula around the edge of the cake, right against the pan, to loosen it up. Now, grab your serving plate (remember, bigger than the pan!).
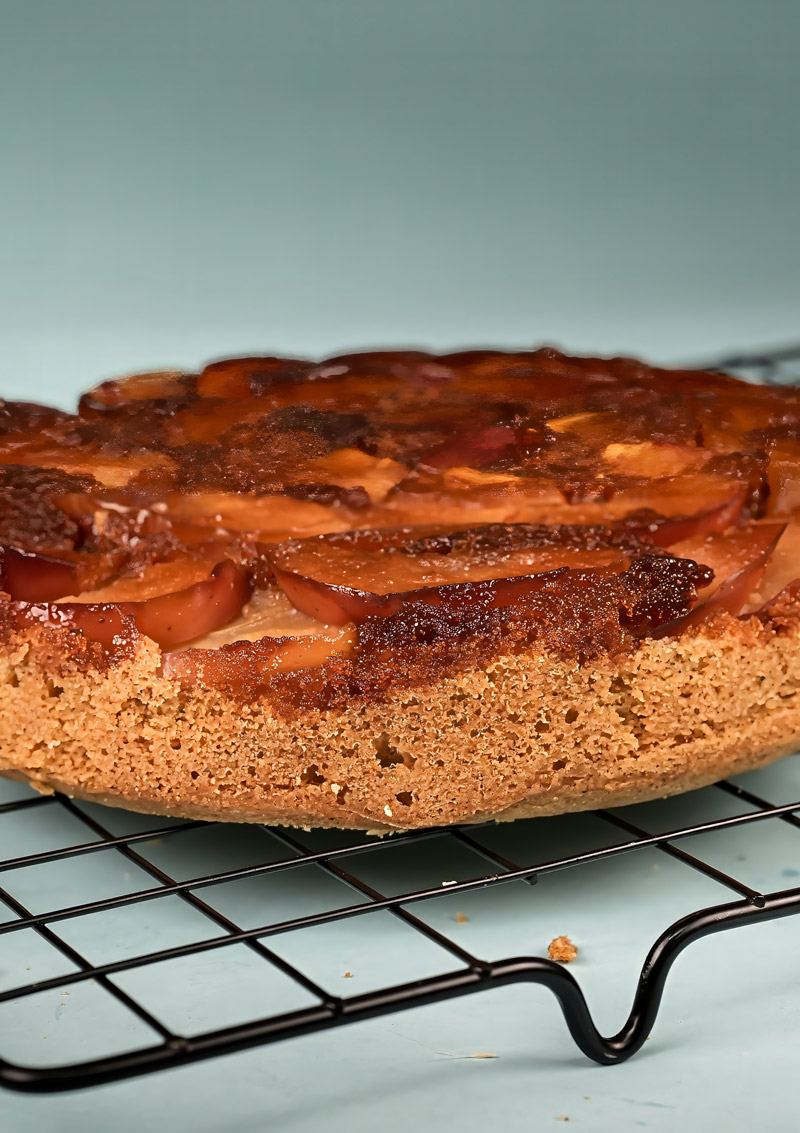
Put the plate firmly on top of the pan. Use your oven mitts (it’s still hot!). Hold the plate and pan together tightly. Okay… Flip! Do it in one quick, confident move. Set the plate down. Slowly lift the pan off. Ta-da! Hopefully, you see gorgeous, caramelly apples!
If an apple slice or two stuck in the pan, no worries – just gently scoop it out and place it back on the cake. Let it cool a little more before slicing, or serve it warm. You did it! High five!
Want to Mix It Up? Ideas!
This cake’s great as is, but here are some fun twists:
- Going Gluten-Free? Use a good “cup-for-cup” or “1:1” gluten-free flour blend (make sure it has xanthan gum). Texture might be a little different, but still yummy.
- Vegan? This one’s tough because of the butter and eggs. You could try vegan butter, flax eggs (1 tbsp flax meal + 3 tbsp water per egg, let sit 5 mins), and hope for the best. Make sure your caramel is vegan too!
- Spice It Up: Love cinnamon? Great. Want more warmth? Add a pinch (like 1/4 tsp) of nutmeg or ginger. Not a big cinnamon fan? Use a little less.
- Make it Fancy: Add chopped pecans or walnuts over the caramel before the apples. Serve with whipped cream or vanilla ice cream. Chef’s kiss!
- Seasonal Swaps: Sliced pears instead of apples are fantastic in the fall. Toss in a few fresh cranberries with the apples for a pop of color and tartness.
How to Serve and Keep Your Cake
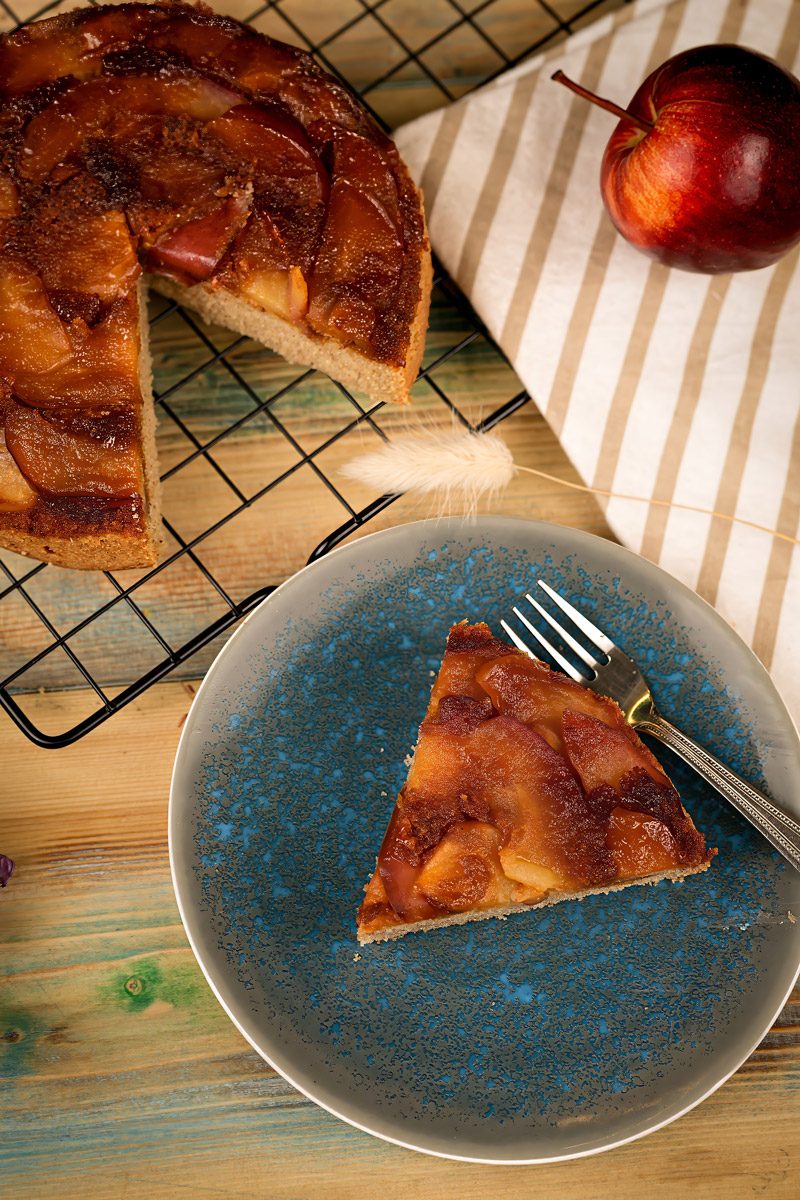
This Caramel Apple Upside Down Cake is honestly best served warm. That gooey caramel, the soft cake… Mmm.
- On the Plate: Slice it up! An extra drizzle of warm caramel never hurt anyone. A little powdered sugar looks pretty too (but wait ’til it’s cool).
- Goes Great With: Vanilla ice cream is classic. Salted caramel ice cream? Even better. Whipped cream works too. Drink? Coffee, tea, or a cold glass of milk!
- Leftovers? Once it’s totally cool, keep it in an airtight container. It’s good for 1-2 days on the counter or 3-4 days in the fridge. (Warning: the caramel might make the container sticky!).
- Warming It Up: Zap a slice in the microwave for 15-20 seconds. Or wrap it in foil and pop it in a low oven (300°F/150°C) for 5-10 minutes. Almost like fresh-baked!
- Freezing: You can freeze it, but the caramel can get weird when it thaws. If you try, wrap it super well in plastic wrap, then foil. Thaw it in the fridge overnight. Freezing just the leftover caramel sauce usually works better.
And that’s it! A super yummy, Easy apple caramel cake that looks impressive but isn’t hard to make. I really hope you have fun baking (and eating!) this Moist apple caramel cake. Happy Baking!
PrintApple Caramel Cake
Whip up this stunning yet super simple Apple Caramel Upside-Down Cake! Imagine a buttery soft cinnamon cake baked over sweet apples swimming in gooey caramel. It looks fancy, tastes amazing, but is easy enough for anyone. Pure comfort food magic!
- Prep Time: 25-30 mins
- Cook Time: 25-30 mins
- Total Time: About 1 hr (+ 15-20 mins cooling in pan)
- Yield: 8-10 slices
- Category: Dessert
- Cuisine: American / Comfort Food
Ingredients
For the Caramel Apple Layer:
- Caramel Sauce: 1/3 cup (store-bought jarred kind works great!)
- Apples: 2 medium, firm & tart (like Honeycrisp or Granny Smith), peeled, cored, sliced ¼-inch thick
For the BUTTERY SOFT Cake Batter:
- Unsalted Butter: 125g (½ cup + 1 tbsp), very soft
- Granulated Sugar: 110g (just over ½ cup)
- Large Eggs: 2, room temperature if possible
- Vanilla Essence: 1 tsp
- All-Purpose Flour: 100g (about ¾ cup + 1 tbsp)
- Ground Cinnamon: 1 tsp
- Baking Powder: 1 tsp
- Baking Soda: ½ tsp
- Salt: ¼ tsp (if using unsalted butter)
Instructions
- Prep Oven & Pan: Heat oven to 350°F (175°C). Pour caramel into an ungreased 9-inch round or square pan, swirling to coat the bottom. Arrange apple slices tightly over the caramel. Set aside.
- Mix Dry Stuff: In a medium bowl, whisk together flour, cinnamon, baking powder, baking soda, and salt. Set aside.
- Cream Butter & Sugar: In a large bowl, beat the softened butter with an electric mixer until creamy. Gradually add sugar and beat on medium-high until light, pale, and fluffy (about 3-4 minutes). Scrape the bowl!
- Add Eggs & Vanilla: Beat in eggs one at a time, mixing well after each. Stir in vanilla. (Don’t worry if it looks slightly split).
- Combine Wet & Dry: Add the dry ingredients to the wet ingredients. Mix on low speed or fold with a spatula just until no flour streaks remain. Do not overmix! The batter will be thick.
- Assemble: Gently spoon the thick batter over the apples in the pan. Carefully spread it evenly to the edges, covering the apples completely.
- Bake: Bake for 25-30 minutes, until golden brown and a toothpick inserted into the cake center comes out clean (or with moist crumbs, no wet batter).
- Cool & Flip (The Fun Part!): Let the cake cool in the pan on a wire rack for 15-20 minutes (this is important!). Run a thin knife around the edge to loosen. Place a large serving plate over the pan. Carefully and quickly, flip the whole thing over. Lift off the pan. Done!
Notes
- Serving: Amazing served warm! Try it with a scoop of vanilla or salted caramel ice cream, or a dollop of whipped cream.
- Tips & Tricks:
- Make sure butter is really soft for the best texture.
- Don’t overmix the batter once flour is added – keeps it tender!
- The 15-20 min cooling time before flipping is key – prevents sticking and breaking.
- If an apple sticks to the pan after flipping, just gently place it back on the cake. No biggie!
- Want nuts? Sprinkle chopped pecans or walnuts over the caramel before adding apples.
- Storage: Cool completely. Store leftovers airtight at room temp for 1-2 days or in the fridge for 3-4 days.
- Reheating: Gently warm slices in the microwave (15-20 secs) or wrapped in foil in a low oven (300°F/150°C for 5-10 mins).