Hey everyone! Let’s talk breakfast. Are you ever craving that amazing French toast taste but, ugh, the thought of standing there, flipping slice after slice? Yeah, me too. Especially on a lazy weekend morning!
That’s why I absolutely love making Baked French Toast Sticks. Seriously, they are such a lifesaver.
You get all that yummy, custardy goodness of classic French toast. But? You bake them! Genius. They come out tender on the inside, a little crisp outside, and perfect for dunking. Plus, making a whole batch at once is so much easier.
You know how regular French toast is sometimes called pain perdu? Fancy French for “lost bread,” because people used stale bread to make it. Smart, right? This baked stick version is just a cool, modern take. This recipe uses heavy cream, which I think makes the custard extra rich and delicious. Ready to try it? Let’s head to the kitchen!
Here’s the Lowdown: What Making These Is Like
Before we jump in, here’s a quick peek at what you’re getting into. Don’t worry, it’s easy stuff!
Quick Look Table
| Detail | Time/Info | Notes |
|---|---|---|
| Prep Time | About 15 minutes | Mostly slicing bread and mixing custard. |
| Bake Time | About 20 minutes | Quick bake! |
| Total Time | Roughly 35-40 minutes | Pretty speedy for something this tasty. |
| Servings | Makes about 30-40 sticks | Feeds around 6 people. |
| (from 10 slices bread) | ||
| Difficulty | Easy! | Seriously, super simple. |
| Good For? | Breakfast, Brunch, Dessert! | Yep, even dessert. |
Need More or Less?
- Smaller group (3 people)? Just cut all the ingredients in half. Easy peasy.
- Big crowd (12 people)? Double everything! You’ll probably need two baking sheets, though.
What You’ll Need (Kitchen Gear):
You probably have this stuff already. Nothing fancy!
- A big baking sheet (or two if doubling)
- Parchment paper (Trust me. Makes cleanup way easier) or a Silicone Mat
- A shallow dish (like a pie plate or square pan)
- A whisk
- A good knife for bread (serrated works best!)
- Measuring cups and spoons
- Optional: Cooking spray or some melted butter (if you want extra crispiness)
Make Ahead? Totally! These are perfect for making ahead. Bake ’em, cool ’em, freeze ’em. Breakfast sorted! We’ll talk more about that later.
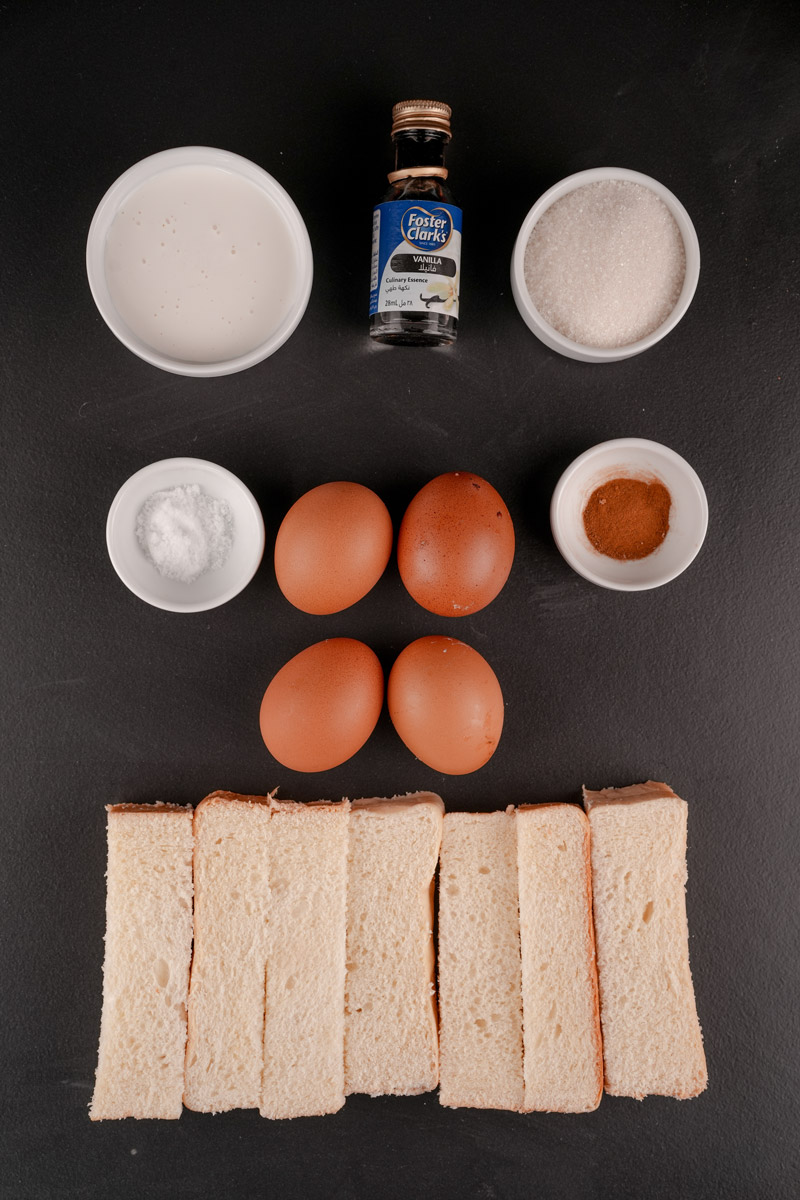
Let’s Get Your Ingredients Ready
Okay, ingredient time! Good stuff makes good food, but don’t stress too much.
Ingredients Table
| Ingredient | Amount | Quick Note |
|---|---|---|
| Texas Toast | 10 slices | The star! Thick-cut (¾-1 inch). Sturdy is key. |
| Large Eggs | 4 | The base for our yummy custard. |
| Heavy Cream | 1 cup | Makes it super rich. Worth it! |
| Granulated Sugar | 3 tbsp | Just a touch of sweetness. Add more/less if you like. |
| Ground Cinnamon | 1 tsp | Classic French toast flavor! |
| Salt | 1 pinch | Don’t skip! It makes everything taste better. |
| Vanilla Extract | 1 tsp (Opt) | My personal must-add! Adds amazing warmth. |
| Oil Spray/Butter | Optional | For extra browning/crispness. |
A Few Ingredient Thoughts:
- Bread: Texas Toast is great because it’s thick and doesn’t fall apart. No Texas Toast? Thick-sliced Brioche or Challah bread are awesome, slightly fancier substitutes. Even thick, regular white bread works if that’s all you have. And hey, if your bread is a day or two old? Perfect! Slightly stale bread actually soaks up the custard better without getting soggy instantly. It’s like it was meant to be!
- Cream: Heavy cream = luxurious custard. Want it lighter? Use whole milk or half-and-half. It won’t be quite as rich, but still good. Dairy-free? Unsweetened almond, soy, or oat milk could work, texture might be a bit different.
- Sugar: White sugar is fine. Light brown sugar adds a nice molasses touch if you have it.
- Spices: Love cinnamon? Add a little extra! A pinch of nutmeg is nice too.
- Vanilla: The original recipe didn’t list it as essential, but I always add it. That teaspoon of vanilla extract just makes it taste complete, you know? Highly recommend.
Quick Tip: Get all your ingredients out and measured before you start. Slice the bread first! Makes everything go smoother. I learned that the hard way juggling bowls and boxes!
Let’s Bake! Step-by-Step
Oven On & Get Set Up: Okay, first step! Crank your oven up to 350°F (175°C). Let it get nice and hot while we prep. Grab your baking sheet and line it with parchment paper. Seriously, do not skip the parchment paper. It’s the secret to easy cleanup. Silicone mat? Also great. Now, the bread. Lay your 10 slices of Texas Toast on your cutting board. Get a serrated knife – those little teeth make cutting bread way easier without squishing it.
Slice each piece into 3 or 4 sticks, going lengthwise. Try to make them about the same size so they bake evenly. No need for a ruler, just eyeball it. Set those future French toast sticks aside. Their destiny awaits!

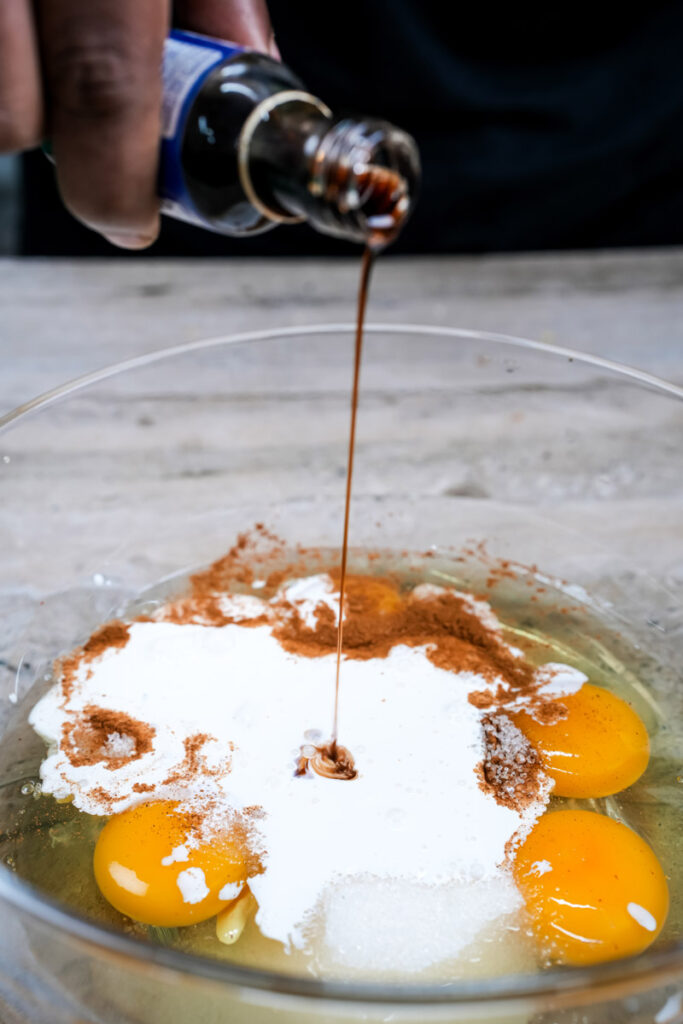
Mix Up That Awesome Custard: Time for the liquid gold – the custard! Find a shallow dish. Wide enough to dip the sticks easily. A pie plate? Perfect. Square baking pan? Great. Crack your 4 large eggs into the dish. Pour in that wonderful 1 cup of heavy cream. Mmm, richness. Add the 3 tablespoons of sugar, 1 teaspoon of cinnamon, and that tiny but mighty pinch of salt. And please, please add that 1 teaspoon of vanilla extract if you have it! Grab a whisk.
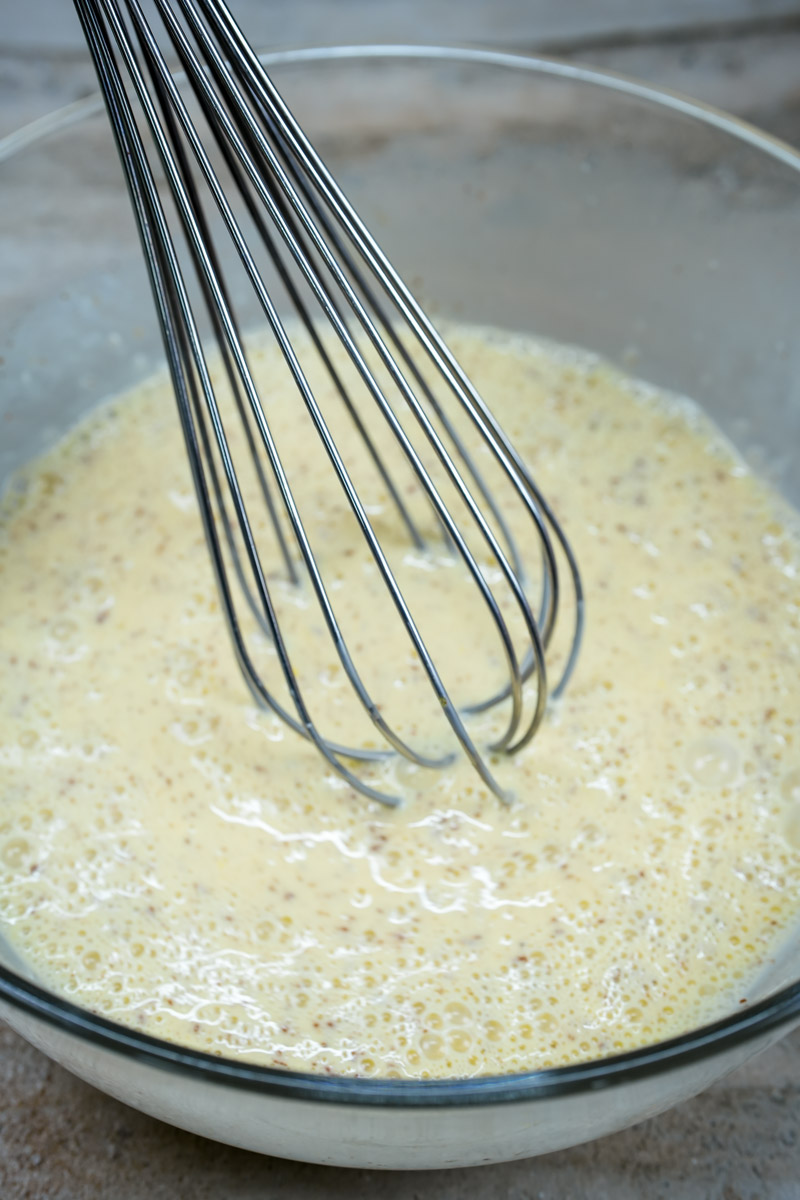
Now, whisk it all together like you mean it! Keep going until it’s totally smooth, no yellow streaks or white bits hanging out. A good whisk makes sure every stick gets coated perfectly. Smell that? That’s happiness starting.
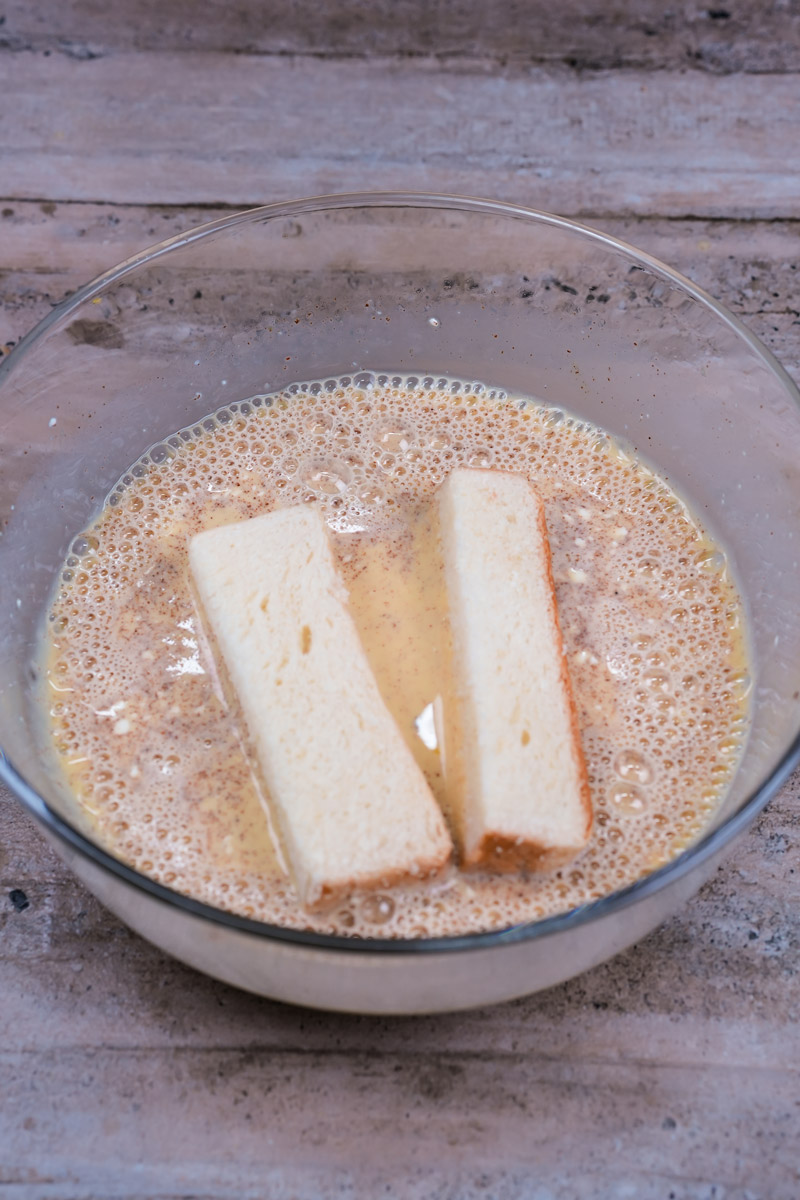
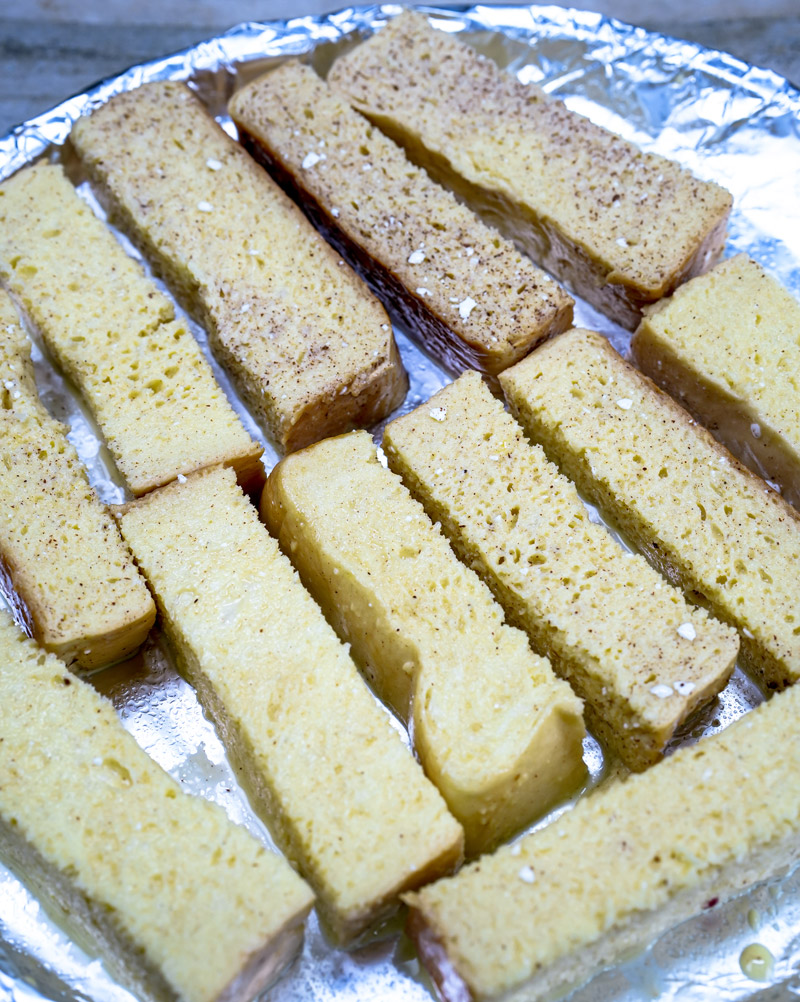
The Dip! Quick Does It: Okay, pay attention here. This part is super important for getting the texture right. We want tender insides, not soggy messes. You gotta work kinda fast. Take a breadstick. Lay it in the custard. Flip it immediately to coat the other side. We’re talking 2 or 3 seconds per side. That’s it! Really. Thick bread soaks fast. Let it sit too long? Soggy city. Lift the stick, let any extra custard drip off back into the dish for a sec. Dip, flip, drip. Got it? Good!
Arrange ‘Em on the Sheet: Once the excess drips off, lay that stick on your parchment-lined baking sheet. Keep dipping and placing. Here’s the key: single layer only! Give them a little space, don’t let them cuddle up and touch. Why? Air needs to get around them to bake them crispy.
If they’re crowded, they steam. Steamed French toast? Not what we’re going for. If you decided to use oil spray or melted butter for extra crispiness, now’s the moment. Give the tops a light spritz or brush gently with butter.
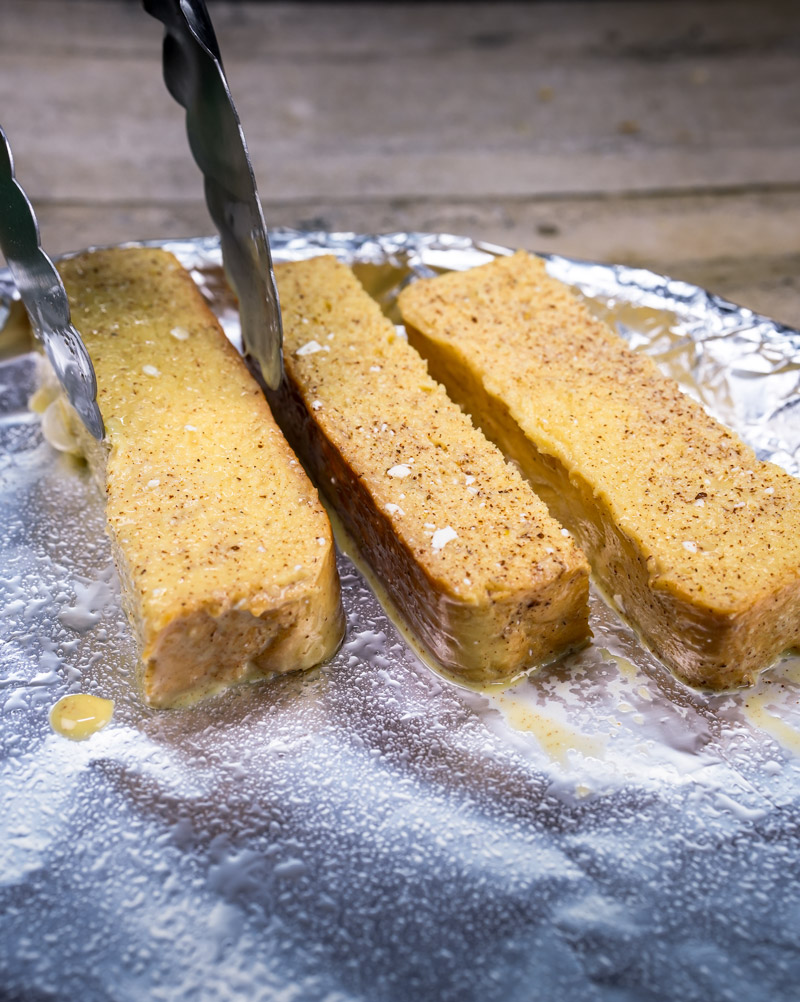
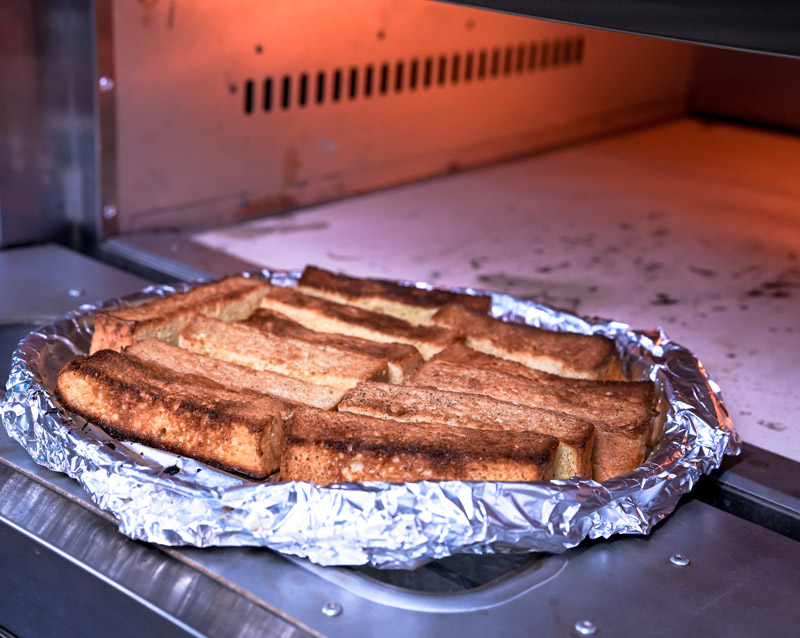
Bake Time!: Showtime! Carefully put that baking sheet onto the middle rack of your hot 350°F (175°C) oven. Set a timer for 10 minutes. When it dings, pull the sheet out (use oven mitts!). Use tongs or a spatula to gently flip each stick over. They should look a bit puffy and maybe starting to get golden on the bottom. Slide them back in the oven. Set the timer for another 10 minutes.
Keep an eye on them now! Ovens can be tricky. You want them golden brown all over, looking kinda puffed up and dry on the surface. Give one a gentle poke – it should feel a little firm. Plus, your kitchen will smell amazing. That’s always a good sign!
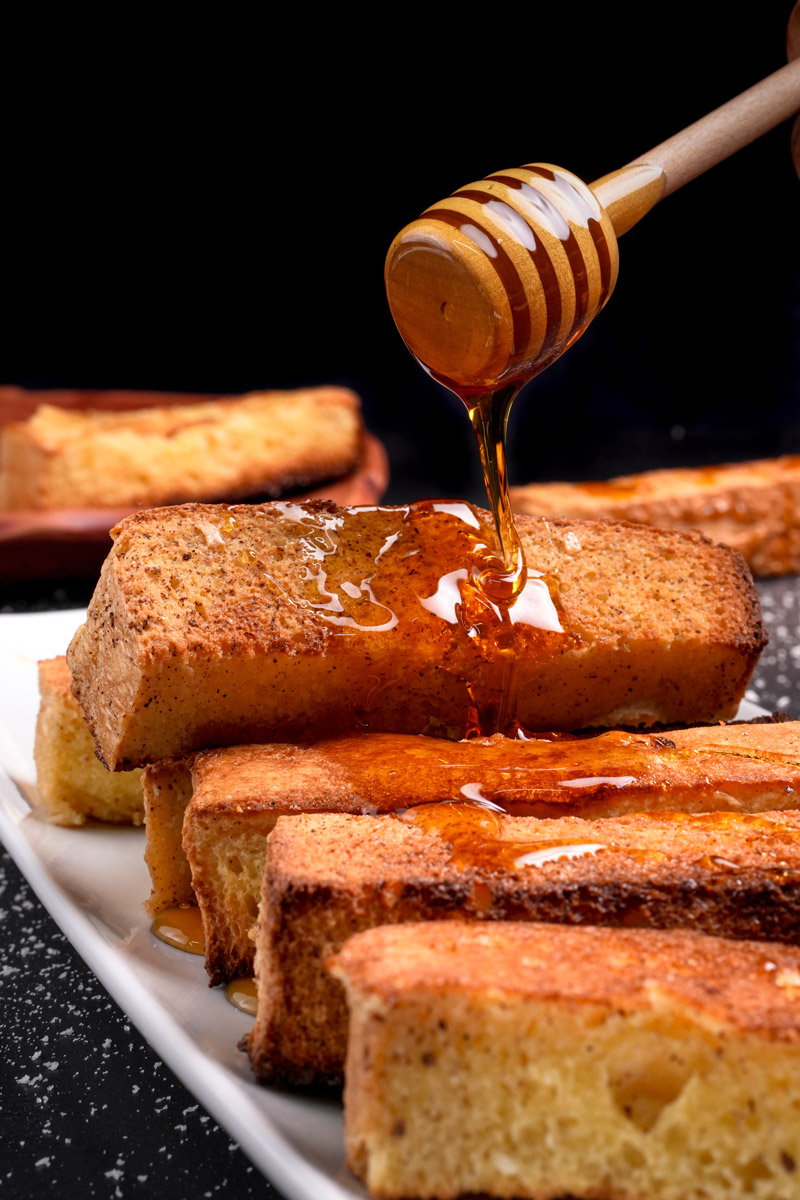
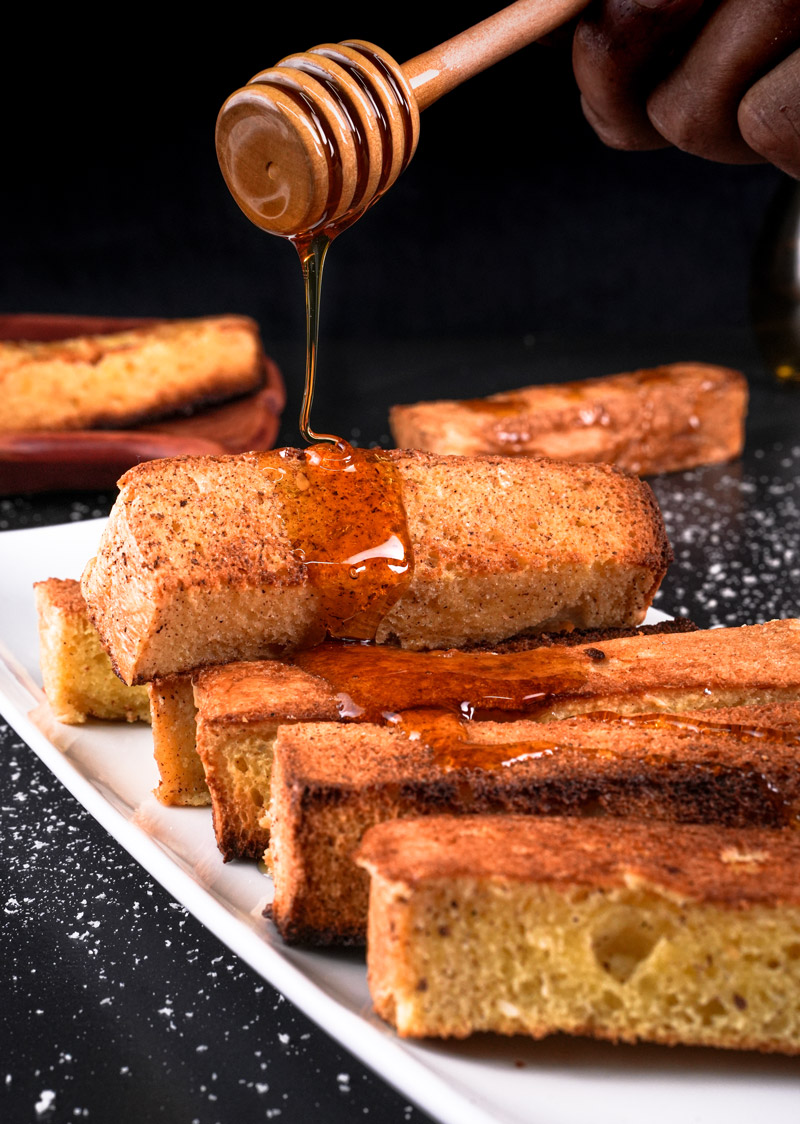
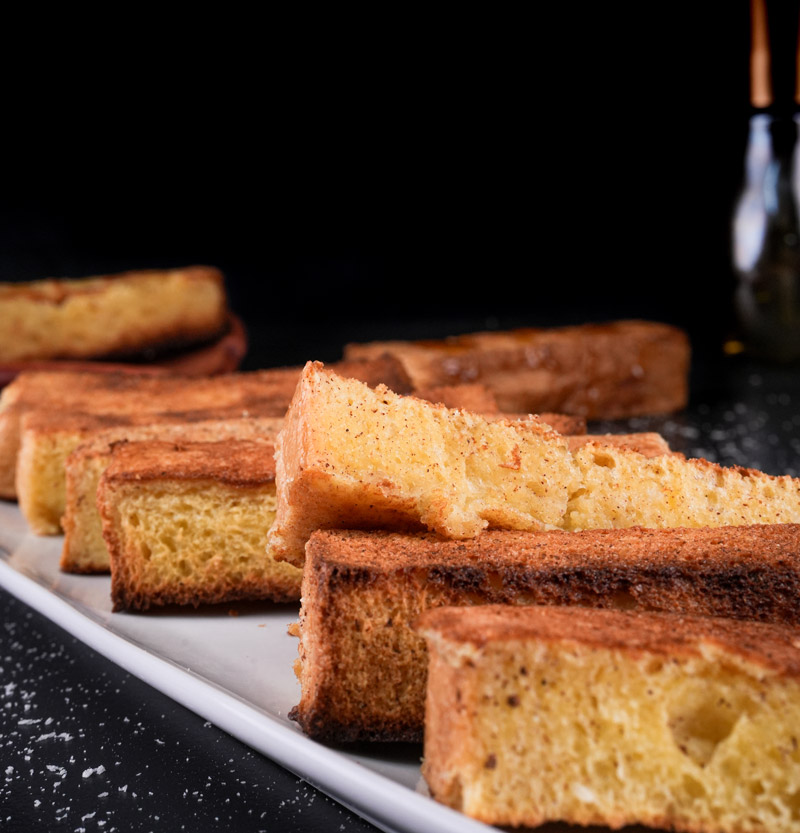
Serve ‘Em Hot!: Done! When they look perfectly golden and cooked, carefully take the baking sheet out of the oven. Let them cool just for a minute or two on the pan – they’re super hot. Okay, time to enjoy your hard work! Pile those beautiful, warm homemade cinnamon french toast sticks onto a platter or plates.
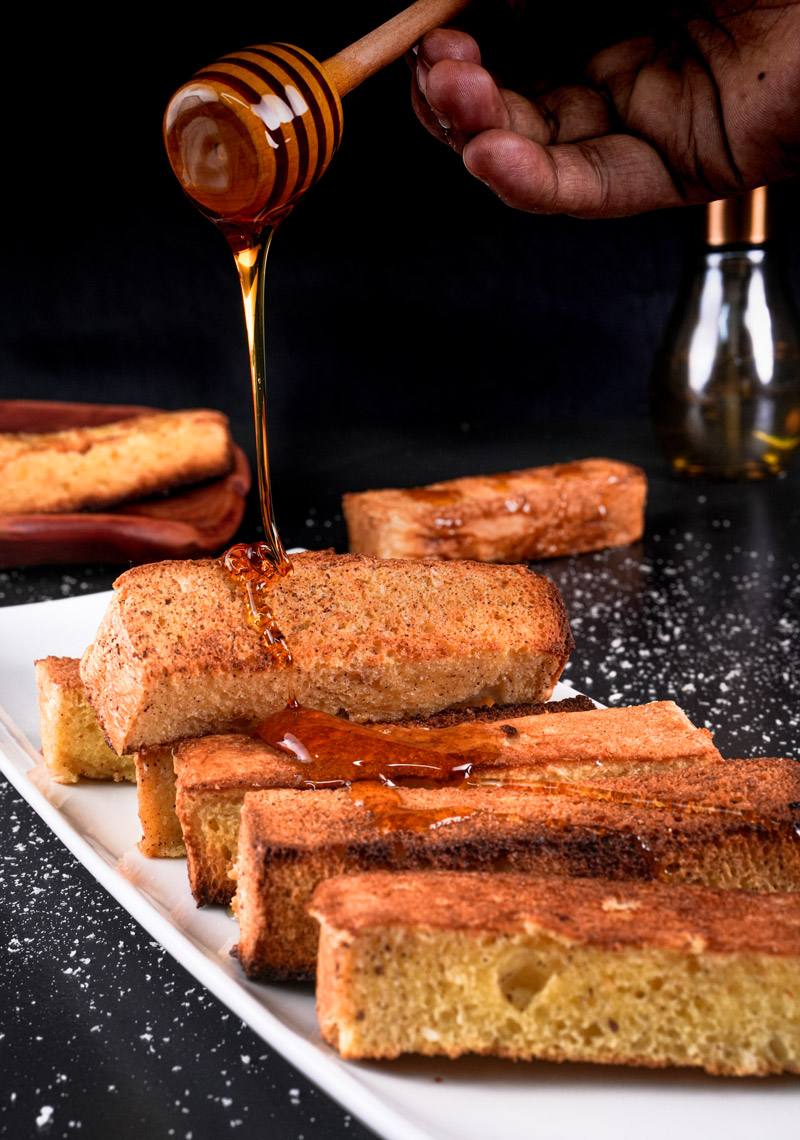
Serve right away! Drizzle with lots of maple syrup or honey. A little dusting of powdered sugar makes them look extra special. Call everyone in and soak up the compliments! You did it!

Mix It Up! Fun Ideas & Swaps
This recipe is great as is, but it’s also fun to play with!
- Need it Gluten-Free? Use a good thick-cut gluten-free bread. Just watch the dipping time – sometimes GF bread acts a bit differently.
- Need it Dairy-Free? Swap the cream for full-fat coconut milk (canned, whisk it well!), creamy oat milk, or soy milk. It might change the richness a bit. Use oil instead of butter if you’re brushing them.
- Watching Sugar? Use less sugar in the custard, or none at all! Let the syrup do the sweetening.
- Spice World: Add a little nutmeg (¼ tsp) or a pinch of cardamom to the custard. Orange zest is lovely too! Around fall, pumpkin pie spice is fantastic in this.
- Extra Crunch? Want really Crunchy Baked French Toast Sticks? After dipping, roll them gently in crushed cornflakes or even crushed Cinnamon Toast Crunch cereal. Crushed nuts with cinnamon sugar work too! Bake as usual. So good!
- Fancy vs. Everyday: Texas toast is perfect for easy mornings. Got brunch guests? Use brioche or challah, add that vanilla and extra spice, maybe serve with lemon curd and maple syrup. Ooh la la.
- Seasonal Fun: Top with fresh berries in summer, warm cooked apples in fall, or cranberry sauce in winter.
Serving and Saving (If There Are Any Left!)
You made ’em, now how to serve and store the leftovers (ha! leftovers…).
- On the Plate: Serve warm! Stack ’em up, fan ’em out, or put them in little cups with dipping syrup on the side. A sprinkle of powdered sugar just before serving looks pro.
- Sidekicks: Great alone, but also awesome with bacon, sausage, fruit salad, or yogurt.
- Fridge Storage: If you do have leftovers, let them cool completely. Pop them in an airtight container in the fridge. They’ll be good for 2-3 days.
- Reheating: Want that crispness back? Oven or toaster oven is best. 350°F (175°C) for 5-10 mins. An air fryer rocks too – maybe 350°F for 3-5 mins. Microwave? Okay for speed, but they’ll be soft.
- Freezing Masterclass: These freeze like a dream! This is my secret weapon for fast weekday breakfasts.
- Cool the baked sticks completely. Completely!
- Lay them flat on a baking sheet (not touching). Freeze until solid (1-2 hours). This stops them from sticking into one giant clump. Flash freezing, they call it.
- Toss the frozen sticks into a freezer bag or container. Label it!
- They stay good for 2-3 months.
- Reheat straight from the freezer! Oven, toaster oven, air fryer – just add a few extra minutes. No thawing needed. It’s almost too easy. Makes mornings feel way less hectic, and it’s definitely a healthier baked french toast sticks option than the frozen ones from the store since you know exactly what’s in them!
And that’s everything! My complete guide to making amazing Baked French Toast Sticks. I really hope you give them a try. Let me know how they turn out! Happy Baking!
PrintBaked French Toast Sticks
Forget flipping! Get that classic French toast flavor you love, baked into easy-to-dunk sticks. Perfect for lazy mornings, feeding a crowd, or even a fun dessert. These homemade cinnamon sticks come out golden, slightly crisp, and oh-so-delicious.
- Prep Time: 15 mins
- Cook Time: 20 mins
- Total Time: 35 mins
- Yield: 6 (Makes 30-40 sticks) 1x
- Category: Breakfast, Brunch
- Cuisine: American
Ingredients
- 10 slices Texas Toast (about ¾–1 inch thick)
- 4 Large Eggs
- 1 cup Heavy Cream
- 3 tbsp Granulated Sugar
- 1 tsp Ground Cinnamon
- 1 pinch Salt
- 1 tsp Vanilla Extract (Optional, but highly recommended!)
- Oil Spray or Melted Butter (Optional, for extra crispness)
- For Serving: Maple syrup, honey, powdered sugar, berries
Instructions
- Get Ready: Preheat your oven to 350°F (175°C). Line a large baking sheet with parchment paper (seriously helps cleanup!). Slice each Texas Toast slice lengthwise into 3 or 4 sticks.
- Mix the Custard: In a shallow dish (like a pie plate), whisk together the eggs, heavy cream, sugar, cinnamon, salt, and vanilla (if using) until smooth.
- Quick Dip: Working one stick at a time, dip it quickly into the custard – just 2-3 seconds per side. Let any extra drip off. Don’t let them soak or they’ll get soggy!
- Arrange & Bake: Place dipped sticks in a single layer on the prepared baking sheet. Don’t overcrowd! Give them space. Optional: Lightly spray with oil or brush with melted butter.
- Bake: Bake for 10 minutes. Flip the sticks carefully. Bake for another 10 minutes, or until golden brown, puffed, and cooked through.
- Serve!: Let cool slightly on the pan. Serve warm with your favorite toppings like maple syrup and powdered sugar. Enjoy your homemade cinnamon french toast sticks!
Notes
- Serving: Perfect with syrup, honey, fresh fruit, or whipped cream. Dust with powdered sugar just before serving!
- Best Bread: Thick-cut bread like Texas Toast, Brioche, or Challah works best. Day-old bread is great!
- No Soggy Sticks!: The quick dip is key. Resist the urge to soak the bread longer than a few seconds.
- Storage: Cool completely. Store leftovers in an airtight container in the fridge for 2-3 days.
- Reheating: Best way? Oven, toaster oven, or air fryer at 350°F (175°C) for 5-10 mins until warm and slightly crisp.
- Freezing: Cool completely, flash freeze on a baking sheet until solid, then store in a freezer bag for up to 3 months. Reheat from frozen! Great for easy make-ahead breakfasts.