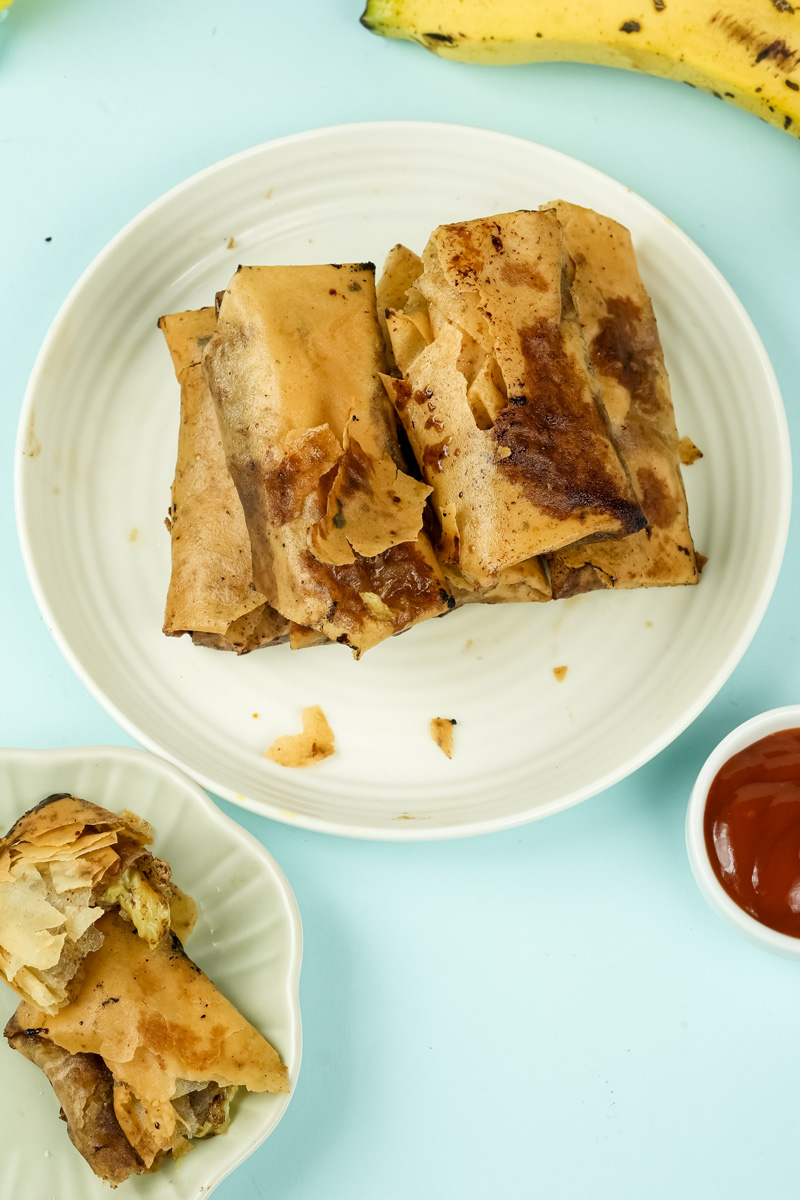
Hey there! So glad you stopped by. Today, I want to share a recipe that is super special to me. It’s for Banana Lumpia, which everyone in the Philippines lovingly calls Turon.
If you’ve never had Turon, let me try to paint a picture.
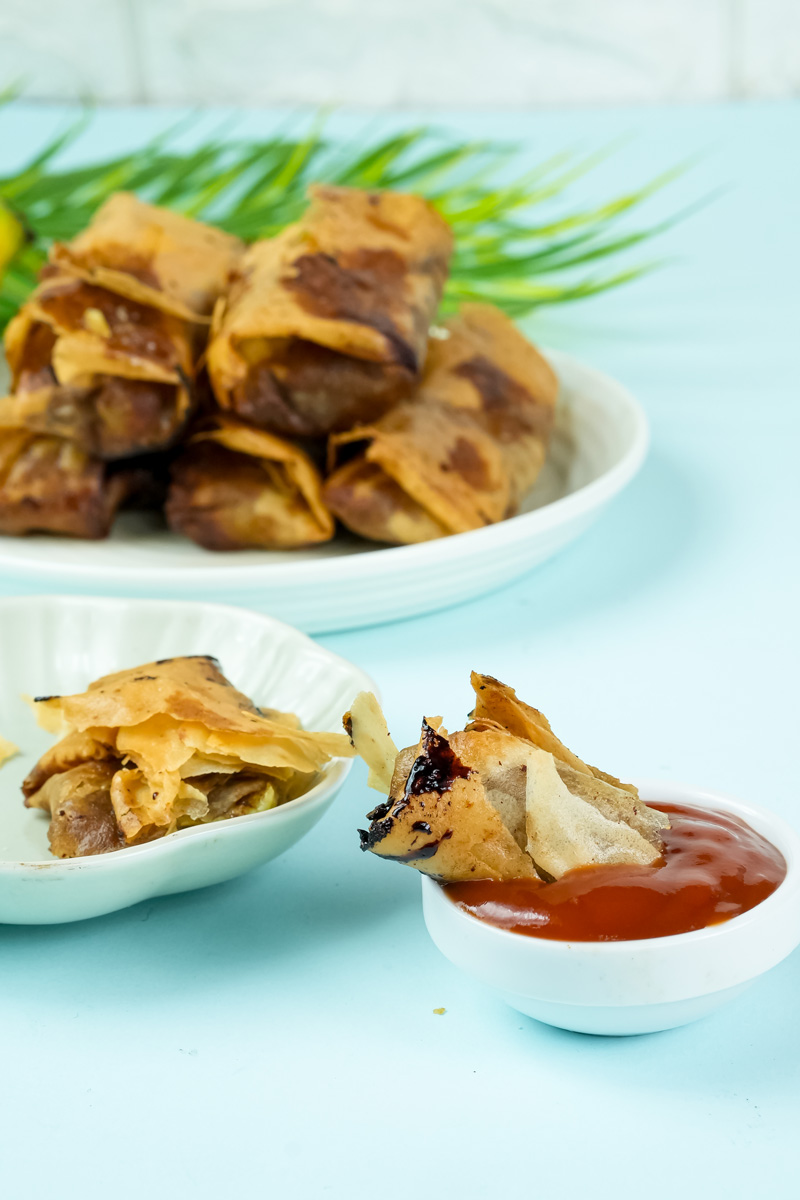
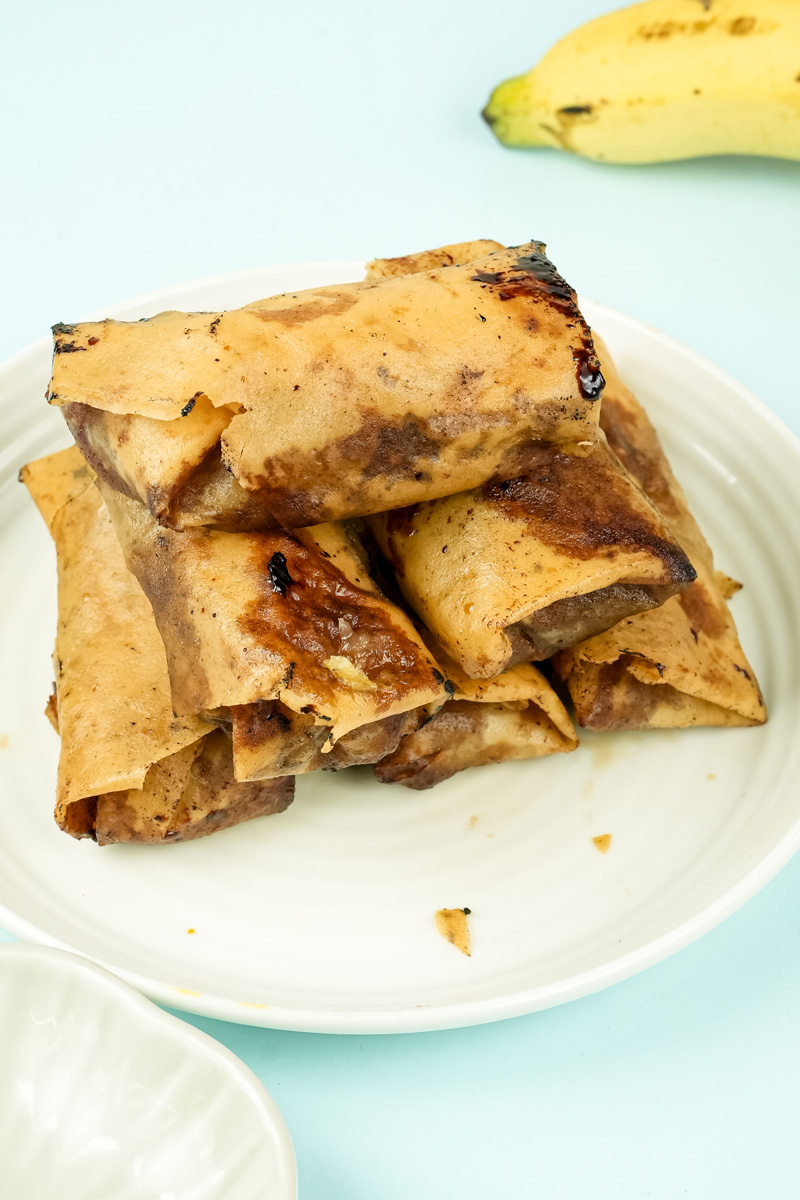
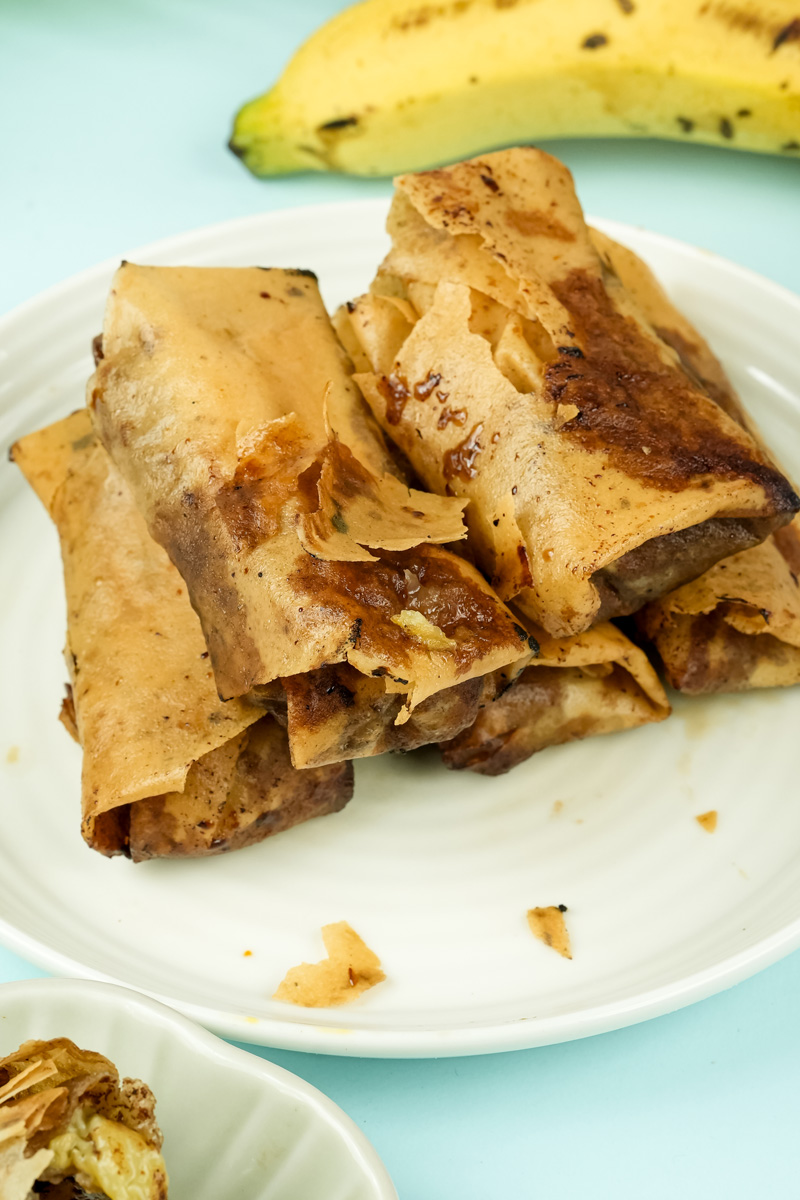
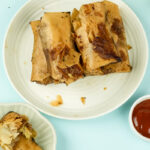
Imagine a sweet, ripe banana all wrapped up in a super-thin, crispy shell. It’s fried until it’s a perfect golden brown. When you take that first bite… CRUNCH. That loud, satisfying crackle gives way to the soft, warm, gooey banana inside. It’s just pure happiness. Seriously, the texture and flavor combo is something you won’t forget.
Turon isn’t just a dessert. It’s a huge part of the culture back home, a go-to merienda (afternoon snack) for kids and adults. I have so many memories of walking down bustling streets and smelling that sweet aroma from the food vendors, who are absolute pros at rolling and frying these.
This recipe is my take on that classic street-food snack. It’s simple, the ingredients are easy to find, and I’ll show you the technique to get that signature crunch. This is your guide to making amazing Turon right in your own kitchen.
Recipe Overview
Before we get rolling, let’s get a quick look at what to expect. This will help you get organized and make the whole process a breeze.
Prep & Cook Time: You’ll need about 15 minutes to get everything ready and another 15 minutes for cooking. So, we’re talking about 30 minutes total. Perfect for when you need a sweet treat, fast!
Servings & Scaling: This recipe makes about 12-16 lumpia. The final count depends on how big your bananas are. It’s also really easy to make more for a party! You can just double or triple the ingredients. I made a little chart below to help.
Difficulty Level: I’d say this is Beginner-Friendly. The steps are easy to follow, and you’ll get the hang of rolling after just one or two tries. The only tricky part is keeping an eye on them while they fry.
Equipment Needed: No fancy gadgets required. You probably have everything already:
- A deep pot or a wok for frying. A cast-iron skillet works great, too.
- Tongs to safely move the lumpia in and out of the hot oil.
- A wire cooling rack set over a baking sheet. This is my secret weapon for keeping them crispy all around!
- A small bowl for your sealing paste.
Make-Ahead & Meal Prep: Yes! You can totally assemble these ahead of time and pop them in the freezer. This is a lifesaver for parties or for when a sudden craving hits. I’ll explain exactly how to do this later on.
Scaling Your Turon Production
| Servings | Bananas | Lumpia Wrappers | Brown Sugar | Flour (for paste) | Water (for paste) |
| 12-16 (Single Batch) | 4-5 | ~16 | 1/2 cup | 1 tsp | 1 tbsp |
| 24-32 (Double Batch) | 8-10 | ~32 | 1 cup | 2 tsp | 2 tbsp |
| 36-48 (Triple Batch) | 12-15 | ~48 | 1.5 cups | 1 tbsp | 3 tbsp |
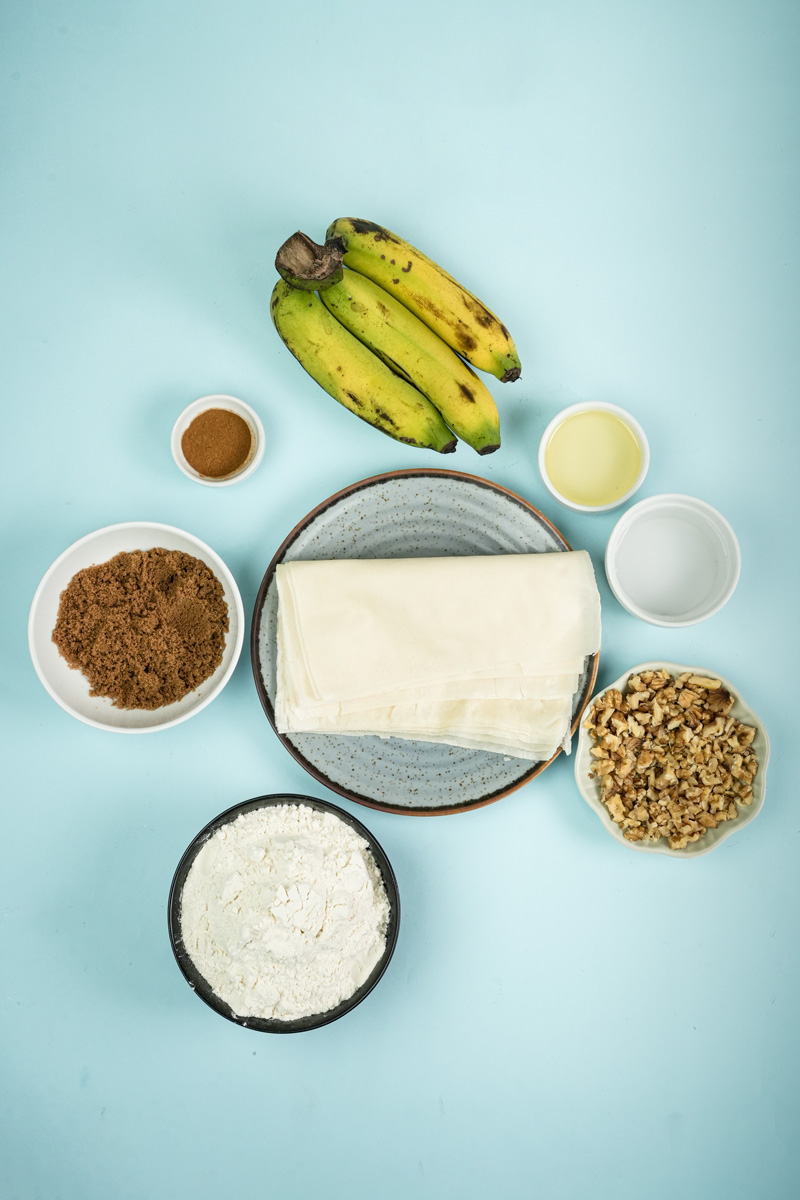
The Heart of the Dish: Your Ingredients
A great dish always starts with great ingredients. Let’s talk about what you need and why it matters.
First, the bananas. They’re the star of the show. Traditionally, Turon is made with Saba bananas. They’re a type of cooking banana that holds its shape really well and has a perfect mix of sweet and tangy. But, I know they can be hard to find outside of the Philippines.
Good news? You can use ripe plantains (the ones with yellow and black peels) or apple bananas instead. Your recipe called for these, and it’s a great choice. They’re firmer than the regular Cavendish bananas we eat for breakfast, which means your lumpia won’t get soggy.
Next up, the crispy wrapper. You’ll want spring roll or lumpia wrappers. You can usually find them in the freezer aisle at an Asian grocery store. They are paper-thin, which is the key to getting that shatter-like crunch. Just be sure to thaw them according to the package instructions. Here’s a little tip I’ve learned: keep the stack of wrappers you aren’t using covered with a damp paper towel. This keeps them from drying out and cracking.
For sweetness, we’re using brown sugar. It does more than just make things sweet. The molasses in it gives the filling a deep, almost caramel-like flavor as it cooks. I also like to add a sprinkle of cinnamon. It’s optional, but it adds a wonderful warmth that goes so well with the banana.
To keep it all together, we’ll make a simple “glue” with all-purpose flour and water. It works way better than just water and makes sure your lumpia don’t fall apart in the oil. Lastly, you’ll need a neutral oil with a high smoke point, like canola, vegetable, or peanut oil, for frying.
How to Make Turon: A Step-by-Step Guide
Okay, time to get our hands dirty! Let’s walk through this together.
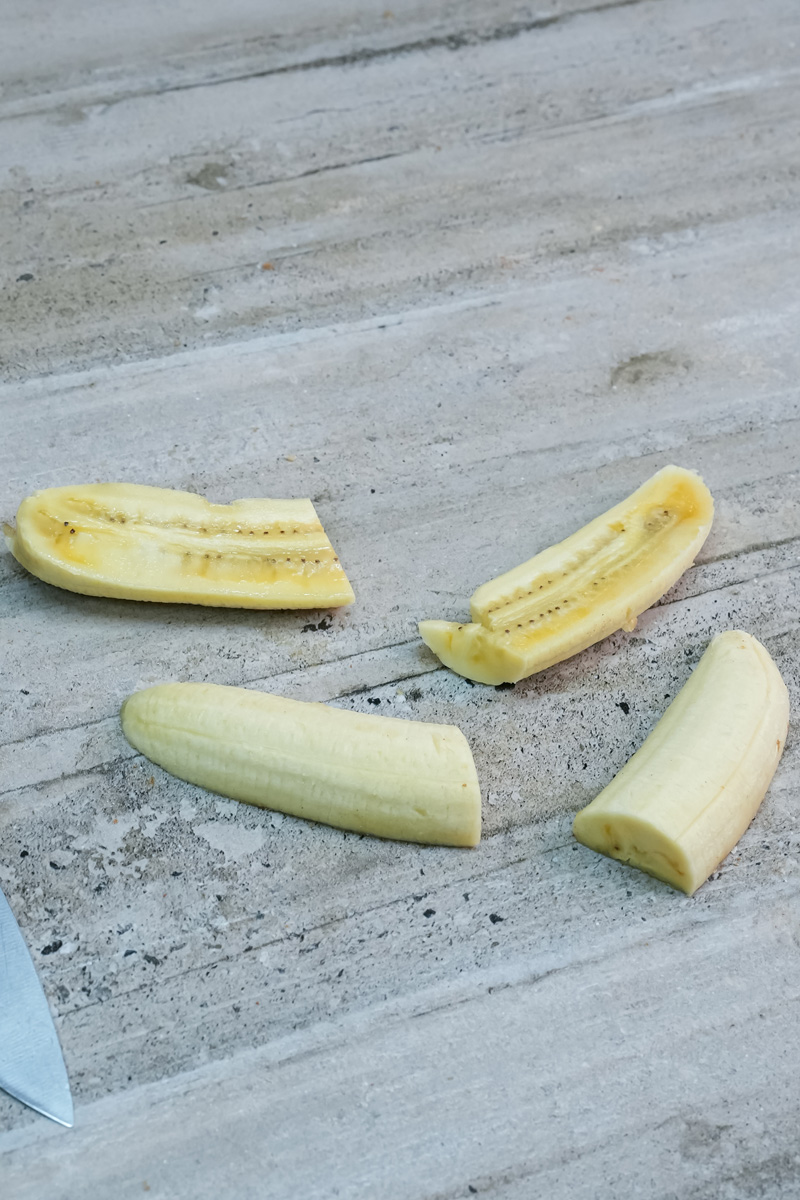
Step 1: Prep the Bananas
First, let’s get the bananas ready. Chop off the ends, then slice them in half lengthwise. If you have really long bananas, you can also cut them in half crosswise. This makes for a nice two-bite treat. After they’re all cut, peel the skins off.
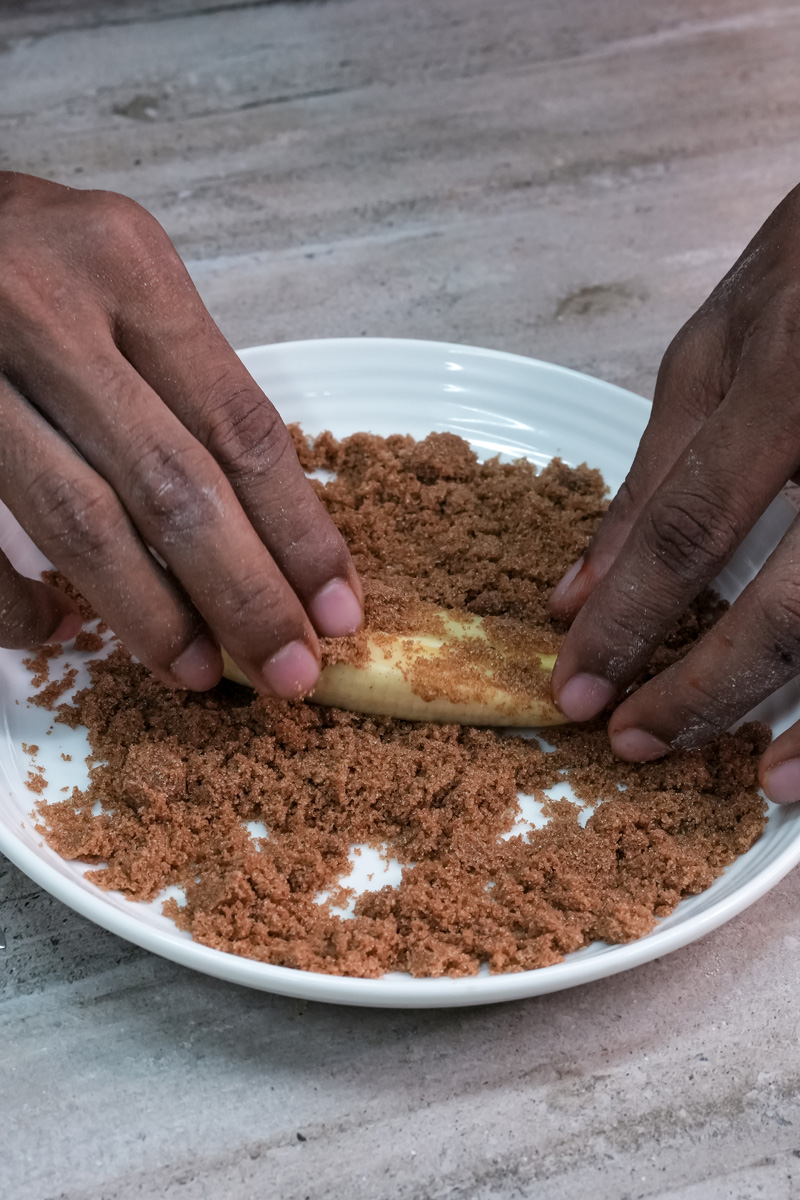
Step 2: Sugar the Bananas
Spread your brown sugar (and cinnamon, if you’re using it) on a plate. Take each piece of banana and roll it around in the sugar until it’s nicely coated. Don’t be shy! This sugar is what makes that yummy, gooey layer inside the wrapper.
Step 3: Make the Sealing “Glue”
In a small bowl, mix the 1 teaspoon of flour with 1 tablespoon of water. Stir it up until it’s a smooth, thin paste. This little mixture is our secret to perfectly sealed lumpia.
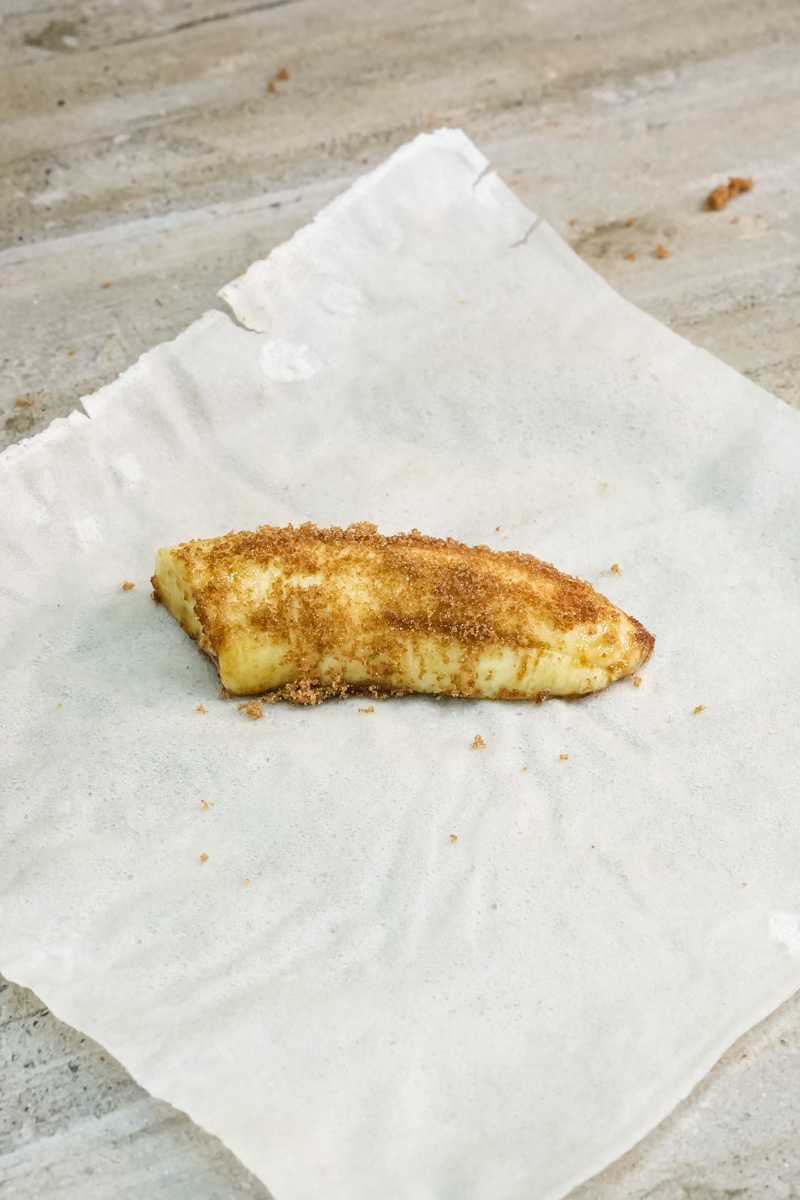
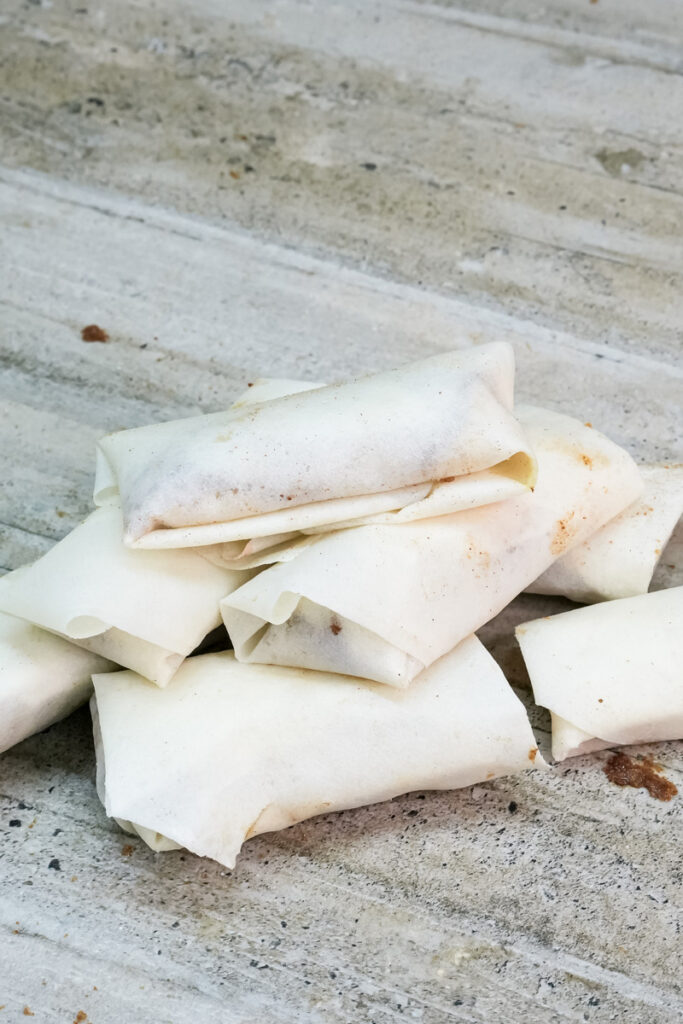
Step 4: The Art of Rolling
This is the most hands-on part, but I promise you’ll be a pro after a couple of tries.
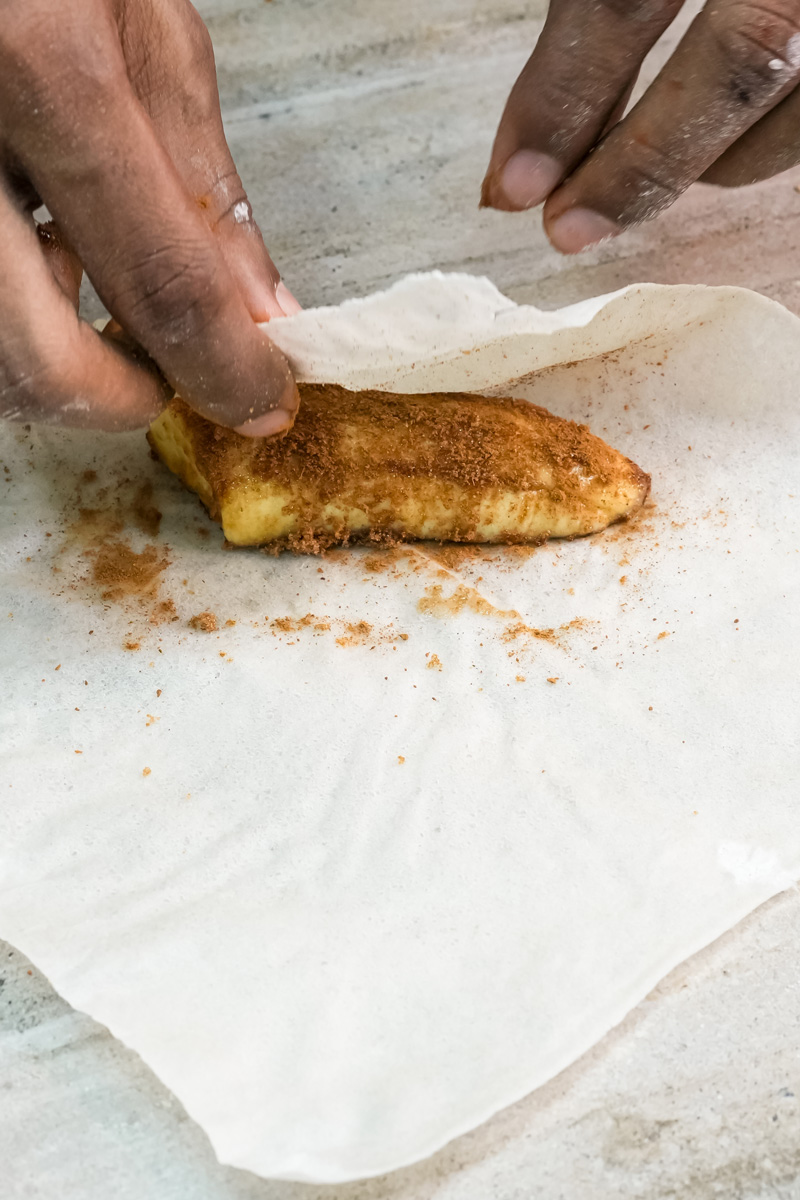
- Set the stage: Lay a single wrapper on your counter like a diamond, with a corner pointing at you.
- Place the banana: Put a sugar-coated banana piece about two inches from the bottom corner.
- First fold: Fold that bottom corner up and over the banana. Tuck it in so it’s snug, but not so tight that you risk tearing the wrapper.
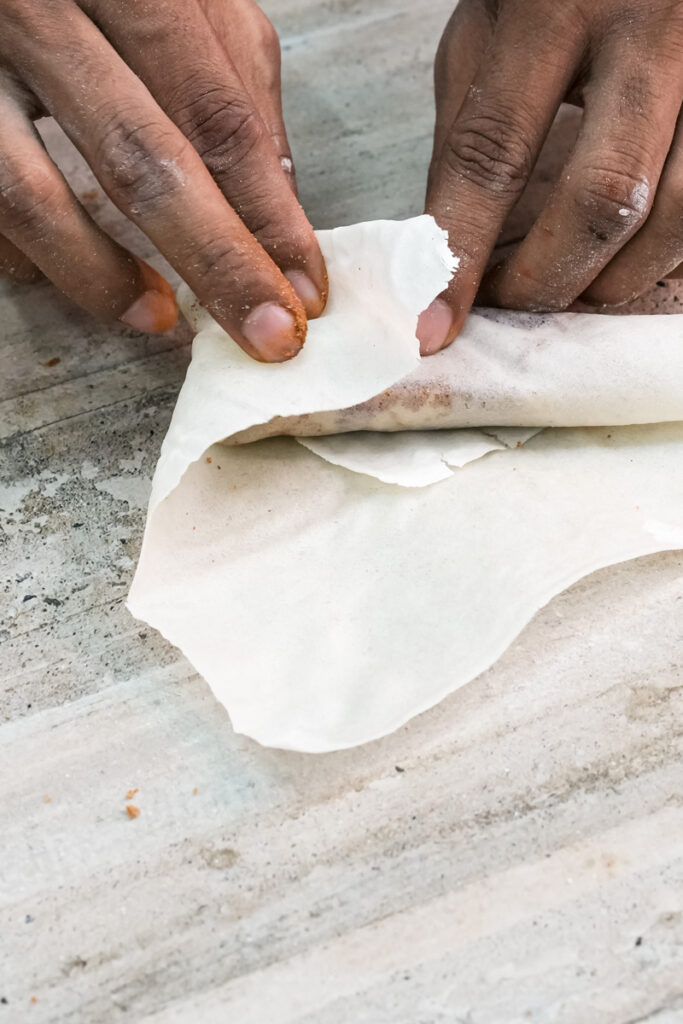
- The middle roll: Roll it forward about halfway.
- Tuck the sides: Fold the left and right corners in toward the middle. Think of it like making a little envelope. This is important because it keeps the oil out.
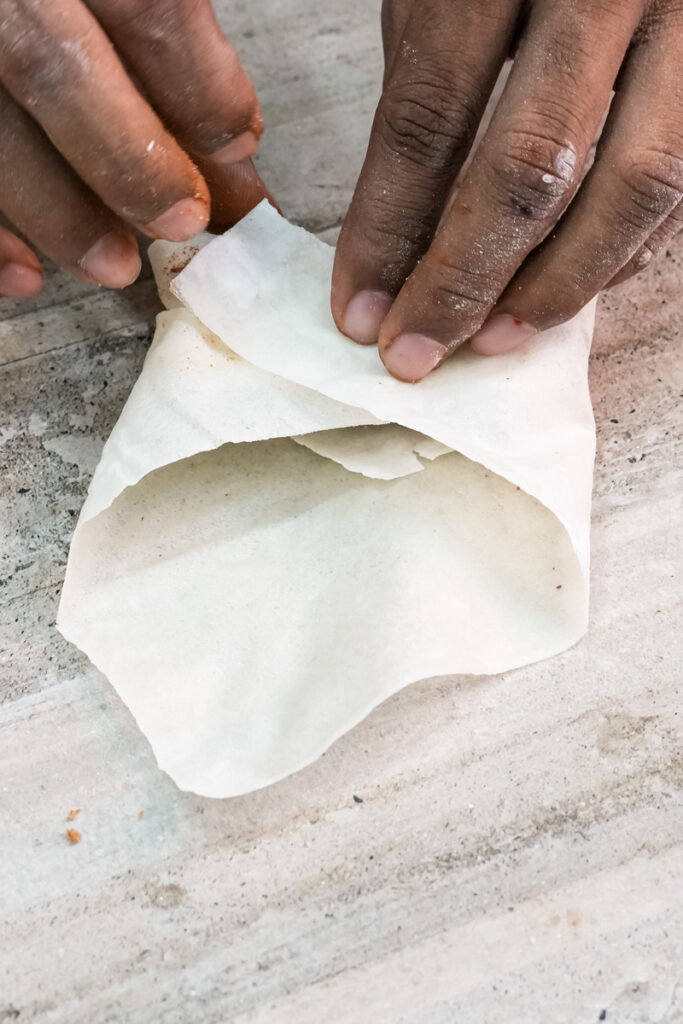
- Seal the deal: Keep rolling toward the top corner. When you have about an inch of wrapper left, dip your finger in the flour paste and paint it along the edge. Finish the roll and press gently to seal it.
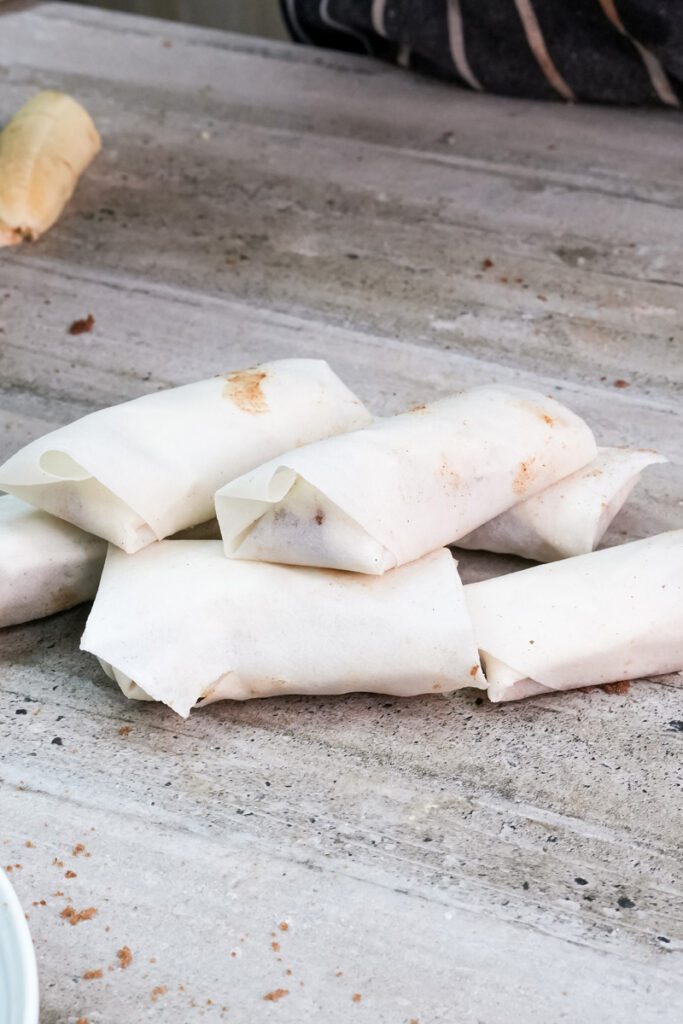
And there you have it! Your first Turon. Set it aside and keep going with the rest. Don’t worry if the first one looks a little wonky. Mine still do sometimes!
Step 5: The Golden Fry
Heat about 1.5 to 2 inches of oil in your pot over medium heat. You want the oil to be around 350°F (175°C). No thermometer? No problem. Just drop a tiny scrap of wrapper in the oil. If it sizzles like crazy and turns golden in about 30 seconds, you’re good to go.
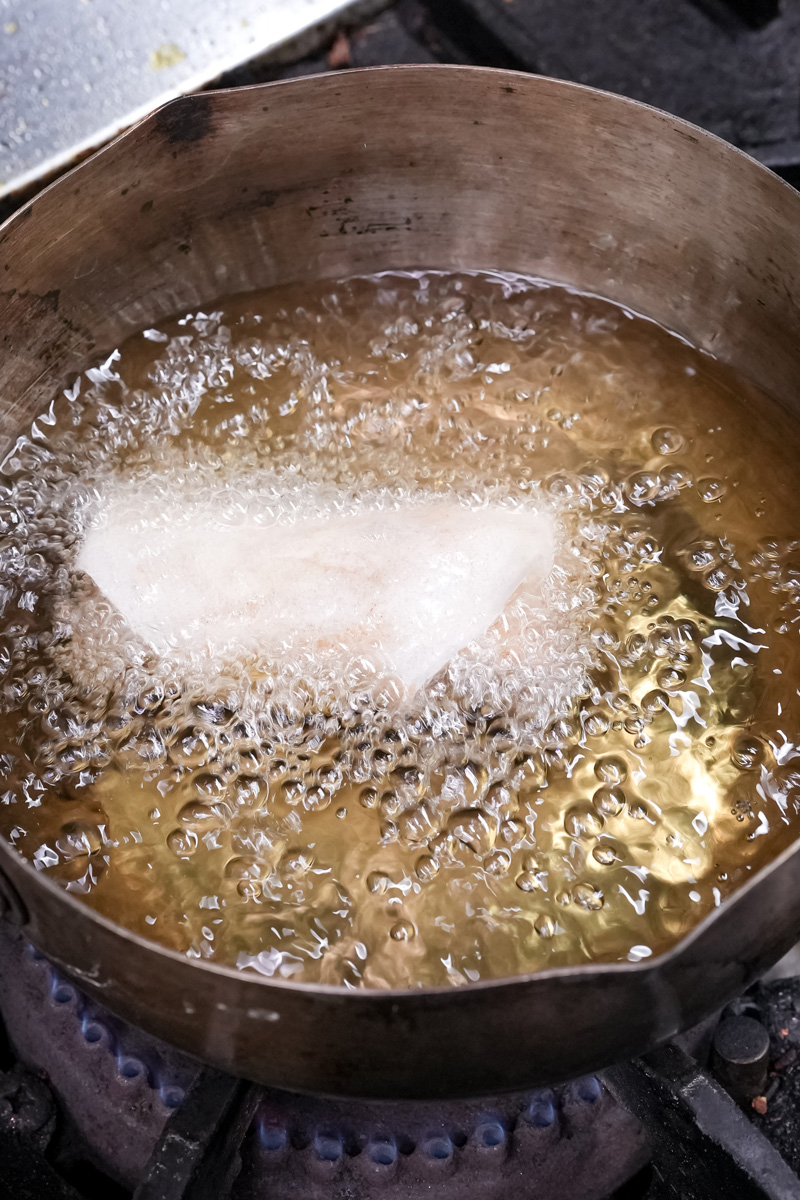
Using tongs, carefully place 3-4 lumpia in the hot oil. A common mistake is to overcrowd the pan. Please don’t do this! It makes the oil temperature drop and you’ll end up with greasy lumpia instead of crispy ones.
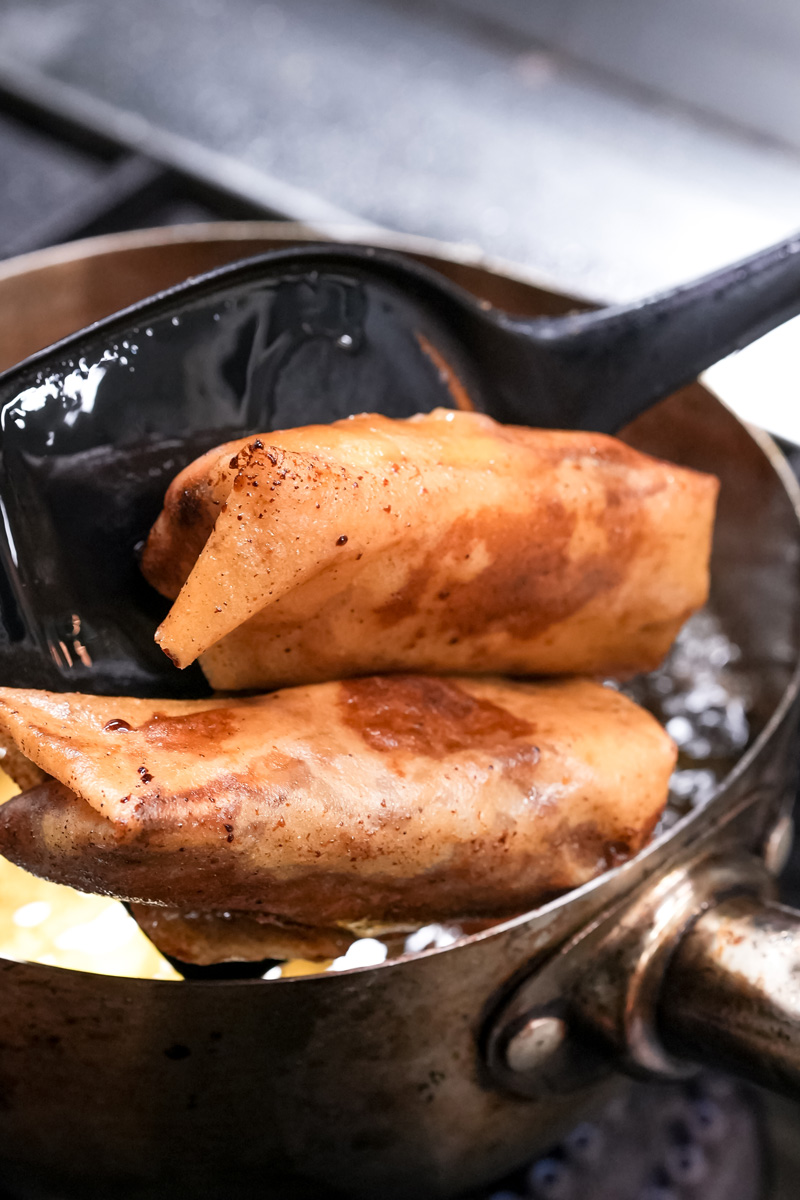
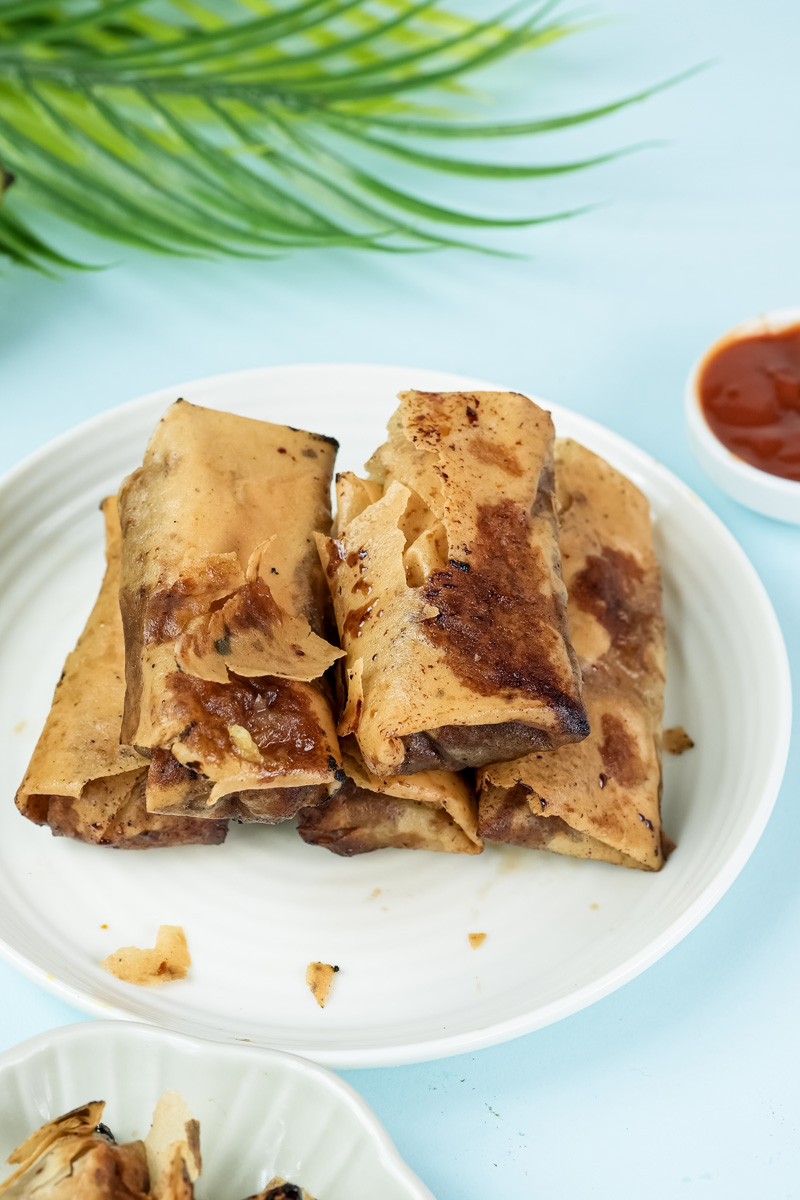
Fry them for about 3-5 minutes, turning them now and then, until they are a gorgeous, even golden-brown. You’ll see the outside get all bubbly and crisp. Once they’re done, lift them out with your tongs and let them drain on your wire rack. The rack is key because it lets air get underneath, keeping the bottoms just as crispy as the tops.
Make It Your Own: Fun Variations
One of the best things about this recipe is how easy it is to play with. Here are a few of my family’s favorite twists:
- The Classic “Lang-ka” Combo: For the most traditional Turon, add a thin slice of ripe jackfruit (we call it lang-ka) next to the banana before rolling. The fruity, slightly floral taste of jackfruit with banana is just heavenly. You can usually find canned jackfruit in syrup at Asian markets.
- Dietary Tweaks:
- Vegan: Good news! This recipe is already vegan. Just make sure your spring roll wrappers are egg-free (most are) and you use the flour-water paste.
- Gluten-Free: Look for gluten-free spring roll wrappers, which you can find online or in some bigger stores. The rest of the ingredients are already GF.
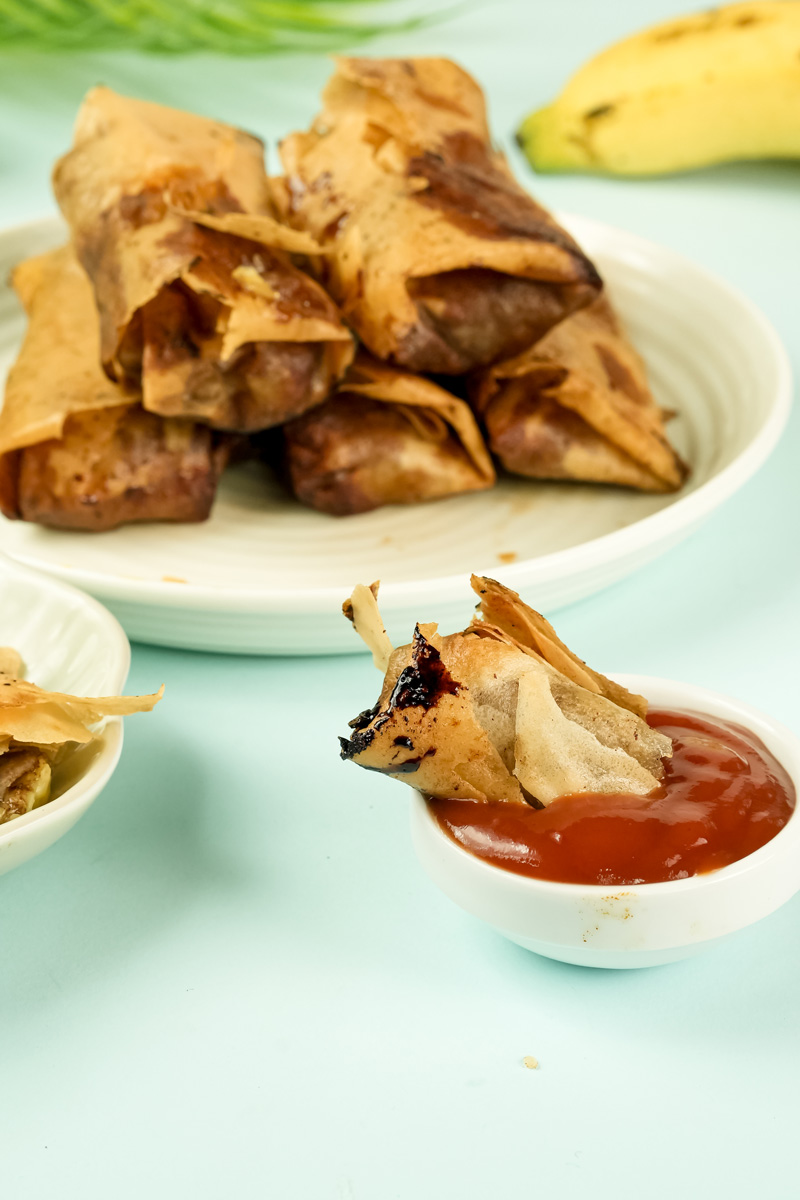
- Everyday vs. Fancy: For an everyday snack, they are perfect as is. If you want to dress them up for dessert, serve them warm with a scoop of vanilla ice cream. Even better? Ube (purple yam) ice cream. I once served this at a dinner party, and it was a huge hit. You can also make a simple caramel dipping sauce.
Serving, Storing, and Enjoying Your Turon
You did it! Now you have a platter of beautiful, crispy Turon.
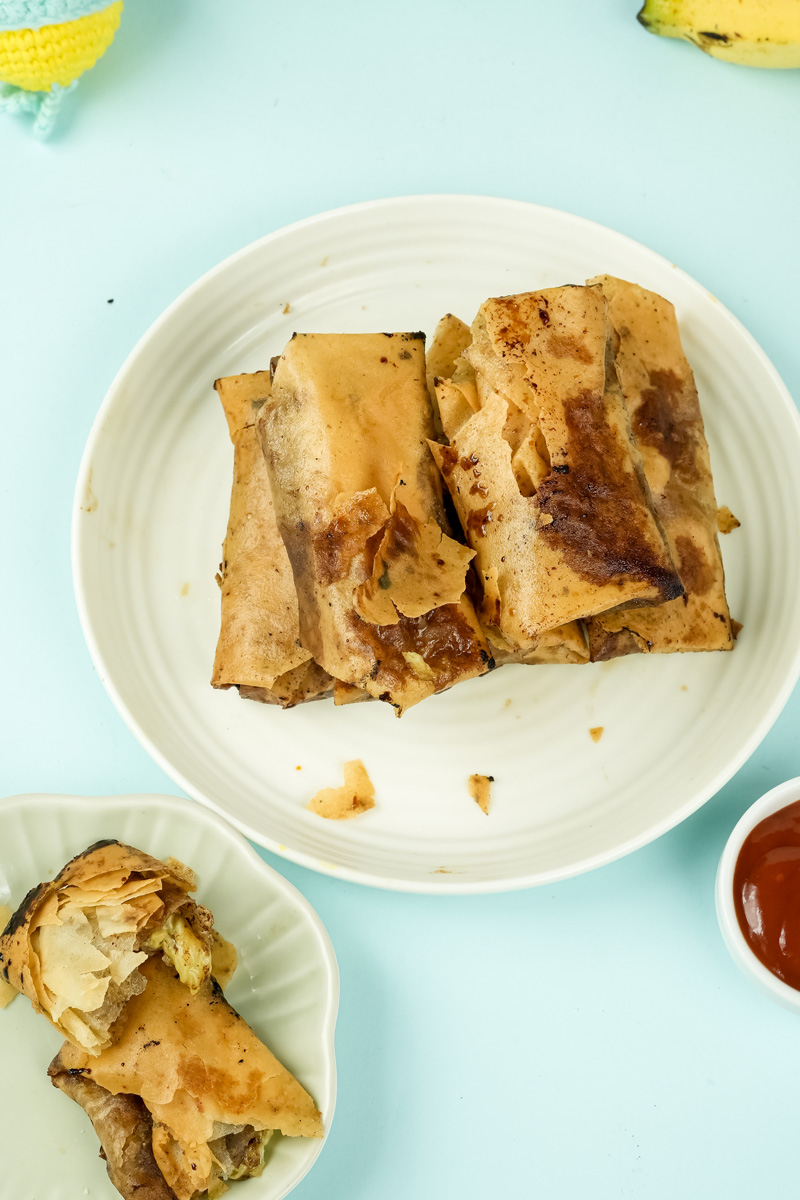
Serving: The absolute best time to eat them is right away, while they’re still warm and super crunchy. You can stack them on a platter or serve them next to a scoop of ice cream.
Storage: If you have leftovers (which is rare in my house!), you can store them in an airtight container at room temperature for a day. I have to warn you, though, they will lose some of that amazing crispness.
Reheating: To bring back some of the crunch, pop them in an air fryer or toaster oven at 350°F (175°C) for 3-5 minutes. For the love of all things crispy, please do not use the microwave!
Freezing for Later: This is my favorite party trick. You can assemble all the lumpia but don’t fry them. Place them on a baking sheet in a single layer and “flash freeze” for an hour. Once they’re solid, toss them into a freezer bag. They’ll be good for up to 3 months. When you want to eat them, you can fry them straight from the freezer! Just add a couple of extra minutes to the cooking time.
I really hope you have fun making this recipe. Enjoy every single crunchy, sweet bite!
PrintBanana Lumpia (Turon)
A beloved Filipino street food snack you can easily make at home! This recipe guides you through creating irresistibly crispy rolls filled with sweet, gooey banana. That first crunchy bite is pure magic!
- Prep Time: 15 minutes
- Cook Time: 15 minutes
- Total Time: 30 minutes
- Yield: 12–16 lumpia 1x
- Category: Dessert, Snack
- Cuisine: Filipino
Ingredients
- 4–5 bananas (Saba or ripe plantains are best)
- 16 (approx.) lumpia or spring roll wrappers
- 1/2 cup brown sugar
- Neutral oil, for frying (canola, vegetable, etc.)
- For Sealing Paste:
- 1 tsp all-purpose flour
- 1 tbsp water
- Optional:
- 1/2 tsp ground cinnamon
Instructions
- Prep Bananas: Slice the bananas in half lengthwise. On a plate, mix the brown sugar and optional cinnamon. Roll each banana piece in the sugar mixture until it’s evenly coated.
- Make Sealant: In a small bowl, whisk the flour and water together to create a smooth, thin paste. This will be your “glue.”
- Wrap the Lumpia: Lay a wrapper on your counter in a diamond shape. Place a sugar-coated banana piece near the bottom corner. Fold the corner up and over the banana, tucking it in. Fold in the left and right sides like an envelope. Continue rolling tightly, then brush the flour paste on the final top corner to seal it shut. Repeat for all banana pieces.
- Fry to Perfection: Heat 1.5 to 2 inches of oil in a deep pot over medium heat to 350°F (175°C). Carefully place 3-4 lumpia in the hot oil. Important: Do not overcrowd the pan! Fry for 3-5 minutes, turning occasionally, until golden brown and crispy all over.
- Drain and Cool: Using tongs, transfer the cooked lumpia to a wire rack. This allows air to circulate, keeping them perfectly crisp.
Notes
- Serving: Turon is best enjoyed immediately while still warm and crunchy. To make it extra special, serve it with a scoop of vanilla or ube (purple yam) ice cream.
- Pro Tip: While you work, keep the stack of unused lumpia wrappers covered with a slightly damp paper towel. This prevents them from drying out and cracking.
- Storage: If you have leftovers, store them in an airtight container at room temperature for up to one day.
- Reheating: To revive that crunch, reheat them in an air fryer or toaster oven at 350°F (175°C) for 3-5 minutes. Please avoid the microwave, as it will make them soggy.
- Make-Ahead: You can assemble the lumpia ahead of time! Place the uncooked rolls on a baking sheet, freeze until solid, and then transfer to a freezer bag. They can be fried directly from frozen—just add a couple of extra minutes to the cooking time.