Hey friends, welcome! Today, we’re diving into a recipe that’s incredibly special to me. It’s what you get when a classic, buttery pound cake and sweet, comforting banana bread decide to get together.
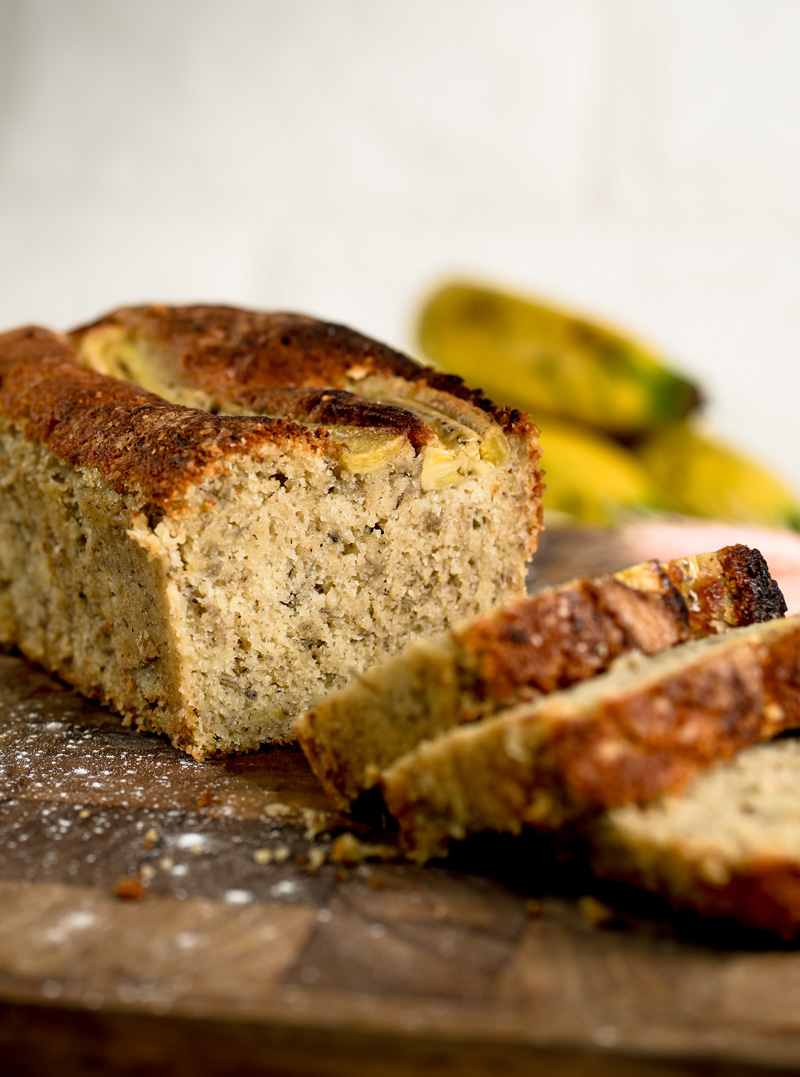
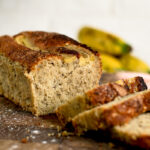
The result? This Easy Banana Pound Cake. It’s dense, it’s rich, and it’s packed with banana flavor.
I’ve always been torn between the two. Pound cakes have that old-school, rich buttery flavor. But then there’s banana bread, which feels like a warm hug and is the perfect way to use up those spotty bananas on the counter. So, I figured, why not combine them?
This recipe is the best of both worlds. It’s simple enough to whip up on a whim but tastes special enough to serve when you have company. Let’s get baking.
What You’re Getting Into
Before we start, here’s a quick look at the road ahead. I designed this recipe to be as straightforward as possible.
- Prep Time: About 15-20 minutes
- Cook Time: 25-30 minutes
- Difficulty: Super easy. Seriously, if you can stir things in a bowl, you’ve got this.
- Makes: 10-12 slices from a 7×4 inch loaf pan.
Need a Bigger Cake?
Thinking of making a bigger batch? I don’t blame you. This stuff disappears fast in my house. Here’s a handy chart to help you scale the recipe for different pan sizes.
| Pan Size | Servings | Butter | Sugar | Eggs | Flour | Baking Powder | Baking Soda | Banana Puri | Approx. Bake Time |
| 7×4″ Loaf | 10-12 | 110g | 90g | 2 | 125g | 1 tsp | 1/4 tsp | 1/2 cup | 25-30 min |
| 9×5″ Loaf | 12-16 | 220g | 180g | 4 | 250g | 2 tsp | 1/2 tsp | 1 cup | 50-60 min |
| 12-Cup Bundt | 16-20 | 220g | 180g | 4 | 250g | 2 tsp | 1/2 tsp | 1 cup | 55-65 min |
The Gear You’ll Need
You don’t need a fancy, decked-out kitchen for this. You probably have everything already.
- The must-haves: A 7×4 inch pound cake mold (a loaf pan works perfectly), a mixing bowl, and an electric mixer. A handheld one is totally fine.
- What if I don’t have a mixer? You can absolutely do this the old-fashioned way with a whisk and a spatula. Just be ready for a mini arm workout when it’s time to cream the butter and sugar! An 8×4 inch pan also works in a pinch, just add a few extra minutes to the bake time.
This cake is a great one to make ahead. I actually think it tastes better on day two. The flavors get a chance to settle in and the whole loaf becomes even more moist. Just wrap it up and keep it on the counter.
Let’s Talk Ingredients
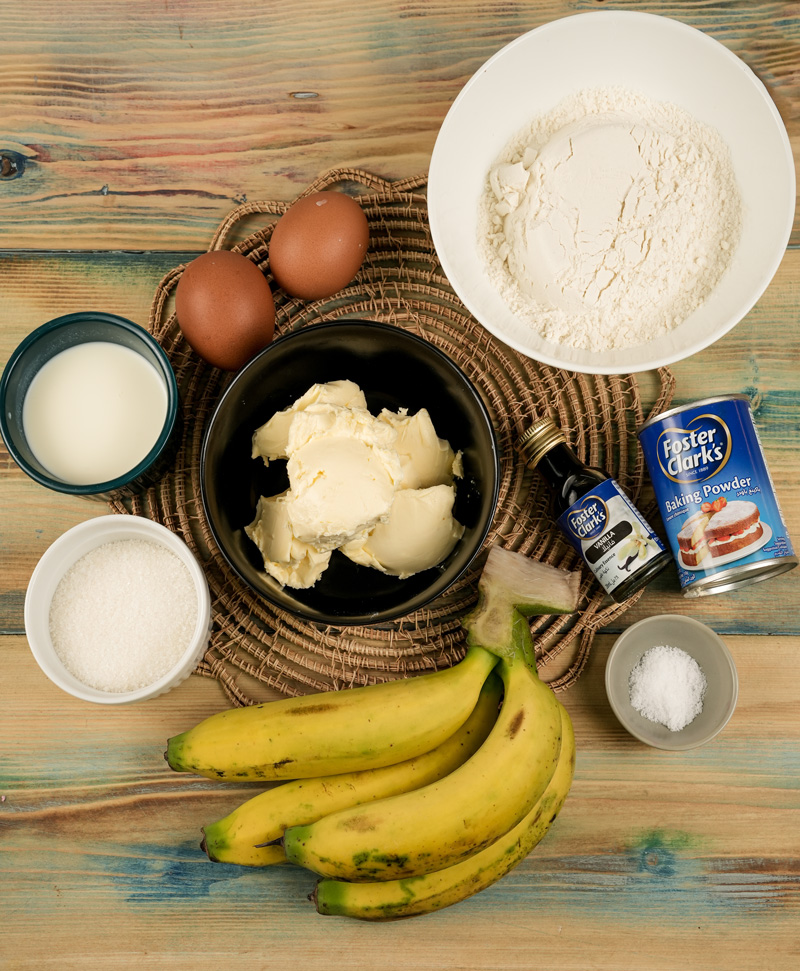
The real secret to this banana pound cake recipe is using simple, good-quality ingredients. Let’s break down what you’ll need.
First, the heart of any pound cake: 110g of unsalted butter. Using unsalted lets you be the boss of the saltiness. The most important thing here? Let it soften to room temperature. This is not a suggestion, it’s the key! I once tried to make this with cold butter because I was impatient. Big mistake. The texture was dense and heavy. Room temperature butter whips up light and airy with the sugar, which is exactly what we want.
Speaking of sugar, you’ll need 90g of granulated sugar. Nothing fancy, just the regular stuff. It adds sweetness and gives the cake that tender texture we love.
Next up, 2 large eggs. They hold everything together. And just like the butter, make sure they’re at room temperature. This helps them mix into the batter smoothly without making it look all curdled.
Of course, we need our star: 1/2 cup of banana puri (puree). For the best flavor, use those bananas that have been sitting on your counter for a while. You know the ones. Covered in brown and black spots. They are way sweeter and so much easier to mash.
For the dry team, we have 125g of all-purpose flour. This gives the cake its sturdy, pound-cake structure. We’ll also add 1 teaspoon of baking powder and 1/4 teaspoon of baking soda. The baking soda is a neat little trick; it reacts with the acid from the bananas to make the cake extra tender and helps it get that perfect golden-brown color.
Finally, 1 teaspoon of vanilla essence brings all the flavors together.
Don’t Have Something? Try a Swap!
Running low on an ingredient? Don’t sweat it. Here are a few swaps that work well.
| Ingredient | Substitute | What Happens? |
| Granulated Sugar | Light Brown Sugar (packed) | You’ll get a moister cake with a yummy caramel flavor. |
| Butter | Melted Coconut Oil | It gives a slightly different, but still delicious, taste. |
| All-Purpose Flour | Cake Flour | The cake will have a finer, more delicate crumb. |
| Banana Puri | Add 1/4 cup Sour Cream or Greek Yogurt | Makes an even moister, slightly tangy cake. Just use 1/4 cup of banana. |
Step-by-Step: Let’s Get Baking!
Okay, this is the fun part. I’ll walk you through everything, step-by-step.
Step 1: Cream the Butter and Sugar
First, get your oven preheating to 180°C (350°F).
Now, grab your softened butter and sugar. Put them in a mixing bowl and beat them together on medium-high. At first, it’ll look kind of yellow and grainy. Keep going! After 3 or 4 minutes, you’ll see the magic happen. The mixture will turn pale, almost white, and get super light and fluffy.
This is called creaming. You’re whipping tiny air pockets into the butter. This is the most important step for a light cake, so don’t rush it!
Step 2: Add the Wet Stuff
Turn the mixer down to low. Add your room-temperature eggs, one at a time. Wait until the first one is mixed in before adding the second. This keeps the batter nice and smooth.
Once the eggs are in, add the mashed banana and vanilla. Mix it all together. Your kitchen is about to start smelling amazing. The batter should look glossy and well-combined.
Step 3: Mix in the Dry Ingredients
In a separate bowl, give the flour, baking powder, and baking soda a quick whisk. This just makes sure everything is spread out evenly.
Now, add all the dry ingredients to the wet batter. Mix on the lowest speed possible. Even better? Fold it in with a spatula.
The moment you can’t see any more flour streaks…stop!
Seriously. This is where you can go wrong. If you overmix, you’ll end up with a tough, rubbery cake. We want a moist banana pound cake, not a hockey puck. A few lumps are totally fine.
Step 4: Bake it!
Gently pour the thick, beautiful batter into your 7×4″ pan. Smooth out the top with a spatula.
Give the pan a couple of good taps on the counter. This gets rid of any big air bubbles.
Now, into the oven it goes for 25 to 30 minutes.
You’ll know it’s done when a toothpick stuck in the center comes out clean. Maybe a moist crumb or two will be attached, but there should be no wet batter. The top will be golden brown.
Let it cool in the pan for 10 minutes. That little rest helps the cake set so it won’t fall apart when you take it out. Then, flip it onto a wire rack to cool the rest of the way.
Make It Your Own!
This recipe is a great starting point. The good news? You can easily customize it. Here are some ideas:
- Add a Glaze: A simple cream cheese frosting is amazing with this cake. Or, just whisk up some powdered sugar with a splash of milk and vanilla for a quick drizzle.
- Mix-ins are Fun: Fold in about 3/4 cup of chocolate chips, chopped walnuts, or pecans when you add the flour.
- Spice it Up: For a warmer flavor, add 1/2 teaspoon of cinnamon and 1/4 teaspoon of nutmeg to the dry ingredients. Perfect for a cozy afternoon.
How to Serve and Store Your Amazing Cake
Honestly, there’s no wrong way to eat this. It’s fantastic with a cup of coffee. But if you want to get a little extra, serve a warm slice with a scoop of vanilla ice cream and a drizzle of caramel.
Keeping it Fresh
- On the Counter: The cake will stay fresh and moist for about 3 days. Just keep it in an airtight container or wrap it up well.
- In the Fridge: It’ll last for up to a week in the fridge. The butter will make it firm up, so let a slice sit out for 20 minutes before you eat it.
- In the Freezer: This cake freezes like a dream! Wrap the whole loaf or individual slices in a couple of layers of plastic wrap and then foil. It’s good for up to 3 months. My favorite part? A frozen slice only takes about 30 seconds in the microwave for a warm, delicious treat.
I really hope you love baking—and eating—this cake as much as I do. Happy Baking!
PrintBanana Pound Cake
This is the best of both worlds—a wonderfully moist and flavorful banana cake with the rich, buttery texture of a classic pound cake. It’s my go-to recipe for a simple, comforting treat that tastes like it came from a fancy bakery.
- Prep Time: 15 minutes
- Cook Time: 30 minutes
- Total Time: 45 minutes
- Yield: 10–12 slices 1x
- Category: Dessert, Snack
- Cuisine: American
Ingredients
- 110g Unsalted Butter, softened to room temperature
- 90g Granulated Sugar
- 2 large Eggs, room temperature
- ½ cup Banana Puree (from very ripe bananas)
- 125g All-Purpose Flour
- 1 tsp Baking Powder
- ¼ tsp Baking Soda
- 1 tsp Vanilla Essence
Instructions
- Prep Oven & Pan: Preheat your oven to 180°C (350°F). Grease and flour a 7×4 inch loaf pan.
- Cream Butter & Sugar: In a large bowl, use an electric mixer to beat the softened butter and sugar on medium-high for 3-4 minutes. Keep going until it’s very pale and fluffy. This step is key!
- Add Wet Ingredients: Turn the mixer to low. Add the eggs one at a time, mixing until just combined after each. Mix in the banana puree and vanilla.
- Combine Dry Ingredients: In a separate small bowl, whisk together the flour, baking powder, and baking soda.
- Finish the Batter: Add the dry ingredients to the wet ingredients all at once. Mix on the lowest speed (or fold by hand) only until you no longer see streaks of flour. Do not overmix!
- Bake: Pour the batter into your prepared pan and smooth the top. Bake for 25-30 minutes, or until a toothpick inserted into the center comes out clean. Let it cool in the pan for 10 minutes before turning it out onto a wire rack to cool completely.
Notes
- Serving Suggestions: This cake is delicious on its own with coffee or tea. For an extra treat, serve a warm slice with a scoop of vanilla ice cream and a drizzle of caramel.
- Pro Tip: Using very ripe, spotty bananas and room temperature butter and eggs makes all the difference for the best flavor and texture. Don’t skip the creaming step—it’s what makes the cake light!
- Storage: Store the cake in an airtight container at room temperature for up to 3 days. It also freezes beautifully for up to 3 months. Just wrap slices tightly in plastic wrap and foil. You can reheat a frozen slice in the microwave for about 20-30 seconds.