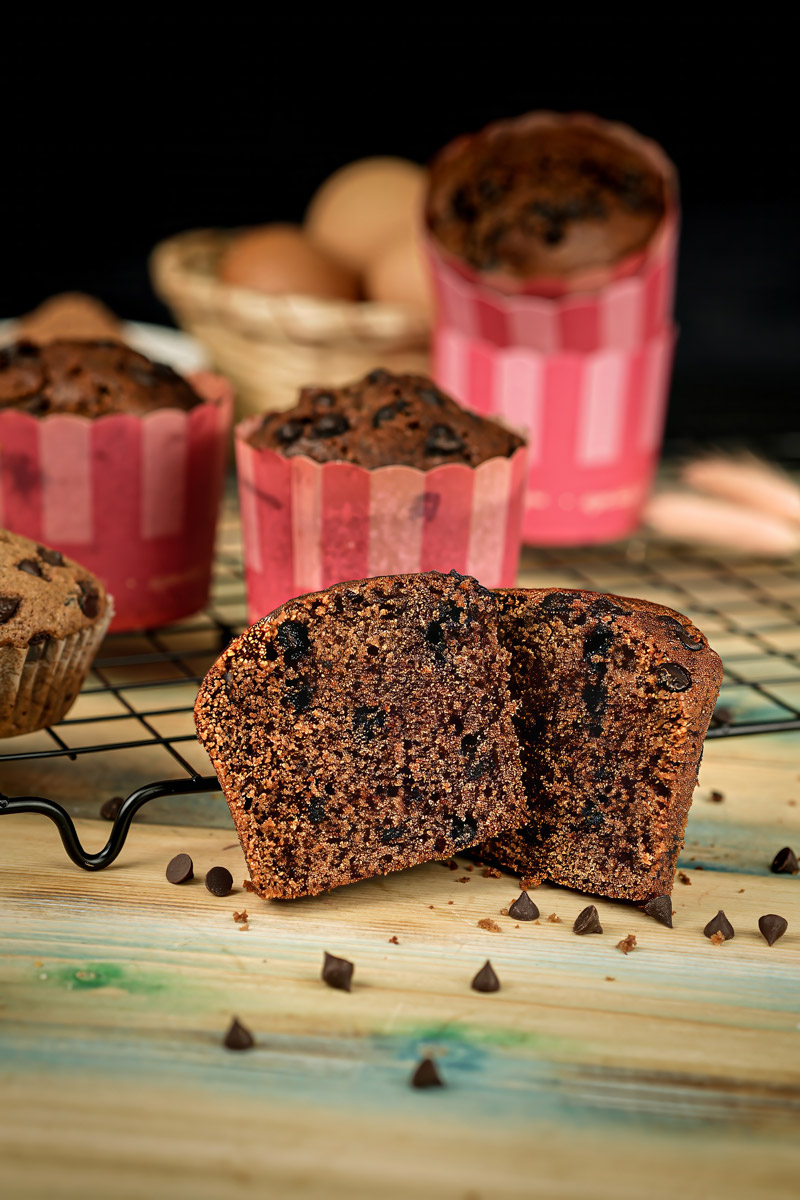
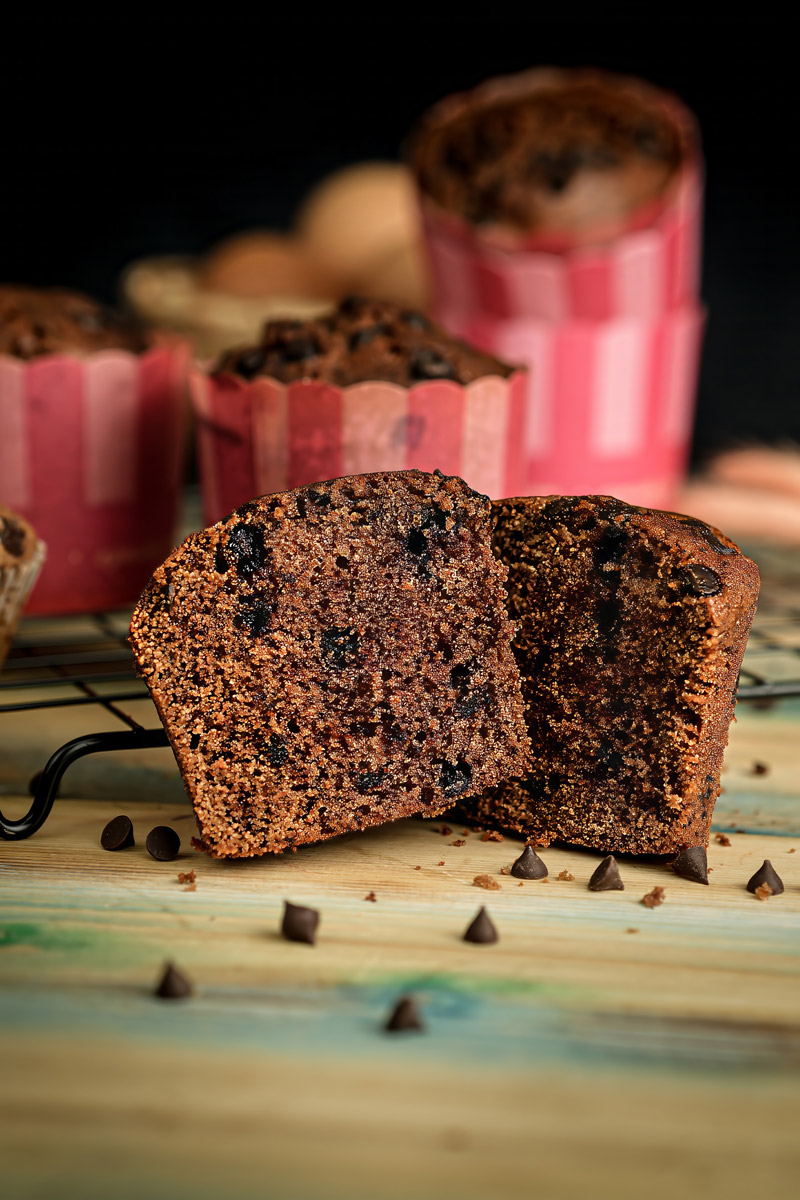
Hey friend! Want to bake something amazing today? Let’s talk about one of my absolute favorites: the Chocolate Muffin with chocolate chips.
Honestly, is there anything better? Imagine a super warm, fluffy chocolate muffin, just packed with gooey, melted chocolate chips. Perfect with coffee, milk, or just on its own. Seriously, so good.
A Little Muffin History (The Quick Version!)
You know, muffins have been around for ages. Way back, there were flatter, griddle-cooked “English” muffins in Europe. But the kind we love today – those light, fluffy, cake-like muffins? They’re more of an American thing, showing up in cookbooks in the 1800s. Back then, they used different stuff, maybe yeast or cornmeal.
Over time, bakers started having fun with them, adding fruits, nuts, and – the best part – chocolate!
Why This Recipe Rocks
This Easy chocolate muffin recipe is my go-to for getting Rich and delicious Chocolate Muffins without a headache.
What makes it work so well?
- Brown Sugar: Gives it that deep, almost caramel flavor. Way better than just white sugar here.
- Butter: Makes them tender and yummy.
- Buttermilk: This is the secret weapon for a truly Moist chocolate muffin.
It’s simple enough if you’re new to baking, but the results? Chef’s kiss. You’ll feel like a total pro.
Ready to whip up some chocolatey goodness? Let’s do this!
What You’re Getting Into (Recipe Overview)
Before we start measuring, here’s the lowdown:
- Getting Ready (Prep): Takes about 20-25 minutes. Just gathering ingredients and mixing. Easy peasy.
- Baking Time: Around 15-20 minutes in the oven. Plus a little cooling time – trust me, waiting is the hardest part!
- How Many Muffins? This makes about 4-5 really nice-sized muffins. Great for a small family or, you know, just for you.
- Need More? No problem! Just double or triple everything. Make sure your bowls are big enough, though! You might need to bake in a couple of batches if your muffin tin isn’t huge.
- Is it Hard? Nope! I’d say this is easy. If you can stir stuff in a bowl, you’ve got this.
- Make Ahead? Totally! They taste best fresh, but they keep well for a few days. You can even freeze them (more on that later!). You could mix the dry stuff and the wet stuff separately the day before (keep the wet mix in the fridge), then mix them together right before baking. Just know, they might not rise quite as much doing it that way.
Stuff You’ll Need (Equipment)
No fancy gadgets required. Here’s the basic kit:
| Equipment | What if I Don’t Have It? |
|---|---|
| Large Mixing Bowl | Any big bowl works. |
| Medium Mixing Bowl | |
| Whisk | An electric mixer (handheld or stand) works fine! |
| Rubber Spatula | A big spoon can do the job for folding. |
| Measuring Cups/Spoons | Gotta have these for baking! |
| Kitchen Scale | Not required, but really helps get flour right. |
| Muffin Tin | Standard 6 or 12-cup one. |
| Cupcake Liners | Paper or silicone ones make life easier. |
| Wire Rack | A plate or cutting board can work too. |
The Good Stuff (Ingredients)
Okay, ingredient time! Getting these right is the key to amazing muffins. Let’s talk about what you need.
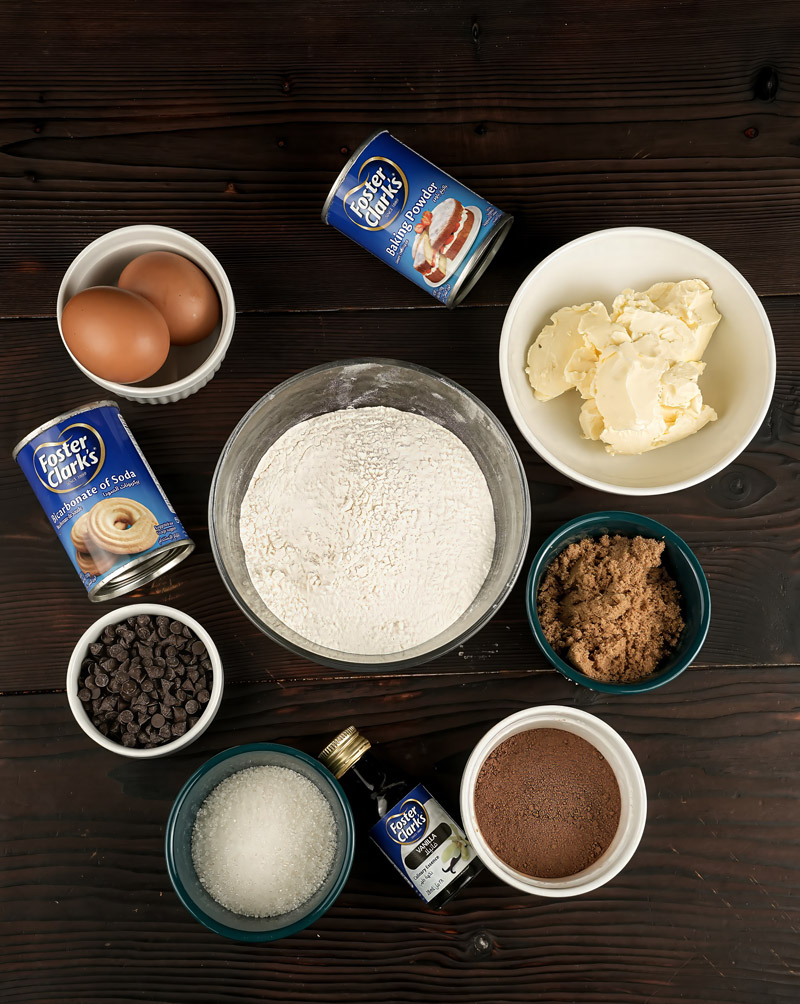
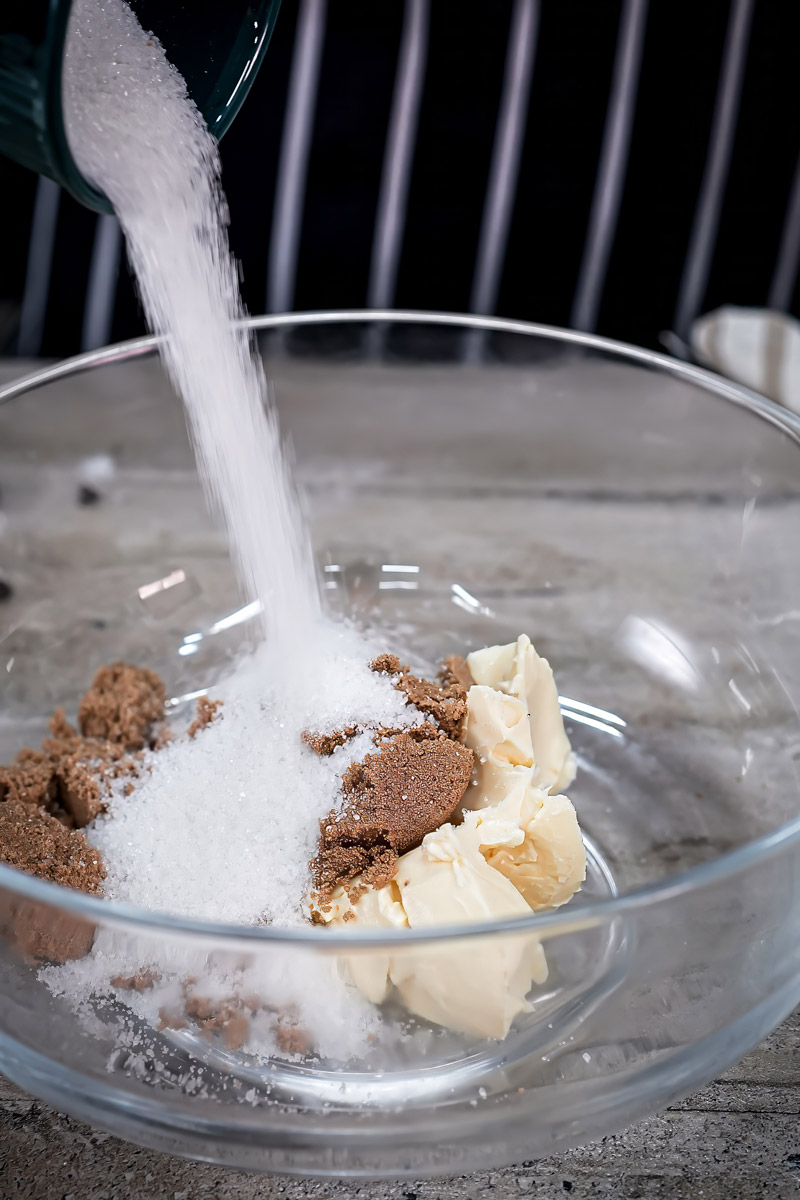
First up, 125g of Butter. I usually grab unsalted butter so I can control the saltiness myself, but if you only have salted, that’s okay too. Just be mindful if a recipe also adds salt (this one doesn’t add extra salt besides what’s in the baking powder/soda, so either butter is fine!). The most important thing? Make sure it’s softened to room temperature. Like, you can easily press your finger into it. This is super important for the first step!
Next, 100g of Brown Sugar. Like I said, you can use white sugar, but trust me, brown sugar adds moisture and this amazing deeper flavor that makes the chocolate pop.
For that lovely taste, we need 1 tsp Vanilla essence. Or hey, use chocolate essence if you want to go full-on chocolate! We also need 2 large Eggs. Try to let them sit out of the fridge for a bit to get closer to room temperature – they mix in much better that way.
Now for the dry ingredients. Grab 125g of All-Purpose Flour. Getting the flour amount right is key. If you don’t have a scale (which is best!), use the ‘spoon and level’ trick: Stir the flour in its container to fluff it up, spoon it gently into your measuring cup until it’s overflowing, then sweep the excess off the top with a straight edge, like the back of a knife. Don’t pack it down!
We also need stuff to make the muffins rise: 1 tsp Baking powder and 1/2 tsp Baking soda. And the star of the show: 2 tbsp Cocoa powder. The recipe doesn’t say which kind, but you can use regular unsweetened cocoa or Dutch-process. Dutch-process usually gives a darker muffin and richer taste, which I personally love. Pro tip: Sift the cocoa powder with the flour and baking powder/soda. It helps get rid of clumps. Nobody wants a clump of dry cocoa in their muffin!
To make sure our muffins are super tender and moist, we need 2 tbsp Buttermilk. Don’t have buttermilk? Easy fix! Just pour about ½ teaspoon of lemon juice or plain white vinegar into 2 tablespoons of regular milk. Let it sit for 5 minutes – boom, instant buttermilk substitute!
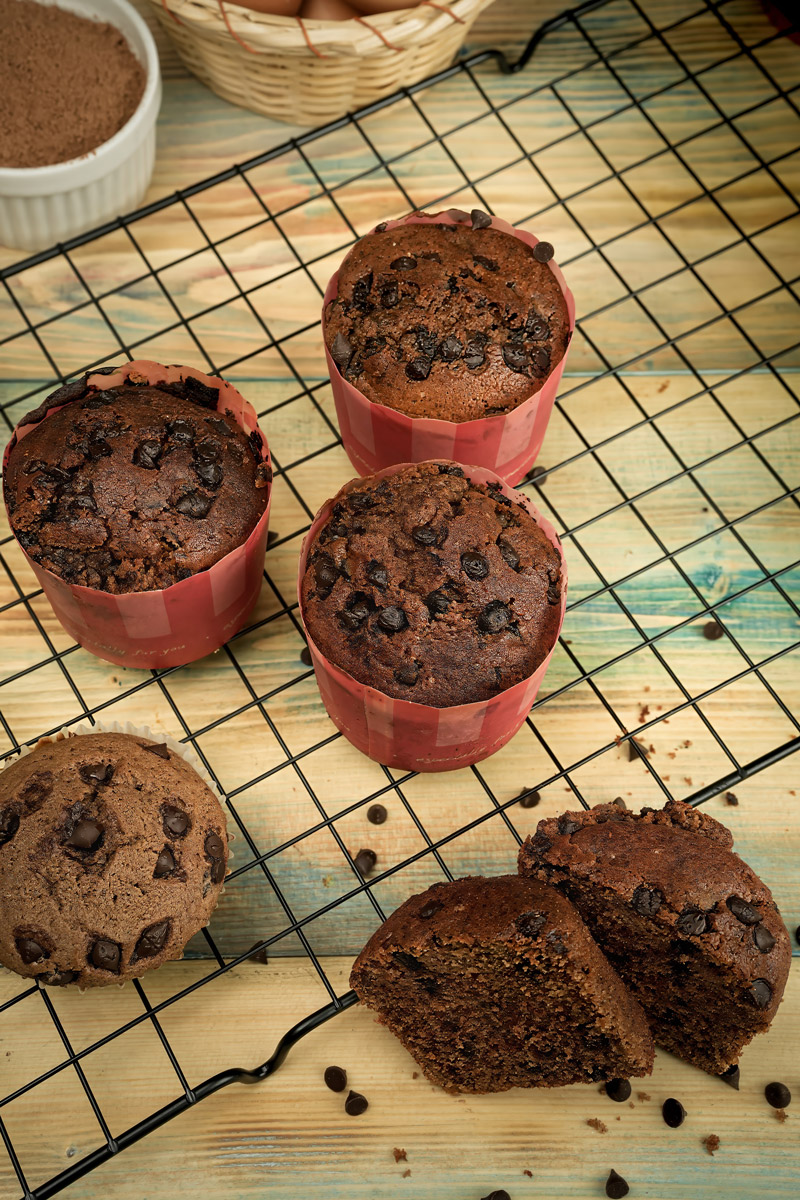
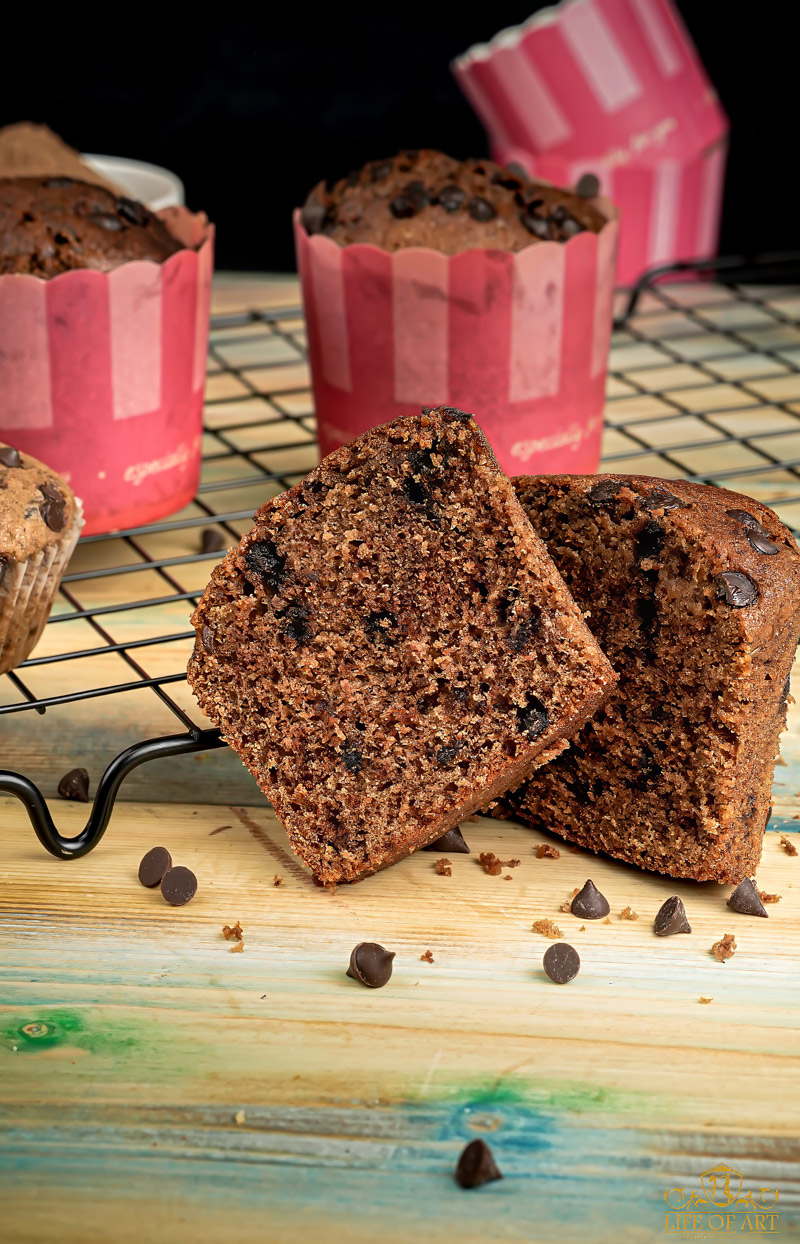
And finally… the best part: 1/3 cup Chocolate chips. Semi-sweet are classic. But feel free to go wild! Use milk chocolate, dark chocolate, or even those big chocolate chunks for serious pockets of melty chocolate. Mmm.
Let’s Bake! Step-by-Step Guide
Alright, got your apron on? Let’s make these awesome Rich and delicious Chocolate Muffins!
Prep Time & Creaming Butter/Sugar: Okay, first job: Get that oven heating up! Set it to 180°C (that’s 350°F). While it’s warming up, get your muffin tin ready. Pop those paper or silicone liners into each cup. Think of them as cozy little beds for the batter!
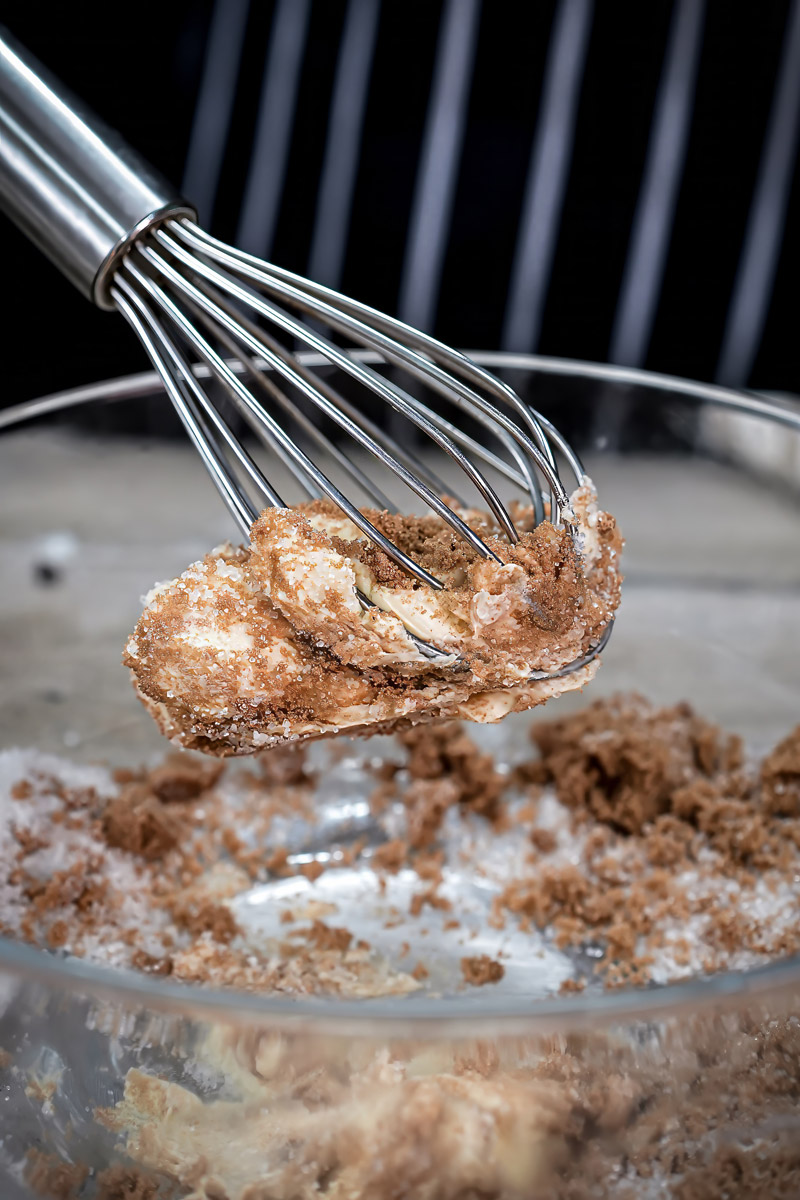
Now, the fun part. In your big mixing bowl, put the 125g of softened Butter. Seriously, make sure it’s soft. Not melted, just soft enough to easily smoosh. Add the 100g Brown Sugar and the 1 tsp Vanilla essence.
Grab your whisk or electric mixer (set it to medium). Start mixing! Watch what happens. It starts off kind of yellow and maybe a bit grainy.
Keep mixing! You’ll see it get lighter in color – pale yellow, almost creamy white – and way fluffier. What you’re doing is whipping air into it. This is the secret to light muffins! Keep going for a few minutes. It should look much bigger and feel soft. Rub a little between your fingers – the sugar grains should feel mostly dissolved. That’s perfect!
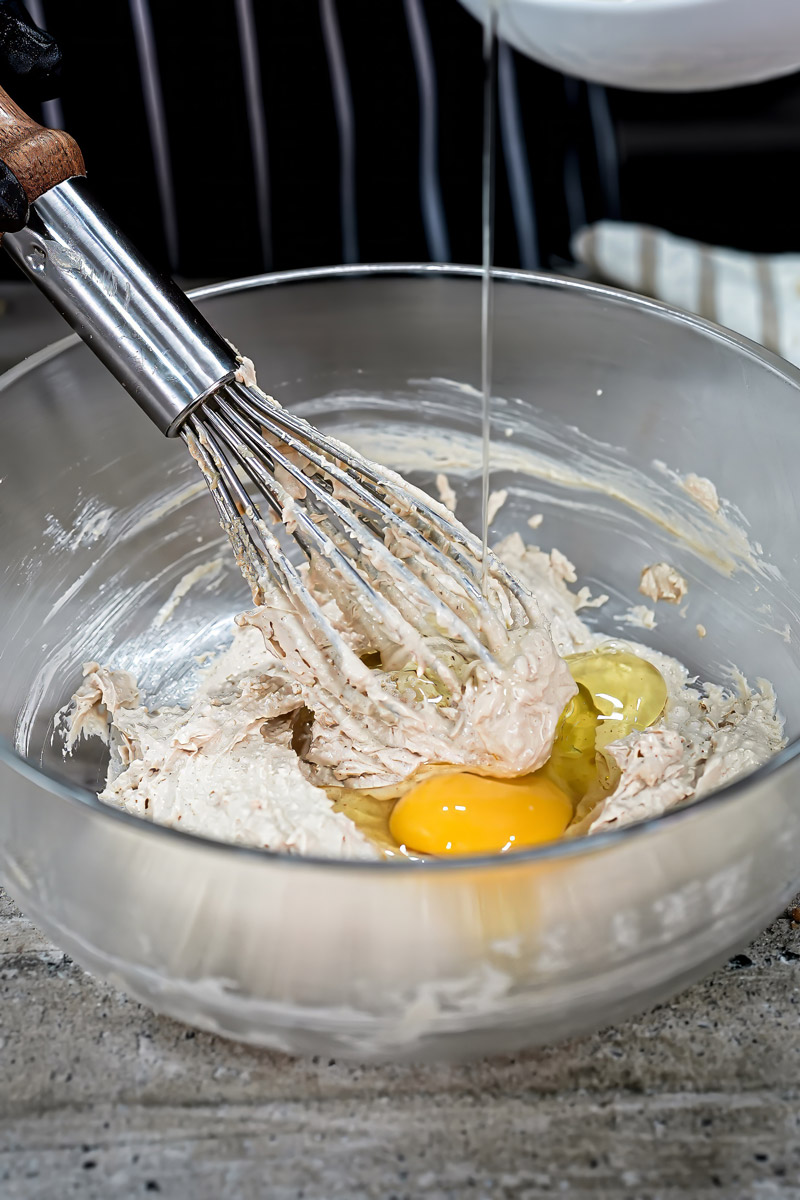
Adding the Eggs: Time for the eggs. Remember, room temp eggs mix in way better! Crack your 2 large Eggs into a small, separate bowl first. Why? It’s my little trick to make sure no sneaky bits of shell get into the batter. Saves frustration later!
Okay, add one egg to your lovely creamed butter mixture. Mix it in really well until you can’t see streaks of egg anymore and the batter looks smooth. Take your time here!
Once that first egg is mixed in, add the second egg. Mix again until it’s totally blended in. The mixture should look smooth and maybe a bit thicker now. Sometimes, if the eggs are cold, it might look a tiny bit curdled or split. Don’t panic! It usually smooths out when you add the flour.
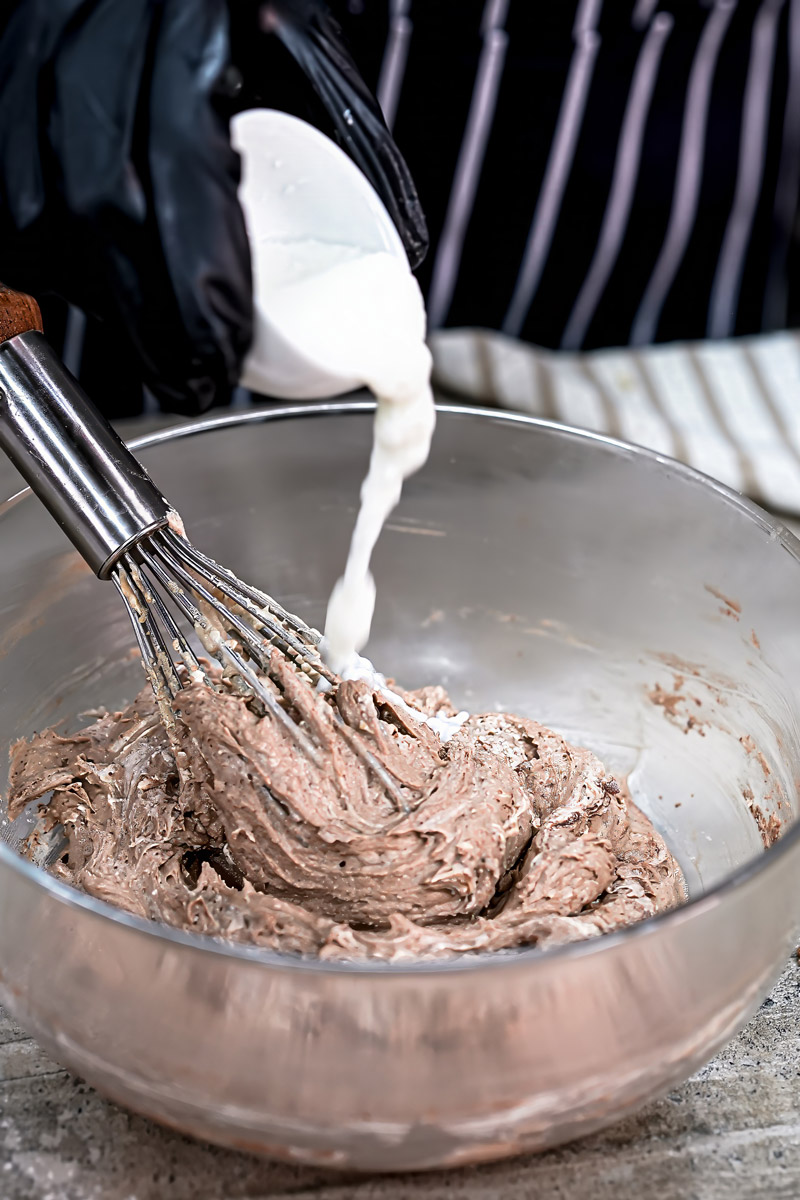
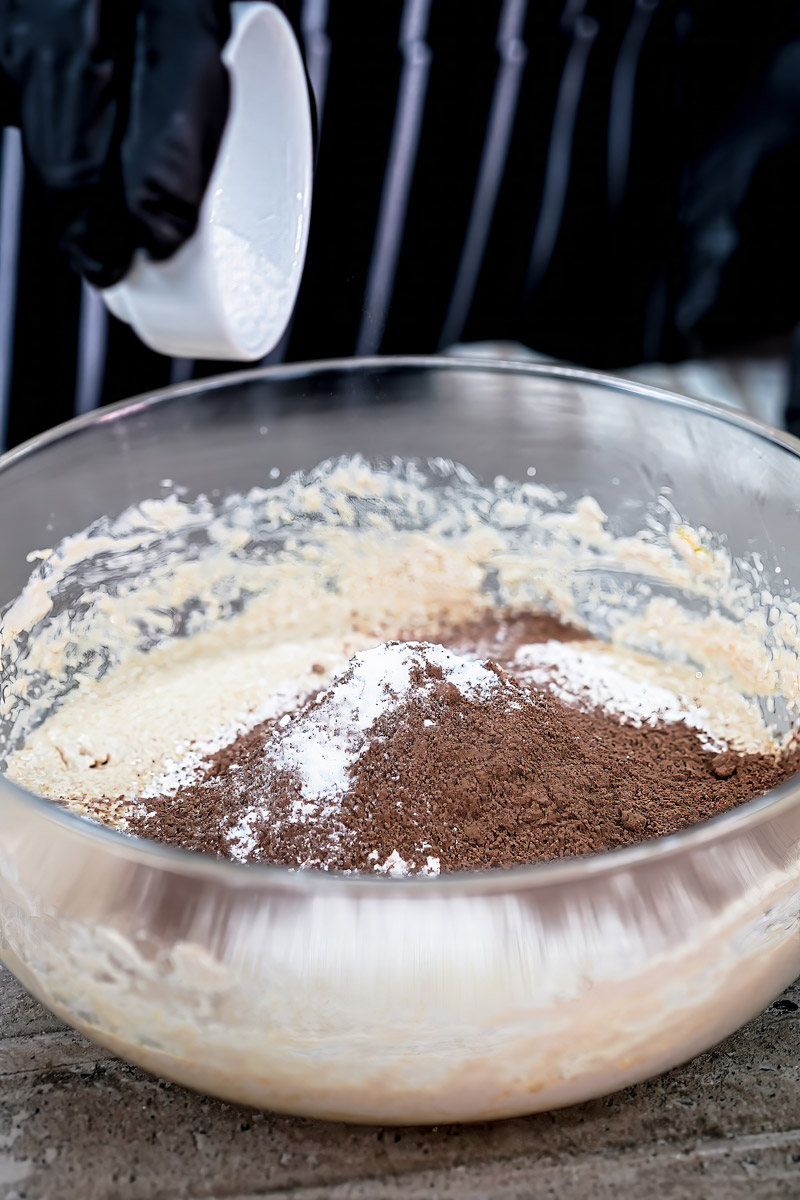
Mixing Wet & Dry (Gently!): Okay, listen up, this part is important for getting that perfect Moist chocolate muffin. In your other medium bowl, put the 125g All-Purpose Flour, 1 tsp Baking powder, 1/2 tsp Baking soda, and the 2 tbsp Cocoa powder. Whisk them all together. Even better? Sift them! It sounds fussy, but sifting adds air, gets rid of lumps (especially cocoa lumps!), and makes sure the baking powder/soda are spread out evenly.
Now, gently dump this whole dry mix into the big bowl with the wet ingredients. Pour in the 2 tbsp Buttermilk (or your substitute) at the same time.
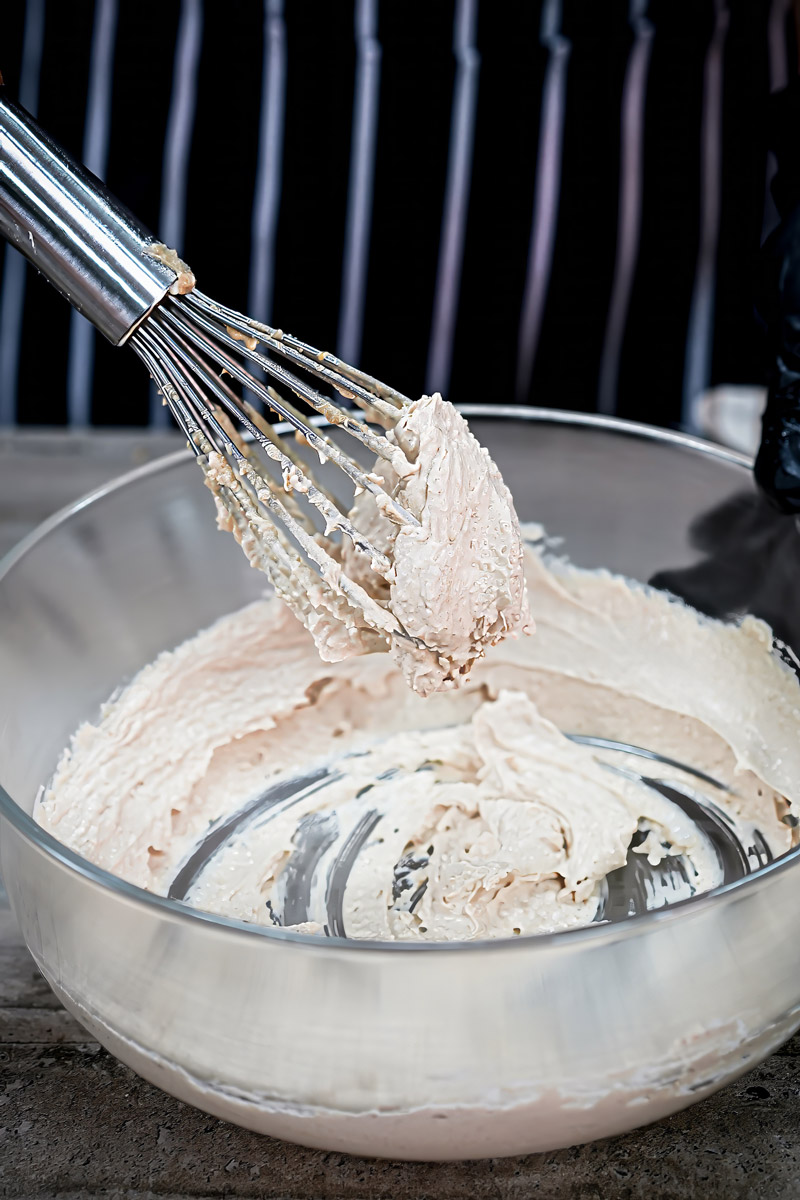
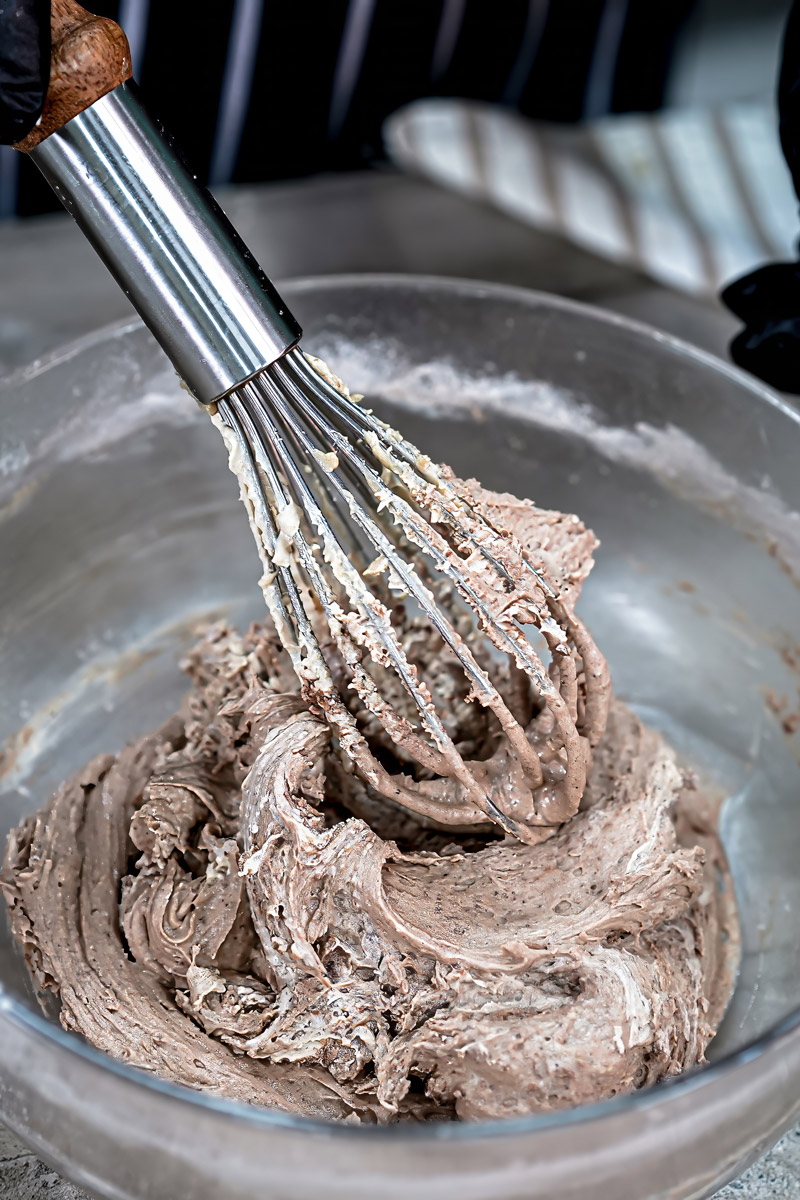
Okay, here’s the golden rule: DO NOT OVERMIX! Put away the electric mixer now. Use your rubber spatula or a wooden spoon. Gently fold the dry stuff and buttermilk into the wet stuff. Think like you’re gently coaxing them together, not beating them up! Mix just until you don’t see big white streaks of flour anymore. Stop mixing right then. The batter should look thick and a bit lumpy. That’s exactly what you want! Lumps are good in muffin batter. Overmixing makes muffins tough. We want tender, fluffy muffins!
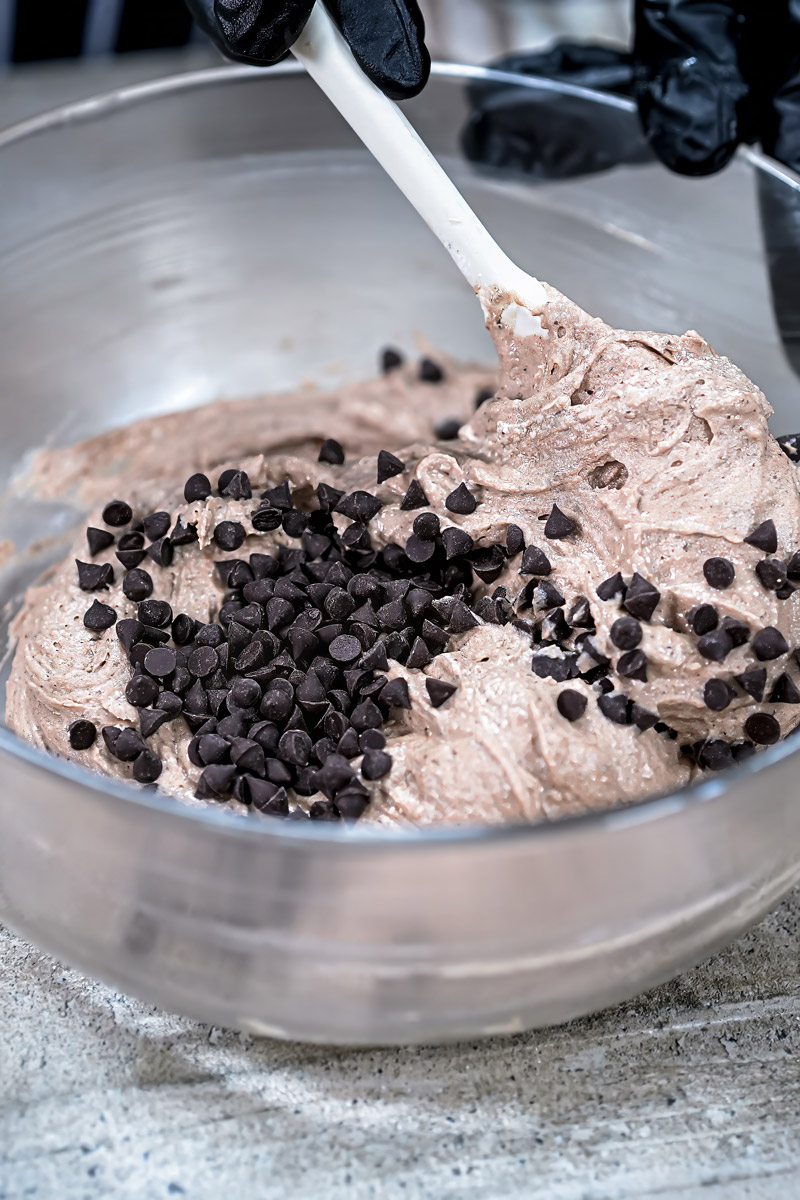
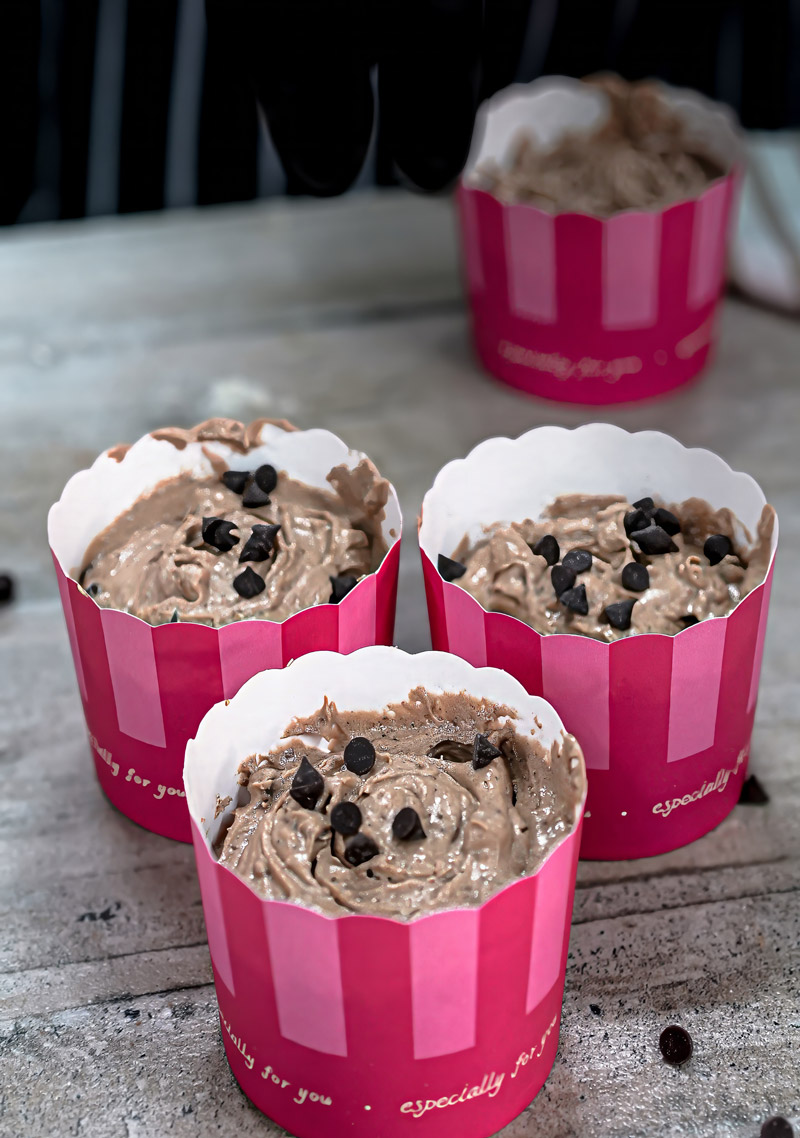
Folding in the Chocolate! Yes! The best step. Gently pour in that glorious 1/3 cup Chocolate chips. Use that same gentle folding method – cut down the middle, scrape the bottom, lift, and fold over. Carefully mix the chips in. Just a few folds are enough. You want them spread out, but don’t stir like crazy. Quick tip: Hold back a small handful of chips to sprinkle on top before baking. Makes them look extra yummy! This step turns this Easy chocolate muffin recipe into a true Chocolate Muffin with chocolate chips dream.
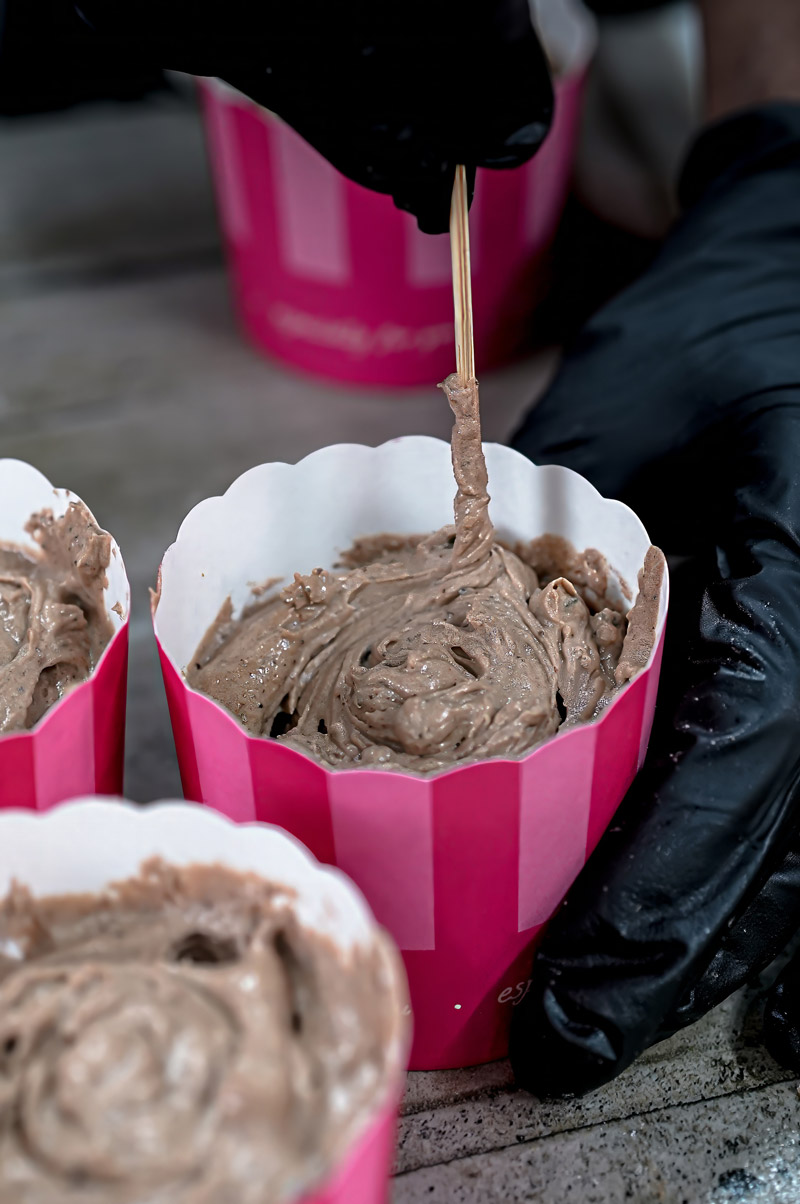
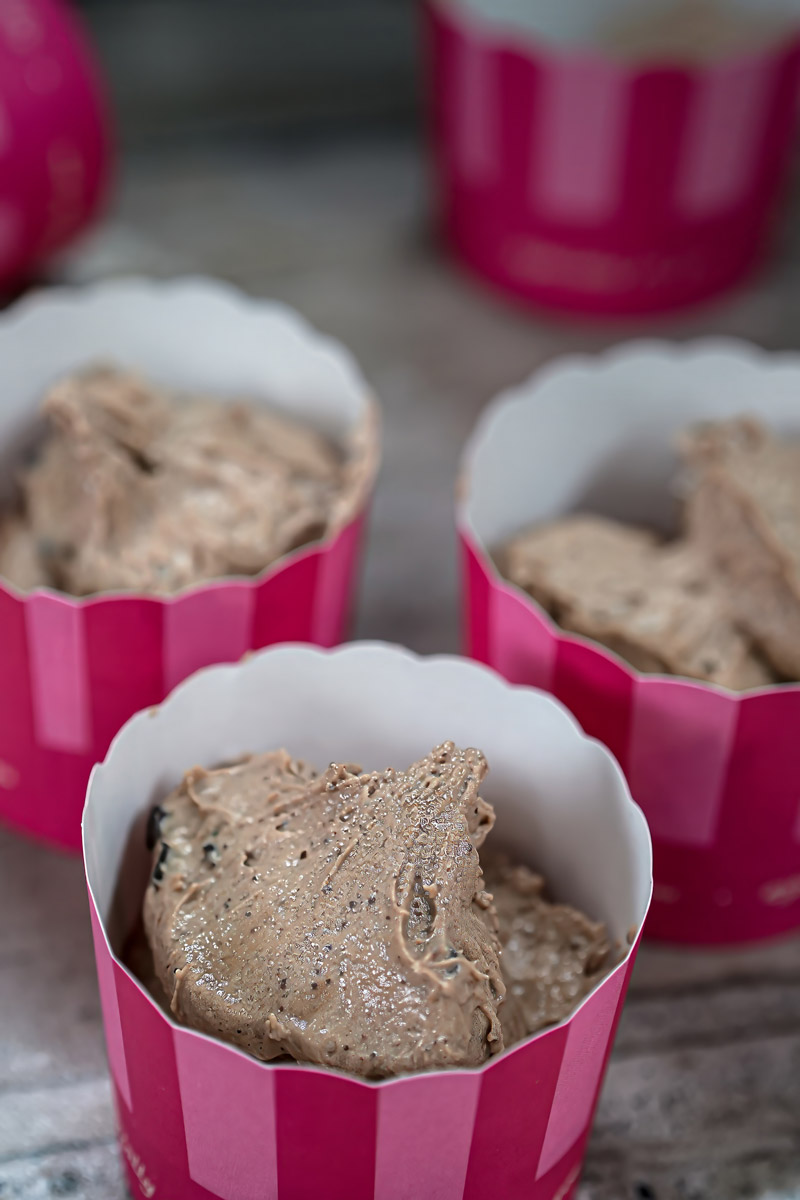
Filling the Muffin Cups: Grab your prepared muffin tin. Use a spoon or, my favorite trick, an ice cream scoop (the kind with the trigger release is awesome for even muffins!) to fill each liner. The recipe says 55 to 60 grams each if you have a scale. If not, just fill them about two-thirds (2/3) to three-quarters (3/4) full. Don’t fill them to the top! They need space to puff up in the oven. Try to make them all about the same size so they bake evenly.
Remember those extra chocolate chips? Sprinkle a few on top of each muffin now. Looks pro!
Baking Time! Let’s bake these beauties. Carefully put the muffin tin into the middle of your hot 180°C (350°F) oven. Set a timer for 15 minutes to start.
Try not to open the oven door too early (it can make them sink!), but peek through the glass. You should see them puffing up nicely! And the smell? Oh my goodness. Your kitchen is about to smell like chocolate heaven.
After about 15 minutes, check if they’re done. Carefully open the oven. Stick a wooden toothpick or skewer into the center of a muffin (pick one in the middle).
If it comes out clean, or with just a few moist crumbs attached (no wet batter!), they’re done! (Careful not to mistake melted chocolate for wet batter).
If there’s wet batter on the toothpick, give them another 2-5 minutes, then check again.
Another way to tell: Gently press the top of a muffin. It should spring back softly.
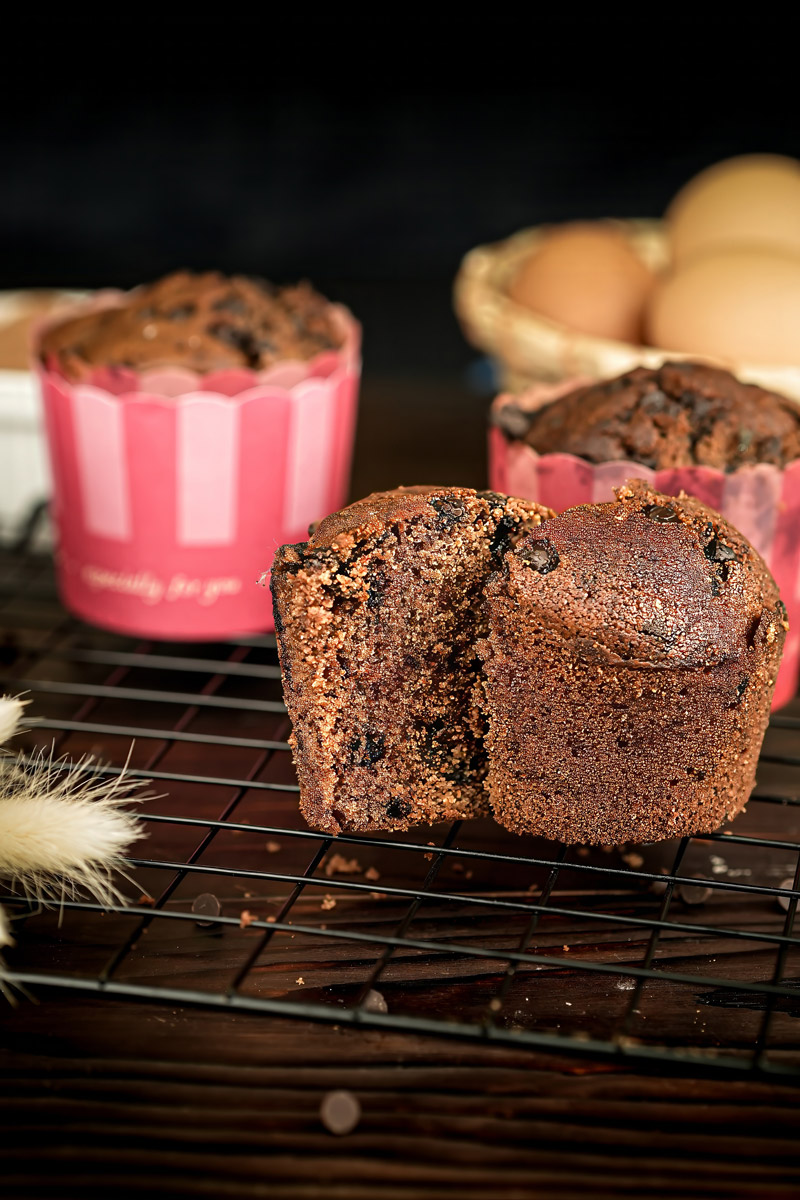
Cooling Down (Super Important!): You did it! Use oven mitts to take the muffin tin out of the oven. Place it on a wire rack or heatproof surface. Now, listen closely: let the muffins cool in the tin for about 5 to 10 minutes. This helps them firm up a bit so they don’t fall apart when you move them.
After that short rest, gently lift each muffin out. A butter knife can help nudge them if needed. Place them directly onto the wire rack to cool completely. Why? Air needs to get all around them, otherwise the bottoms get steamy and soggy. Nobody wants soggy bottoms!
I know, I know, it’s torture waiting when those warm, Rich and delicious Chocolate Muffins are right there. But letting them cool properly lets them finish setting up inside and makes the flavor even better. Patience, my friend! It leads to the perfect Moist chocolate muffin.
Mix It Up! (Variations & Fun Ideas)
This Easy chocolate muffin recipe is amazing on its own, but feel free to play around!
- Need Gluten-Free? You could try a good 1-to-1 gluten-free flour blend instead of regular flour. Sometimes results vary with GF flours, so it might take a try or two to get it perfect.
- Want Vegan Muffins? This needs bigger changes. You’d swap the butter for vegan butter or oil, use an egg replacer (like a flax egg, applesauce, or store-bought kind), and use non-dairy milk for the buttermilk substitute.
- Boost the Flavor:
- More Chocolatey: Add ½ to 1 teaspoon of instant espresso powder with the cocoa. Coffee makes chocolate taste more like chocolate! It’s a classic trick.
- A Little Spice: Feeling bold? Add a pinch of cinnamon or even a tiny bit of chili powder for a hint of warmth. Kinda like Mexican hot chocolate!
- Different Extracts: Swap the vanilla for peppermint or orange extract. Yum!
- Fun Add-Ins & Toppings:
- Chocolate Swap: Use dark, milk, or white chocolate chips. Or chop up a chocolate bar for bigger melted bits.
- Add Crunch: Fold in some chopped walnuts or pecans.
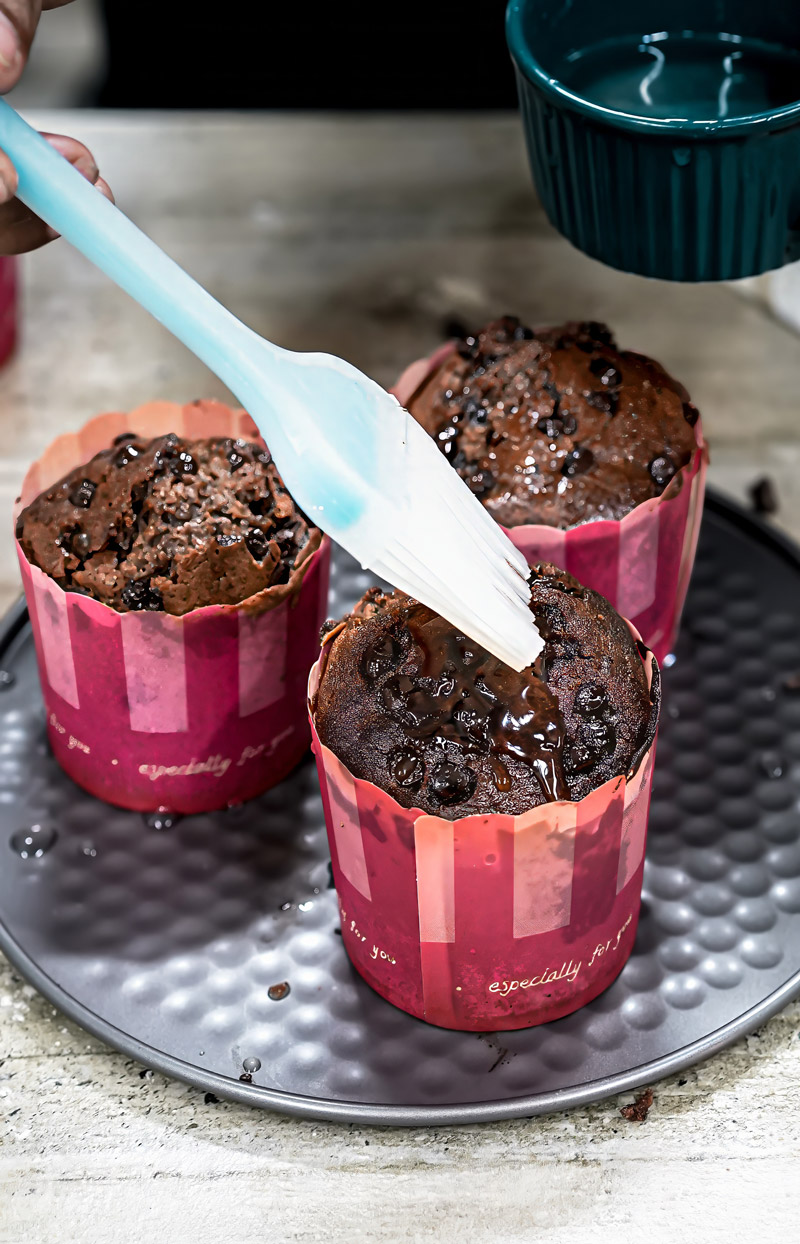
- Make ‘Em Fancy: Once they’re cool, top them with chocolate frosting (ganache is amazing!), cream cheese frosting, or just sprinkle some coarse sugar on top before baking for a sparkly crunch.
- Seasonal Ideas: Add orange zest in winter. Maybe some pumpkin puree and pumpkin spice in the fall? Or chopped cherries in summer? Go for it!
Serving and Storing Your Muffins
You baked them! These Rich and delicious Chocolate Muffins are ready. How should you serve and save them?
Honestly, eating them warm is the best. Maybe add a little butter? Heaven. They’re perfect with coffee, tea, or cold milk. Just pile them on a plate and watch them disappear!
Got Leftovers? (If that happens!)
No worries! Once the muffins are completely cool, store them in an airtight container.
- Room Temp: They’ll stay good for about 3-4 days.
- Fridge: You can keep them in the fridge for up to a week, though they might get a little dense.
- Freezer: These freeze really well! Wrap each cooled muffin tightly in plastic wrap or foil. Then pop them into a freezer bag or container. They’ll be good for up to 3 months.

Bringing Back That Fresh-Baked Feeling:
- From Room Temp/Fridge: Zap one in the microwave for 10-15 seconds. Perfect. Or, for a slightly crispy top (my fave!), pop it in a toaster oven on ‘Bake’ at around 160°C (325°F) for 5-6 minutes.
- From Frozen: Let them thaw on the counter for about 30 minutes first. Or give them a quick 20-30 seconds on the defrost setting in the microwave. Then reheat like above.
Enjoy every single chocolatey bite of your homemade Chocolate Muffin with chocolate chips! Happy baking!
PrintChocolate Muffin
Seriously, these are the best! Super moist, packed with chocolate, and surprisingly simple to whip up. They make the kitchen smell amazing and are perfect anytime. Let’s bake some happiness!
- Prep Time: 20 mins
- Cook Time: 15-20 mins
- Total Time: About 40 mins (+ cooling!)
- Yield: 4–5 muffins 1x
- Category: Snack, Dessert, Breakfast
- Cuisine: American
Ingredients
- 125g Butter: Make sure it’s nice and soft (room temp is key!)
- 100g Brown Sugar: For that lovely deep flavour.
- 1 tsp Vanilla Essence: Or chocolate essence for extra punch!
- 2 Large Eggs: Room temp if you can remember.
- 125g All-Purpose Flour
- 1 tsp Baking Powder
- 1/2 tsp Baking Soda
- 2 tbsp Cocoa Powder: Unsweetened or Dutch-process works great.
- 2 tbsp Buttermilk: (Or make your own: 2 tbsp milk + 1/2 tsp lemon juice/vinegar, rest 5 mins)
- 1/3 cup Chocolate Chips: Semi-sweet, milk, dark – your choice! (+ a few extra for sprinkling!)
Instructions
- Get Ready: Heat your oven to 180°C (350°F). Line a muffin tin with 4-5 liners.
- Cream Butter & Sugar: In a big bowl, beat the soft butter, brown sugar, and vanilla with a mixer (or whisk) until it looks light and fluffy (takes a few minutes!).
- Add Eggs: Beat in the eggs, one at a time, mixing well after each.
- Mix Dry Stuff: In a separate bowl, whisk together the flour, baking powder, baking soda, and cocoa powder.
- Combine Gently: Add the flour mix and the buttermilk to the butter mixture. Using a spatula, fold just until combined. Don’t overmix! A few lumps are totally fine – that means tender muffins!
- Fold in Chips: Gently fold in the chocolate chips.
- Fill & Bake: Spoon the batter into the liners, filling them about 2/3 to 3/4 full. Sprinkle a few extra chips on top if you like! Bake for 15-20 minutes. They’re done when a toothpick stuck in the centre comes out clean (or with moist crumbs, not wet batter).
- Cool Down: Let the muffins cool in the tin for 5-10 minutes before moving them to a wire rack to cool completely. Waiting is hard, but worth it!
Notes
- Serving: Amazing warm! Great with coffee, milk, or just as they are. A little butter doesn’t hurt either!
- Tip: Using an ice cream scoop makes filling the liners super easy and keeps the muffins the same size.
- Another Tip: Sifting the cocoa powder helps prevent lumps!
- Storage: Keep cooled muffins in an airtight container. They’ll last about 3-4 days at room temp, a week in the fridge, or 3 months in the freezer (wrap them well!).
- Reheating: Warm fridge/room temp muffins gently in the microwave (10-15 secs) or a low oven/toaster oven. For frozen, thaw first or give them a bit longer.
Enjoy your delicious homemade muffins!