Hey there! Let me tell you about one of my absolute favorite baking projects: making rustic, airy, and unbelievably good homemade ciabatta.
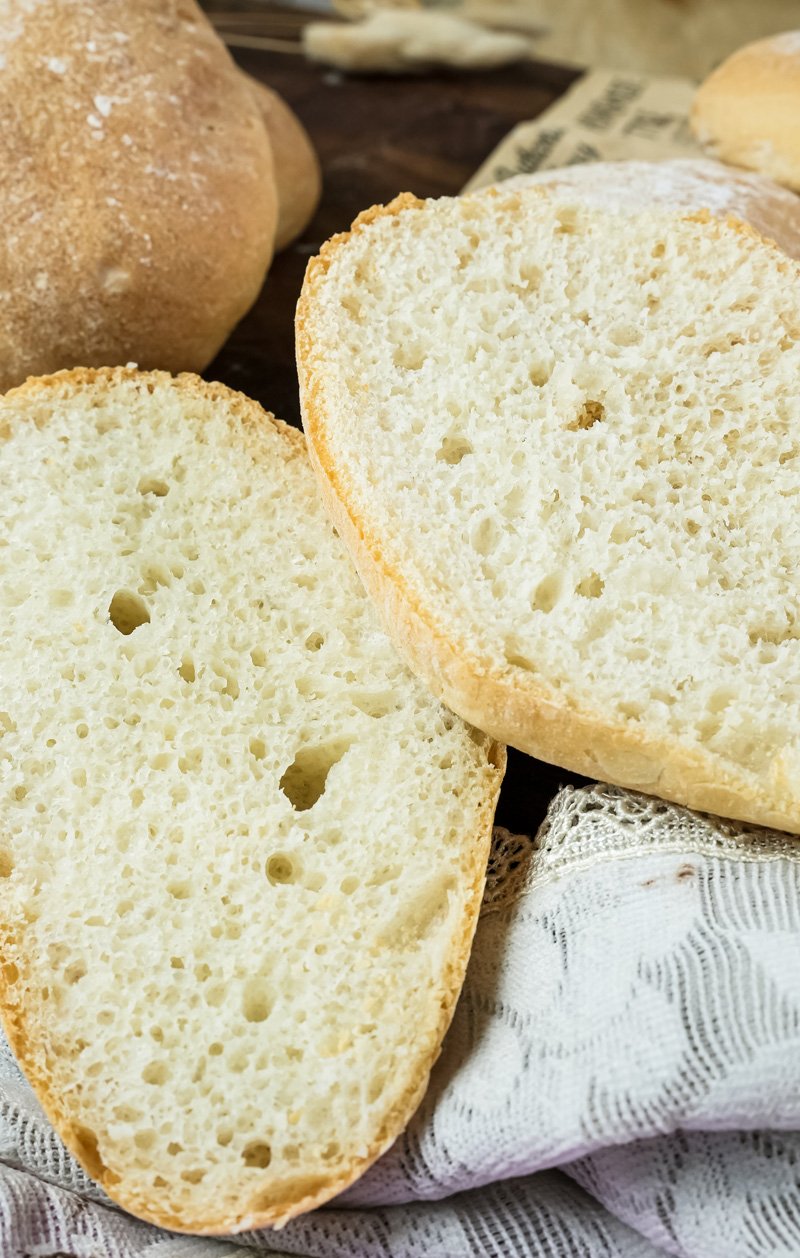
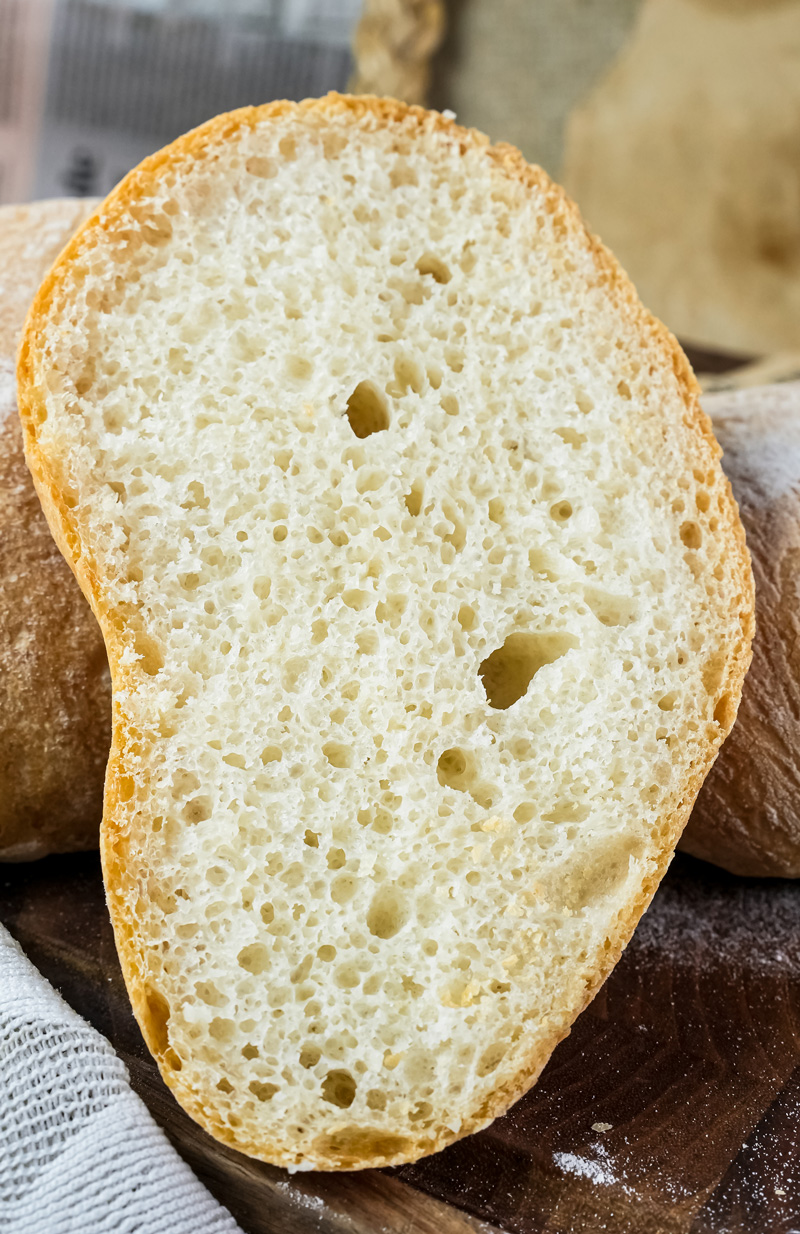
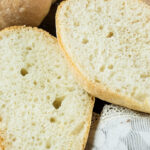
There’s a special kind of magic in pulling a loaf of this classic Italian bread from your own oven. First, you hear the crackle of the crust. Then you see the soft, hole-filled inside. And that smell… that slightly tangy, fresh-baked aroma just fills the whole house. It feels like a mini-vacation to a sunny spot in Italy.
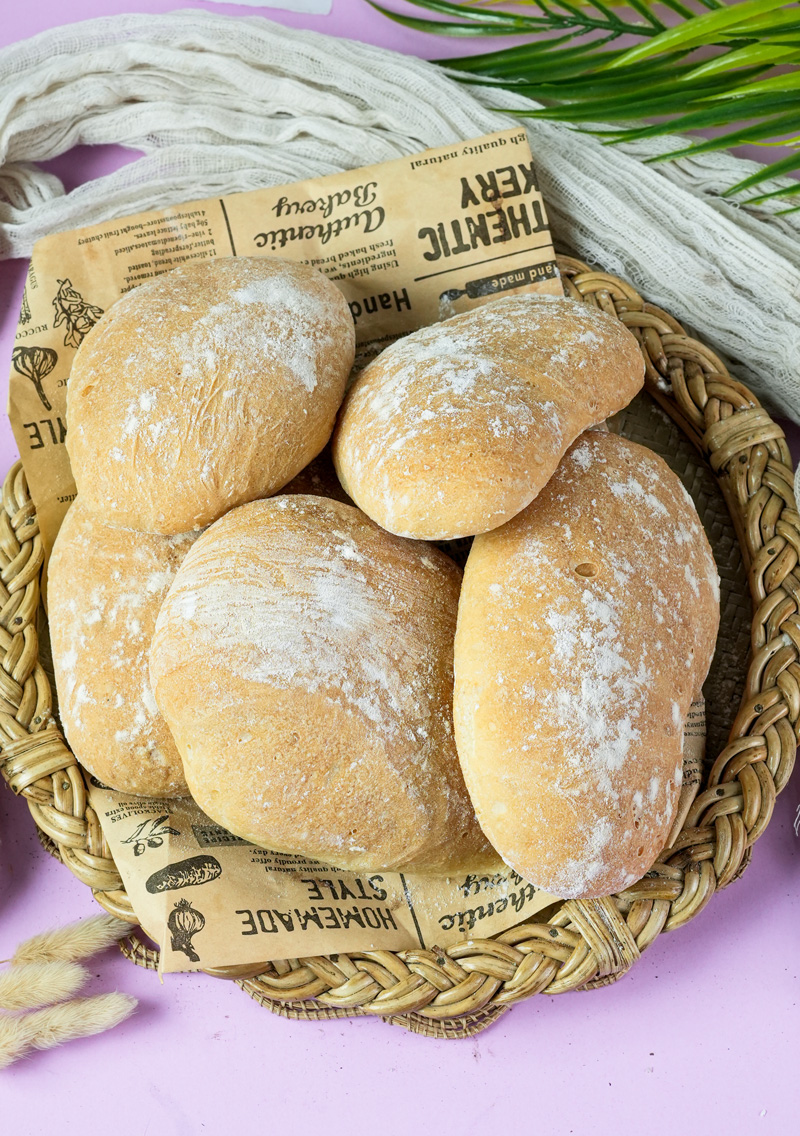
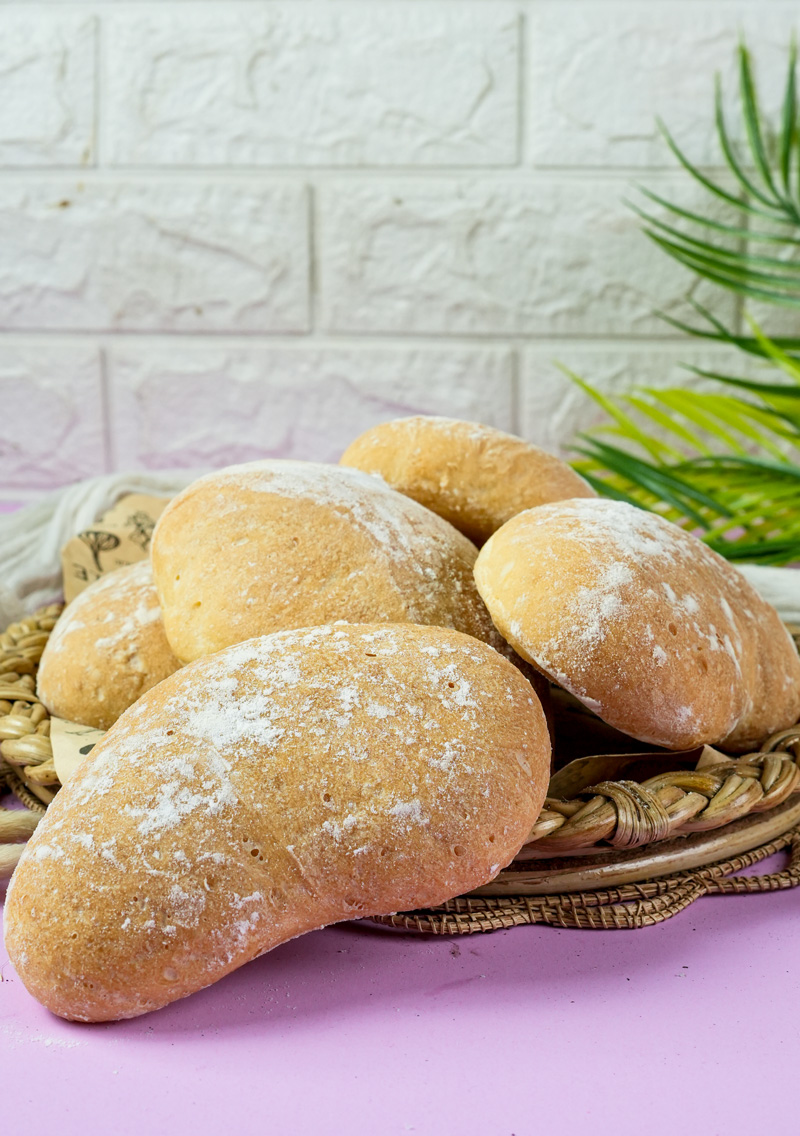
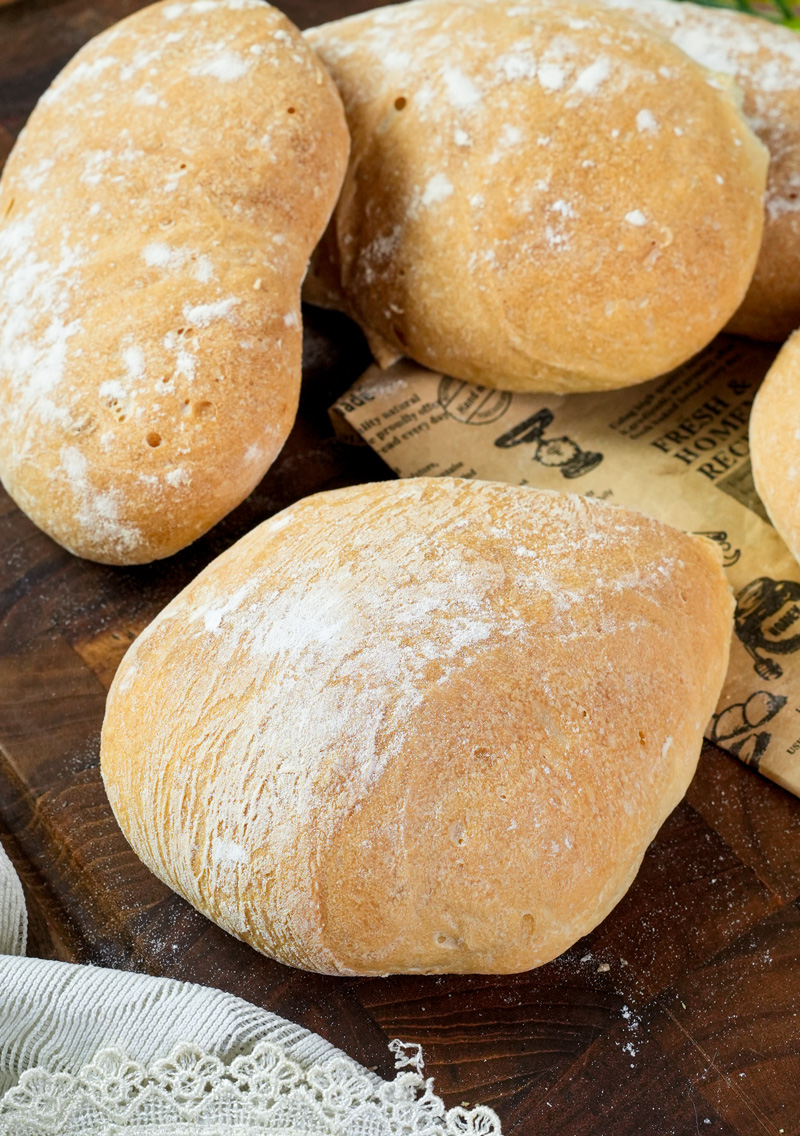
Lots of people think ciabatta is some ancient, time-honored bread. But here’s a fun fact for you: it was actually invented in the 1980s! An Italian baker created it to compete with the super-popular French baguettes. The name itself means “slipper” in Italian, which makes sense when you see its flat, long shape.
What I love most about this recipe is how simple it is. We’re skipping all the hard kneading. Instead, we’ll use a very wet dough and a simple “stretch and fold” trick. It takes a little patience, but it’s super easy and gives you that chewy texture and those beautiful air pockets with almost no real work.
So, think of me as your baking buddy for this one. I’ll walk you through every single step. Whether you’re a pro or have never touched wet dough in your life, we’ll get through it together.
Recipe at a Glance
This is the perfect recipe for a lazy weekend. The actual hands-on time is tiny—probably less than 20 minutes total. The rest of the time, you just let the dough do its thing.
- Active Time: 20 minutes
- Resting & Rising: 3 hours 10 minutes
- Baking Time: 20 minutes
- Total Time: About 4 hours
How Much Does This Make?
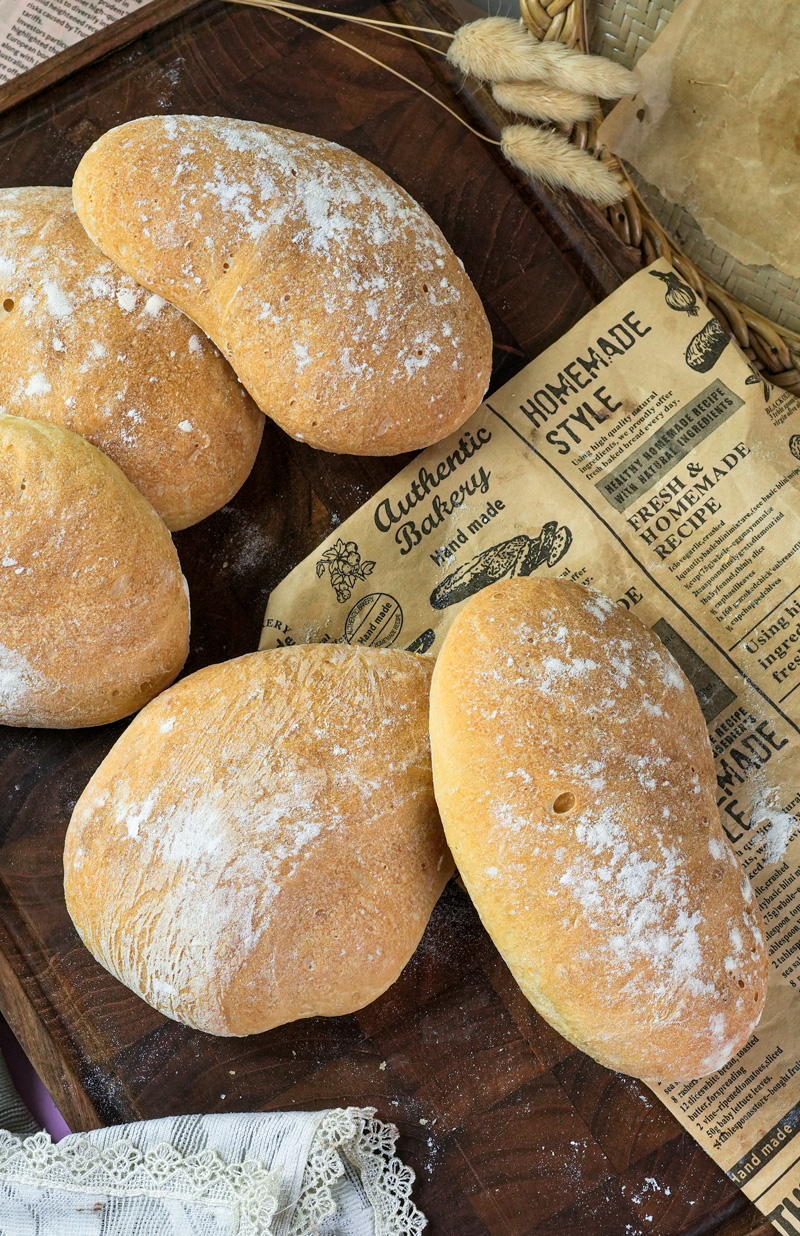
This recipe makes four good-sized rolls, perfect for sandwiches. But you’re the boss here! It’s easy to make more or less.
Yields: 4 ciabatta rolls
Want to change the batch size? No problem. Just make sure your bowl is big enough for the dough to rise.
| Yield | Instant Yeast | Water | All-Purpose Flour | Salt |
| 2 Rolls | 1/2 tsp | 120g | 150g | 1/2 tsp |
| 4 Rolls | 1 tsp | 240g | 300g | 1 tsp |
| 8 Rolls | 2 tsp | 480g | 600g | 2 tsp |
How Hard Is It, Really?
I’d call this one Adventurous Beginner. The steps are simple, I promise. The only tricky part is that the dough is very wet and sticky. It might feel a little weird at first. My advice? Just trust the process. Embrace the mess a little. The bakery-level results are totally worth it.
What You’ll Need (No Fancy Gear Required!)
- A Large Mixing Bowl: Give that dough plenty of room to grow!
- A Small Cup or Bowl: Just for waking up the yeast.
- Kitchen Scale (Seriously, get one!): For years, my baking was hit-or-miss. The day I bought a cheap kitchen scale, everything changed. Measuring by weight (grams) instead of cups is the best way to get the exact same, perfect result every single time.
- Whisk or Spatula: For the first quick mix.
- Plastic Wrap or a Clean Kitchen Towel: To cover the bowl.
- Baking Tray: A standard 8×12-inch tray is perfect.
- Parchment Paper: This is your best friend. It stops the sticky dough from welding itself to your tray.
- A Small Baking Pan: Any metal or glass pan will do. We’ll fill this with water to create steam in the oven.
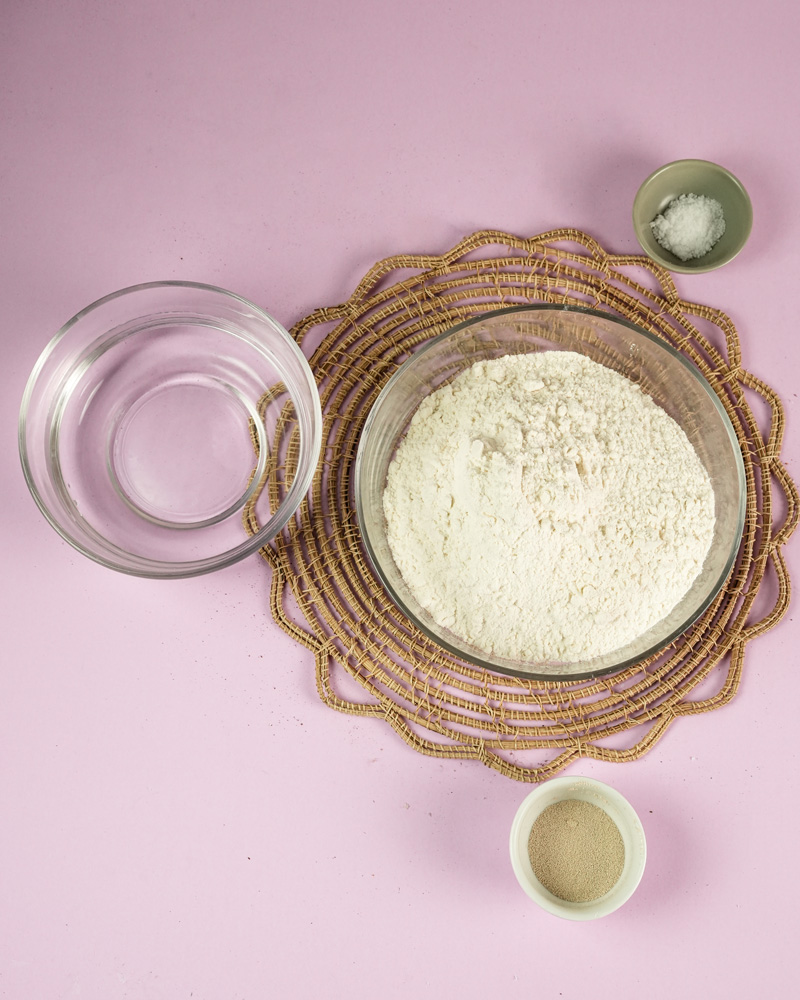
The Ingredients for Perfect Ciabatta
The best part about this recipe is you only need four simple things. When the list is this short, you can really taste the quality of each ingredient.
Here’s your shopping list:
- 300g All-Purpose Flour
- 240g Room Temperature Water
- 1 tsp Instant Yeast
- 1 tsp Salt
Let’s talk about why each one matters. The flour is the body of the bread. Regular all-purpose works great. If you happen to have bread flour, though, use it! It has more protein and will make your ciabatta even chewier.
The water is the secret sauce. We use a lot of it here, which makes the dough 80% hydration. Don’t panic when you see how wet the dough is! That sticky, wet feeling is exactly what you want. It’s what creates those light, airy pockets inside the bread.
Next up, the yeast. This is what brings the dough to life. Make sure yours is fresh! When you mix it with water, it should get a little bubbly and smell, well, yeasty. That’s how you know it’s ready to make those beautiful bubbles for us.
And finally, salt. It’s not just for taste. Salt actually controls how fast the yeast works and helps make the dough stronger.
What if I don’t have…?
- Active Dry Yeast: You can use it! Just use a little more (maybe 1 ¼ teaspoons) and make sure it gets nice and foamy in the water before you add it to the flour.
- Bread Flour: As I mentioned, it’s a great substitute and will make your rolls chewier. Just don’t use cake flour; it’s too soft for this job.
The Step-by-Step Method: Let’s Get Baking!
Alright, are you ready? Roll up those sleeves. Let’s make some dough.
Stage 1: Mix the Dough (1-hour rise)
First up, let’s get the yeast woken up. In a small cup, stir your teaspoon of yeast into the room-temperature water. Let it sit for a minute or two. You should see it start to bubble up a bit. That’s the sign it’s alive and ready to go!
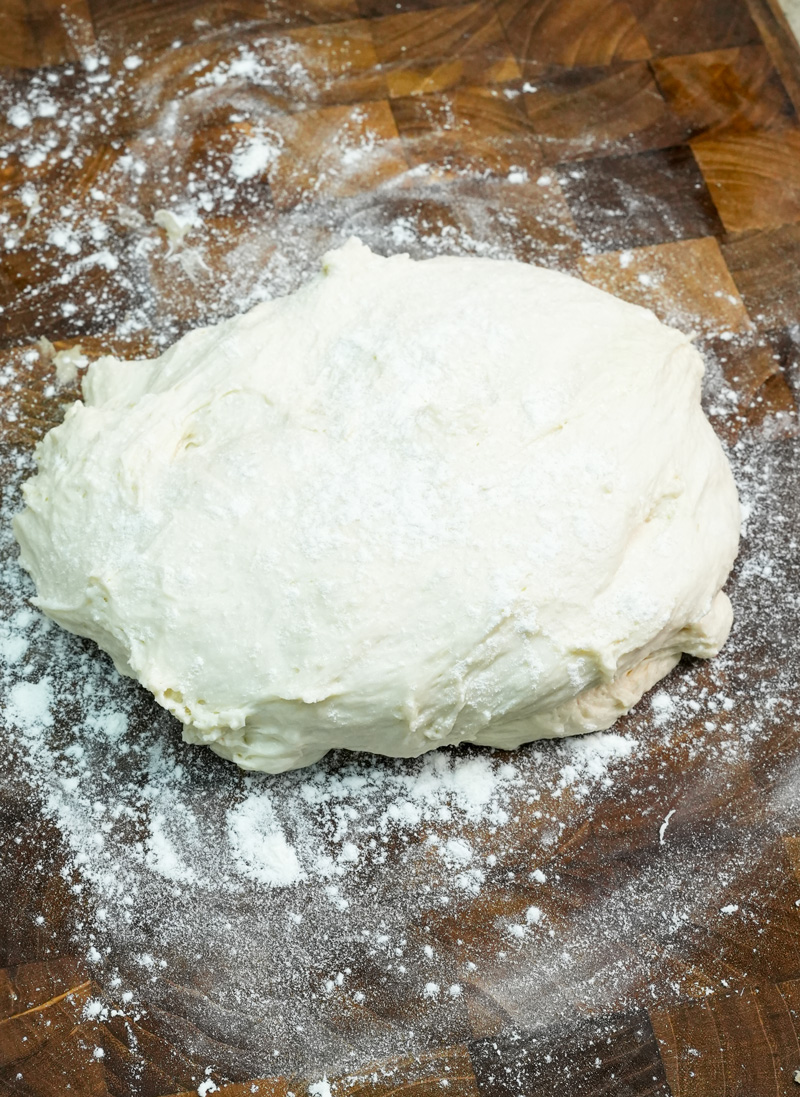
In your big mixing bowl, add the 300g of flour and 1 teaspoon of salt. Pour in the yeast-water mixture. Grab a spatula and mix it all together. You’re looking for a very wet, sticky, shaggy mess. It will look more like a thick pancake batter than bread dough. This is perfect.
Scrape down the sides of the bowl so there are no dry bits of flour. Don’t even think about kneading it. Cover the bowl with plastic wrap and let it sit on your counter for one hour.
Stage 2: The Stretch and Fold (1.5-hour rise)
This is where the magic happens, and you don’t even have to knead! After an hour, your dough will have puffed up a little.
Now, dip your hands in water to keep them from sticking. Reach into the bowl, grab one side of the dough, stretch it up, and fold it over into the middle. Turn the bowl a quarter-turn and do it again. Repeat for all four “sides.” The whole thing takes less than a minute.
Cover the bowl and let it rest for 30 minutes. You’re going to do this stretch-and-fold process two more times, with a 30-minute rest in between.
- After the 2nd fold: You’ll feel a difference. The dough will seem smoother and stretchier.
- After the 3rd fold: Now it’s really alive! The dough will be super puffy and full of air. It should feel like a soft, wobbly pillow.
These simple folds are building up the structure inside the dough that will trap all that air.
Stage 3: Shape the Rolls (40-minute rise)
Time to shape our “slippers”!
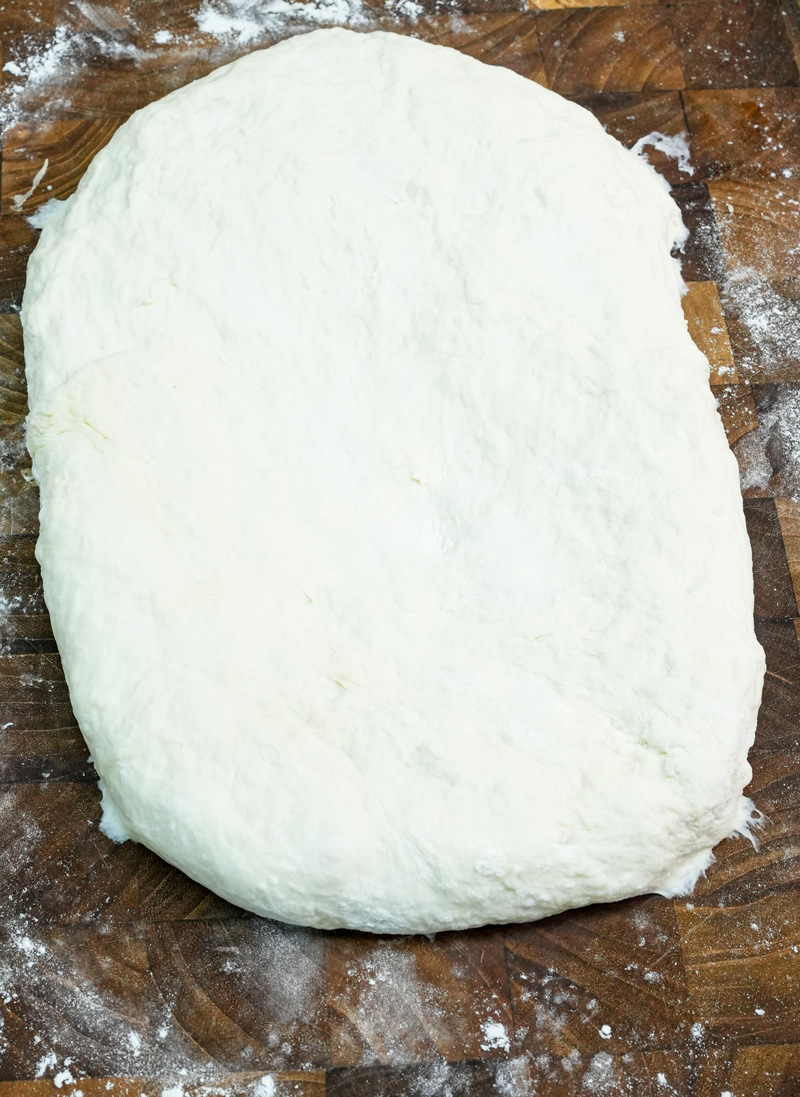
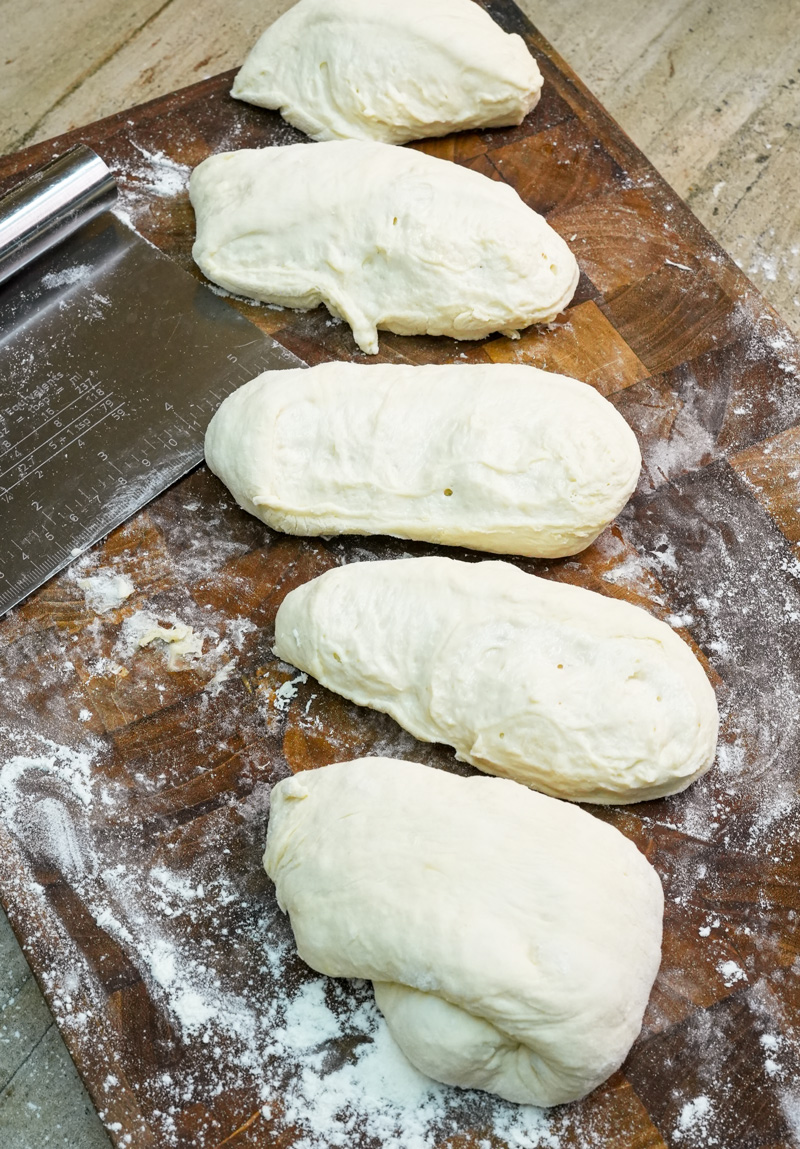
Flour your counter. And I mean really flour it. Be generous! This is the key to handling the sticky dough. Gently tip the dough out of the bowl onto the flour. It will spread out into a soft blob.
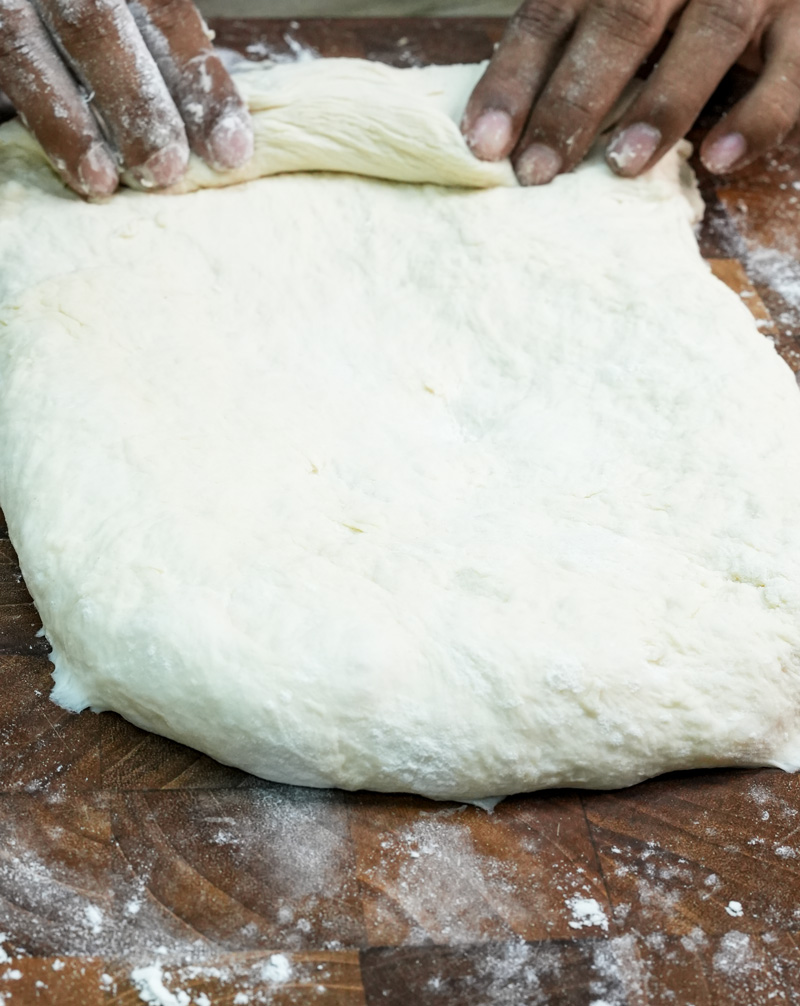
Sprinkle a little more flour on top. Gently pull the dough from the sides to form a rough rectangle. Be gentle here. You want to keep all those wonderful air bubbles we just made. Now, roll the rectangle up into a log shape.
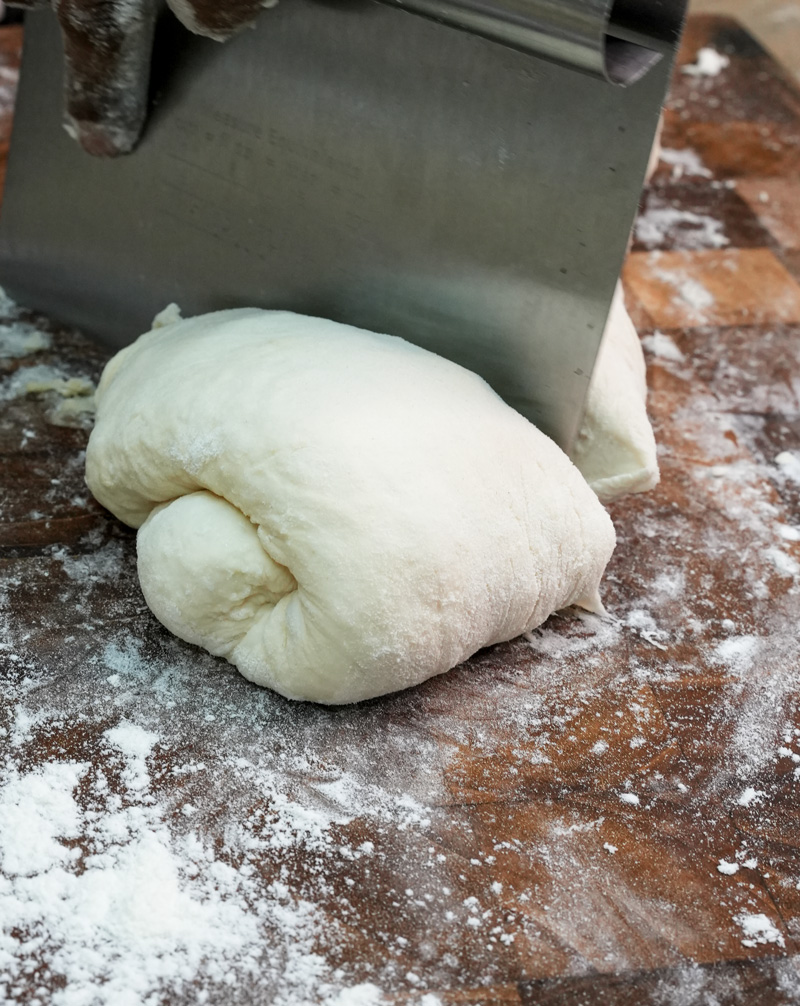
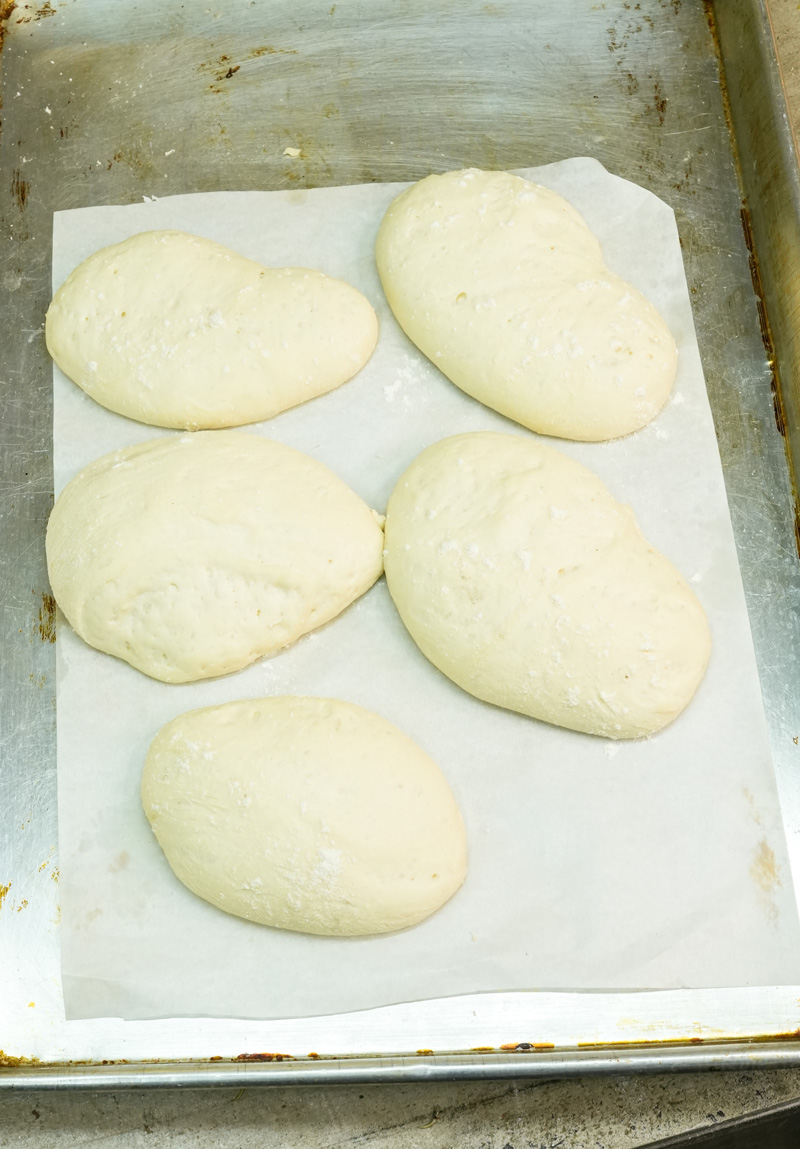
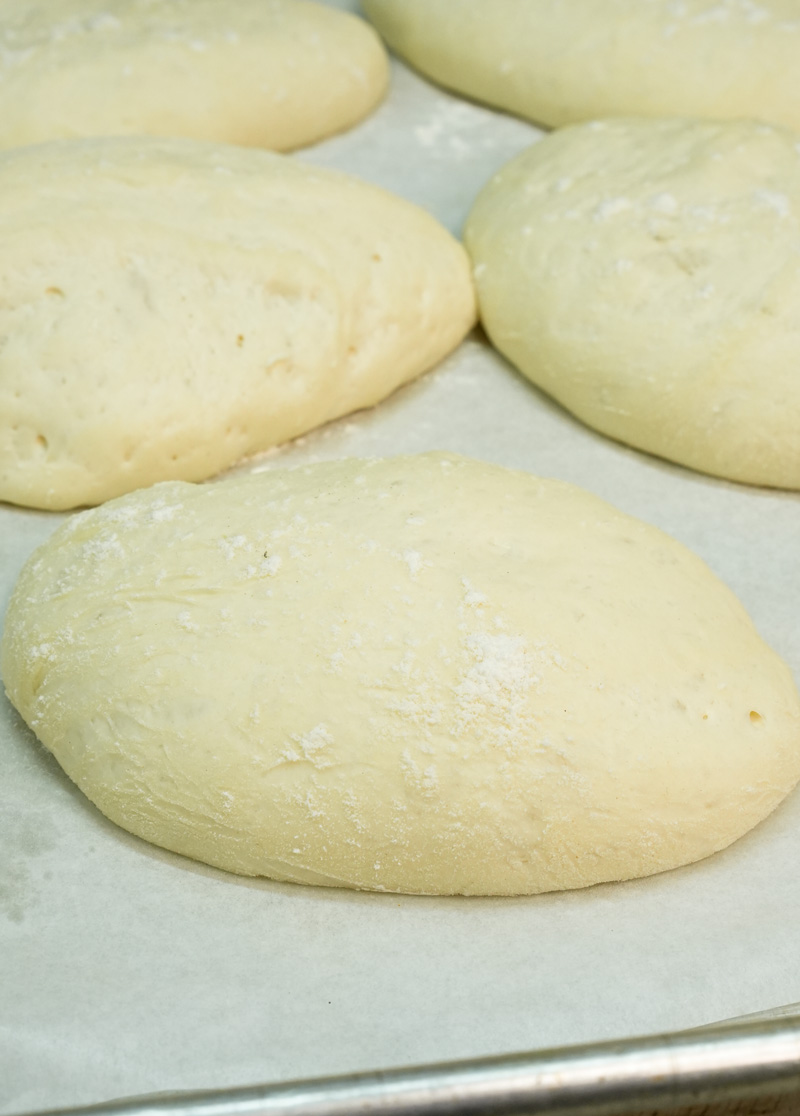
Using a floured knife or a bench scraper, cut the log into four equal pieces. Place them a few inches apart on your floured counter and just let them rest there for about 40 minutes. They’ll puff up one last time.

Stage 4: Bake to Perfection!
When you have about 20 minutes left on that final rest, it’s oven time.
Place a small baking pan on the bottom rack of your oven and pour in about an inch of water. Now, preheat your oven to 420°F (215°C). That pan of water will create a hot, steamy environment, which is the secret to a super-crispy crust.
Carefully move your puffed-up rolls onto a baking tray lined with parchment paper. They’re delicate, so be gentle.
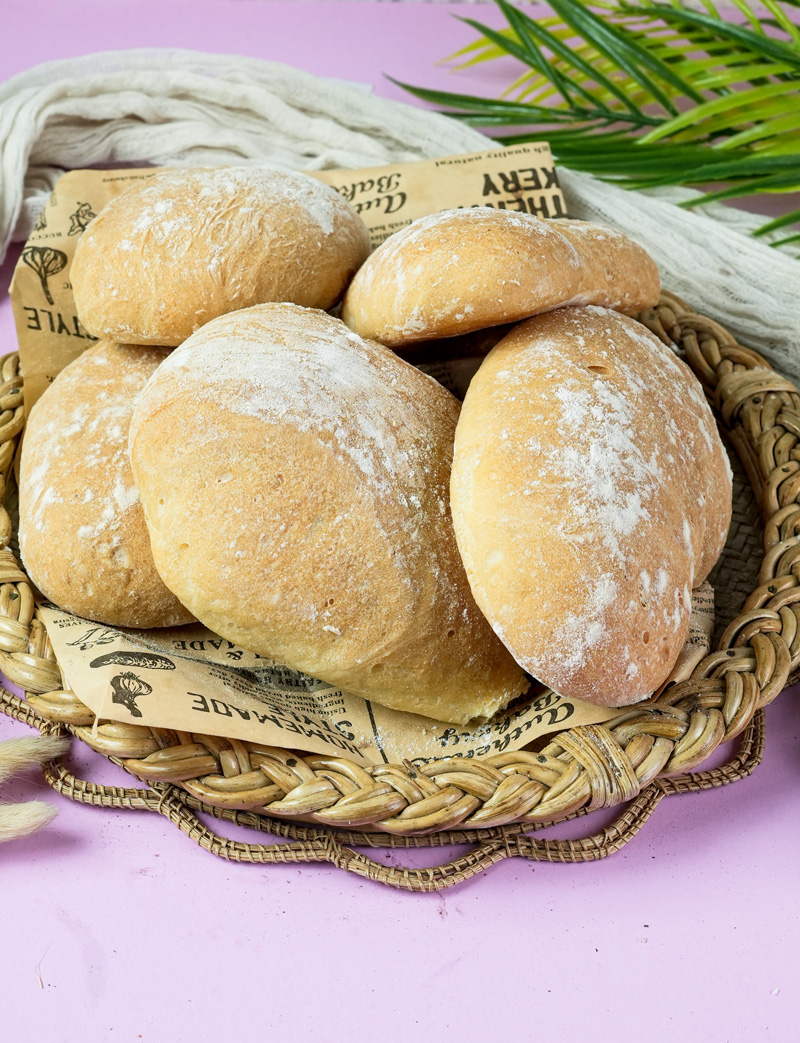
When the oven is hot and steamy, slide the tray onto the middle rack. Bake for 20 minutes. The rolls will puff up big time and turn a beautiful golden brown. Your kitchen is about to smell incredible.
How do you know they’re done? Carefully pick one up and tap the bottom. It should sound hollow, like you’re tapping on a little drum. Let them cool on a wire rack for at least 20 minutes before you tear one open. This is important! It lets the inside finish setting up.
Fun Variations
Once you get this recipe down, you can start playing!
- Savory Twist: During the last stretch-and-fold, try adding a half-cup of chopped olives, sun-dried tomatoes, or fresh rosemary.
- Fancy Finish: Before baking, brush the tops with olive oil and sprinkle with flaky sea salt.
- Rustic Look: Dust the rolls with a little semolina flour before their final rest.
Serving and Storing Your Bread
Honestly, the best way to eat this is to tear a piece off the second it’s cool enough to handle. It’s amazing dipped in good olive oil. It makes the best sandwiches and paninis. It’s also perfect for sopping up the last bits of soup.
To store it:
- Keep it in a paper bag on the counter for 2-3 days.
- Whatever you do, don’t put it in the fridge! It’ll go stale way faster.
- For longer storage, freeze it. Wrap the cooled rolls tightly in plastic wrap, then foil, and they’ll be good for up to 3 months. Just warm them in the oven for 5-10 minutes to bring them back to life.

Enjoy the process, and happy baking!
PrintCiabatta Bread
Ever dreamed of baking crusty, airy ciabatta at home? This surprisingly simple, no-knead recipe delivers bakery-quality results with just four basic ingredients. Get ready to enjoy the best bread for sandwiches, dipping, or enjoying all on its own!
- Prep Time: 20 minutes
- Cook Time: 20 minutes
- Total Time: 4 hours
- Yield: 4 rolls 1x
- Category: Bread, Baking
- Cuisine: Italian
Ingredients
- 300g All-Purpose Flour (or bread flour for a chewier texture)
- 240g Room Temperature Water
- 1 tsp Instant Yeast
- 1 tsp Salt
Instructions
- Activate Yeast: In a small cup, stir the yeast into the room-temperature water. Let it sit for a few minutes until it looks slightly bubbly.
- Mix Dough: In a large bowl, whisk together the flour and salt. Pour in the yeast-water mixture and stir with a spatula until a very wet, shaggy dough forms. No kneading required!
- First Rise: Cover the bowl and let the dough rest at room temperature for 1 hour.
- Stretch & Fold: With wet hands, grab an edge of the dough, stretch it up, and fold it to the center. Rotate the bowl a quarter turn and repeat 3 more times. Do this for a total of 3 sets, with a 30-minute rest between each set.
- Shape & Proof: Generously flour your work surface. Gently tip the dough out, shape it into a rough rectangle, and roll it into a log. Cut the log into 4 equal pieces. Let them rest on the floured surface for 40 minutes.
- Preheat Oven: While the rolls are proofing, place a small pan with an inch of water on the bottom oven rack. Preheat your oven to 420°F (215°C).
- Bake: Carefully transfer the rolls to a parchment-lined baking sheet. Bake on the middle rack for 20 minutes, until beautifully golden brown.
- Cool Down: Let the rolls cool on a wire rack for at least 20 minutes before slicing. This step is crucial for the texture!
Notes
- Tips & Tricks:
- Embrace the Stickiness: The high-hydration (wet) dough is the secret to ciabatta’s light, airy crumb. Don’t add extra flour to the mix!
- A Kitchen Scale is Your Friend: For consistent, perfect results, weighing your ingredients is far more accurate than using measuring cups.
- The Power of Steam: The pan of water in the oven creates a steamy environment, which is key to getting that signature crisp, crackly crust.
- Serving Suggestions:
- Makes incredible sandwiches and paninis.
- Perfect for dipping in high-quality olive oil and balsamic vinegar.
- Serve alongside hearty soups and stews.
- Storage & Reheating:
- Store rolls in a paper bag at room temperature for up to 3 days. Avoid the refrigerator, as it will make them stale faster.
- To Freeze, wrap cooled rolls tightly in plastic wrap and then foil. They will keep for up to 3 months.
- To Reheat, warm in a 350°F (175°C) oven for 5-10 minutes to bring back that “freshly baked” crust.