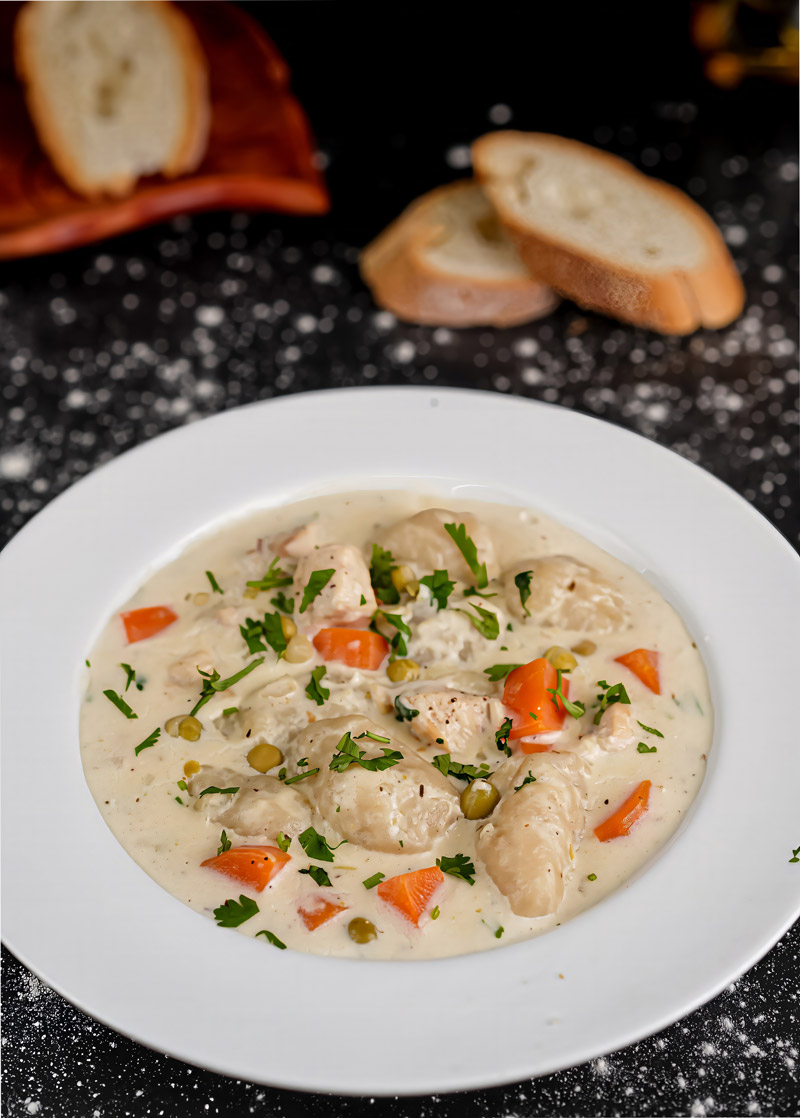
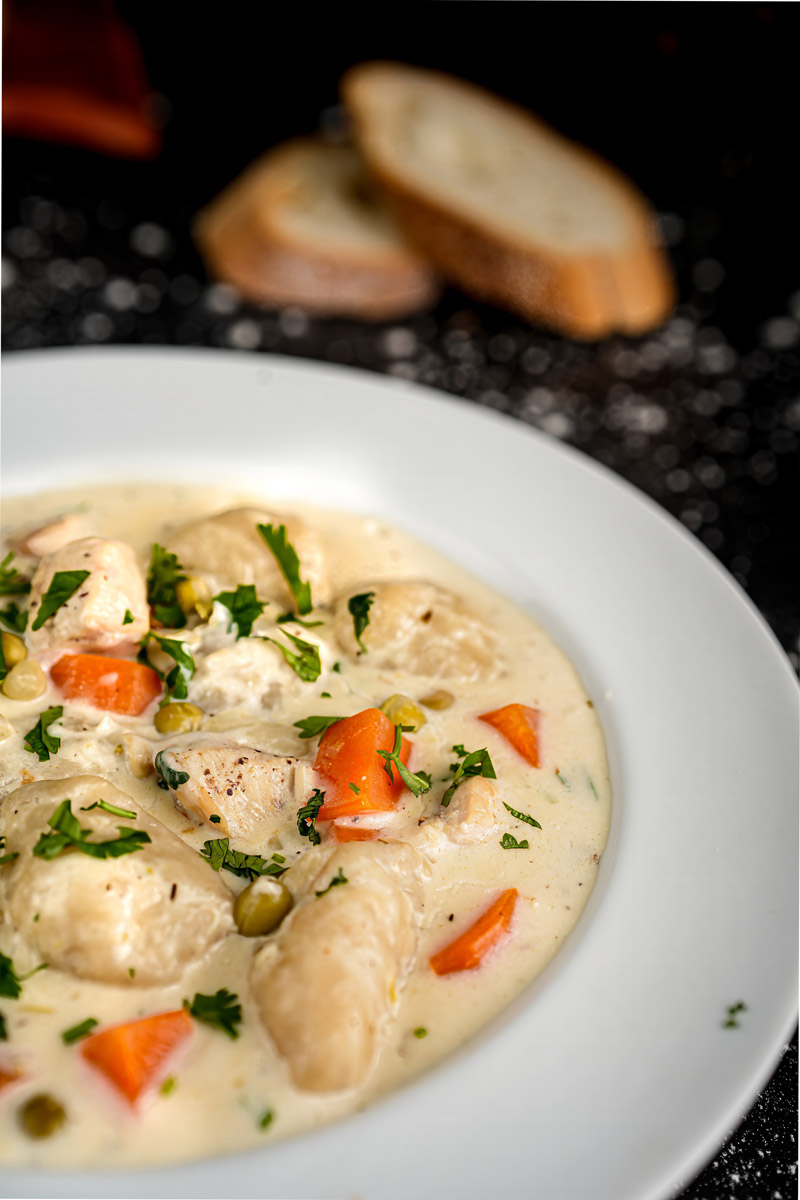
There’s something magical about a warm bowl of creamy chicken stew with fluffy dumplings. It’s the kind of dish that wraps you in a blanket of comfort, perfect for chilly evenings or when you need a little culinary hug. This recipe brings together tender chicken, hearty vegetables, and rich, creamy broth topped with pillowy dumplings that soak up all the delicious flavors. It’s a timeless classic, rooted in rustic cooking traditions, but this version is simple enough for any home cook to master.
What inspired this recipe? I wanted to create a version that feels indulgent but doesn’t require hours in the kitchen. With just a few fresh ingredients and pantry staples, you’ll have a dish that tastes like it’s been simmering all day. Let’s dive in and make this comforting meal together!
Recipe Overview
Prep and Cook Time
- Prep Time: 20 minutes
- Cook Time: 25 minutes
- Total Time: 45 minutes
Servings and Scaling Tips
This recipe makes enough for 2 hearty servings, but it’s easy to scale up if you’re feeding a crowd. Simply double or triple the ingredients as needed—just make sure your pot is large enough to handle the extra volume.
Difficulty Level
Beginner-friendly! If you can chop vegetables and stir a pot, you can make this dish. The dumplings are especially easy since there’s no rolling or shaping required—just drop them into the stew.
Equipment Needed
- A medium-sized pot or Dutch oven (preferably with a lid)
- Wooden spoon or spatula
- Measuring cups and spoons
- Ice cream scoop or spoon for shaping dumplings
Substitutes: If you don’t have a Dutch oven, any heavy-bottomed pot will work. For dumpling shaping, two spoons will do the trick if you don’t have an ice cream scoop.
Make-Ahead/Meal Prep Options
While this dish is best enjoyed fresh, you can prep many components ahead of time:
- Dice the chicken and chop all vegetables up to 24 hours in advance.
- Mix the dry ingredients for the dumplings and store them in an airtight container until ready to use.
- The stew itself (without the dumplings) can be made ahead and reheated before adding fresh dumplings.
Ingredients
For the Stew:
- 130 g boneless chicken, diced into bite-sized cubes (breasts or thighs work well)
- ½ medium yellow onion, finely chopped
- 3 cloves garlic, minced
- 1 tbsp celery, finely chopped
- ½ large carrot, diced into small pieces
- 2 tbsp frozen green peas
- 1 tbsp parsley, chopped (plus more for garnish)
- 1 tbsp olive oil
- 2 tbsp butter
- 1 bay leaf
- ½ tsp thyme (dried or fresh)
- 2 cups chicken stock
For the Dumplings:
- ½ cup all-purpose flour (125 g)
- ½ tsp baking powder
- Salt and pepper to taste
- 150 ml heavy cream
Ingredient Notes & Substitutions
- Chicken: Boneless thighs are juicier, but breasts work just as well. You could even use shredded rotisserie chicken if you’re short on time.
- Vegetables: Feel free to add other veggies like parsnips or mushrooms for extra flavor.
- Heavy Cream: For a lighter version, substitute half-and-half or whole milk.
- Flour: Gluten-free flour blends work well for both the stew thickener and dumplings.
- Herbs: Fresh thyme adds depth, but dried works fine too. You can swap parsley for chives or dill if preferred.
Step-by-Step Method
Let’s cook together! Follow along as I guide you through each step with helpful tips and cues.
Step 1: Preparing Your Ingredients (Mise en Place)
Before we start cooking, let’s get everything organized. This step is crucial for a smooth cooking experience. Start by dicing your chicken into uniform 1-inch cubes – consistency is key here! You want them all roughly the same size so they cook evenly. Pat the pieces dry with paper towels; this helps achieve better browning.While you’re prepping the chicken, let’s talk vegetables. I like to create what French chefs call a “mise en place” – having everything chopped and ready to go. Dice your onions into small, uniform pieces (about ¼ inch). For the carrots, aim for slightly larger pieces (about ½ inch) – they’ll need longer to cook and we want them to hold their shape. Mince your garlic finely – I find that crushing it slightly with the side of your knife before mincing releases more flavor.
Pro Tip:
Keep your chopped vegetables separate rather than in one bowl – we’ll be adding them at different times.
Step 2: The Perfect Sear (10-12 minutes)
Now comes the fun part! Heat your pot over medium-high heat until it’s nice and hot – test it by adding a drop of water; if it sizzles and evaporates immediately, you’re ready to go. Add your olive oil and let it heat until it shimmers (about 30 seconds).Working in small batches (I recommend no more than half the chicken at a time), add your chicken pieces. Here’s the secret to perfect browning: resist the urge to move them around! Let them sit undisturbed for 3-4 minutes until they develop a golden-brown crust. You’ll know it’s time to flip when the chicken releases easily from the pot – if it’s sticking, it’s not ready yet.
Common Mistake to Avoid:
Overcrowding the pan is the enemy of good browning. Too much chicken at once will cause it to steam rather than sear.
What to Look For:
The chicken should have a beautiful golden-brown color on all sides. Don’t worry if it’s not fully cooked through – it will finish cooking in the stew.
Step 3: Building the Flavor Base (8-10 minutes)
Once your chicken is seared and set aside, it’s time to build our flavor base. Lower the heat to medium and add your butter. Watch it melt and foam slightly – this is when you know it’s ready for the vegetables.Start with your onions – add them to the pot and listen for that satisfying sizzle. Stir them occasionally, letting them cook until they become translucent and slightly golden around the edges (about 4-5 minutes). You’ll notice they start to smell sweet – that’s the natural sugars caramelizing.Now add your carrots and celery. These will take another 3-4 minutes to soften slightly. You want them to be tender-crisp at this stage – they’ll continue cooking in the stew.
Sensory Cue:
Your kitchen should be filling with an amazing aroma at this point – the vegetables will smell sweet and savory, and you might notice a slight nuttiness from the browned bits on the bottom of the pot.Finally, add your minced garlic. Here’s a crucial tip: garlic burns easily and becomes bitter, so it only needs 30-60 seconds until it becomes fragrant. You’ll know it’s ready when you can smell its sweet, pungent aroma.
Step 4: Creating the Perfect Roux (3-4 minutes)
This is where we build the foundation for our creamy sauce. Reduce the heat to medium-low – this is important because we don’t want to burn the flour. Sprinkle the flour over your vegetables and stir constantly. You’re looking for the flour to coat the vegetables evenly and cook just enough to lose its raw taste.
What to Look For:
The mixture will look somewhat paste-like and slightly golden. You might notice a subtle toasted aroma – this is perfect!
Technique Tip:
Keep stirring! Use a wooden spoon or silicone spatula to scrape the bottom of the pot as you stir. This prevents the flour from sticking and burning, and helps incorporate all those flavorful browned bits from searing the chicken.
Step 5: Creating the Silky Broth (10-12 minutes)
Now comes a crucial moment – adding the liquid. This is where we transform our vegetable and flour mixture into a luxurious, silky broth. Start by slowly pouring in about ¼ cup of the chicken stock, stirring constantly. You’ll notice the mixture will immediately become very thick – that’s perfect! This is your chance to smooth out any lumps.
Technique Focus:
Pour the remaining stock in a steady stream while stirring continuously. I like to add it in three additions, stirring well between each. This prevents lumps and ensures a smooth sauce. The mixture will gradually become more liquid, but don’t worry if it seems thin at this point – it will reduce and thicken as it simmers.
What to Look For:
The broth should be smooth and free of lumps. Run your spoon along the bottom of the pot – it should leave a slight trail that quickly fills in.
Step 6: Enriching the Stew (15-20 minutes)
Time to build layers of flavor! Add your bay leaf and thyme – I like to crush the dried thyme slightly between my fingers to release more flavor. Return the chicken and any accumulated juices to the pot – these juices are flavor gold!Now for the magic touch – pour in the heavy cream while stirring. Watch as the broth transforms into a beautiful, creamy consistency. Bring everything to a gentle simmer – you’re looking for small bubbles around the edge of the pot, not a rolling boil.
Temperature Tip:
If your stew is bubbling too vigorously, lower the heat. Gentle cooking prevents the cream from curdling and keeps the chicken tender.Add your frozen peas at this point – they’ll cook quickly and retain their bright green color. Season with salt and pepper, but remember to taste as you go. The saltiness of chicken stock can vary greatly.
Step 7: Mastering the Dumplings (10-12 minutes)
While your stew simmers, let’s create those pillowy dumplings. The key to perfect dumplings is a light touch – overmixing will make them tough. In a bowl, whisk together your flour, baking powder, salt, and pepper. Make a well in the center and pour in the heavy cream. Using a fork, gently stir from the center outward, incorporating the flour gradually. Stop mixing as soon as there are no dry flour pockets – the dough will look shaggy and that’s exactly what we want!
Texture Guide:
Your dumpling dough should be sticky but still hold its shape. If it’s too wet, add a sprinkle of flour; if too dry, a splash more cream.
Step 8: The Dumpling Drop (15 minutes)
Here’s where timing is everything. Your stew should be gently simmering and slightly thickened. Using two spoons (or an ice cream scoop), drop dollops of dumpling dough onto the surface of the stew. Aim for about 2 tablespoons per dumpling.
Pro Tip:
Dip your spoons in hot water between scoops to help the dough release easily.Once all dumplings are in, cover the pot with a tight-fitting lid. This creates a steamy environment that’s essential for fluffy dumplings. Resist the urge to peek! Every time you lift the lid, you lose precious steam.
Timing Guide:
Cook for 15 minutes without lifting the lid. The dumplings are done when they’re puffy and a toothpick inserted into the center comes out clean.
Step 9: The Final Touch (5 minutes)
Remove the bay leaf – it’s done its job. Gently stir in your freshly chopped parsley, being careful not to break up the dumplings. Let the stew rest for about 5 minutes – this allows the flavors to meld and the sauce to reach the perfect consistency.
Visual Cue:
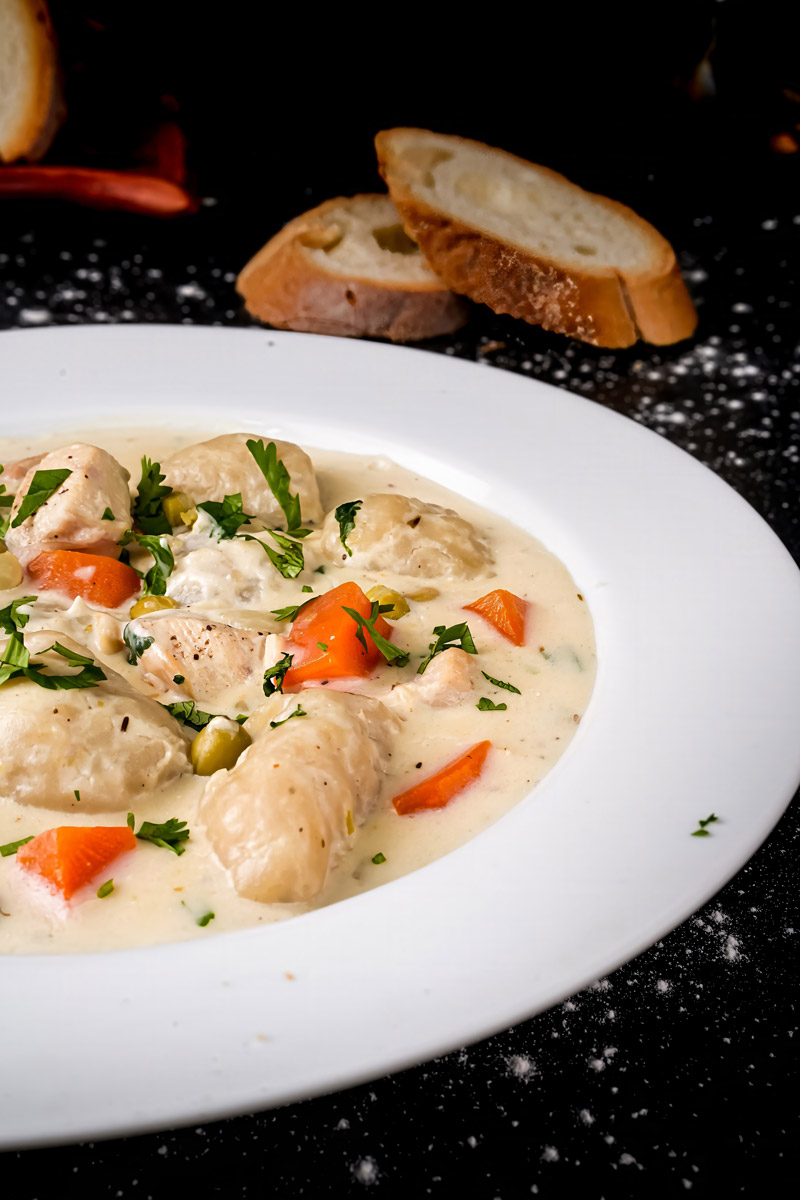
Your stew should be creamy but still fluid, coating the back of a spoon. The dumplings should be light and fluffy, having soaked up the flavorful broth around their edges.
Step 10: Serving Your Creation
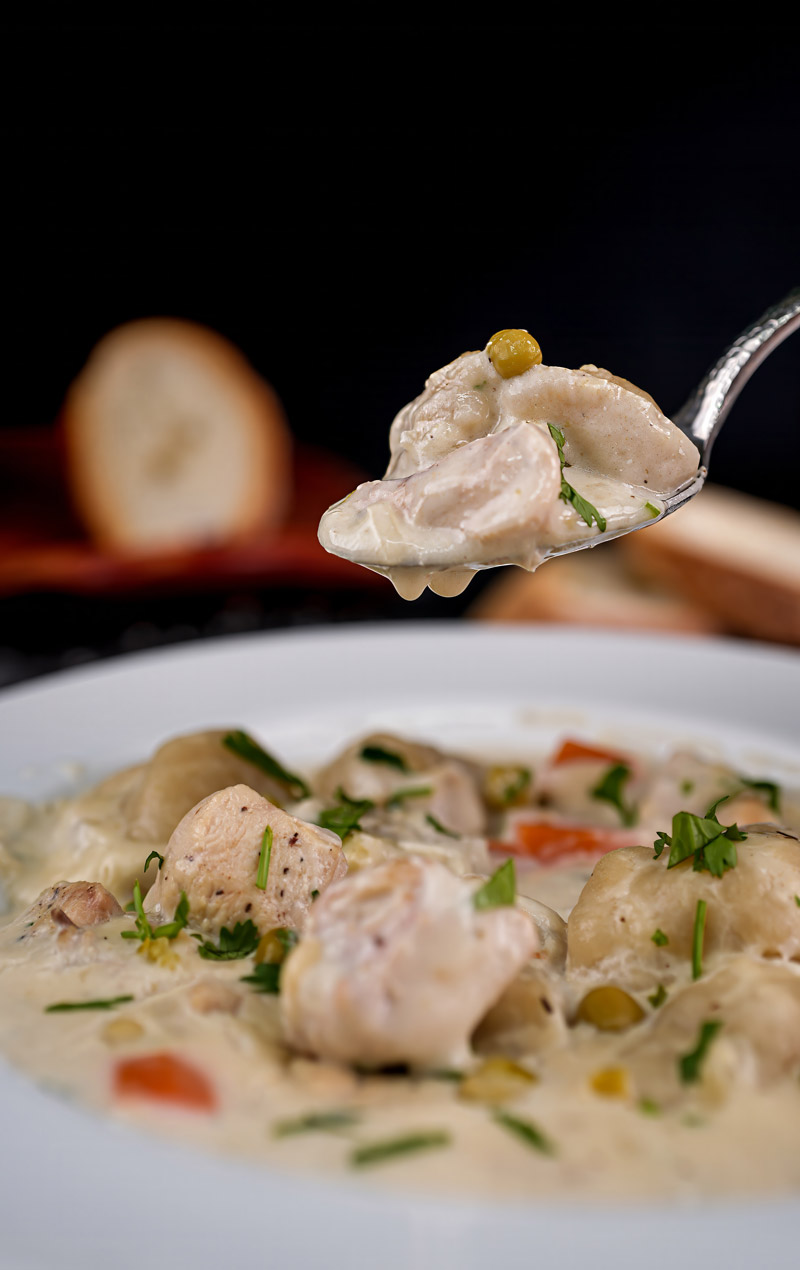
Ladle the stew into warm bowls, making sure each serving gets a generous portion of chicken, vegetables, and 2-3 dumplings. The dumplings should be tender and light, almost cloud-like in texture.
Presentation Tip:
Garnish with a sprinkle of fresh parsley and a few cracks of black pepper. For an extra touch of luxury, drizzle a tiny bit of good quality extra virgin olive oil around the edge of the bowl.

Troubleshooting Tips:
- If your sauce is too thick: Thin it with warm chicken stock, adding a little at a time
- If your sauce is too thin: Simmer uncovered for a few extra minutes
- If your dumplings are doughy: They might need an extra 2-3 minutes of cooking
- If your stew lacks flavor: Add a splash of white wine or a squeeze of lemon juice to brighten it up
Remember, cooking is about using all your senses – the sound of the simmer, the aroma of the herbs, the visual cues of doneness, and most importantly, tasting as you go. With practice, this comforting dish will become second nature, and you’ll be able to make it by feel alone!
Variations & Customization
- Dietary Modifications: Use gluten-free flour for GF dumplings or coconut cream instead of heavy cream for a dairy-free option.
- Spice Level Adjustments: Add chili flakes or smoked paprika for extra warmth.
- Seasonal Adaptations: Swap peas for sweet corn in summer or add root vegetables like turnips in winter.
- Fancy Touches: Garnish with crispy fried shallots or drizzle truffle oil over each bowl for an elevated twist.
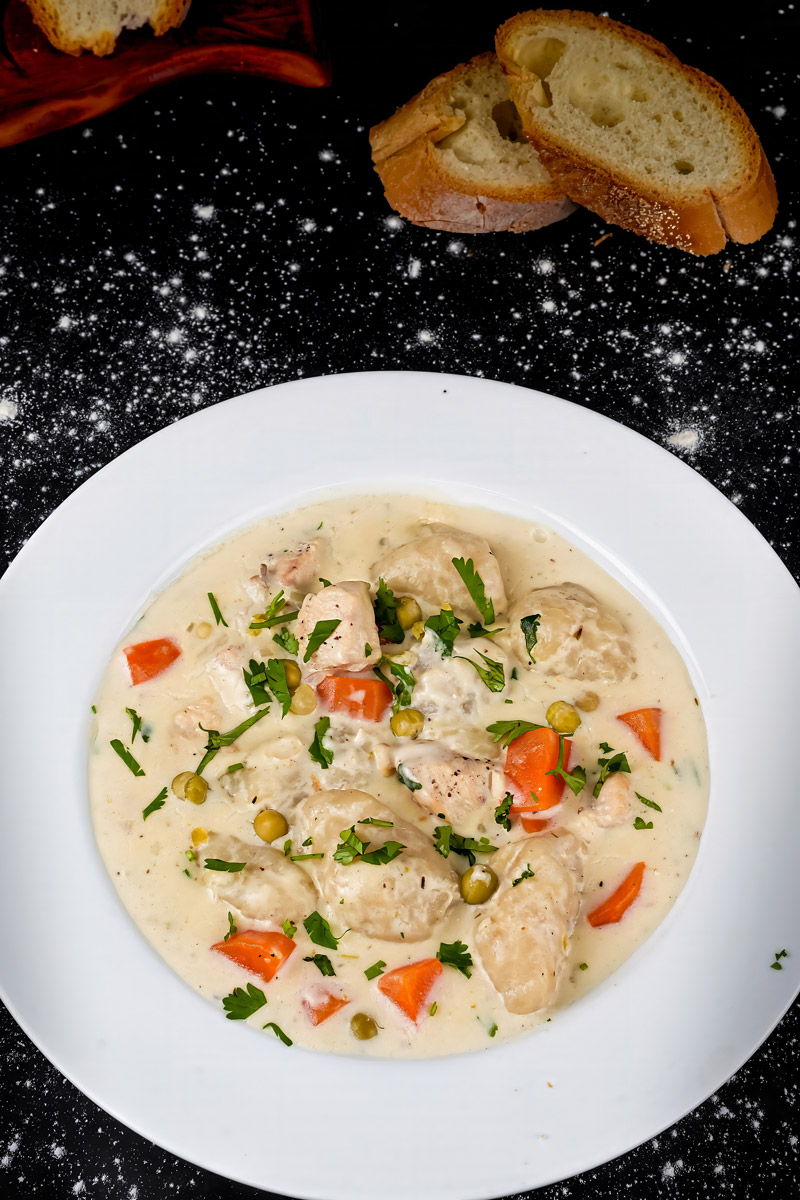
Serving
Serve this stew in deep bowls with fresh parsley on top—it’s rustic yet elegant! Pair it with warm crusty bread or even buttery biscuits.
Storage & Make-Ahead Guidelines
Immediate Storage
After cooking, let the stew cool for no more than 2 hours at room temperature before refrigerating:
- Transfer to an airtight container
- Separate larger portions into smaller containers for quicker cooling
- Store dumplings and stew together, though they will soften slightly
Refrigerator Storage (Up to 3 Days)
- Keep in an airtight container
- The sauce will thicken considerably when cold
- Dumplings will absorb more liquid
Freezer Storage (Up to 3 Months)
For best results, freeze the stew and dumplings separately:
- Stew: Cool completely, portion into freezer-safe containers, leaving ½ inch headspace
- Dumplings: Flash freeze on a baking sheet, then transfer to freezer bags
- Label with date and contents
Reheating Guidelines
Refrigerated Leftovers
- Stovetop Method (Preferred):
- Heat slowly over medium-low heat
- Add ¼ cup chicken stock or water to thin the sauce
- Stir gently to avoid breaking up the dumplings
- Heat until internal temperature reaches 165°F (74°C)
- Microwave Method:
- Use 70% power in 1-minute intervals
- Stir gently between intervals
- Add a splash of liquid if needed
Frozen Leftovers
- Thaw overnight in refrigerator (recommended)
- For quick thawing:
- Place sealed container in cold water
- Change water every 30 minutes
- Once thawed, reheat using above methods
Make-Ahead Strategies
Prep-Ahead Components (Up to 2 Days Before)
- Chop all vegetables and store in airtight containers
- Cube chicken and store separately
- Mix dry ingredients for dumplings
Partial Make-Ahead (Up to 1 Day Before)
- Make stew base without cream or dumplings
- Cool and refrigerate
- When ready to serve:
- Reheat stew base
- Add cream
- Make fresh dumplings
- Complete final cooking steps
Quality Preservation Tips
- Store herbs in a glass with water, covered with a plastic bag
- Keep dumplings on top of stew when storing
- Let stew cool completely before covering to prevent condensation
- Use glass containers to prevent staining and odor absorption
This creamy chicken stew with dumplings is more than just food—it’s an experience of warmth and joy in every bite! Whether you’re making it for yourself or sharing it with loved ones, I hope this recipe becomes one of your go-to comfort meals. Enjoy!
PrintCreamy Chicken Stew with Dumplings
A cozy, hearty dish featuring tender chicken, creamy broth, and fluffy dumplings. Perfect for chilly evenings or when you crave comfort food.
- Prep Time: 20 minutes
- Cook Time: 25 minutes
- Total Time: 45 minutes
- Yield: 2 1x
- Category: Main Dish
- Cuisine: American Comfort Food
Ingredients
For the Stew:
- 130 g boneless chicken, diced
- ½ medium yellow onion, chopped
- 3 cloves garlic, minced
- 1 tbsp celery, finely chopped
- ½ large carrot, diced
- 2 tbsp frozen green peas
- 1 tbsp parsley, chopped (plus extra for garnish)
- 1 tbsp olive oil
- 2 tbsp butter
- 1 bay leaf
- ½ tsp thyme (dried or fresh)
- 2 cups chicken stock
For the Dumplings:
- ½ cup all-purpose flour (125 g)
- ½ tsp baking powder
- Salt & pepper to taste
- 150 ml heavy cream
Instructions
Step 1: Sear the Chicken
Heat olive oil in a medium pot over medium-high heat. Add diced chicken and cook until golden on all sides (about 5 minutes). Remove and set aside.
Step 2: Sauté Vegetables
Lower the heat to medium and melt butter in the same pot. Add onion, garlic, carrot, and celery; sauté until softened and fragrant (about 3 minutes).
Step 3: Build the Broth
Sprinkle flour over the vegetables and stir constantly for about 30 seconds to cook out the raw taste. Gradually pour in chicken stock while stirring to create a smooth base. Add bay leaf, thyme, salt, and pepper. Return chicken to the pot and stir in heavy cream. Simmer gently for 10 minutes.
Step 4: Add Dumplings
While the stew simmers, mix flour, baking powder, salt, pepper, and heavy cream in a bowl until just combined. Drop spoonfuls of dough onto the simmering stew. Cover with a lid and cook for about 10 minutes until dumplings are puffed and cooked through.
Step 5: Finish & Serve
Remove bay leaf and stir in parsley. Ladle stew into bowls, ensuring each serving gets dumplings. Garnish with extra parsley and enjoy!
Notes
Serving Suggestions:
Pair with crusty bread or a side salad for a complete meal.
Tips & Tricks:
- Avoid overmixing dumpling dough to keep it light and fluffy.
- Keep the stew at a gentle simmer when cooking dumplings—don’t boil!
Storage & Reheating:
Store leftovers in an airtight container in the fridge for up to 3 days. Reheat gently on the stovetop over low heat, adding a splash of stock if needed to thin the sauce. Dumplings may soften slightly upon reheating but will still taste delicious!