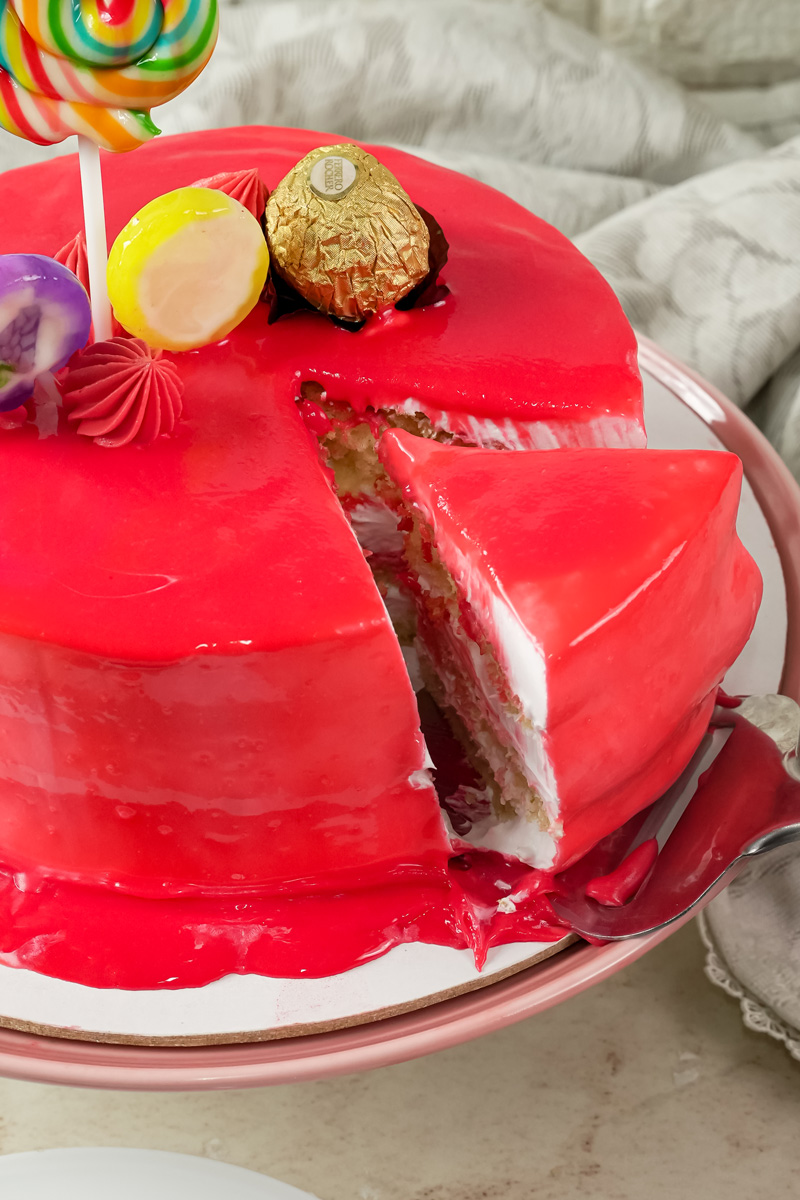
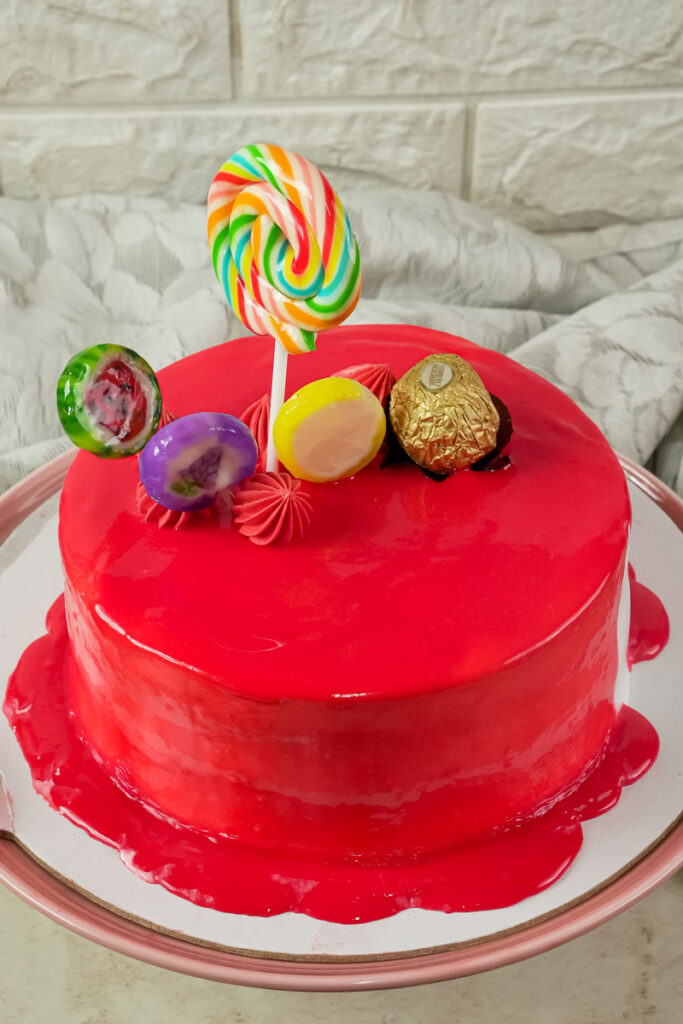
Hey everyone! Come on into my kitchen. Today, we’re going to make a Drip Cake, and trust me, it’s not as intimidating as it looks. This isn’t just any cake; it’s a modern masterpiece that has taken over Instagram. It’s the kind of dessert that makes everyone stop and ask, “How did you do that?!”
The beauty of the Drip Cake? It’s all in the visuals. That cascade of colorful ganache dripping down the sides, creating this fun, artistic effect. It looks incredibly impressive, but I’ll let you in on a little secret: with the right tips and a friendly guide, you can totally do this.
My personal journey with Drip Cakes started a few years ago. I saw so many creative ideas online—from sleek, all-black designs to vibrant, rainbow creations. I was hooked. This specific recipe is my go-to. It’s a reliable and delicious vanilla cake with a simple, foolproof technique for that perfect drip.
Quick Look at the Recipe
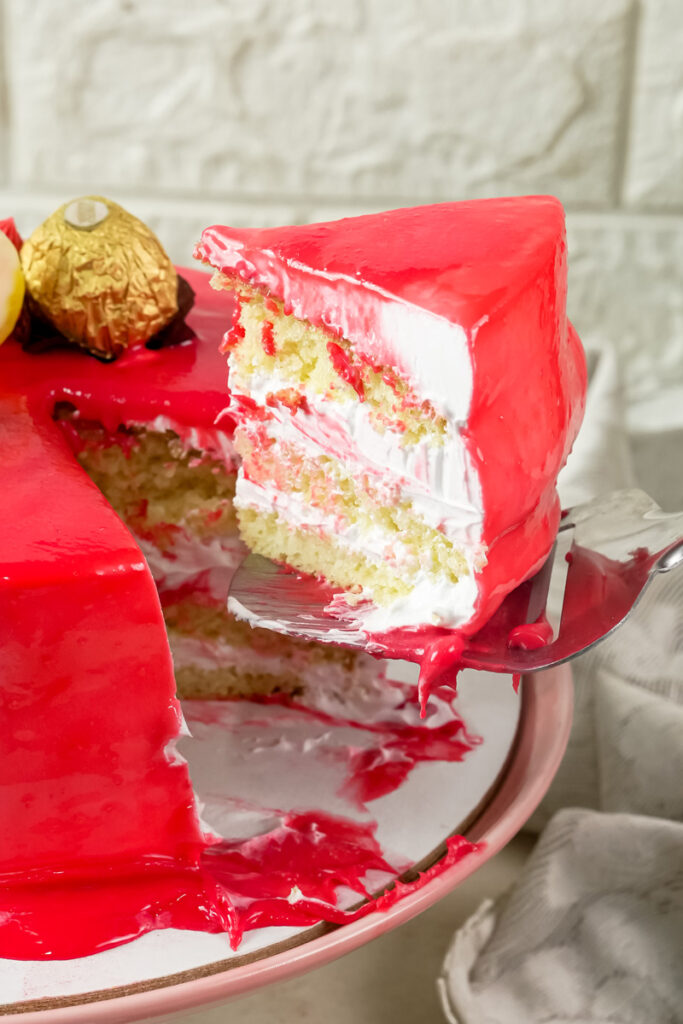
This recipe makes a moist vanilla cake with classic buttercream frosting, all topped with a beautiful white chocolate ganache drip. It’s the perfect foundation for any celebration—birthdays, anniversaries, you name it.
- Total Time: About 1 hour and 33 minutes.
- Prep: 15 minutes
- Baking: 33 minutes
- Cooling & Chilling: 45 minutes (this part is super important!)
- Servings: Generously serves 24 people. Need to make a smaller cake? Just halve the recipe.
- Difficulty: I’d call this an intermediate-level project. The individual parts—the cake, the frosting, the ganache—are all pretty straightforward. The tricky part? The assembly and chilling. It takes patience and a little attention to detail, but I’ll walk you through every step.
What You’ll Need
For the best results, having the right tools makes a huge difference.
- A stand mixer with a paddle attachment (makes life way easier)
- Three 8-inch or four 7-inch round baking pans
- Parchment paper and non-stick baking spray
- A rubber spatula
- A heat-proof bowl for the ganache
- A plastic squeeze bottle or piping bag with a small round tip (for perfect drips!)
- A kitchen scale (super helpful for dividing batter evenly)
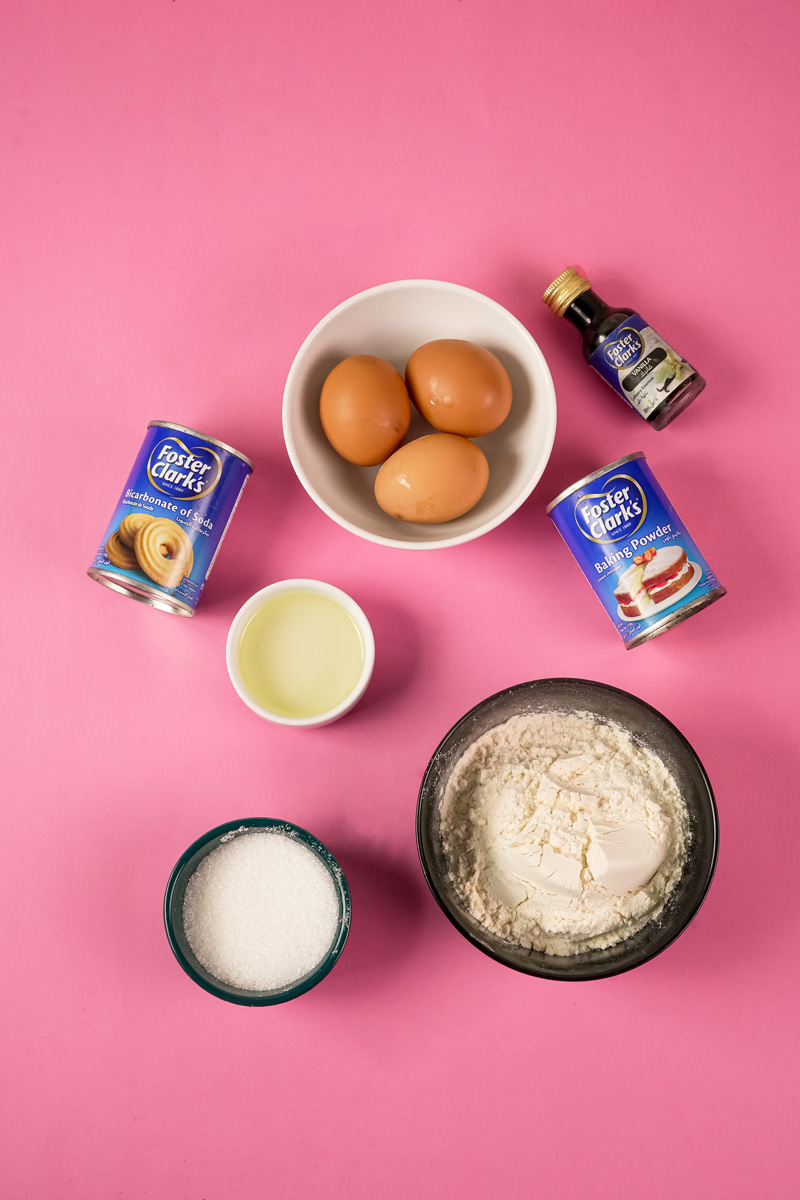
The Ingredients
The key to a truly delicious cake is the quality of your ingredients. Here’s what we’re working with:
- For the Vanilla Cake: All-purpose flour, granulated sugar, baking powder, and fine salt. The moist, tender crumb comes from unsalted butter, vanilla extract, egg whites, buttermilk, and a touch of vegetable or canola oil. Want to have some fun? Add gel food coloring to the batter for vibrant layers!
- For the Vanilla Buttercream: Unsalted butter, fine salt, vanilla extract, and powdered sugar.1 The secret to that smooth, pipeable consistency? A little heavy whipping cream.
- For the White Chocolate Ganache: This is the magic part! You only need two ingredients: heavy whipping cream and white chocolate chips. Gel food coloring is the best way to add color without messing up the texture.
Pro Tips on Ingredients and Prep
- Temperature is everything. Make sure your butter, egg whites, and buttermilk are all at room temperature. This helps all the ingredients combine smoothly, creating a light and fluffy batter.
- Sift your powdered sugar. This prevents lumps and ensures your buttercream is super smooth.
- Don’t cheap out on chocolate. The quality of your white chocolate chips can affect the final ganache. Be prepared to make small adjustments if needed.
| Ingredient | Quantity | Prep Notes & Tips |
| Unsalted Butter (for Cake) | 1 cup | Room temperature |
| Egg Whites (for Cake) | 1 cup | Room temperature |
| Buttermilk (for Cake) | 1.5 cups | Room temperature |
| Unsalted Butter (for Buttercream) | 2 cups | Room temperature |
| Heavy Whipping Cream | 1/4 cup (for buttercream) + 1/4 cup (for drip) | Room temperature for buttercream, warmed for ganache |
| White Chocolate Chips | 1 cup | High-quality chips are best |
Step-by-Step Method: How to Make a Drip Cake
Let’s get our hands dirty and start baking! I’ll guide you through each stage.
1. Vanilla Cake Layers:
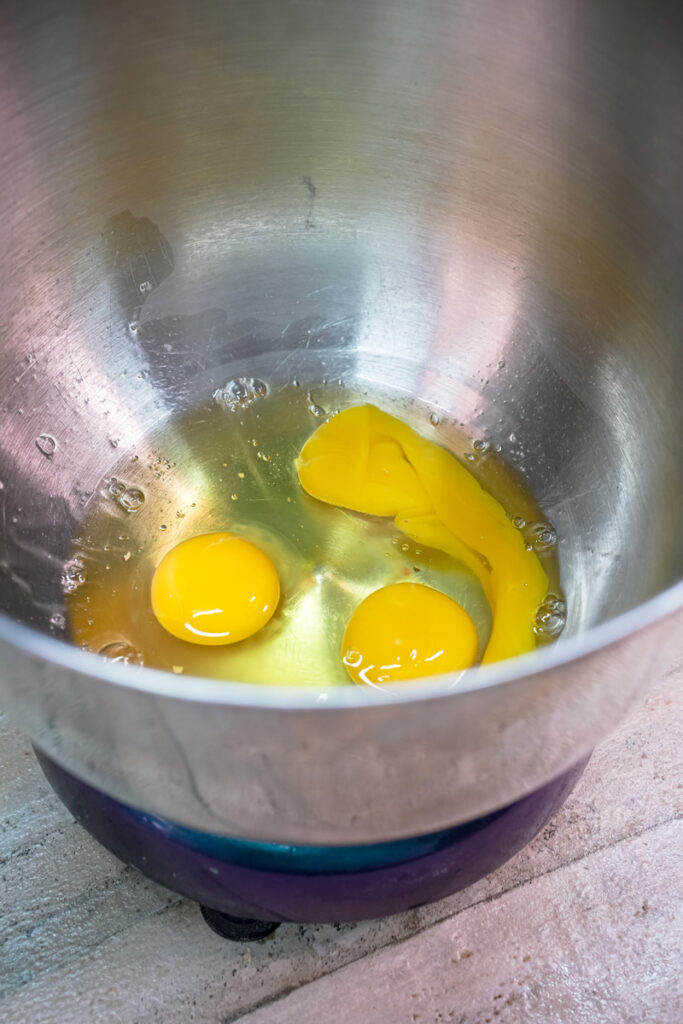
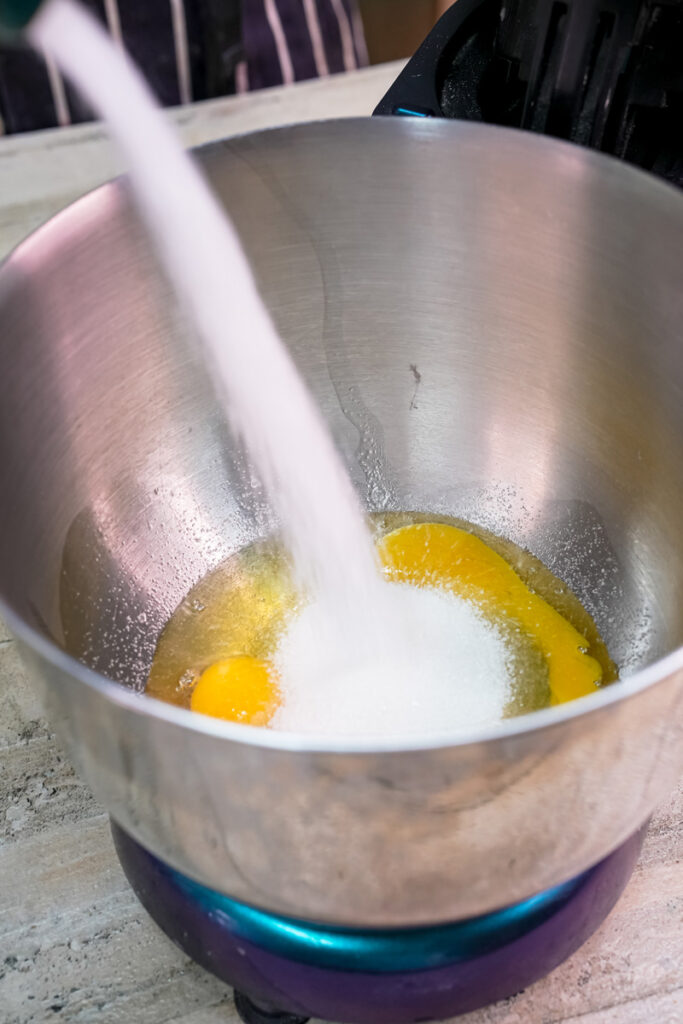
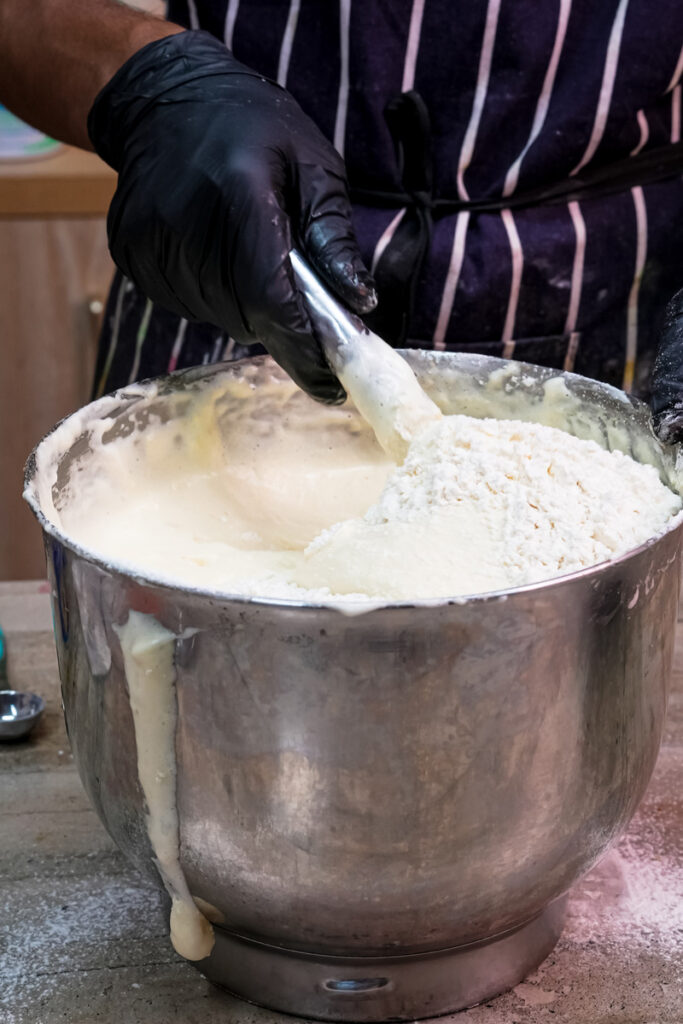
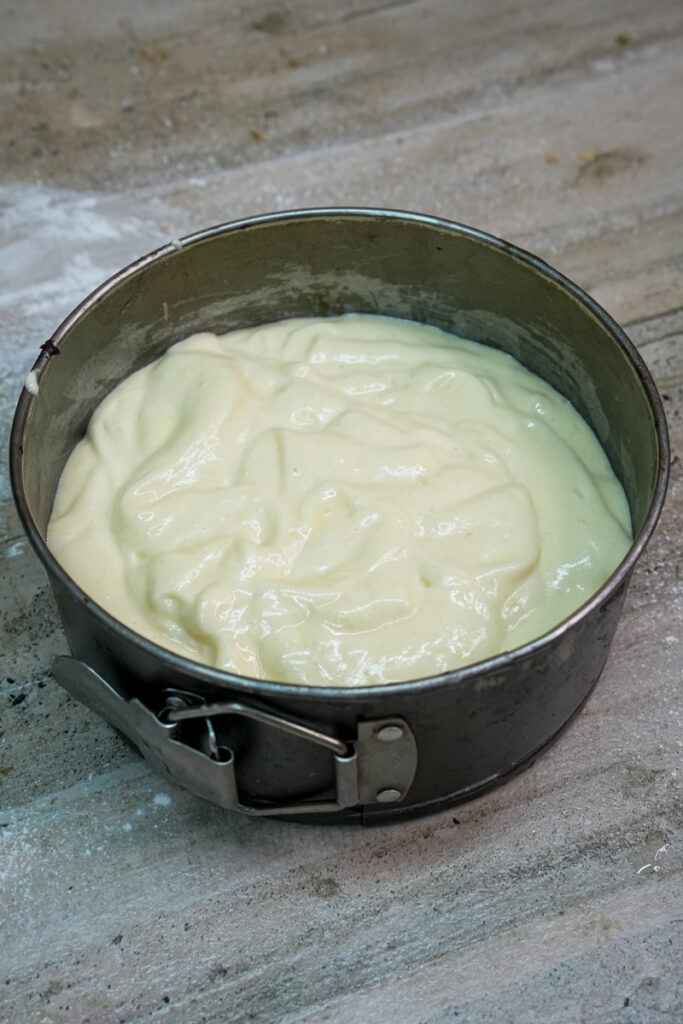
First, preheat your oven to 350°F (175°C) and prep your cake pans. Line them with parchment paper rounds and give them a good spray. In a stand mixer, mix the dry ingredients: flour, sugar, baking powder, and salt.2 Now, slowly add the room-temperature butter until the mixture looks like wet sand. This is the creaming method—it gives our cake its amazing texture.
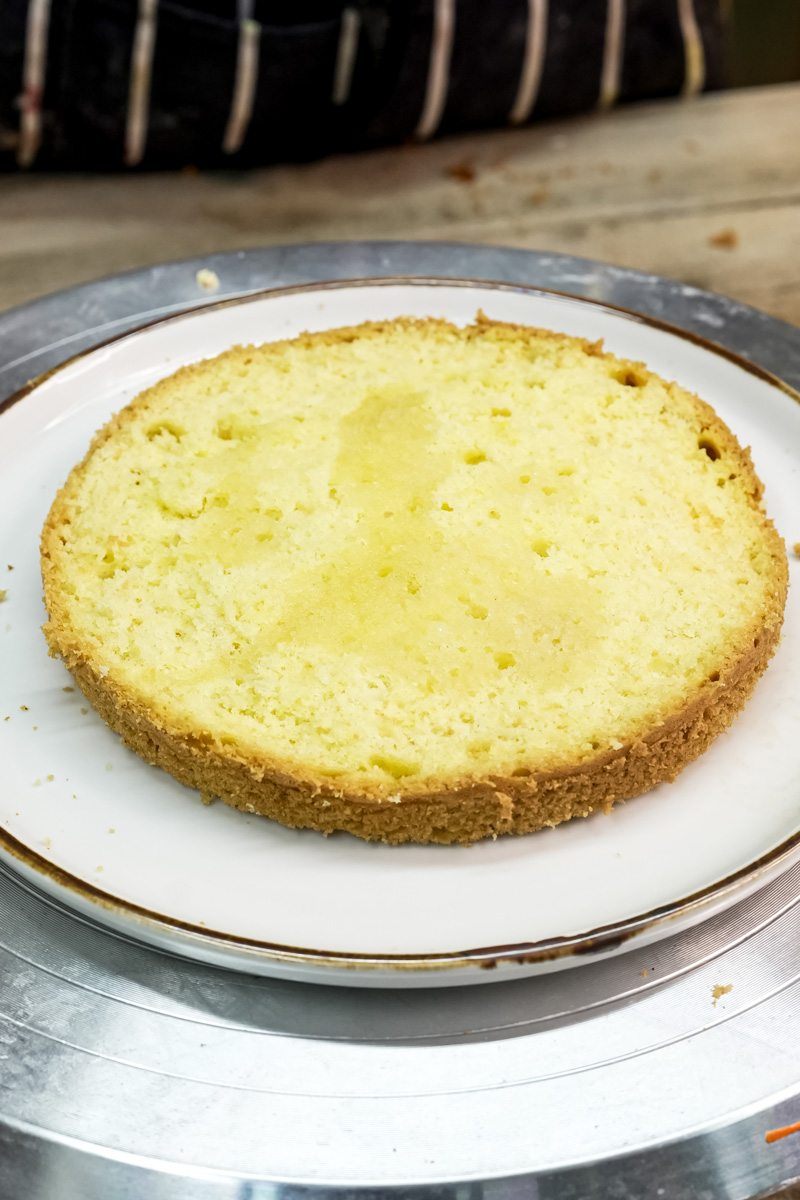
Next, add the egg whites, followed by the buttermilk, vanilla extract, and vegetable oil. Don’t overmix! Just combine everything until the batter is smooth. A good trick is to use a scale to divide the batter evenly between the pans, so your layers bake up to the same height. Bake for 33-35 minutes, or until a toothpick comes out with just a few moist crumbs.
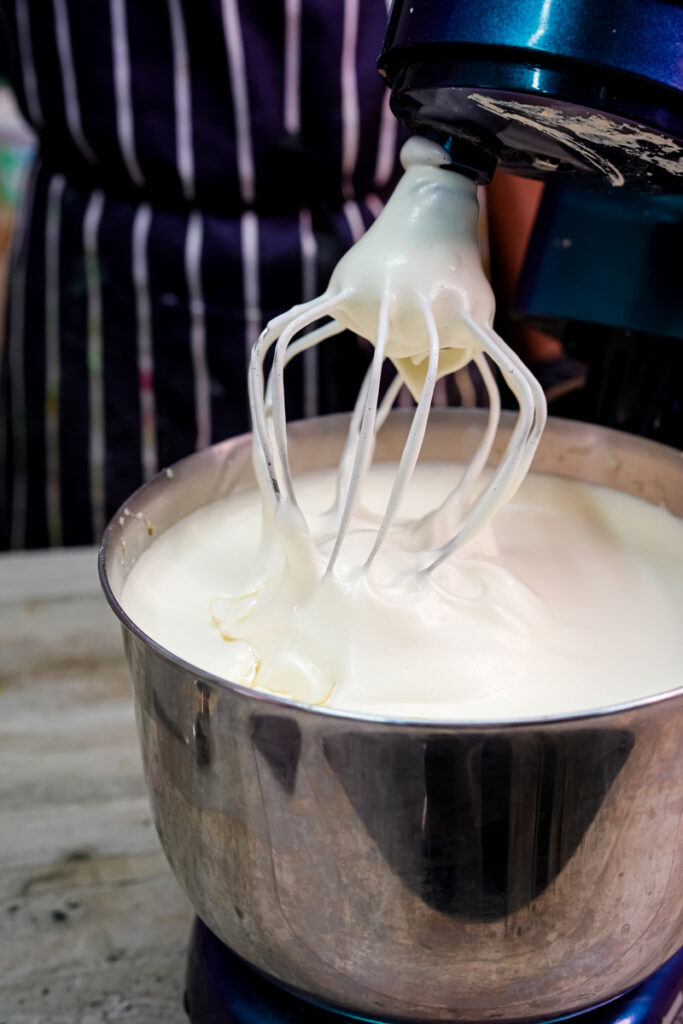
2. Vanilla Buttercream:
While the cakes bake and cool, let’s get on with the frosting. Beat the room-temperature butter until it’s smooth and creamy. Add the vanilla extract and salt. Now, slowly add the powdered sugar. Start on a low speed or you’ll get a cloud of sugar all over your kitchen! Gradually add the heavy cream until you get a smooth, spreadable frosting. It should be easy to pipe but still hold its shape. If it’s too thick, add more cream a tablespoon at a time. Too thin? Add more powdered sugar.
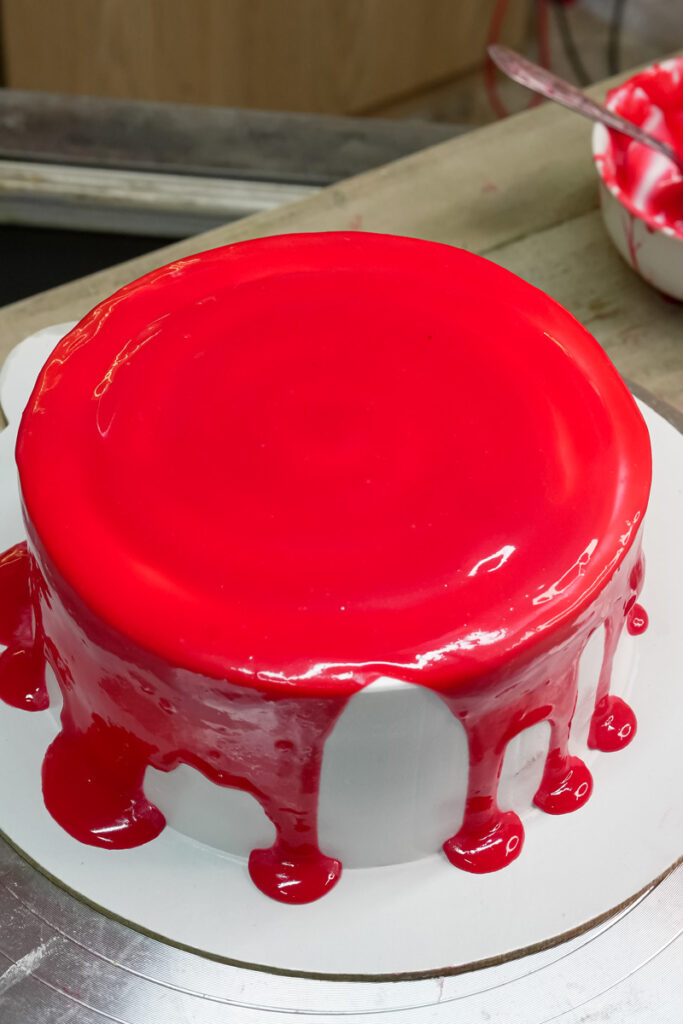
3. White Chocolate Ganache Drips:
Okay, the moment you’ve been waiting for! Place your white chocolate chips in a heat-proof bowl. Heat your heavy cream until it’s just about to bubble, then pour it over the chocolate. Let it sit for a minute, then slowly stir until it’s fully combined and smooth.
If you have any stubborn bits, pop it in the microwave for 15 seconds. The key to the perfect drip is the consistency. It should be barely warm, flow easily, but not run like water. My advice? Do a test drip on the side of a glass to see how it flows.

4. Assembly:
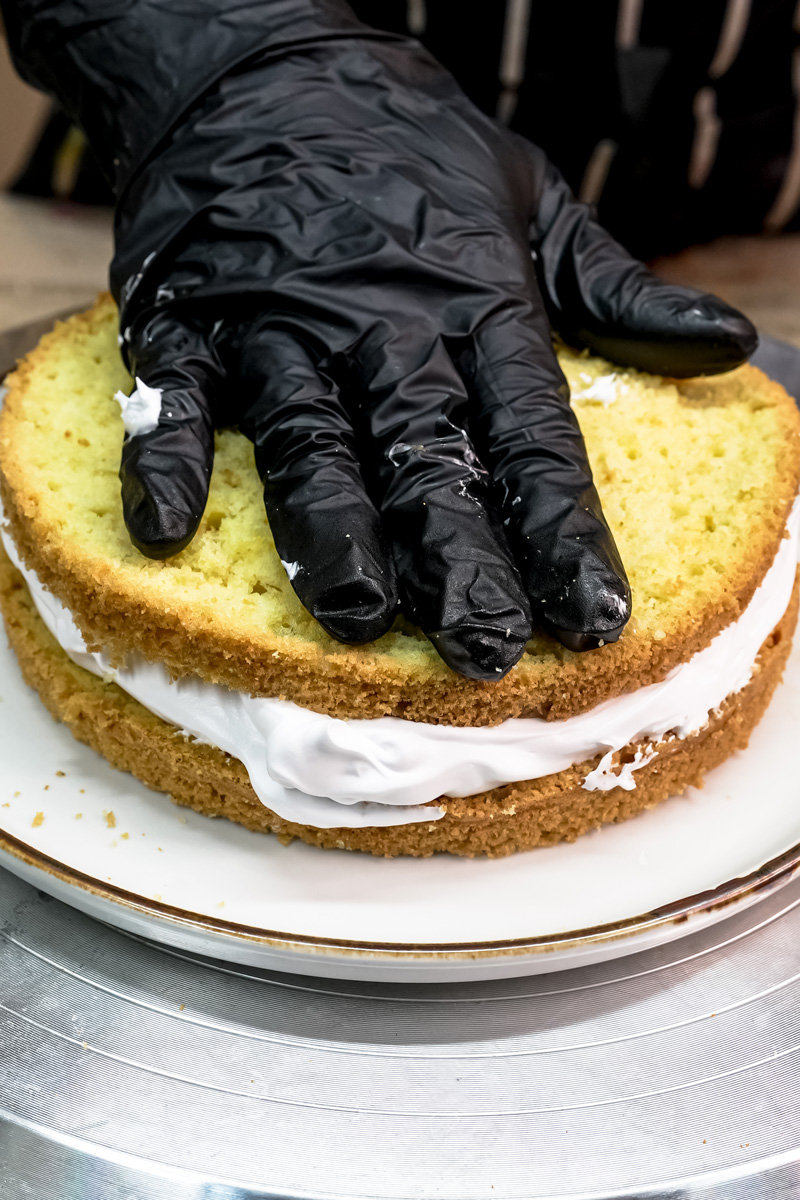
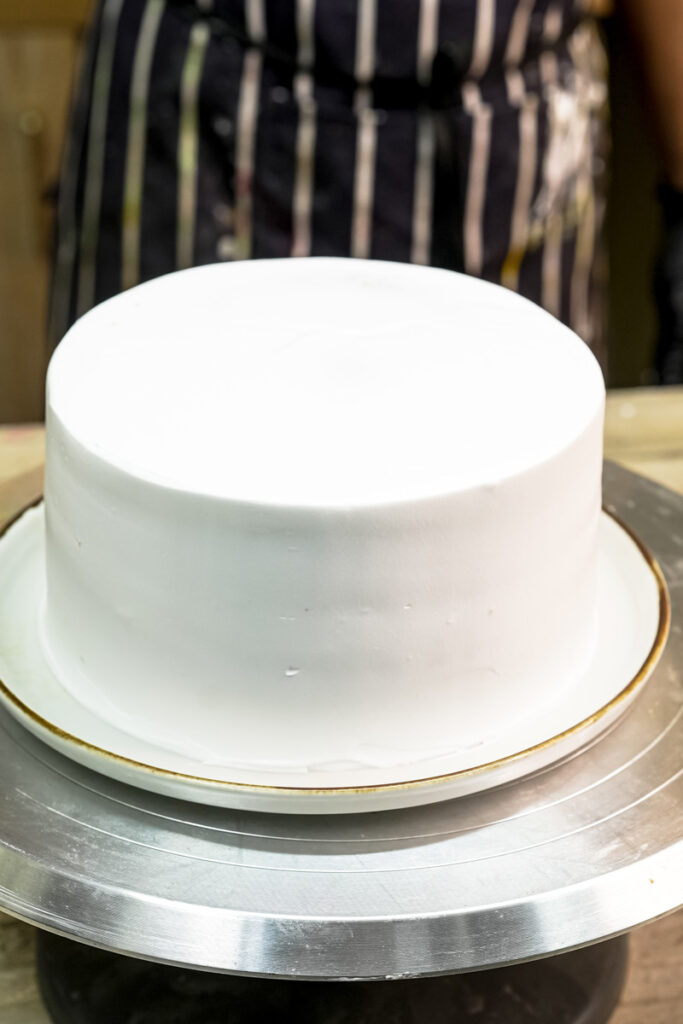
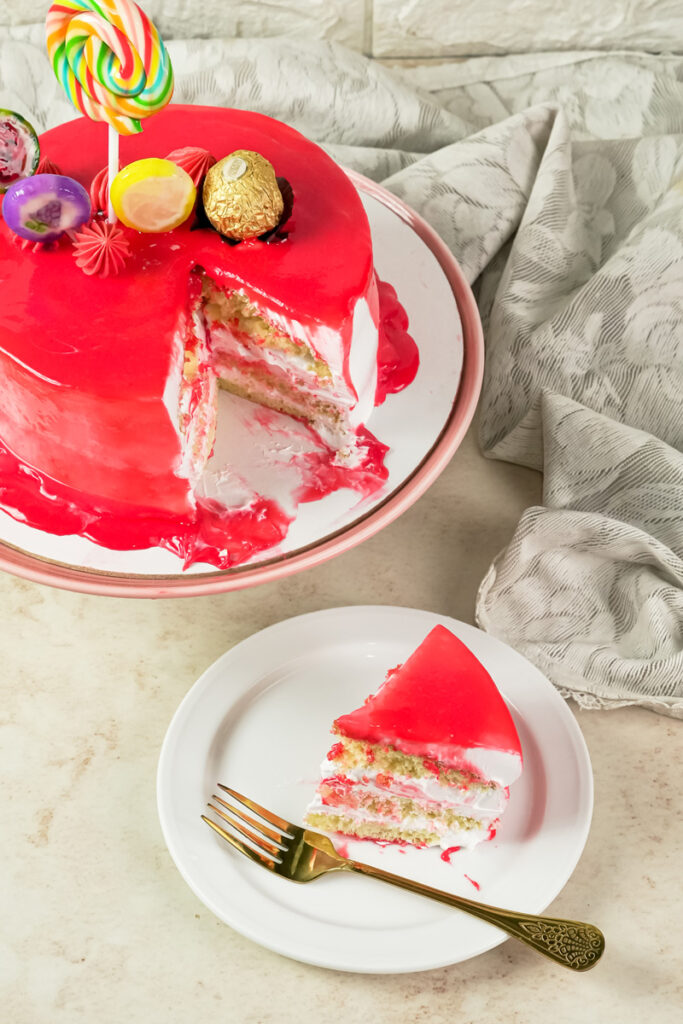
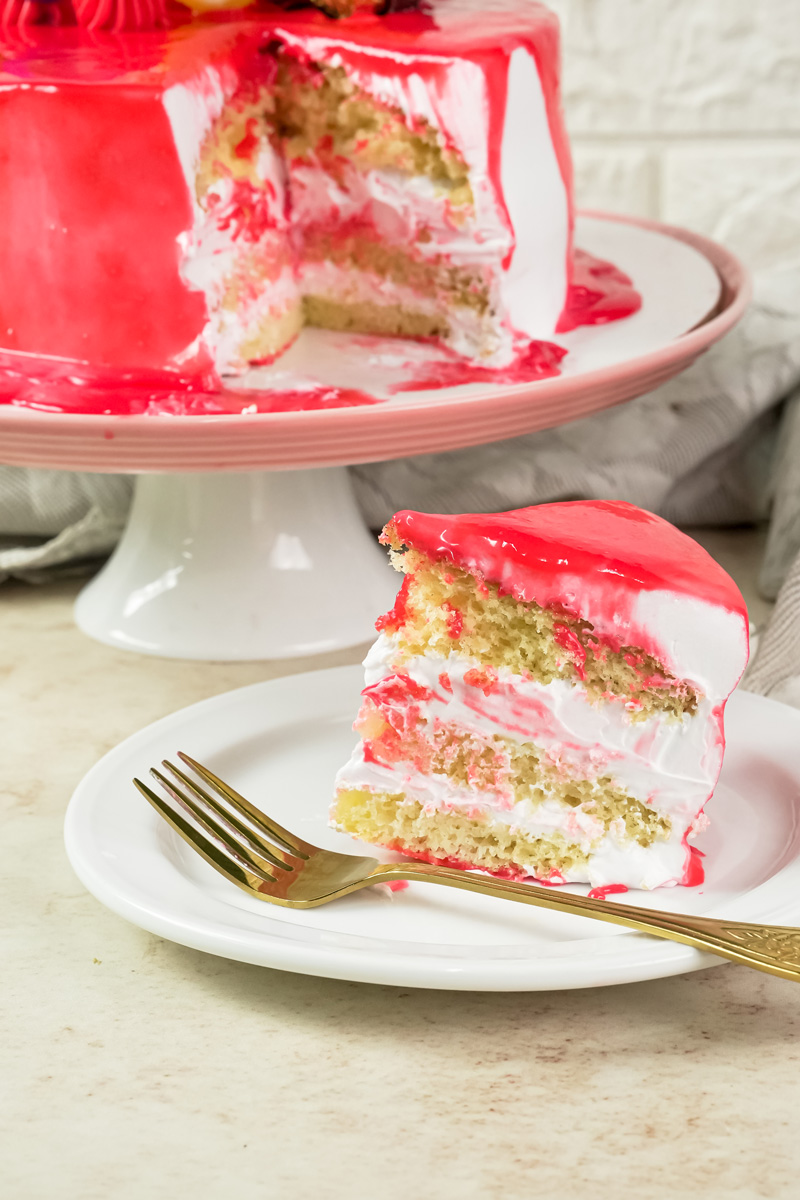
This is where everything comes together! First, make sure your cake layers are completely cooled and leveled. Put a dab of frosting on your cake board to keep the first layer from sliding. Add an even layer of buttercream and repeat with the other layers. Once they’re stacked, apply a thin coat of frosting to the entire cake. This is your “crumb coat.” It seals in all the loose crumbs.
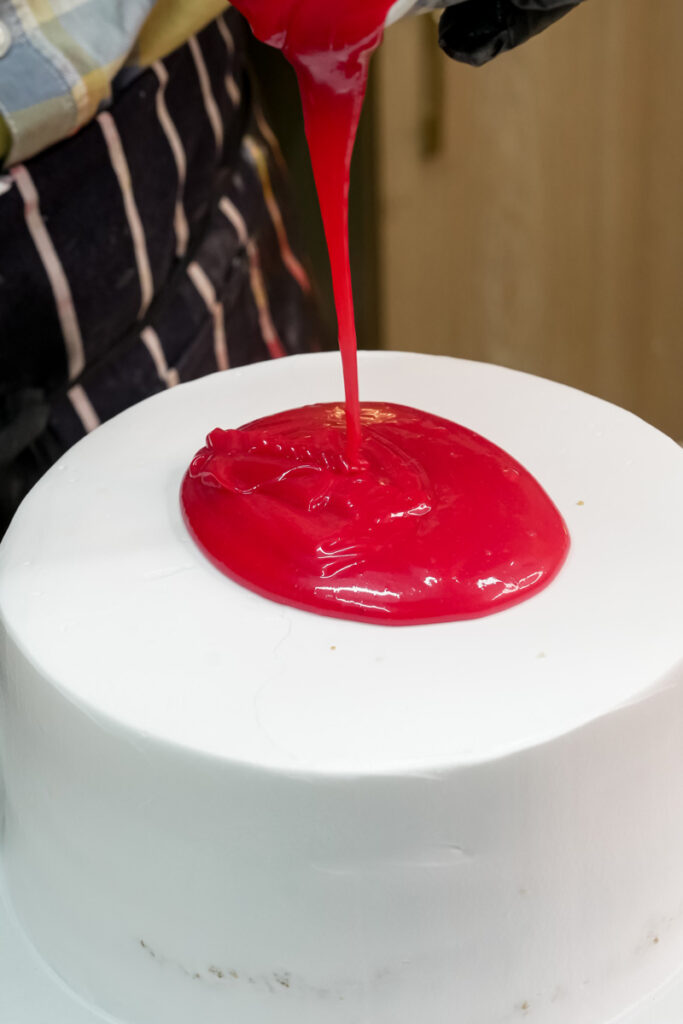
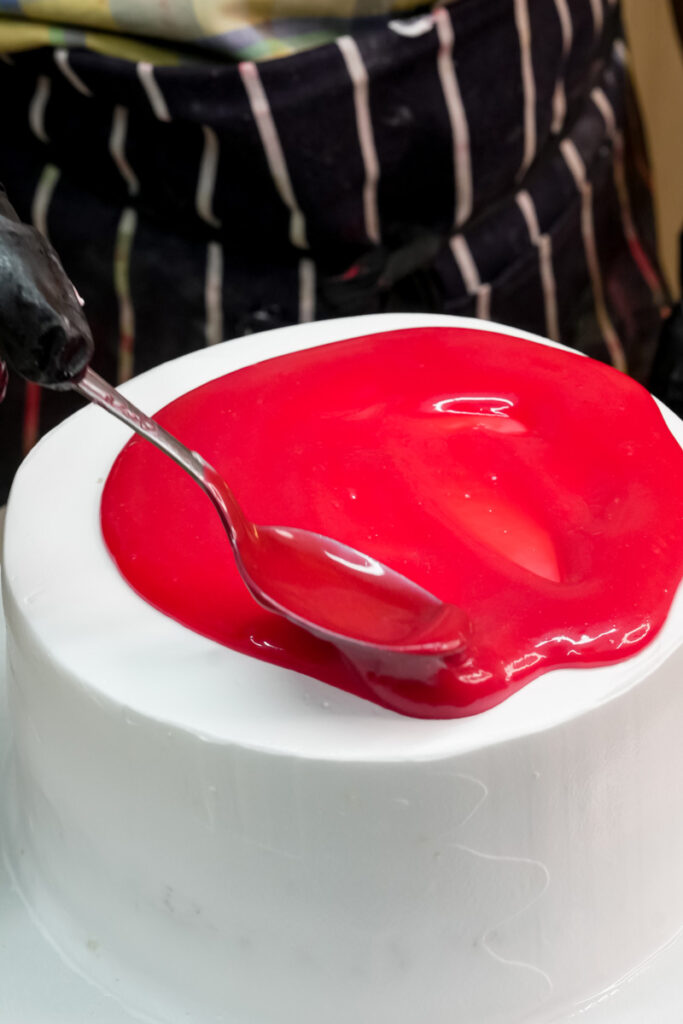
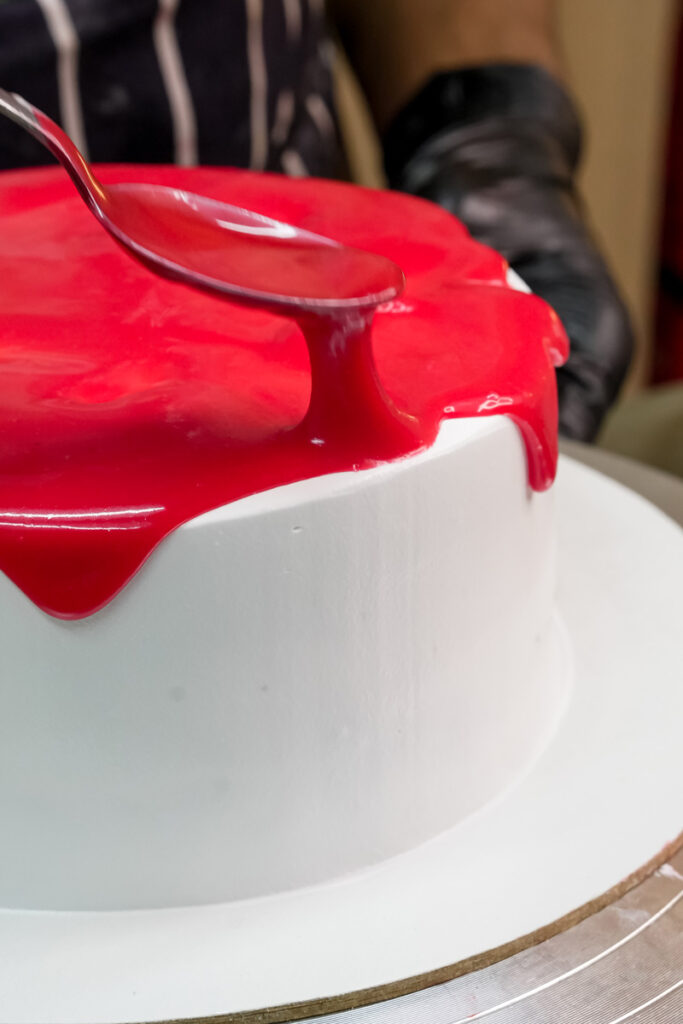
Now, chill the cake in the fridge or freezer until the frosting is firm. This step is critical because it ensures the drip won’t melt the frosting and will set perfectly. Once it’s chilled, apply your final, thicker layer of frosting and smooth it out. Chill again until firm. Now you can finally add your ganache drips with a squeeze bottle or a spoon.
Variations & Customization
This is your chance to get creative and make this cake your own!
Fancy vs. Everyday: For a simple cake, you can skip the drip entirely. For a more elegant look, try a dark chocolate or caramel drip. The process is the same!
Seasonal Adaptations: Use different colors to match the season. Think festive red and green for the holidays or pastels for spring. You can even change the cake flavor, like a pumpkin spice cake for autumn.
Dietary Modifications: For a vegan cake, use plant-based butter and cream and a dairy-free chocolate.
Serving & Storage
You’ve put in all this hard work, so let’s make sure you show it off and store it right.
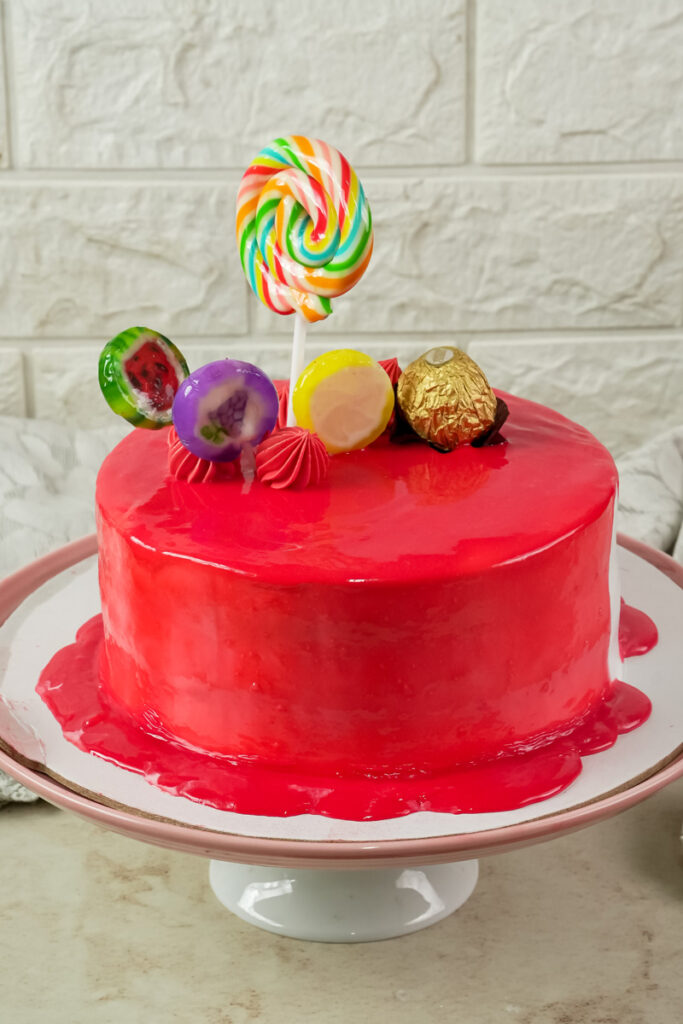
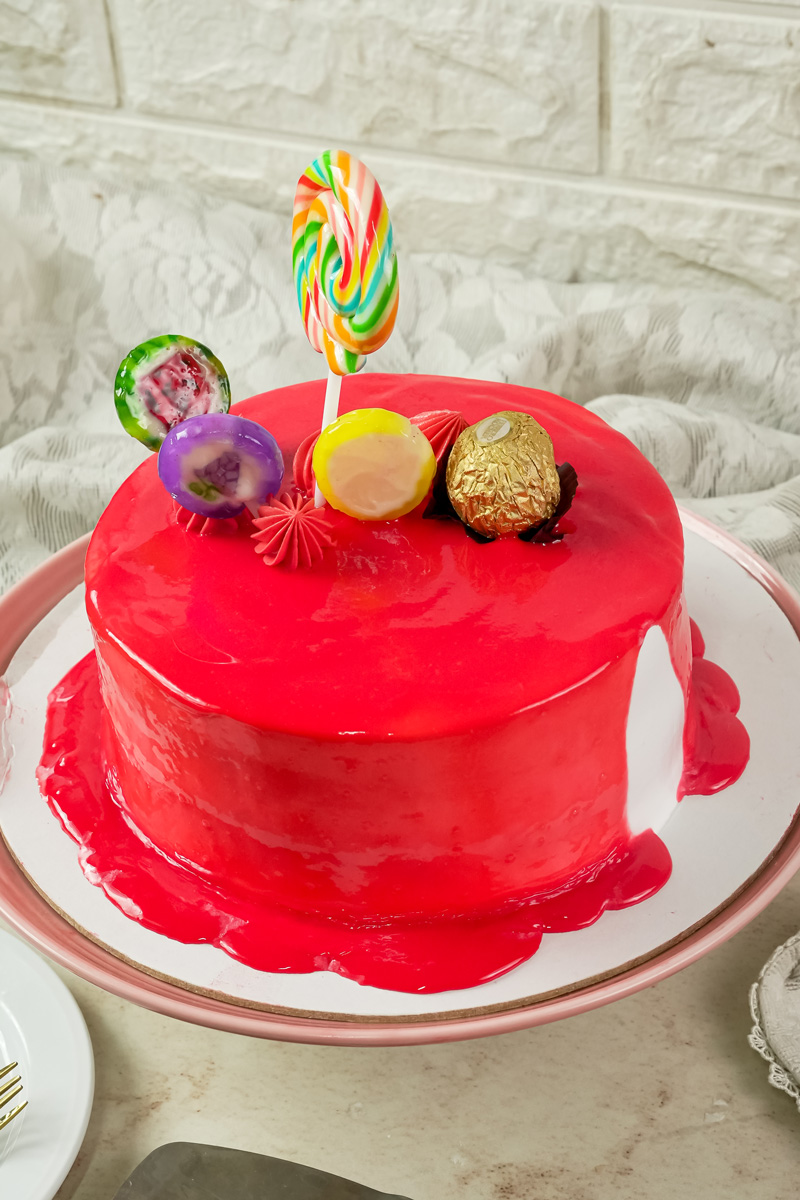
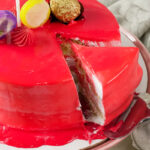
Plating Suggestions: A beautiful cake stand is the perfect way to display your masterpiece. Garnish the top with fresh fruit, flowers, or sprinkles to finish the look.
Storage Instructions: Store the finished cake in an airtight container at room temperature for up to 3 days, or in the fridge for longer.
Make-Ahead and Freezing: The cake layers can be wrapped in plastic and frozen for up to 2 months.3 To use them, just thaw for about 20 minutes before assembly.
Reheating Tips: There are none! Cakes are best enjoyed at room temperature. Enjoy every single slice!
PrintDrip Cake
This isn’t just a cake—it’s a celebration centerpiece! This recipe gives you a moist vanilla cake, silky buttercream, and a beautiful white chocolate ganache drip. It’s the perfect showstopper for any special occasion, and easier to master than you think.
- Prep Time: 15 minutes
- Cook Time: 33 minutes
- Total Time: 1 hour 33 minutes (included chill time)
- Yield: 24 1x
- Category: Dessert
- Cuisine: American
Ingredients
For the Vanilla Cake
- 1 cup unsalted butter, softened
- 3 cups all-purpose flour
- 3 cups granulated sugar
- 2 ½ tsp baking powder
- 1 tsp fine salt
- 1 cup egg whites, at room temperature
- 1 ½ cups buttermilk, at room temperature
- 2 tsp vanilla extract
- 2 tbsp vegetable or canola oil
- Gel food coloring (optional)
For the Vanilla Buttercream
- 2 cups unsalted butter, softened
- 1 tsp fine salt
- 2 tsp vanilla extract
- 7 cups powdered sugar, sifted
- ¼ cup heavy whipping cream
For the White Chocolate Ganache
- 1 cup white chocolate chips
- ¼ cup heavy whipping cream
- Gel food coloring (optional)
Instructions
- Prepare the Cake: Preheat oven to 350°F (175°C). Grease and line three 8-inch or four 7-inch round pans. In a stand mixer, combine dry cake ingredients (flour, sugar, baking powder, salt). Slowly mix in butter until it resembles wet sand. Add egg whites, then buttermilk, vanilla, and oil until just combined. Divide batter evenly among pans. Bake for 33-35 minutes.
- Make the Buttercream: While cakes cool, beat softened butter until creamy. Add salt and vanilla. Slowly mix in powdered sugar on low speed. Gradually add heavy cream until the frosting is smooth and spreadable.
- Whip up the Ganache: Put white chocolate chips in a heat-proof bowl. Heat heavy cream until it just starts to bubble, then pour it over the chocolate. Let it sit for a minute, then stir slowly until smooth. Add food coloring if you like. The ganache should be barely warm—test a small drip on a glass to check its flow.
- Assemble and Drip: Once cakes are completely cool and leveled, stack them on a cake board with buttercream between each layer. Apply a thin “crumb coat” of frosting and chill the cake until firm. Add a thicker, final layer of frosting and chill again. Finally, use a squeeze bottle or spoon to create the ganache drips around the top edge before filling the center.
Notes
- Tips & Tricks: The key to a perfect drip cake is patience. Make sure your cake and ingredients are at the right temperature, and don’t rush the chilling steps. Using a kitchen scale to divide the batter ensures even layers.
- Storage: Store the finished cake in an airtight container at room temperature for up to 3 days, or in the refrigerator for longer.
- Make-Ahead: You can bake the cake layers ahead of time and freeze them wrapped in plastic wrap for up to 2 months. Thaw for about 20 minutes before assembly.
- Serving Suggestions: Garnish the top with fresh fruit, flowers, or sprinkles to make your cake truly shine!