We’ve all been there. It’s late. You’re lounging on the couch and suddenly, you need chocolate. Not just a piece of candy, but something warm and gooey.
The problem? You don’t want to preheat the oven. You definitely don’t want to wash a pile of bowls. I used to just give up and go to sleep sad. Then, I found the perfect eggless mug cake.
The secret is actually skipping the egg. I recently tried making one with an egg, and it turned out like a rubber bouncy ball. No thanks. By using baking powder instead, you get a texture that’s more like a rich, fudgy pudding. It’s fast, it’s vegan-friendly, and it’s a total lifesaver.
The Game Plan
Before we start mixing, here is the quick breakdown of what you’re getting into. It’s basically faster than boiling water for tea.
| Detail | Info |
| Prep Time | 4 minutes |
| Cook Time | 1 minute |
| Difficulty | Super Easy |
| Yield | 1 Big Mug |
What You’ll Need
You don’t need fancy tools. Just a standard ceramic mug and a fork. If you don’t have a microwave, you can use an oven-safe dish, but it’ll take a bit longer.
Pro Tip: I like to mix the dry ingredients for 3 or 4 of these in little jars ahead of time. It’s like having your own custom “cake helper” sitting in the pantry.
The Essentials:
- 8-12 oz Mug: Your baking “pan.”
- Mini Whisk or Fork: To get the lumps out.
- Measuring Spoons: For accuracy (though I’ve definitely eyeballed the chocolate chips).
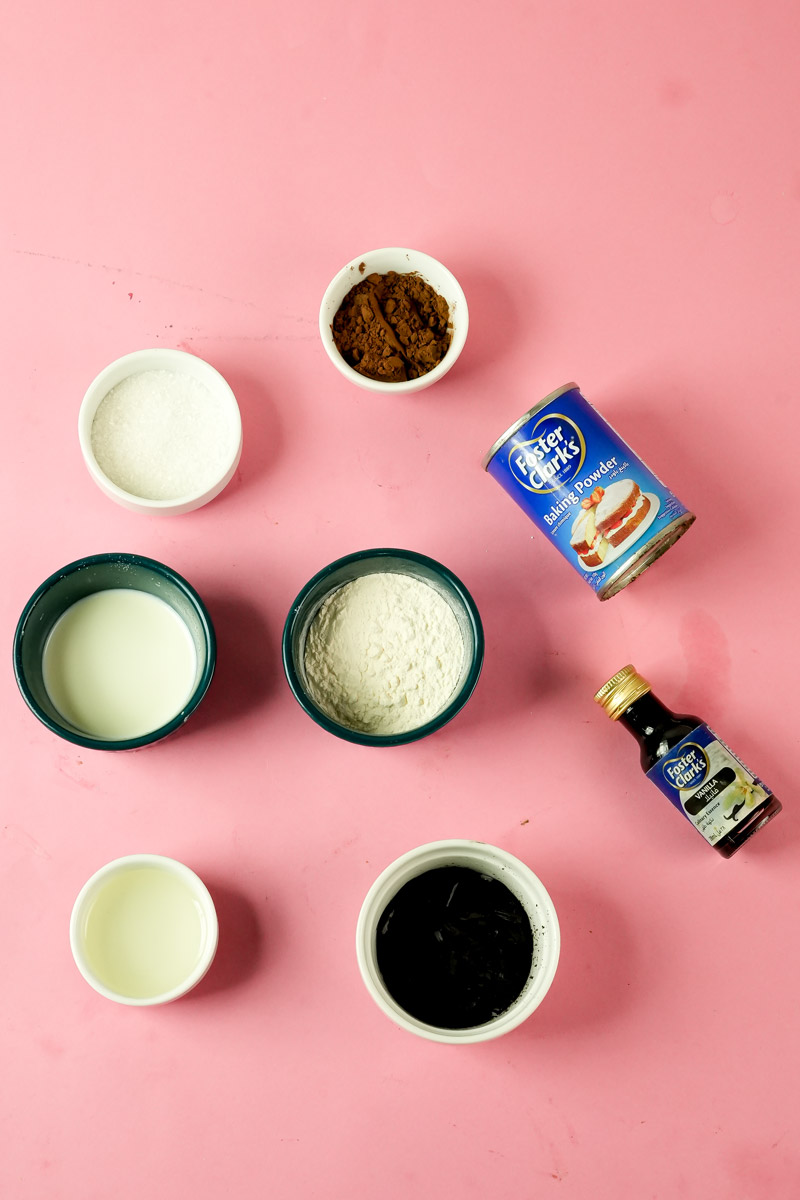
The Ingredients
- 1 tbsp Oil: Use something neutral like canola. If you want a tropical vibe, melted coconut oil is chef’s kiss.
- 3 tbsp Milk: Any milk works. I use oat milk because it makes the cake naturally sweeter.
- 2 tbsp Sugar: White sugar is fine, but brown sugar adds a nice “molasses” depth.
- 2 tbsp Cocoa Powder: Use the good stuff if you have it. Dutch-processed is best.
- 3 tbsp Flour: All-purpose is the standard.
- 1/4 tsp Baking Powder: This is your “lift.”
- 1/8 tsp Sea Salt: Just a pinch to make the chocolate pop.
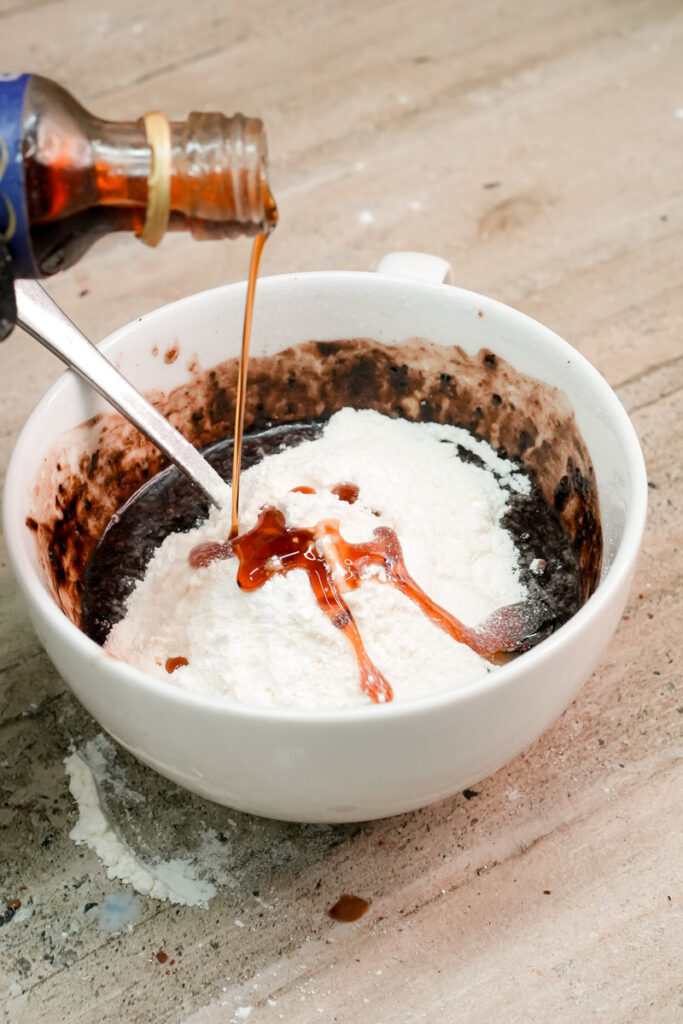
- 1/2 tsp Vanilla: For that bakery smell.
- 1 tbsp Chocolate Chips: Because… obviously.
How to Make It
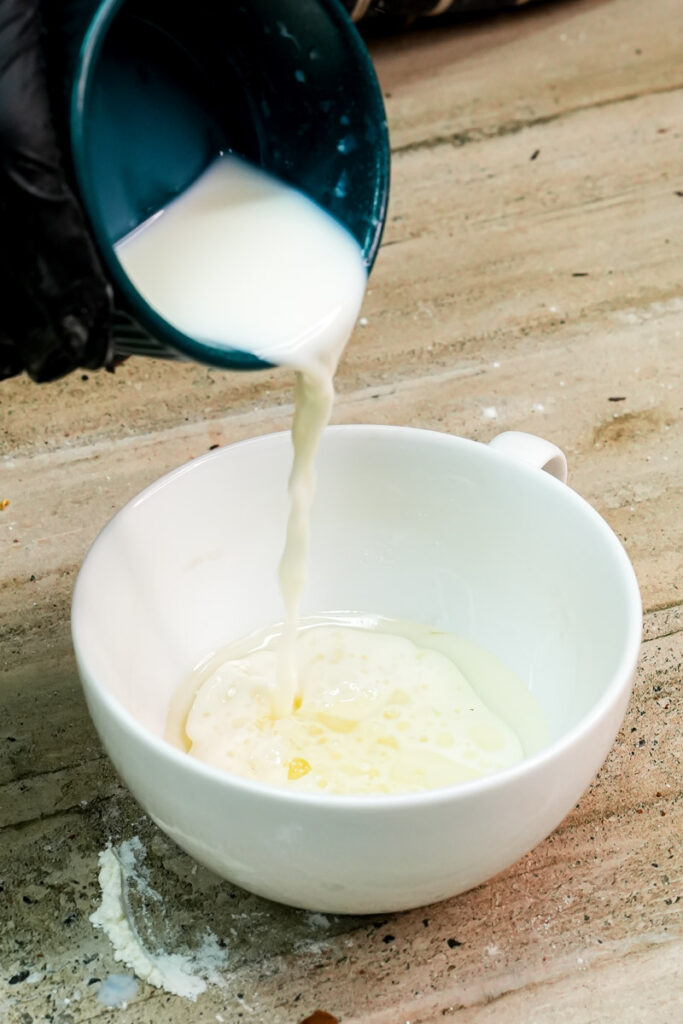
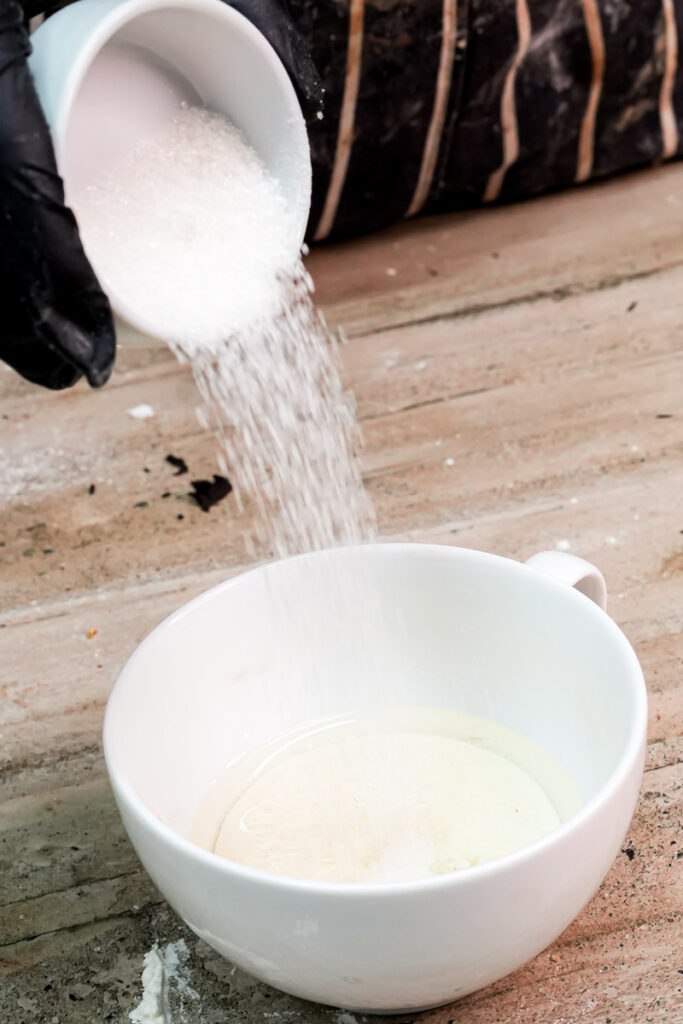
1. The “Syrup” Base
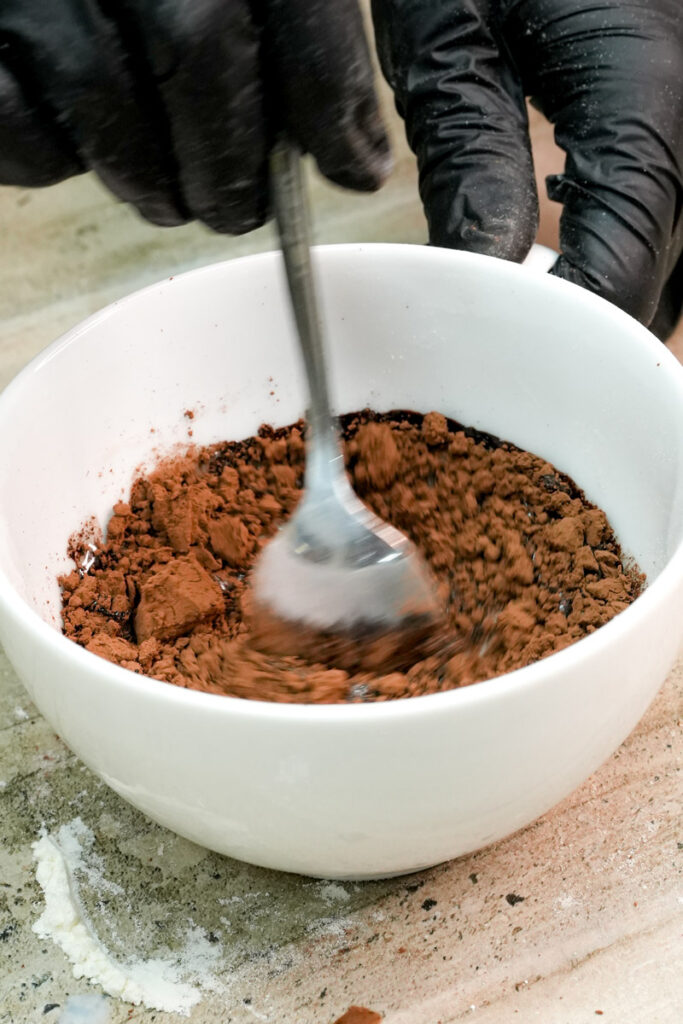
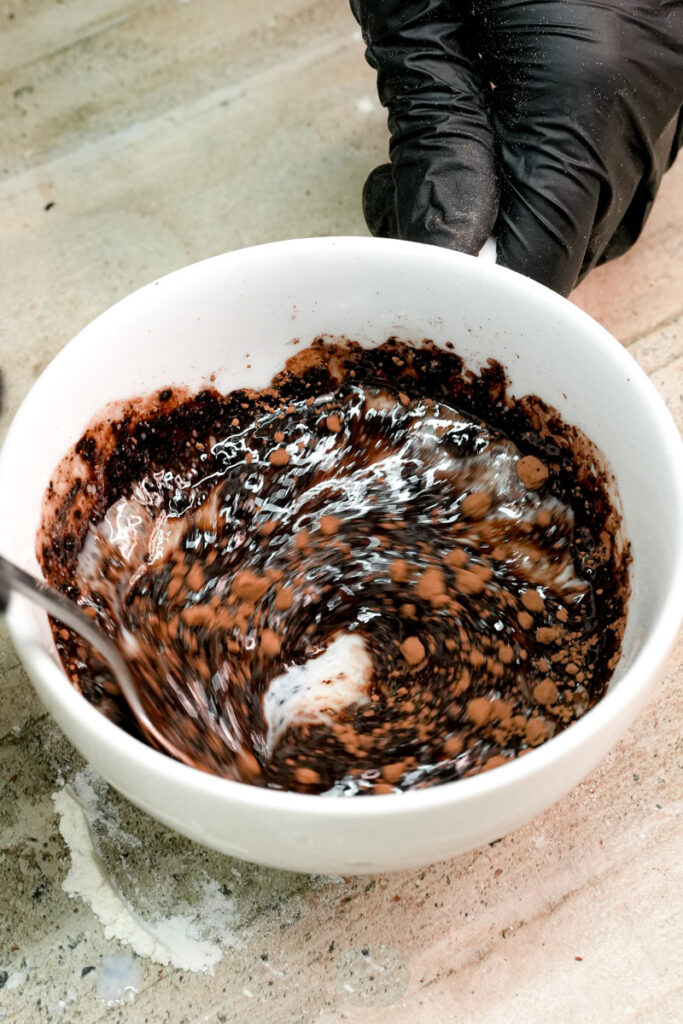
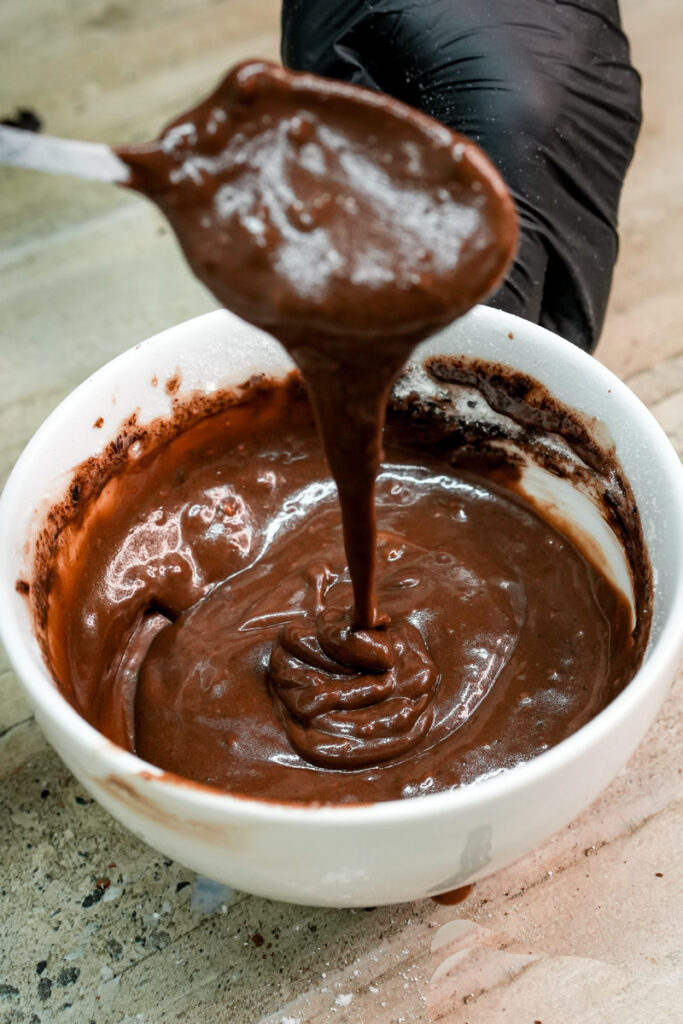
First, grab your favorite 8–12 oz mug. Add the oil, milk, sugar, and cocoa powder. This is the most important part! Use your fork to whisk these for about 15 seconds. You’re looking for a smooth, glossy chocolate syrup. By mixing the cocoa with the liquids first, you “bloom” the cocoa. This intensifies the chocolate flavor and ensures you don’t end up with those annoying dry pockets later.

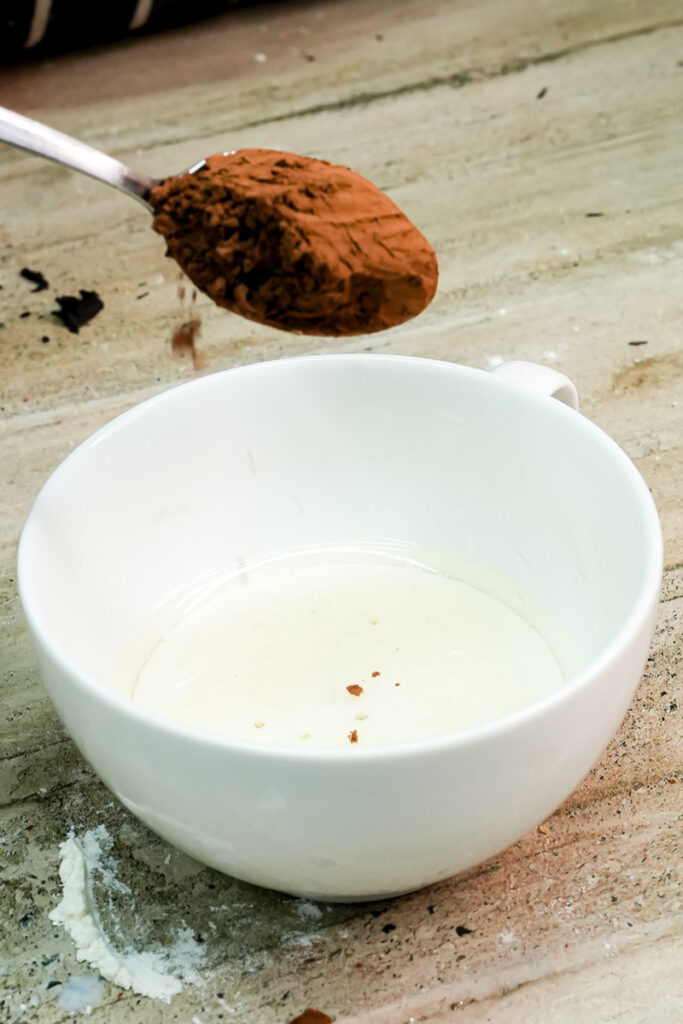
2. Incorporate the Solids
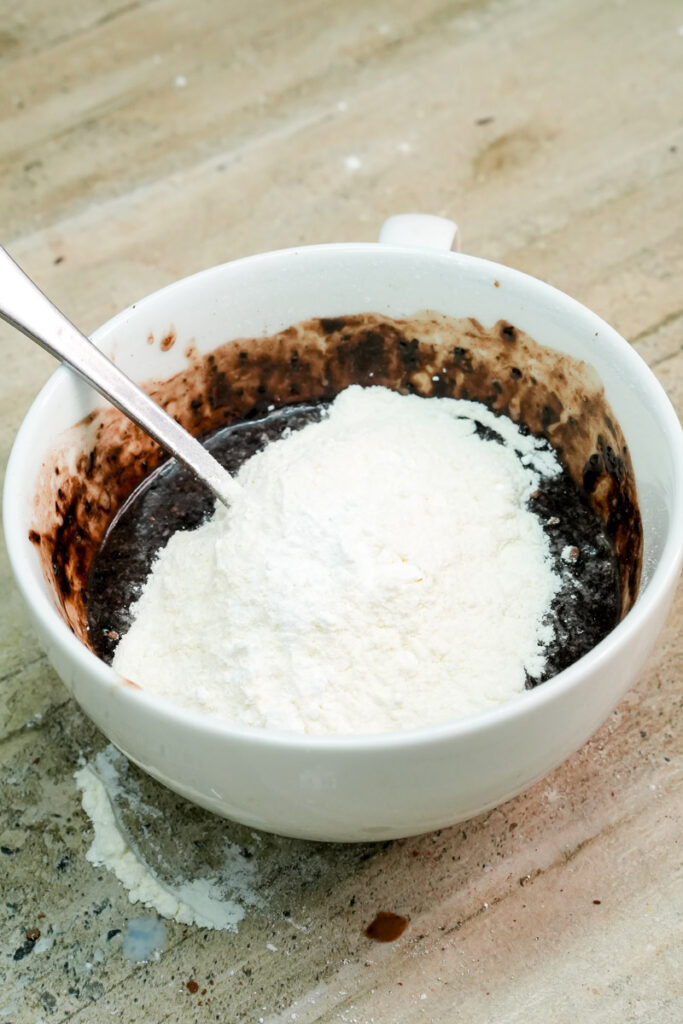
Once that syrup is smooth, add in your flour, baking powder, sea salt, and vanilla. Stir this for about 30 seconds. You want to be thorough but gentle. Make sure you really scrape the “corners” at the bottom of the mug where flour loves to hide. The batter should look thick and smell like a dream.
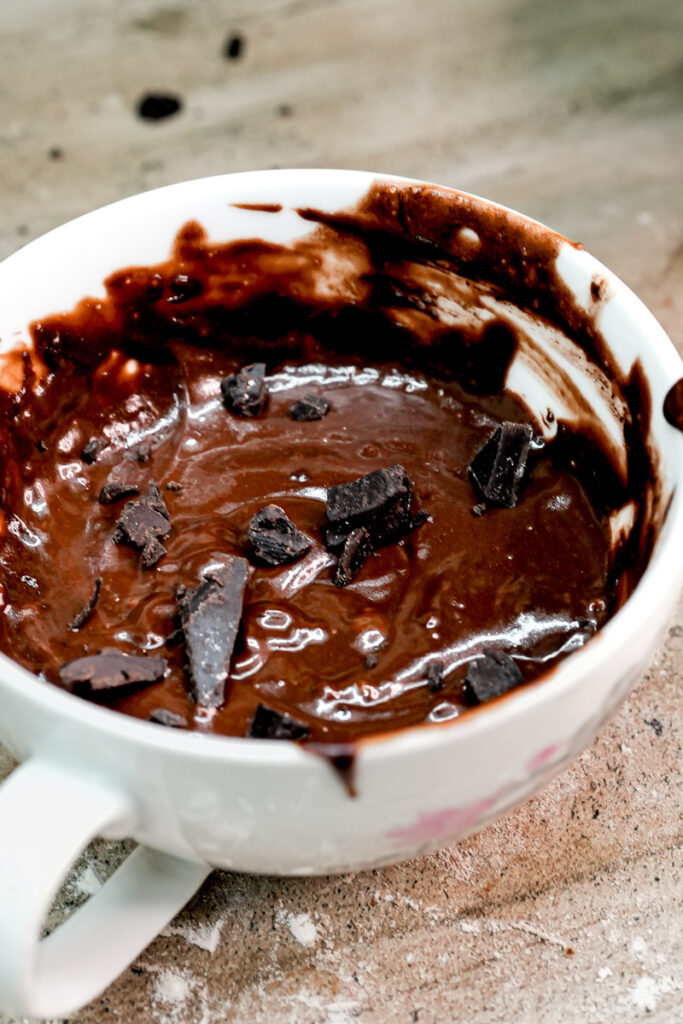
3. The Chocolate Payload
Now, fold in those chocolate chips. I always save a few to sprinkle right on top; they sink just enough during cooking to create a molten, gooey top layer that looks professional.

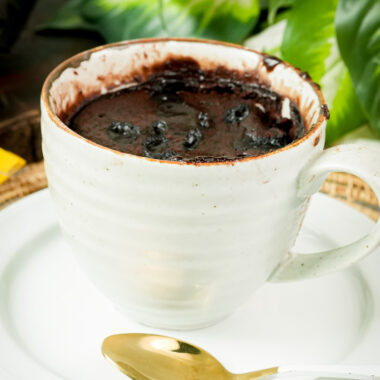
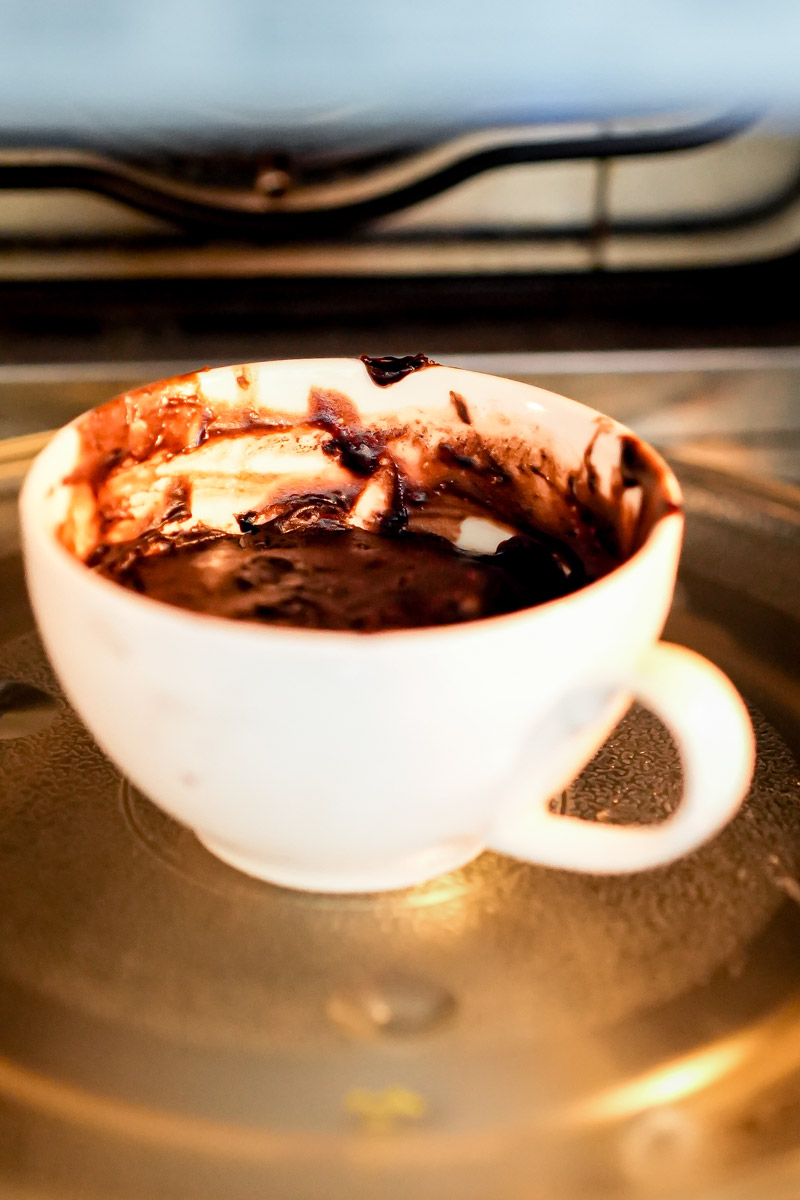
4. The Microwave Moment
For a standard 1100W microwave, 65 seconds is the sweet spot. If your microwave is a bit older or lower wattage (around 800W), you might need up to 75 seconds.
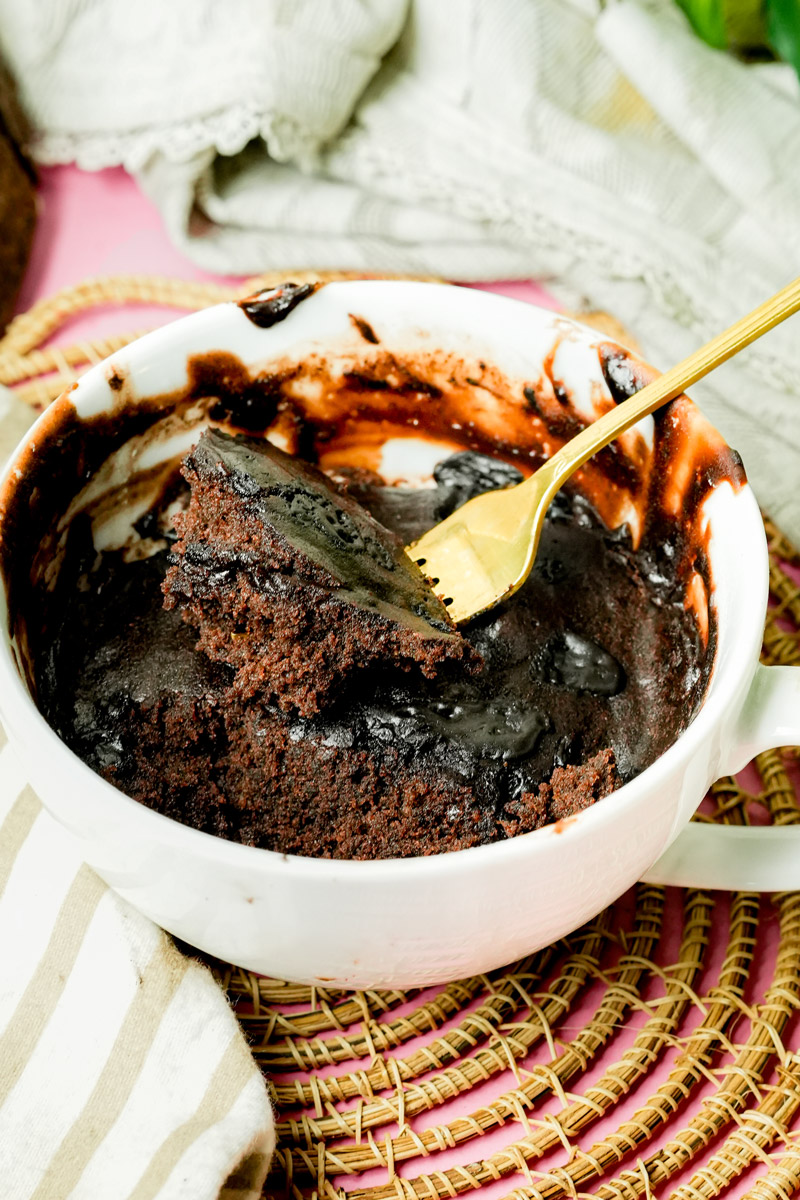
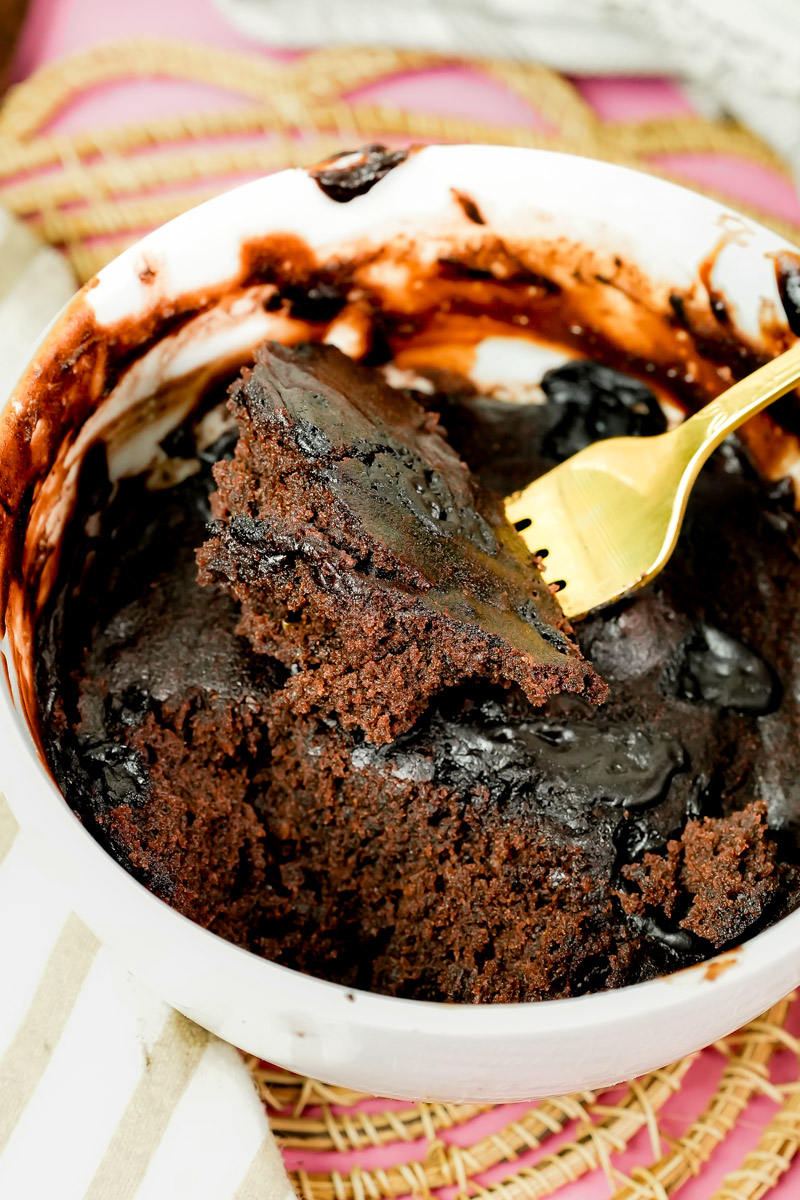
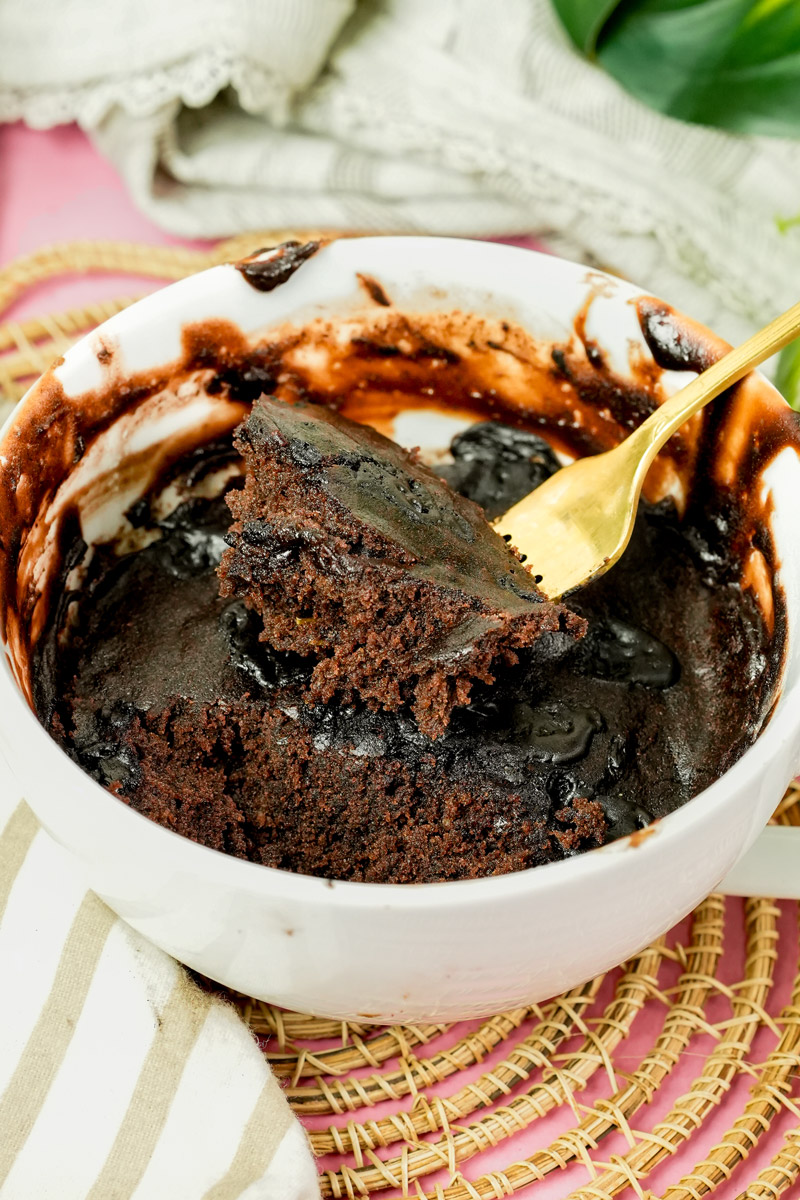
- Watch the show: Keep an eye on it through the glass. The cake will rise quite high—looking like it might escape—and then settle back down.
- The Golden Rule: The most common mistake is overcooking. If the top looks slightly tacky or “underdone,” it’s actually perfect. It will continue to firm up as it sits.
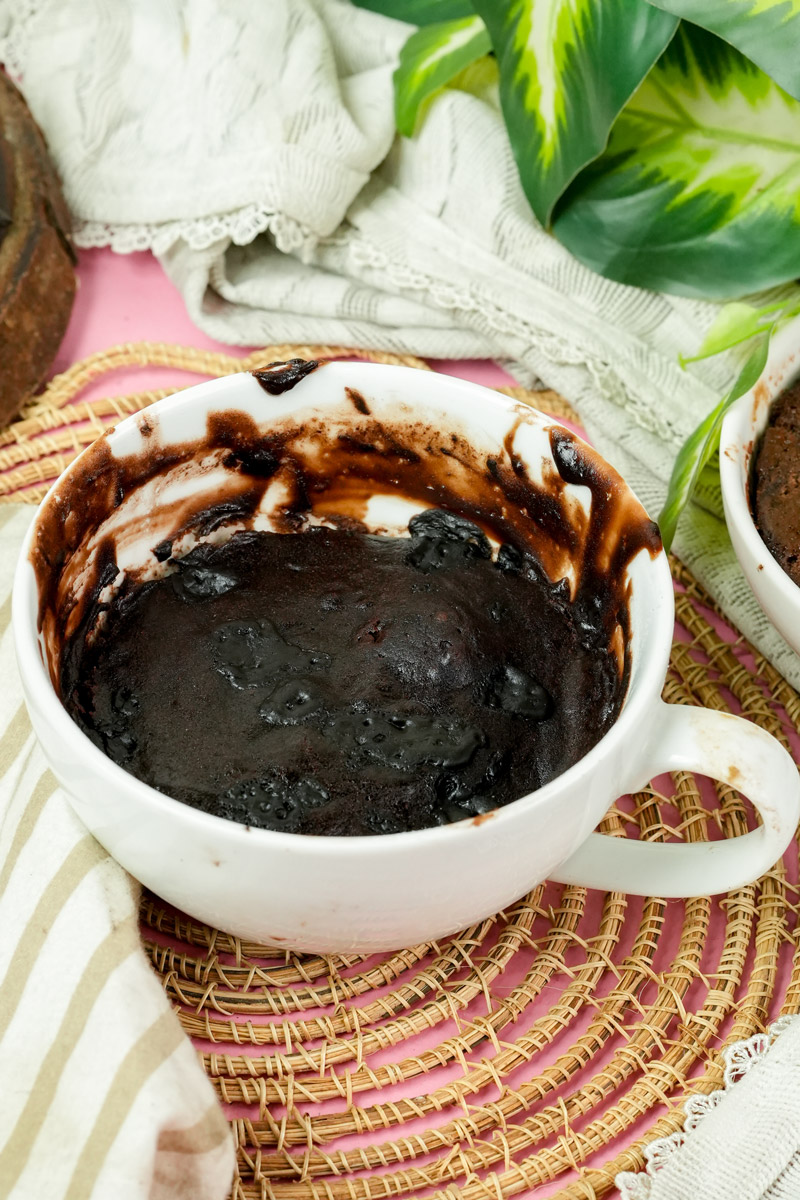
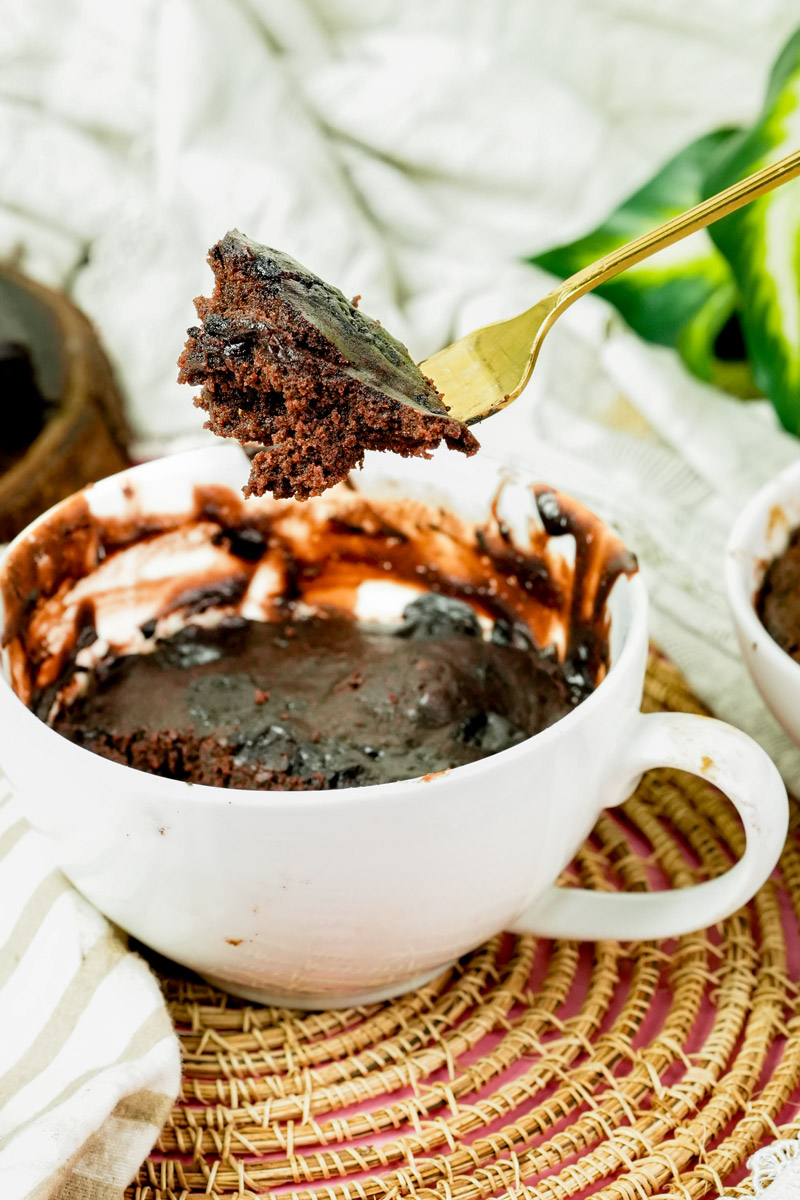
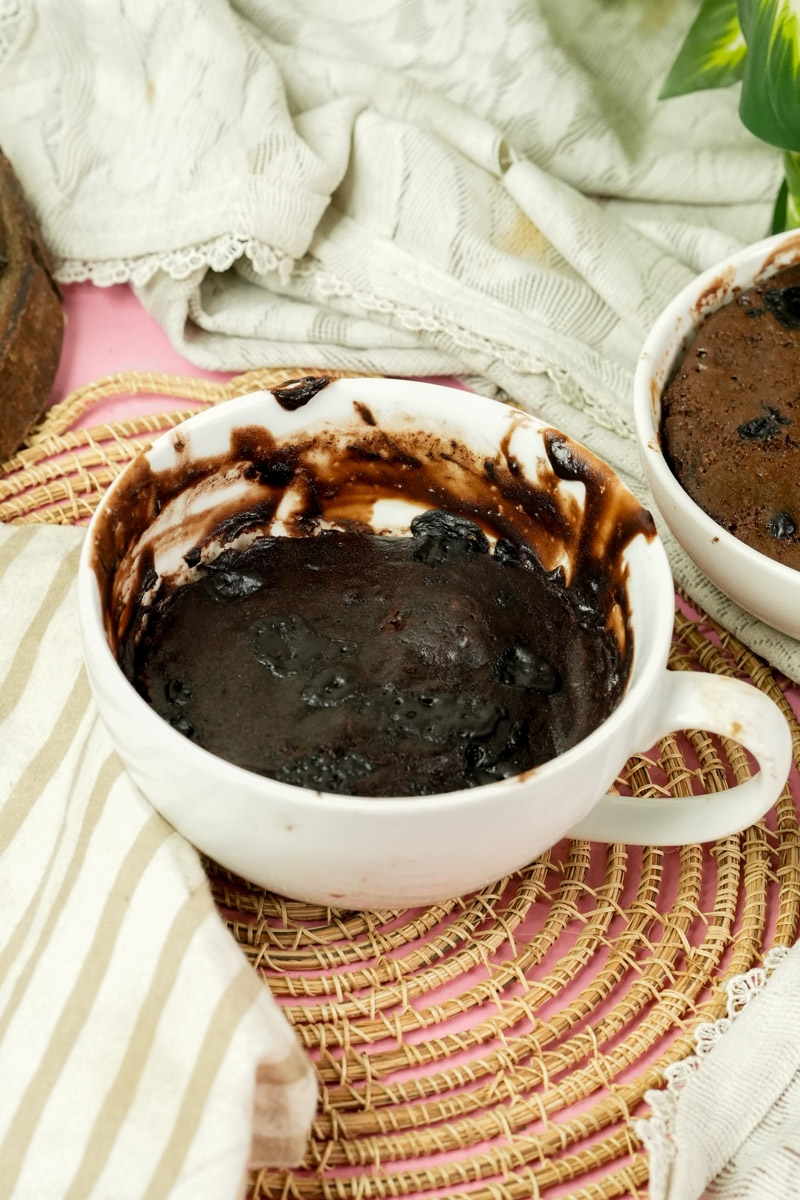
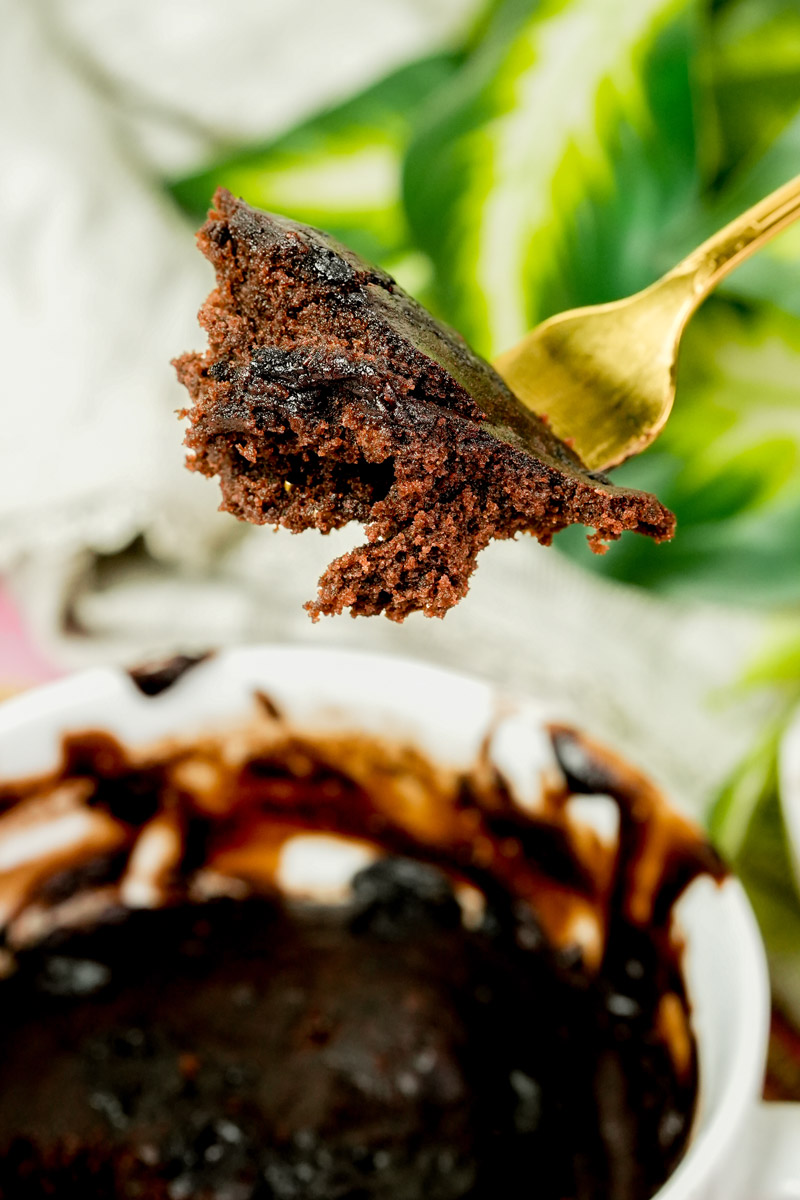
5. The Final Rest
I know it smells amazing, but patience is your best friend. Let the cake cool for at least 3 to 5 minutes. This allows the internal steam to finish setting the crumb. It’s the difference between eating a “bowl of hot batter” and a “fluffy, moist cake.”
Is It Done?
- The Look: The top should look matte, not wet.
- The Touch: Give it a gentle poke. It should spring back like a sponge.
- The Smell: Your kitchen should smell like a chocolate factory.
Mix It Up
This recipe is like a blank canvas. I’ve experimented with a few variations when I’m feeling fancy:
The Nutty Center: Drop a big glob of peanut butter right in the middle before cooking. Don’t stir it. You’ll end up with a molten peanut butter core.
Mexican Chocolate: Add a dash of cinnamon and a tiny pinch of cayenne.
The “Guest” Version: If I’m making this for a friend, I’ll flip it onto a plate and add a single raspberry. It looks like a $12 dessert.
A Note on Eating
The hardest part? Waiting. Give it 3 to 5 minutes to cool down. If you eat it instantly, it’s just hot goo. Letting it sit allows the crumb to actually set so it feels like real cake.
It’s best eaten right away. If you have leftovers, just cover it and keep it on the counter for a day. But let’s be honest—it’s probably not going to last that long.
PrintEggless Chocolate Mug Cake
This is my favorite “emergency” dessert. It’s perfect for those nights when you’re craving something warm and chocolatey but can’t face a mountain of dishes. By skipping the egg, we avoid that weird “rubbery” texture microwaves often cause. Instead, you get a moist, fudgy treat that’s more like a rich steamed pudding. It’s vegan-friendly, uses basic pantry staples, and is ready in less time than it takes to find something to watch on TV.
- Prep Time: 4 minutes
- Cook Time: 1 minutes
- Total Time: 5 minutes
- Yield: 1 generous mug 1x
- Category: Dessert
- Cuisine: American
Ingredients
- 1 tbsp neutral oil (canola or sunflower works great)
- 3 tbsp milk (dairy or plant-based like oat or almond)
- 2 tbsp sugar (white for sweetness or brown for a deeper flavor)
- 2 tbsp cocoa powder (unsweetened)
- 3 tbsp all-purpose flour
- 1/4 tsp baking powder
- 1/8 tsp sea salt
- 1/2 tsp vanilla extract
- 1 tbsp chocolate chips
Instructions
- Whisk the liquids: Grab an 8–12 oz ceramic mug. Add the oil, milk, sugar, and cocoa. Use a fork to whisk these into a smooth chocolate syrup. This “blooms” the cocoa for a better flavor.
- Add the rest: Stir in the flour, baking powder, salt, and vanilla. Mix for about 30 seconds. Be sure to scrape the bottom edges where dry flour likes to hide.
- Add the chips: Fold in the chocolate chips. I like to save a few to sprinkle right on top for a molten finish.
- Microwave: Cook on high for 65 seconds (for a standard 1100W microwave). Watch it rise up high and then settle back down—it’s like a science experiment!
- Cooling is key: Wait 3 to 5 minutes before eating. I know it’s hard, but this lets the cake finish “setting” so it’s fluffy rather than gooey.
Notes
Serving Suggestions
- Keep it simple: Enjoy it straight from the mug while it’s warm.
- Go big: Add a scoop of vanilla ice cream or a dollop of whipped cream.
- Make it fancy: Flip it onto a plate and top with a few fresh raspberries.
Tips & Tricks
- The “Tacky” Rule: If the top looks slightly wet or tacky when it comes out, that’s okay! It will firm up as it sits. Overcooking is the only way to ruin this.
- Peanut Butter Surprise: Drop a spoonful of peanut butter into the center of the batter before cooking for a hidden molten core.
- Gift of Prep: You can mix the dry ingredients in a small jar ahead of time. Just add the wet stuff whenever the craving hits.
Storage & Reheating
- Stay fresh: This is definitely a “right now” dessert. If you have leftovers, cover the mug and keep it at room temperature for up to 24 hours.
- Warm it up: A quick 10-second zap in the microwave will wake those chocolate chips back up.