Hey there! Let’s talk about that little gold-wrapped candy, the Ferrero Rocher. You know the one. You peel back the foil, bite through that crunchy chocolate-hazelnut shell, and hit that creamy, dreamy center. It’s perfect, right?
Well, what if we took that perfect little bite and turned it into a whole cake?
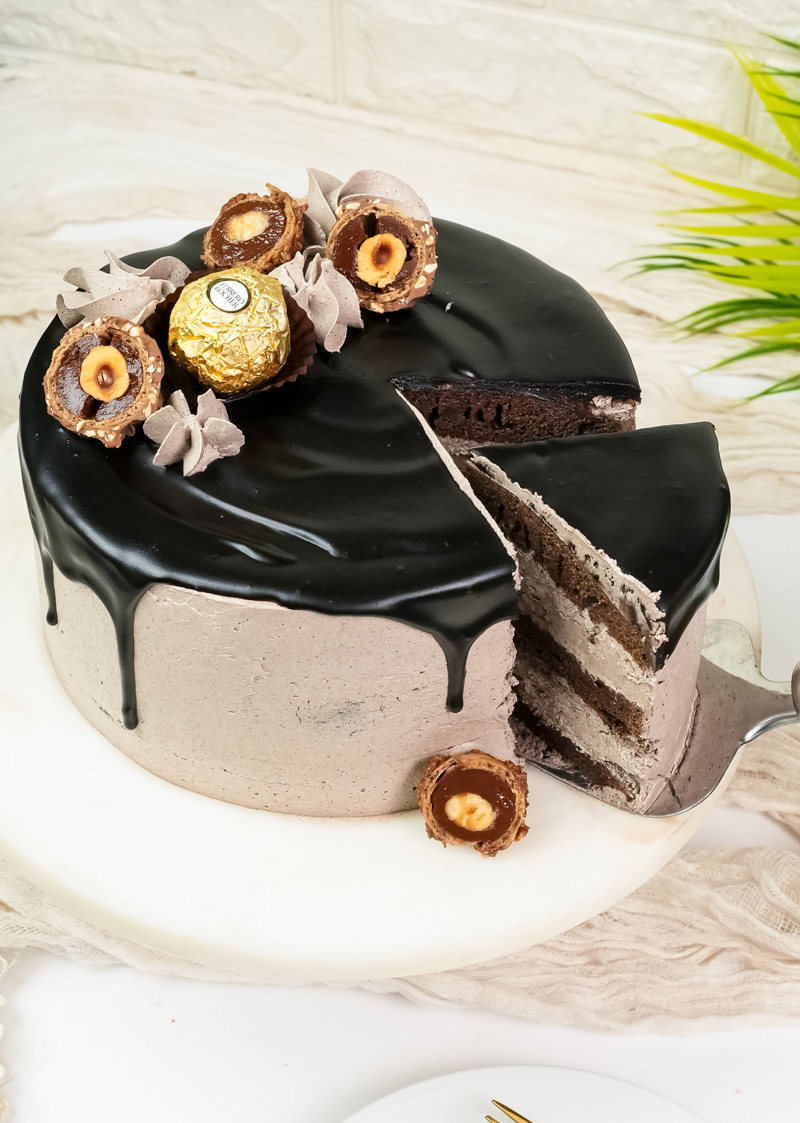
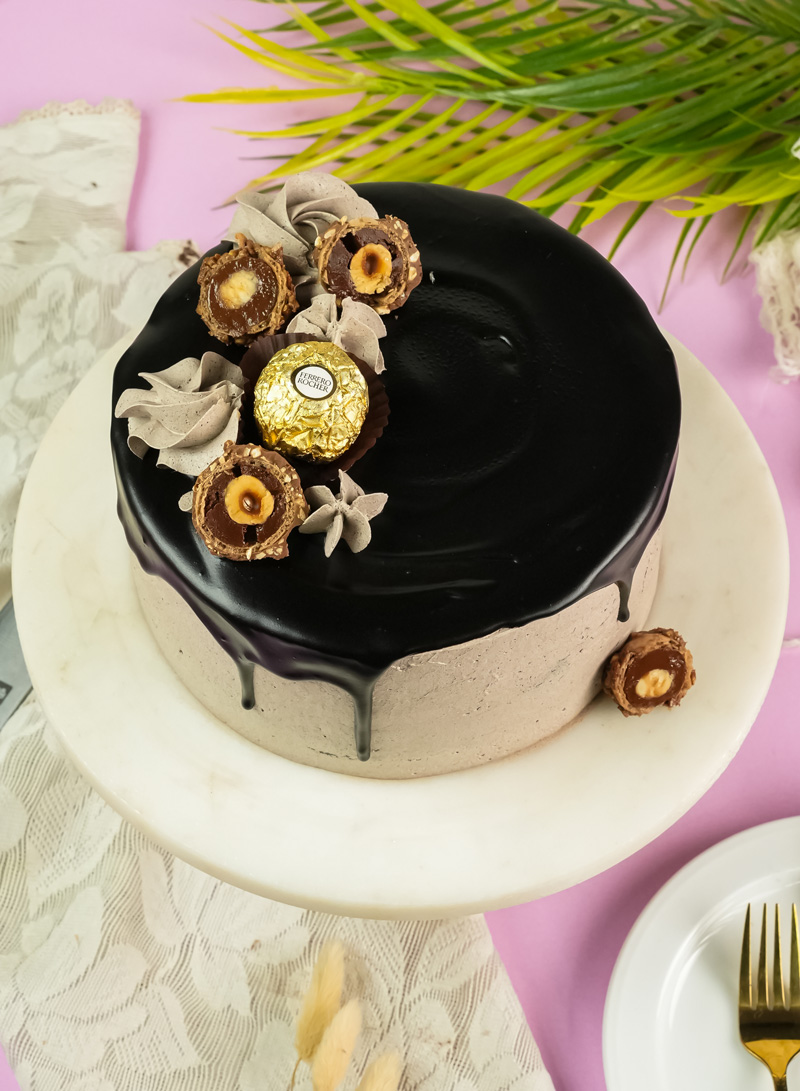
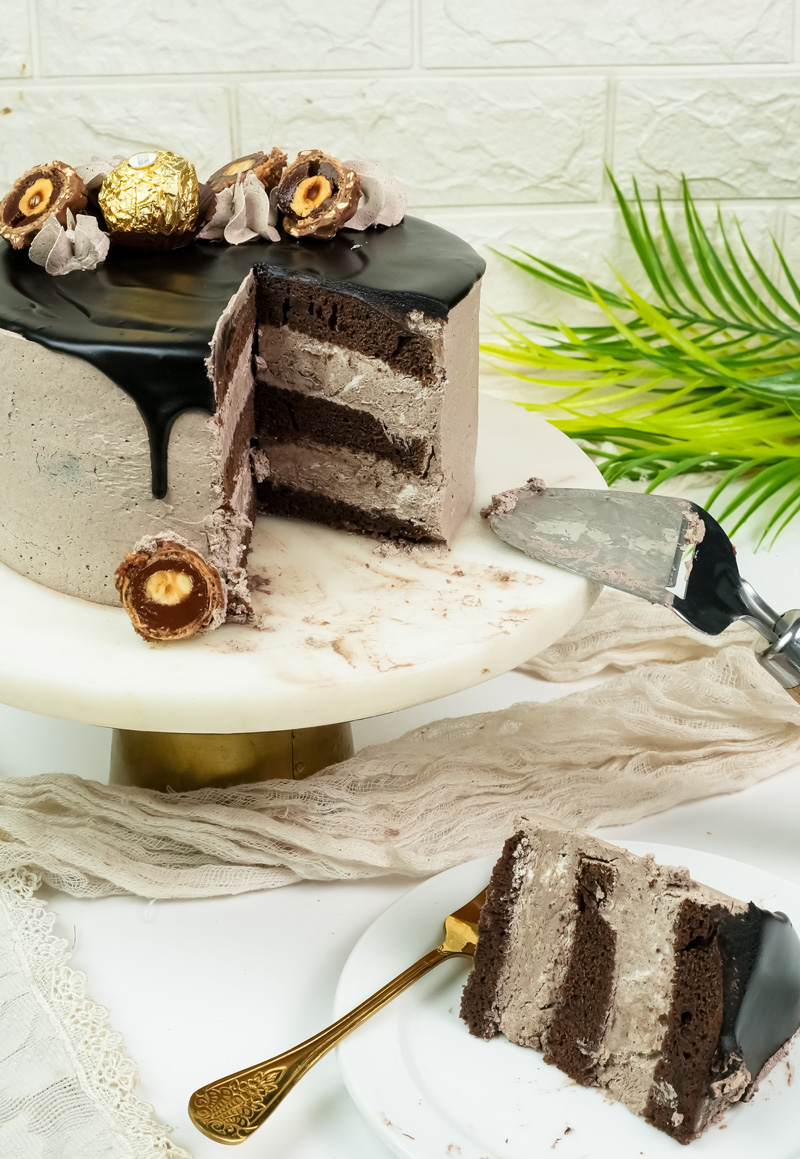
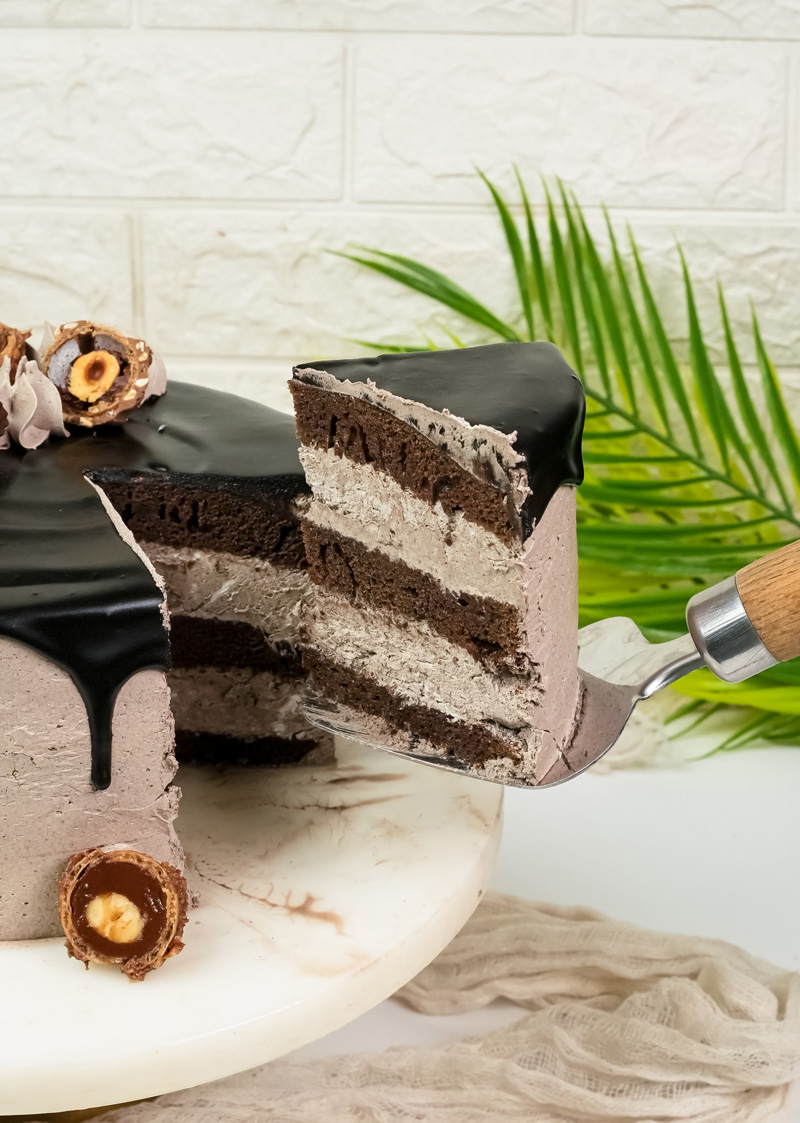
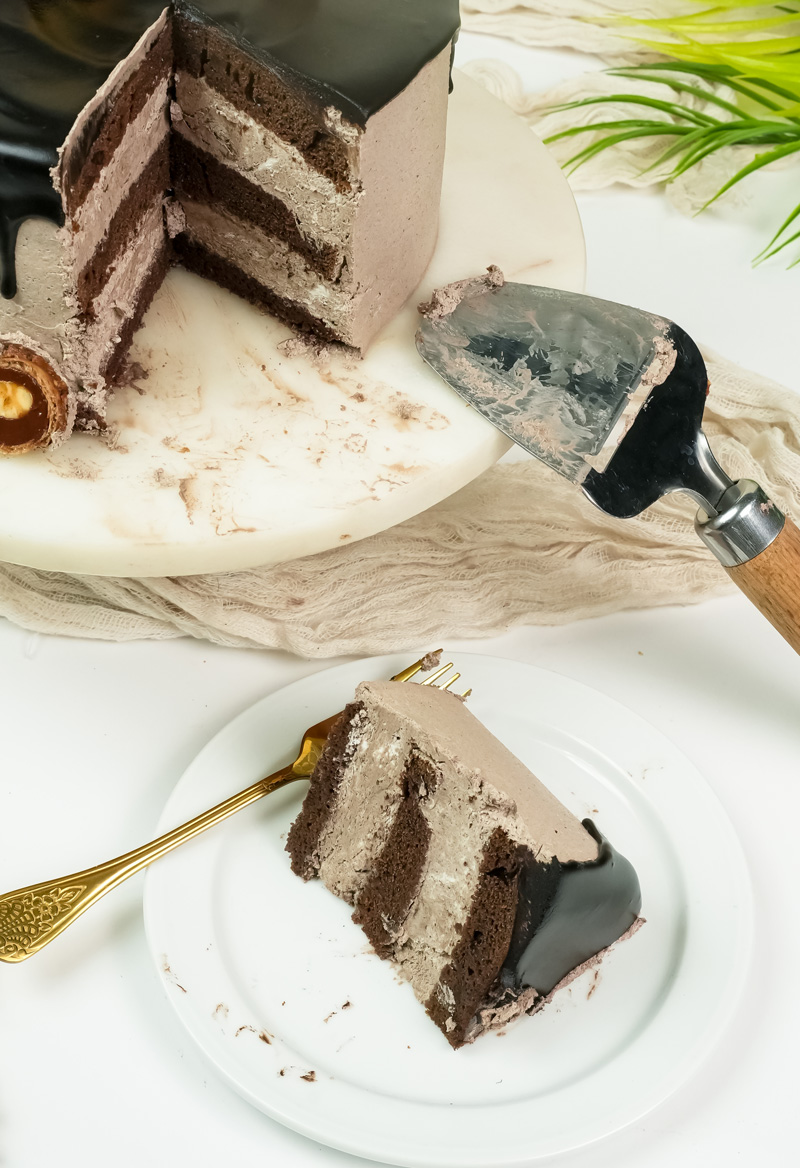
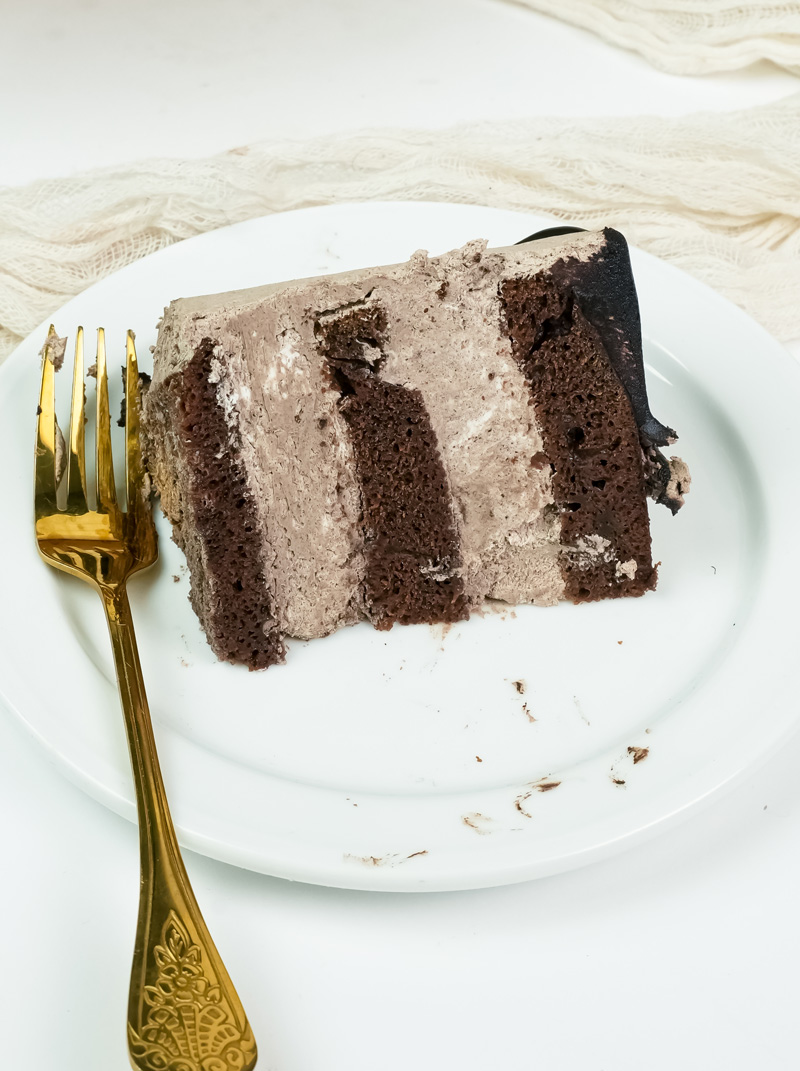
That’s exactly what we’re doing today. This cake is everything you love about the candy, but in a big, beautiful, sliceable form. It’s built on a crazy-moist chocolate cake, layered with a fluffy Nutella frosting, and packed with the crunch of toasted hazelnuts.
I first made a version of this for a friend’s birthday, and it was a huge hit. Now, my family asks for it for every special occasion. It looks super impressive, but don’t let that scare you. The steps are simple, and I’ll walk you through everything.
Think of it as a fun afternoon project. So, grab your apron, and let’s make a cake that people will talk about for weeks.
A Quick Look at Our Project
I know, looking at a long recipe can feel like a lot. But trust me, every part has a purpose. Let’s break down what to expect.
| Task | Estimated Time | Notes |
| Active Prep & Baking | About 1 hour | This is when you’ll be mixing and baking. |
| Cooling Time | 1.5 – 2 hours | Super important! The cake must be completely cool. |
| Assembly & Decorating | 30 – 60 minutes | The fun part! This includes the chill time for the crumb coat. |
| Total Project Time | 3 – 4 hours | A perfect weekend baking session. |
Servings: This recipe makes a tall, three-layer 8-inch cake. It’s a beast! You’ll easily get about 14 generous slices out of it. Need less? No problem. Here’s a quick guide to cutting the recipe in half.
| To Halve the Recipe (8-10 Servings) | Instructions |
| Cake | Use two 6-inch round pans. |
| Buttercream | Cut all the buttercream ingredients in half. |
| Ganache | Cut the ganache ingredients in half. |
| Baking Time | Check your cakes 5-10 minutes earlier. |
Difficulty: Let’s call this Intermediate. Why? The cake itself is easy. The frosting is a breeze. The tricky part is putting it all together. But again, that’s what I’m here for! We’ll tackle it step-by-step.
The Tools for the Job
Having the right gear makes baking so much smoother. Here’s what you’ll need:
- A Stand Mixer: This is your best buddy for this recipe, especially for making the fluffy frosting. If you don’t have one, a good electric hand mixer will work just fine. Get ready for a little arm workout!
- Three 8-inch Round Cake Pans: This is how we get those beautiful, thick layers.
- Wire Cooling Rack: This is a must-have. It lets air circulate under the cakes so they don’t get soggy.
- Piping Bag & Wilton 1M Tip: This is for making those pretty frosting swirls on top. No piping bag? No worries. Just use a spatula to create a rustic, swoopy finish. It’ll still look amazing.
- A Big Serrated Knife: Like a bread knife. We’ll use this to level the tops of our cakes.
- Offset Spatula: This is the key to getting that smooth, professional-looking frosting.
How to Make This Cake Ahead of Time
One of my favorite things about this cake is that you don’t have to make it all in one day. Here’s how to break it up:
- The Cake Layers: You can bake these up to 2 days ahead. Let them cool completely, then wrap them up tight in plastic wrap and keep them on the counter. You can even freeze them for up to a month!
- The Buttercream: The frosting can be made 3 days in advance. Just store it in an airtight container in the fridge. When you’re ready to use it, let it sit on the counter to soften up, then give it a quick whip with your mixer to make it light and fluffy again.
Let’s Talk Ingredients
Great cake starts with great ingredients. Let’s look at the stars of our show.
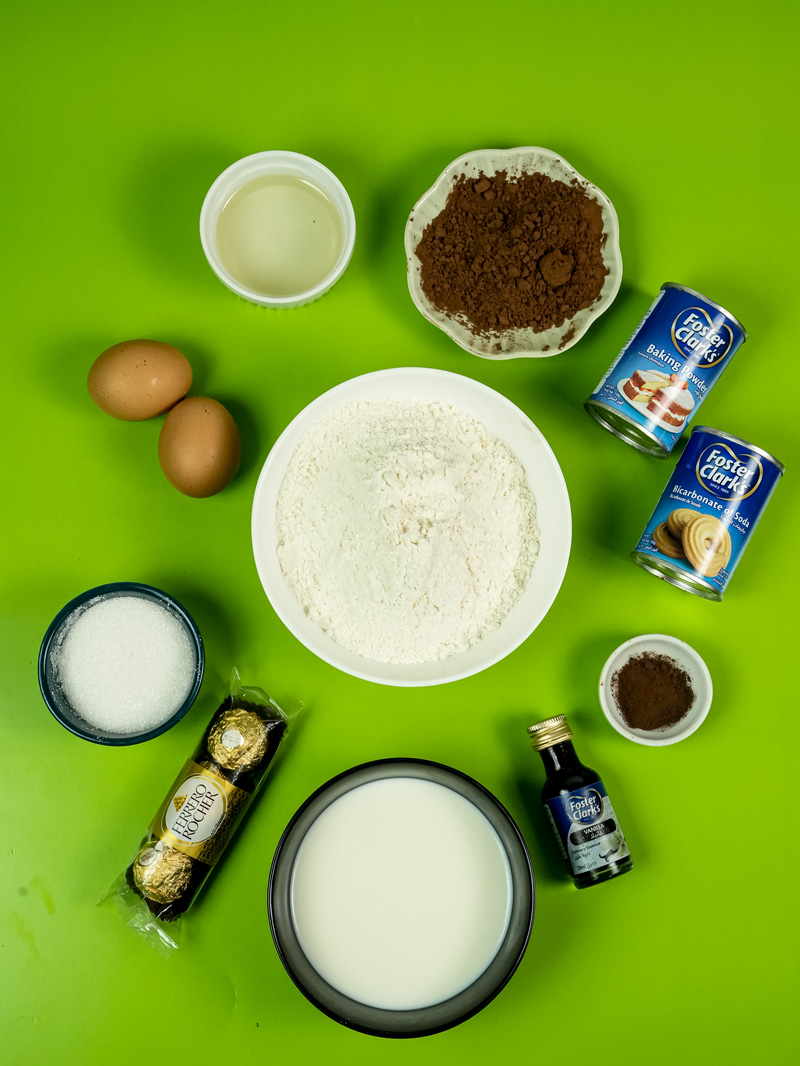
For the cake, we’re using standard stuff: flour, sugar, and cocoa powder. But there are two secret weapons here. First, espresso powder. It won’t make your cake taste like coffee, I promise. It just makes the chocolate taste more… well, chocolatey. Second, boiling water. Pouring this in at the end makes the cocoa powder “bloom,” unlocking a deeper flavor and giving you an incredibly moist cake.
For the frosting, the main player is obviously Nutella. We’ll whip it with a good amount of softened butter. This frosting is more about creamy hazelnut flavor than just being sugary sweet. A bit of powdered sugar gives it body, and heavy cream makes it feel as light as a cloud. Please use real, full-fat heavy cream! It makes a huge difference.
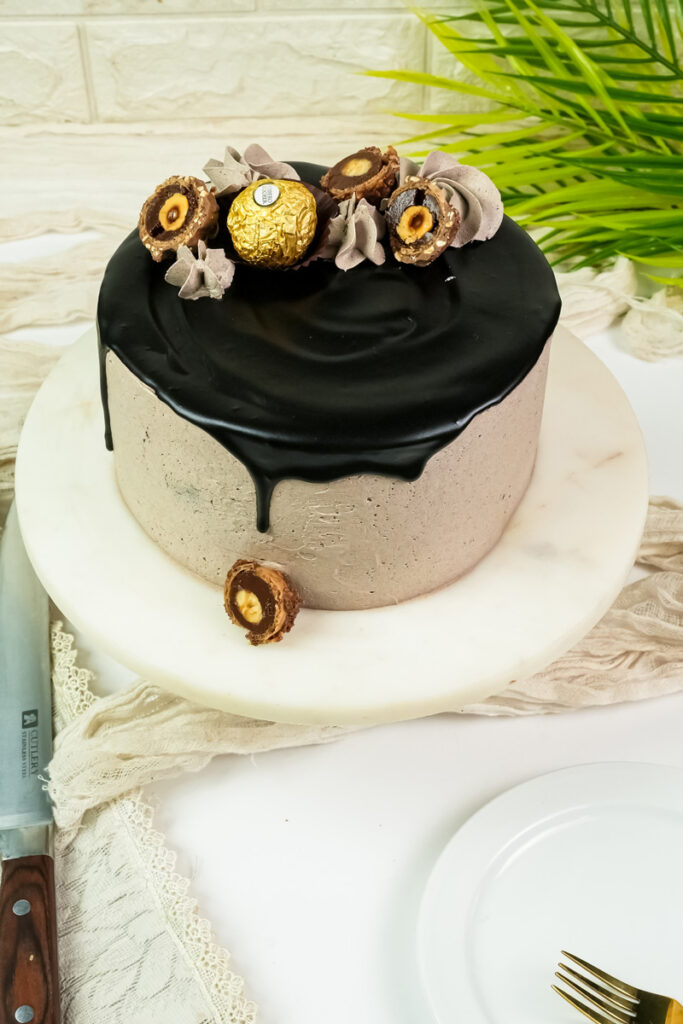
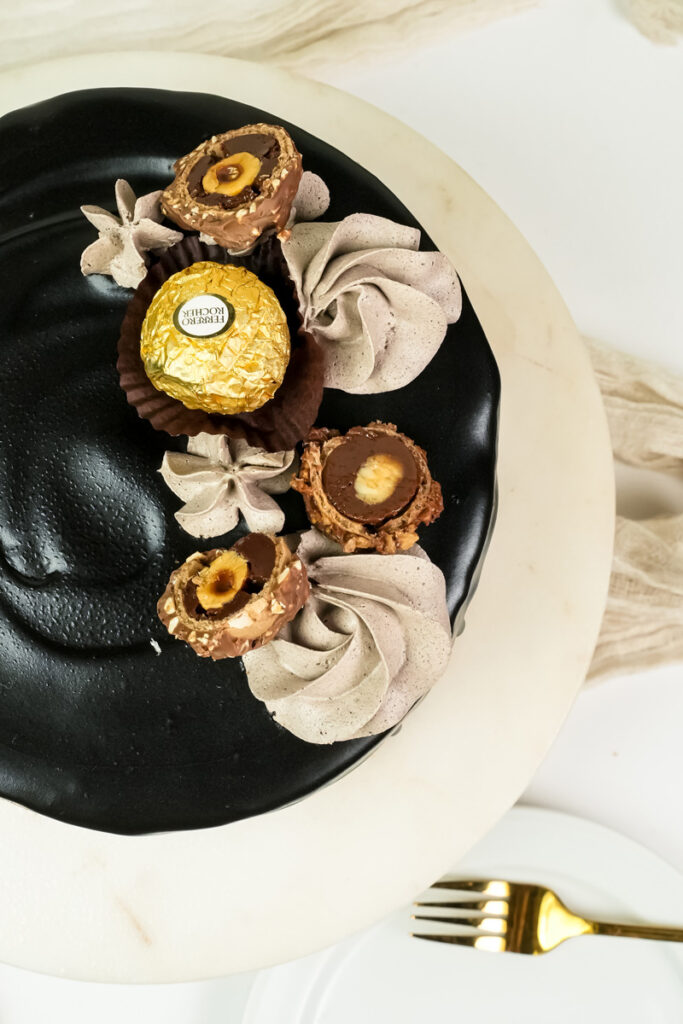
Finally, the best parts: the ganache and the crunch! The ganache is a simple mix of chocolate and cream that creates that awesome drip effect.1 And for the crunch? Toasted hazelnuts and, of course, whole Ferrero Rocher candies. You absolutely must toast the hazelnuts. It might seem like a small step, but it wakes up their flavor in a way that raw nuts just can’t compete with.
The Step-by-Step Guide
Okay, ready to get started? Let’s do this in three parts: the cake, the frosting, and the final assembly.
Part 1: Bake the Perfect Chocolate Cake
First up, get your oven preheating to 350∘F (177∘C).
Now for a little trick I learned: prepping your pans. Instead of butter and flour, grab some vegetable shortening (like Crisco). Grease the pans really well with it, then dust them with cocoa powder, not flour. Why? This stops you from getting those pasty white marks on your beautiful dark chocolate cake.
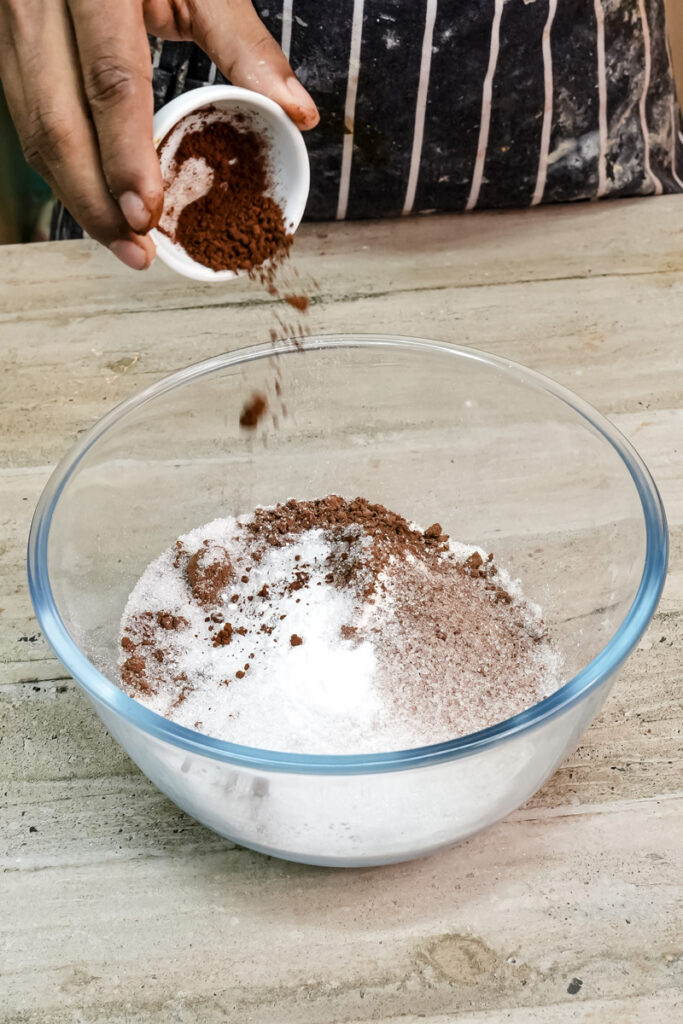
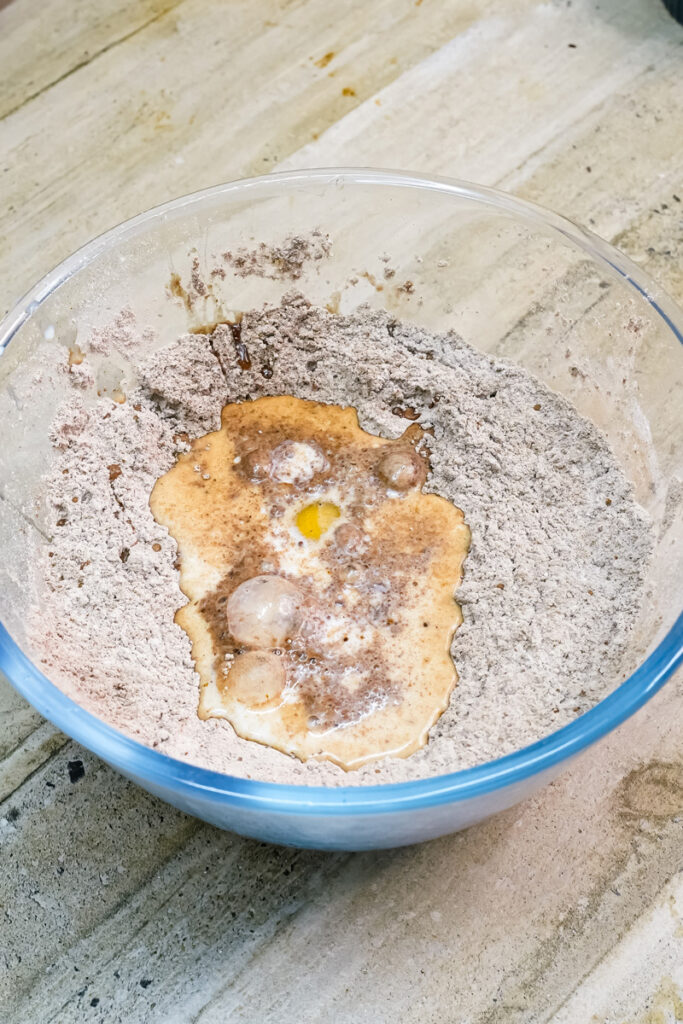
- In your mixer bowl, whisk together the dry stuff: flour, sugar, cocoa powder, baking powder, baking soda, salt, and that magic espresso powder.
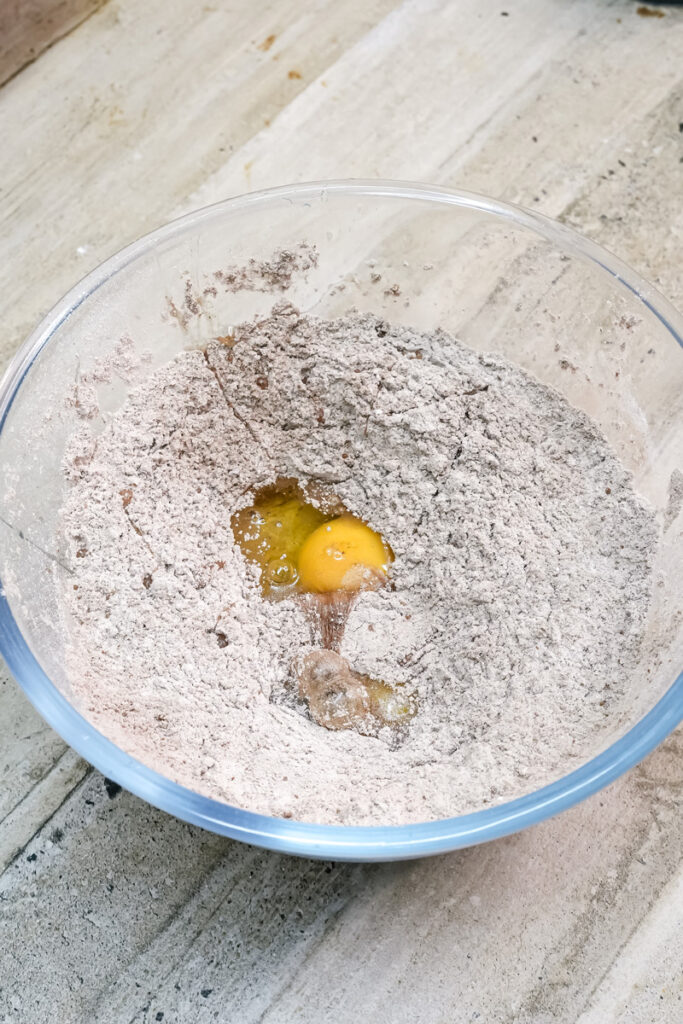
- Next, add the wet ingredients: vanilla, eggs, milk, and oil. Mix on low until it’s all combined.
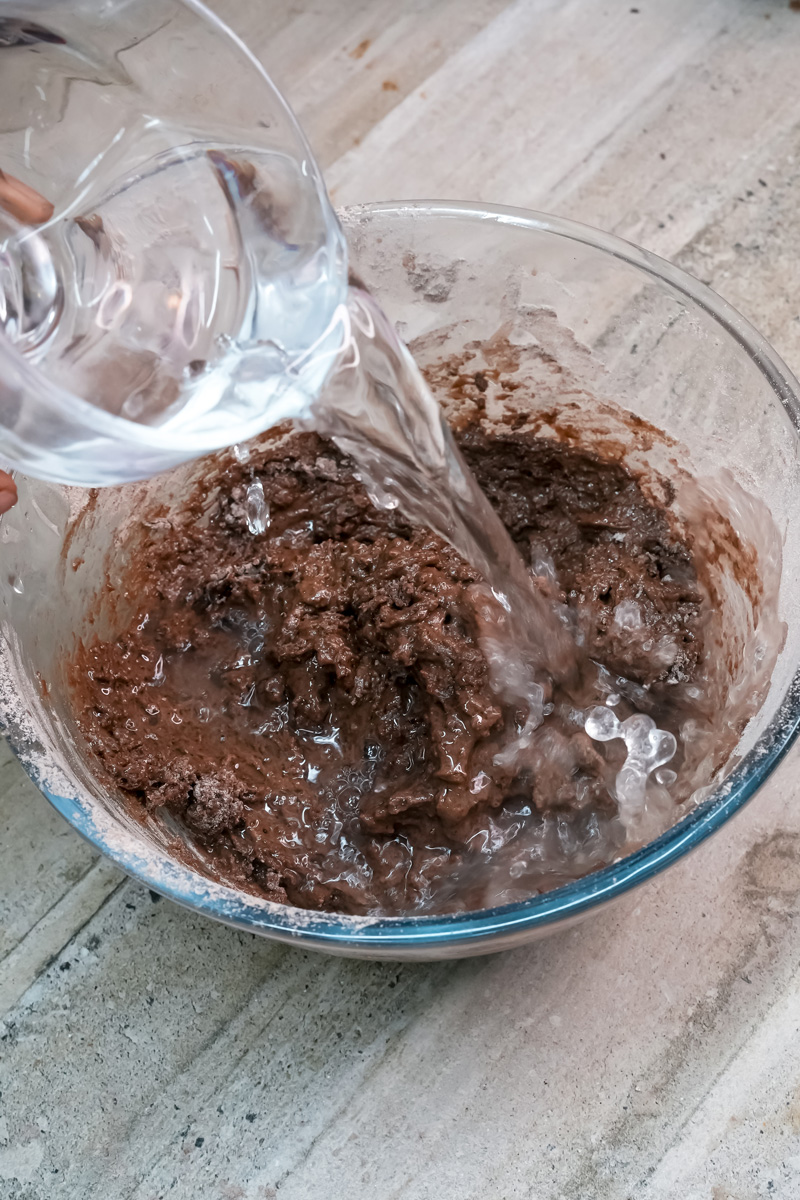
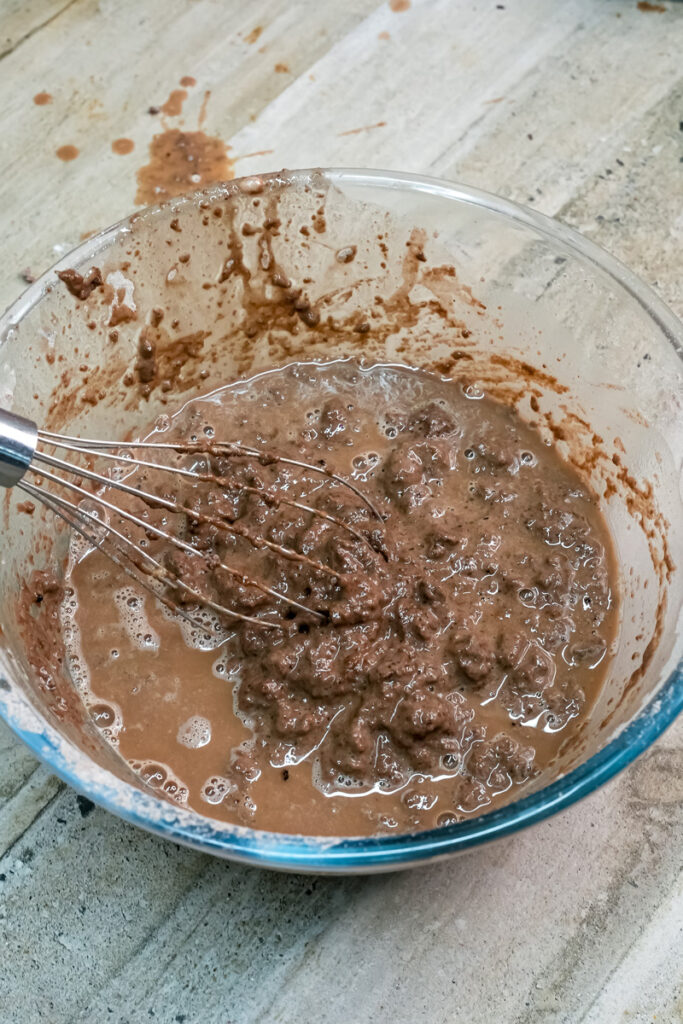
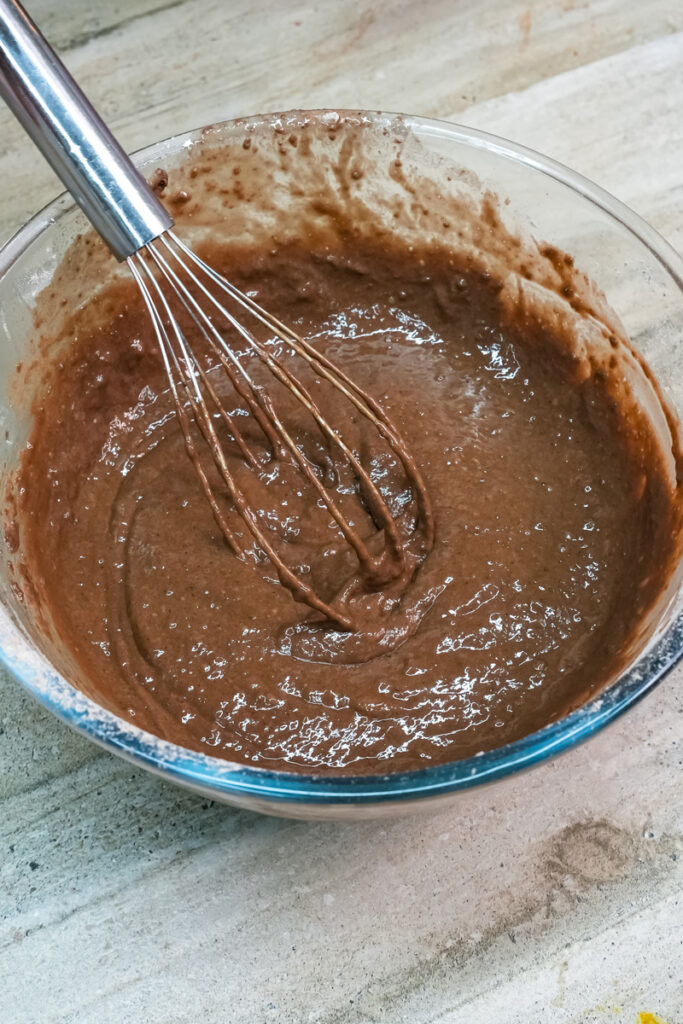
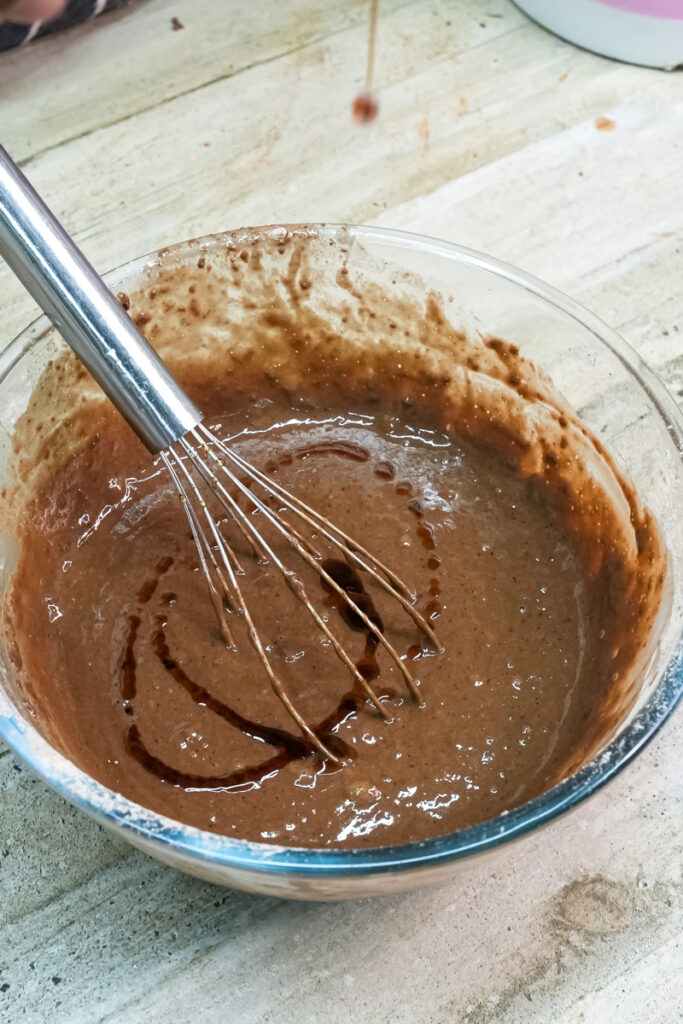
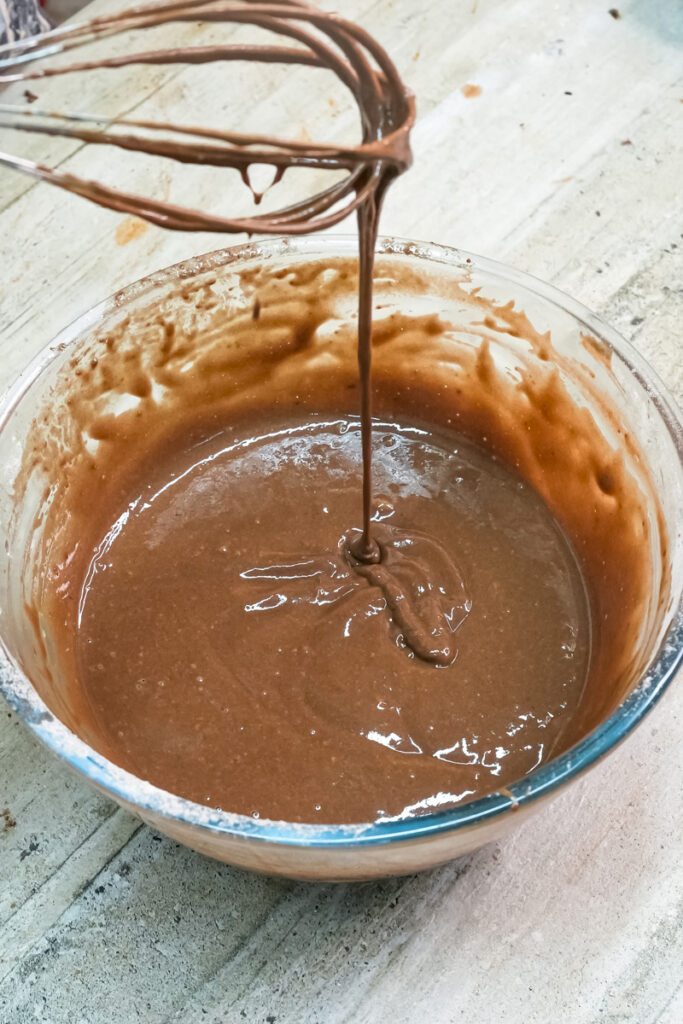
- Now for the secret step. Turn the mixer to low and carefully pour in the boiling water. The batter will look really thin, almost like chocolate milk. Don’t freak out! This is what you want. This thin batter is the key to a super moist cake. Give it one last mix on high for about a minute to make sure it’s smooth.
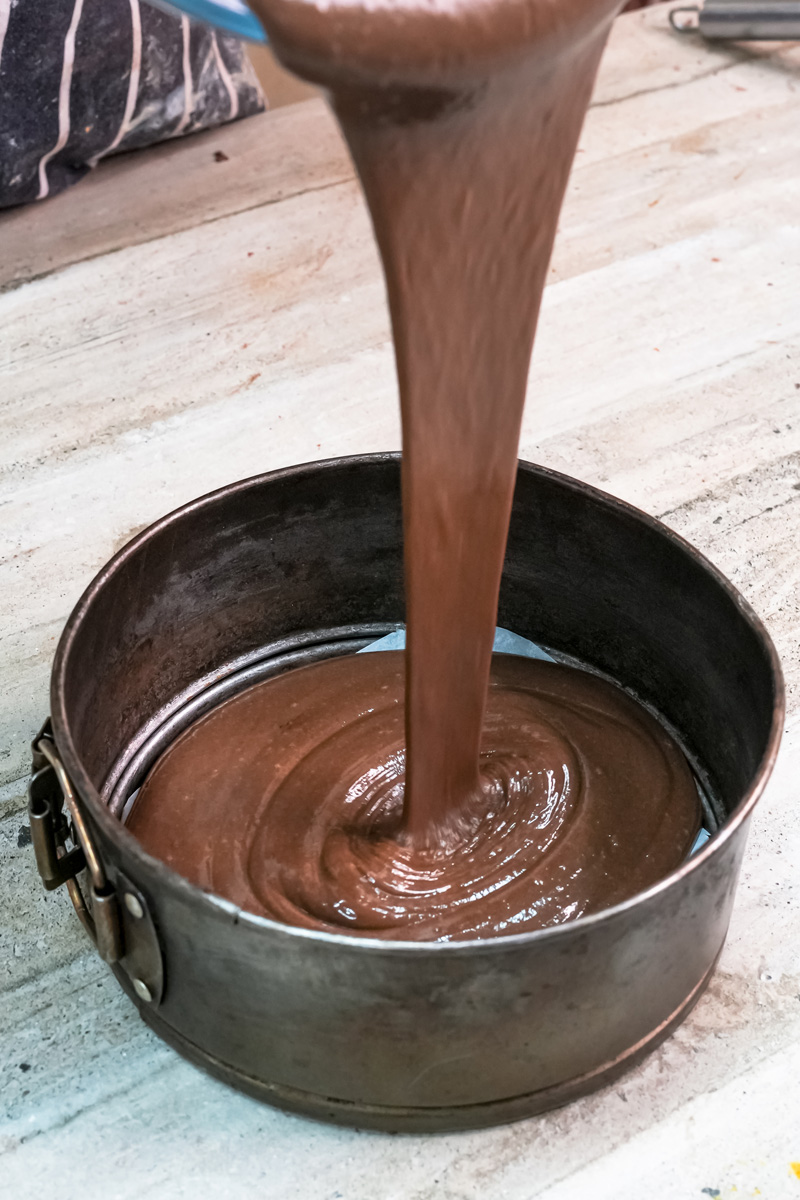
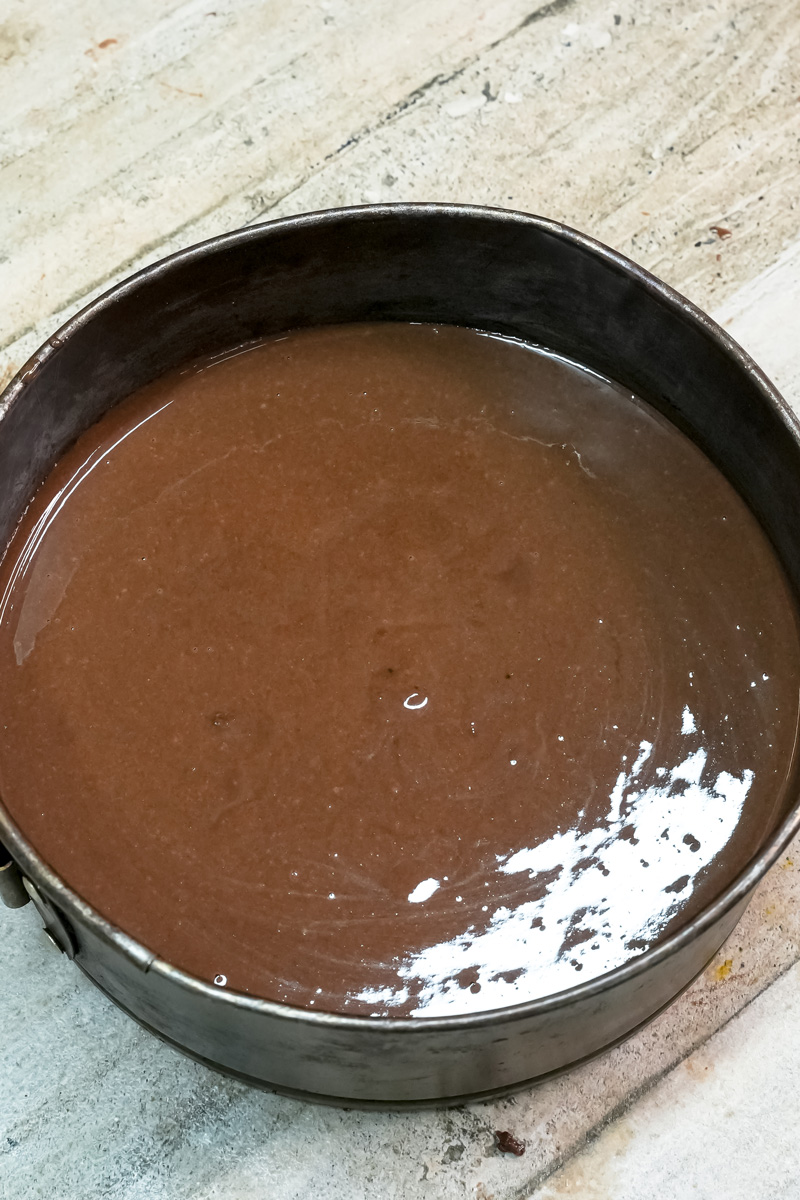
- Pour the batter evenly into your three prepared pans. Pop them in the oven and bake for 23-28 minutes. You’ll know they’re done when the sides of the cake start to pull away from the pan and a toothpick stuck in the center comes out clean.
- Let the cakes cool in the pans for about 10 minutes. Then, flip them out onto a wire rack to cool completely. And I mean completely. If you try to frost a warm cake, you’ll have a melted, soupy mess. Patience is key!
Part 2: Whip Up the Dreamy Nutella Frosting
While the cakes are cooling, let’s make the frosting.
- In your clean mixer bowl, beat the softened butter with the paddle attachment on high speed for a solid 4-5 minutes. This is the most important step for fluffy frosting. You’re whipping air into it, making it light and creamy. It should get pale in color.
- Add the Nutella and mix just until it’s combined. Scrape down the sides of the bowl.
- Add the powdered sugar in two parts, mixing on low so you don’t create a sugar storm in your kitchen.
- With the mixer still on low, slowly pour in the heavy cream and vanilla. Once it’s all in there, turn the speed up to high and let it whip for another 4-5 minutes. The result should be a smooth, fluffy, and totally irresistible frosting.
Part 3: Putting It All Together!
This is where the magic happens. If your cakes have a slight dome on top, use a serrated knife to gently slice it off to make a flat surface. (Pro tip: those scraps are the baker’s reward. Eat them!)
- First Layer: Place one cake layer on your serving plate or cake stand. Plop on about 121 cups of frosting and spread it out. Sprinkle on about half of your chopped, toasted hazelnuts.
- Second Layer & Crumb Coat: Add the second cake layer and do the same thing: frosting and hazelnuts. Place the final cake layer on top. Now for the crumb coat. This is a pro trick that makes your final cake look clean. Take a small amount of frosting and spread a very thin layer all over the cake. It doesn’t have to be pretty! This thin layer traps all the loose crumbs. Pop the cake in the fridge for 15-20 minutes to let it firm up.
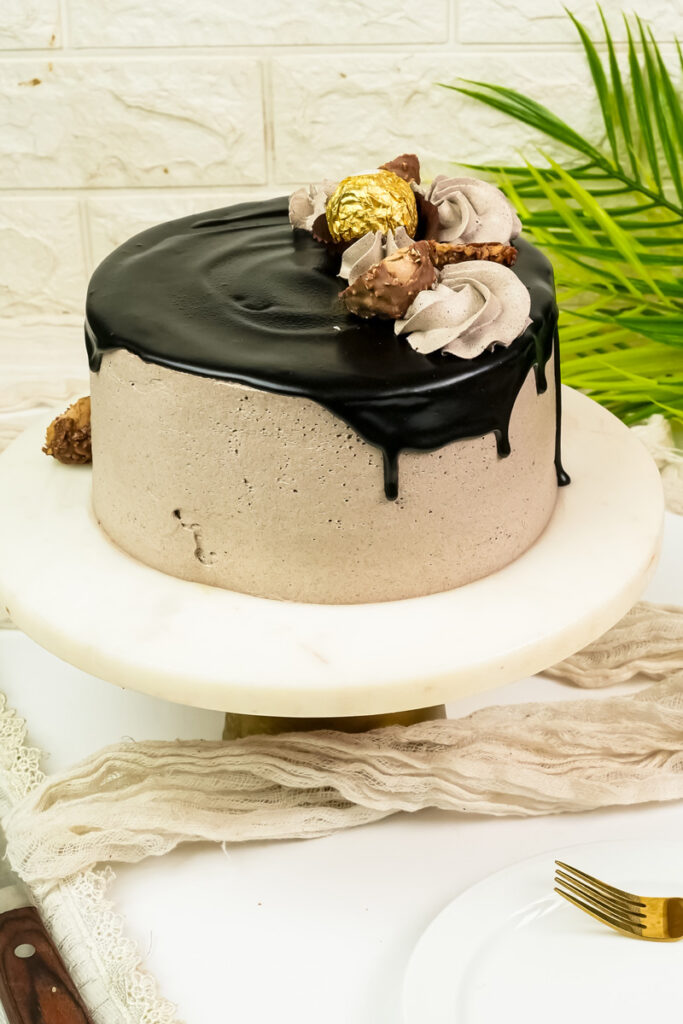
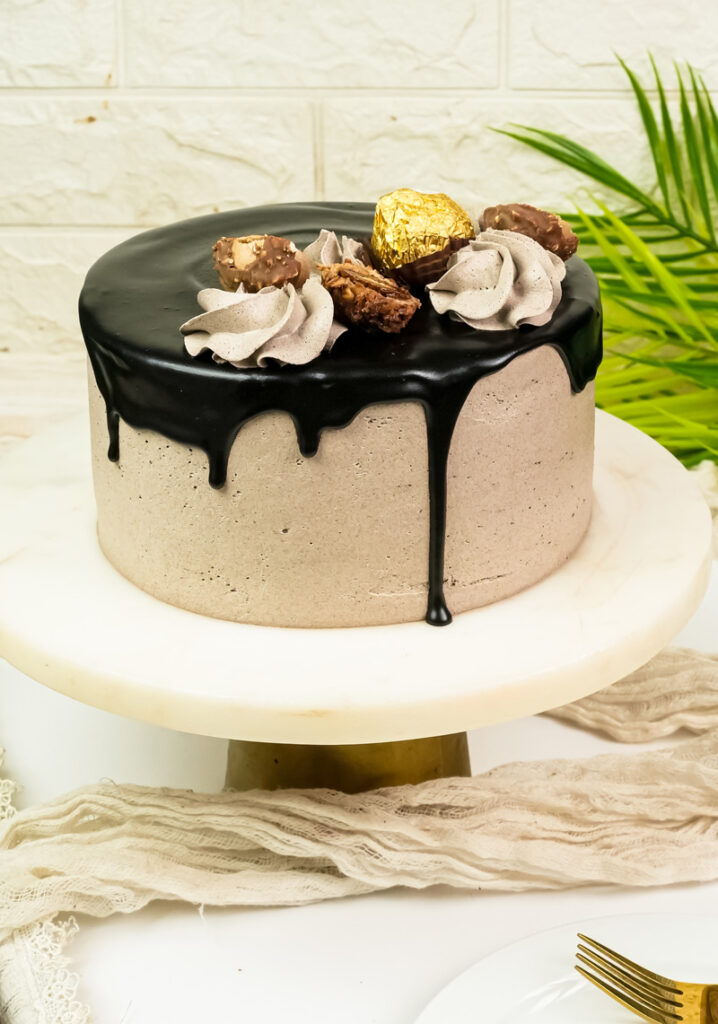
- Final Coat: Now that your crumb coat is set, cover the whole cake with the rest of the frosting. Use your offset spatula to make it as smooth or as swirly as you want.
- The Ganache Drip: Place your chopped chocolate in a heatproof bowl. Heat the heavy cream until it’s just simmering (you can do this in the microwave or on the stove), then pour it over the chocolate. Let it sit for 5 minutes—don’t touch it! Then, stir gently until it’s a smooth, shiny river of chocolate. Let it cool for 10-15 minutes. You want it thick enough to drip slowly, but still pourable.
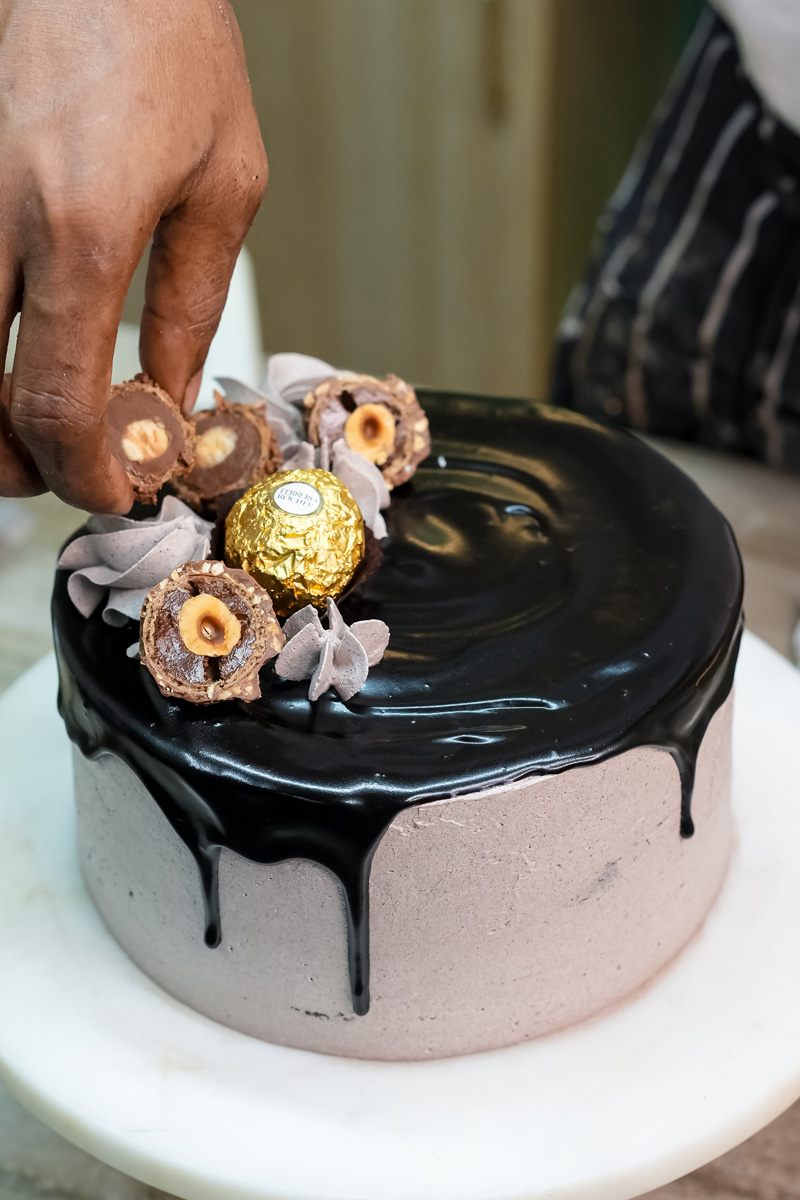
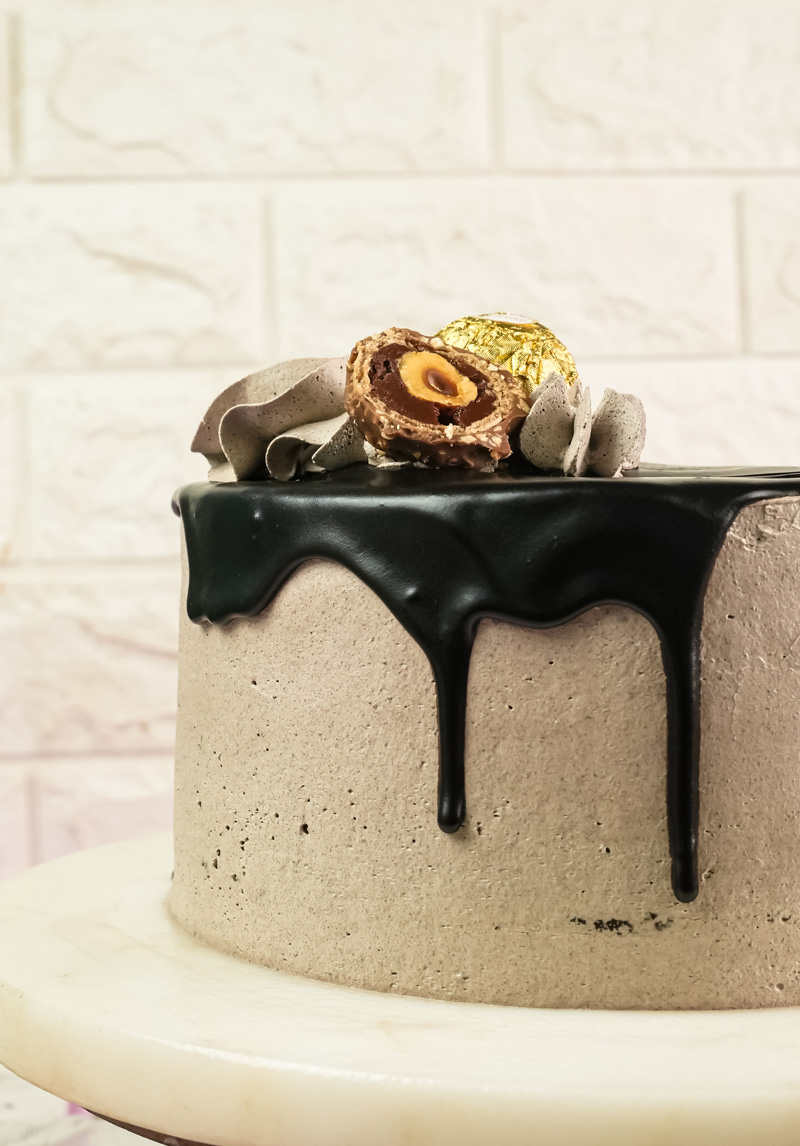
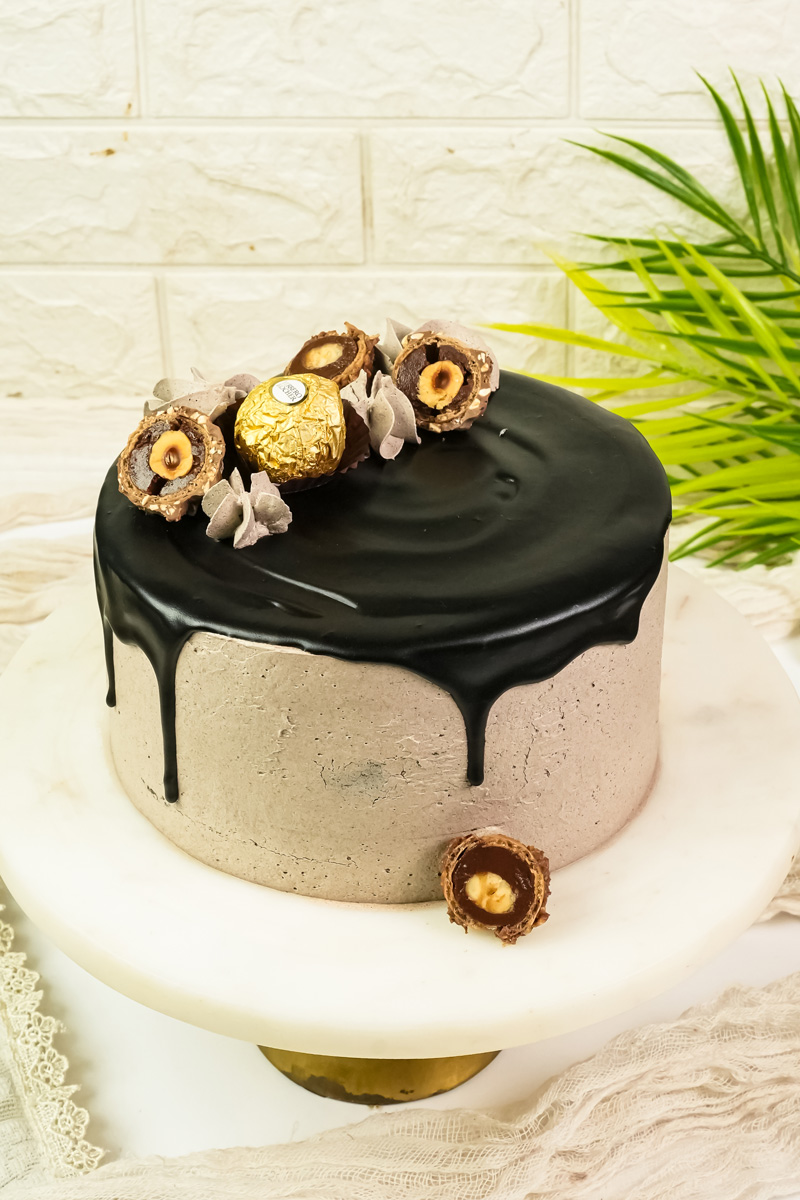
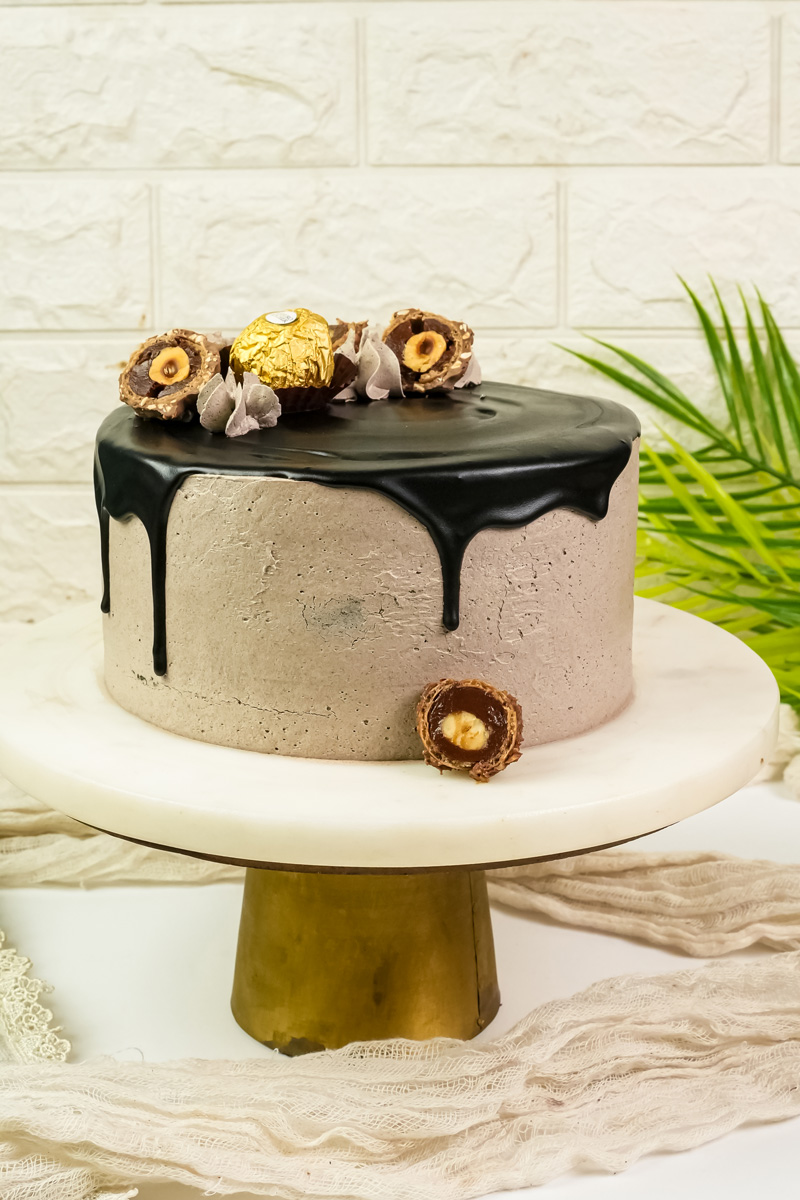
- Decoration: Carefully pour the cooled ganache over the center of your chilled cake. Use your spatula to gently push it toward the edges to create those beautiful drips. Put the frosting you set aside into your piping bag and pipe swirls on top. Finish by placing half a Ferrero Rocher candy on each swirl and sprinkling on any leftover chopped hazelnuts.
And… that’s it! Step back and admire your masterpiece.
Fun Ways to Mix It Up
One of the best things about baking is making a recipe your own. Here are a few ideas:
- Make it boozy: Add a tablespoon or two of Frangelico (a hazelnut liqueur) to your buttercream for an extra kick of flavor.
- Add more crunch: Some people love adding a layer of crushed wafer cookies or even crispy rice cereal between the cake layers for an even more authentic texture.
- Make it gluten-free: You can use a good 1-to-1 gluten-free baking flour instead of all-purpose flour.
- The “Everyday” Version: Don’t have time for a three-layer spectacle? Bake the cake in a 9×13-inch pan, top it with one layer of frosting, and sprinkle on the nuts. All the flavor, half the work!
How to Serve and Store Your Cake
You did it! Now, let’s make sure you enjoy every last bite.
This cake tastes best when served at a cool room temperature. If you’ve had it in the fridge, let it sit out for at least 30 minutes before serving. This lets the buttercream soften up and the flavors really shine. It’s fantastic with a strong cup of coffee.
To store leftovers, keep the cake in an airtight container in the fridge for up to 4 days.
This cake also freezes beautifully! You can wrap individual slices in plastic wrap and foil, or freeze the whole thing. Just let it thaw in the fridge overnight. It’s a great way to save a piece of the celebration for a rainy day.
I really hope you have fun making this cake. Happy baking!
Ferrero Rocher Cake
Turn the iconic gold-wrapped candy into a showstopping dessert! This recipe creates a stunning three-layer cake with incredibly moist chocolate layers, fluffy Nutella buttercream, and that signature hazelnut crunch in every single bite. It looks like it came from a fancy bakery, but it’s surprisingly simple to make at home.
- Prep Time: 1 hour
- Cook Time: 28 minutes
- Total Time: 3 hours 30 minutes (includes cooling & assembly)
- Yield: 14 slices 1x
- Category: Dessert
- Cuisine: Italian-Inspired
Ingredients
For the Chocolate Cake:
- 2 cups all-purpose flour
- 2 cups granulated sugar
- 43 cup unsweetened cocoa powder
- 2 tsp baking powder
- 121 tsp baking soda
- 1 tsp salt
- 1 tsp espresso powder
- 1 cup milk, room temperature
- 21 cup vegetable oil
- 2 large eggs, room temperature
- 1 tsp vanilla extract
- 1 cup boiling water
For the Nutella Buttercream:
- 2 cups unsalted butter, softened
- 1 cup Nutella
- 4 cups powdered sugar
- 31 cup heavy whipping cream
- 1 tsp vanilla extract
For the Ganache & Garnish:
- 4 oz semi-sweet chocolate, chopped
- 21 cup heavy whipping cream
- 1 cup hazelnuts, toasted and chopped
- 8−10 Ferrero Rocher candies, halved
Instructions
Make the Cake Layers:
- Prep: Preheat oven to 350∘F (177∘C). Grease three 8-inch round pans with shortening and dust with cocoa powder.
- Mix Dry: In a large bowl, whisk together flour, sugar, cocoa powder, baking powder, baking soda, salt, and espresso powder.
- Mix Wet: Add milk, oil, eggs, and vanilla. Mix on low speed until just combined. Carefully pour in the boiling water and mix on high for 1 minute until smooth. The batter will be thin.
- Bake: Divide batter evenly between the pans. Bake for 23-28 minutes, or until a toothpick inserted in the center comes out clean.
- Cool: Let the cakes cool in the pans for 10 minutes, then turn them out onto a wire rack to cool completely.
Whip the Buttercream:
- Whip Butter: In a stand mixer, beat the softened butter on high speed for 4-5 minutes until pale and fluffy.
- Combine: Add Nutella and mix until just combined. Add powdered sugar and mix on low.
- Finish: Slowly stream in the heavy cream and vanilla. Whip on high for another 4-5 minutes until light and spreadable.
Assemble the Cake:
- Level & Layer: If needed, level the cake tops with a serrated knife. Place the first layer on a plate, top with 121 cups of frosting, and sprinkle with half the chopped hazelnuts. Repeat with the second layer.
- Crumb Coat: Place the third layer on top. Apply a very thin layer of frosting all over the cake to trap crumbs. Chill in the fridge for 20 minutes.
- Final Frosting: Cover the chilled cake with the remaining buttercream. Reserve about 1 cup for decoration.
- Ganache Drip: Place chopped chocolate in a bowl. Heat heavy cream until simmering and pour over chocolate. Let sit for 5 minutes, then stir until smooth. Let it cool and thicken for 10-15 minutes.
- Decorate: Pour the cooled ganache over the top, nudging it over the sides to create drips. Pipe swirls with the reserved frosting, top with Ferrero Rocher halves, and sprinkle with leftover hazelnuts.
Notes
- Tips & Tricks: Toasting the hazelnuts is a must for the best flavor! Never try to frost a warm cake—it will melt. The crumb coat is the secret to a clean, professional finish.
- Serving Suggestion: This cake is incredible! For the best taste and texture, let it sit at room temperature for 30 minutes before serving. It pairs beautifully with a hot cup of coffee.
- Storage: Keep leftovers in an airtight container in the refrigerator for up to 4 days. You can also freeze individual slices wrapped tightly for up to a month. Thaw in the fridge overnight.