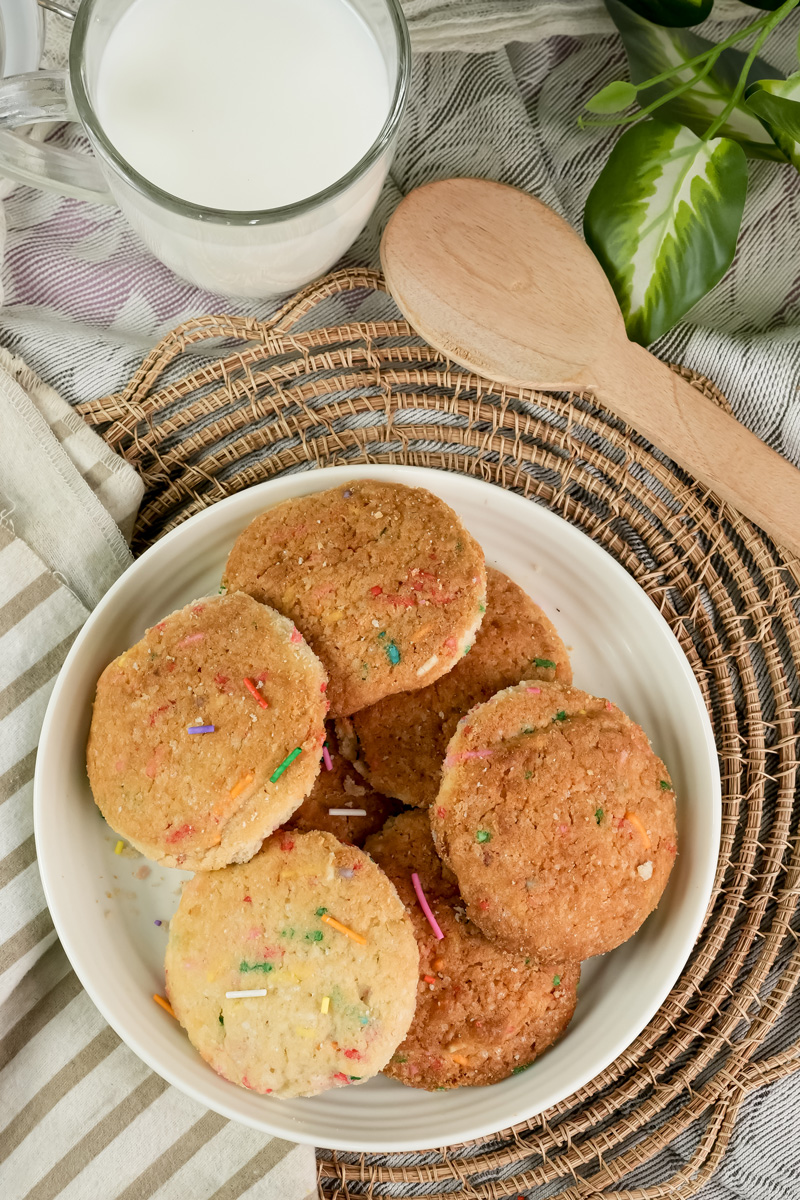
Hey, my fellow bakers! Are you ready for some sprinkles and pure nostalgia? Today, we’re making what I truly believe are the best funfetti cookies. It’s more than a recipe; it’s a celebration in a cookie!
Funfetti has a fascinating history. It first showed up in the 1980s as a Pillsbury cake mix. It was a total game-changer, and for good reason. Who doesn’t love sprinkles baked right into the batter? It’s a kaleidoscope of color in every single bite.
My version takes that classic idea and gives it a little upgrade. The goal? A cookie that’s soft, chewy, and loaded with flavor. I’ve spent years perfecting this recipe, trying to find the sweet spot between using a convenient cake mix and getting that rich, homemade taste we all love.
The good news? This is your guide to creating your very own bites of happiness.
Recipe Breakdown
This recipe is designed to be super easy. We’re using a boxed cake mix as a shortcut, but we’ll “doctor it up” with a few simple ingredients to make it taste completely from scratch.
- Prep and Cook Time: This is a quick one! You’re looking at about 15 minutes of prep and only 11 minutes in the oven. That means you can go from craving cookies to eating them in less than an hour.
- Servings: You’ll get about 16 cookies, which is the perfect amount for a small get-together or just to have on hand for a snack. The recipe is also easy to scale up or down.
Here’s a simple table to help you out:
| Batch Size | Butter | Sugar | Eggs | Cake Mix | Flour | Servings |
| Single | 1/2 cup | 1/2 cup | 2 | 1 box | 3/4 cup | 16 cookies |
| Double | 1 cup | 1 cup | 4 | 2 boxes | 1 1/2 cups | 32 cookies |
- Difficulty: I’d call this a beginner-friendly recipe. If you can use a mixer, you can make these cookies. It’s a great way to learn some basic baking skills without any of the stress.
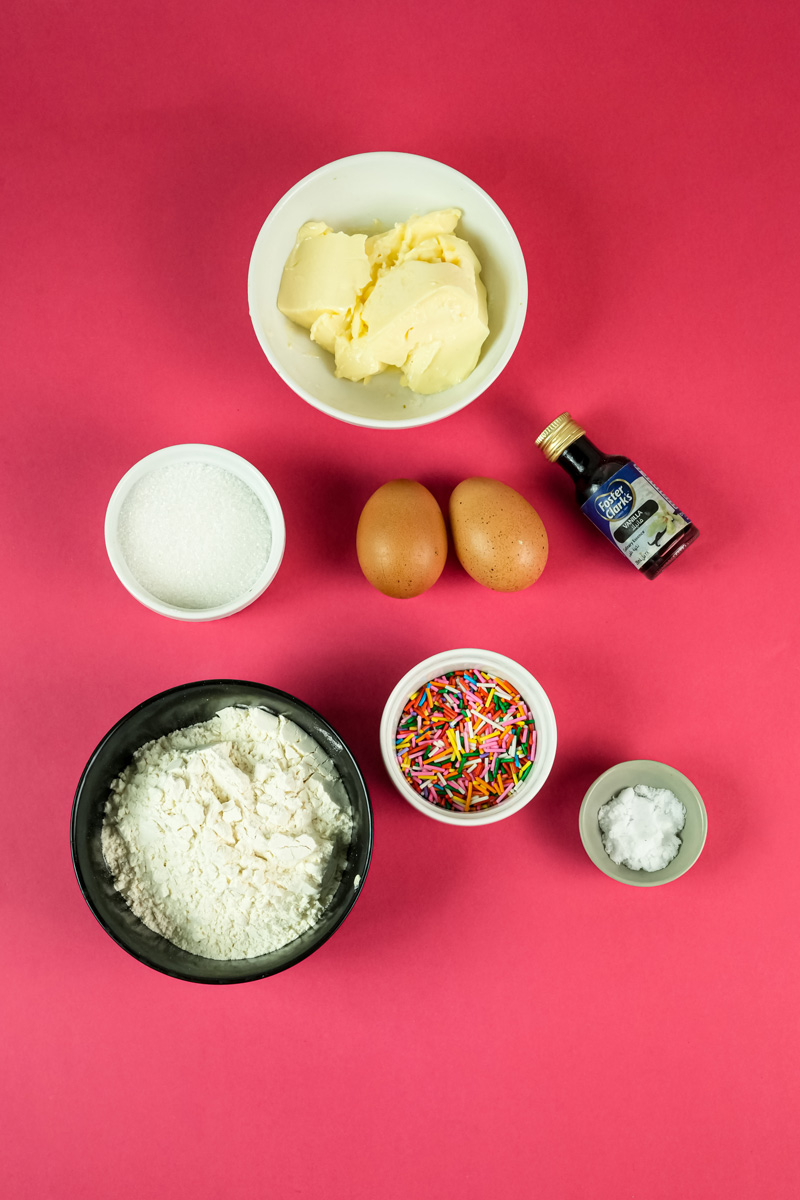
What You’ll Need
This isn’t just a list of ingredients. It’s the cast of characters for your own personal baking show. Every ingredient plays a crucial role in creating the perfect cookie.
The Main Stuff:
- Box of Sprinkle Cake Mix: This is the base of our cookies. It gives us that classic birthday cake flavor and, of course, all the sprinkles.
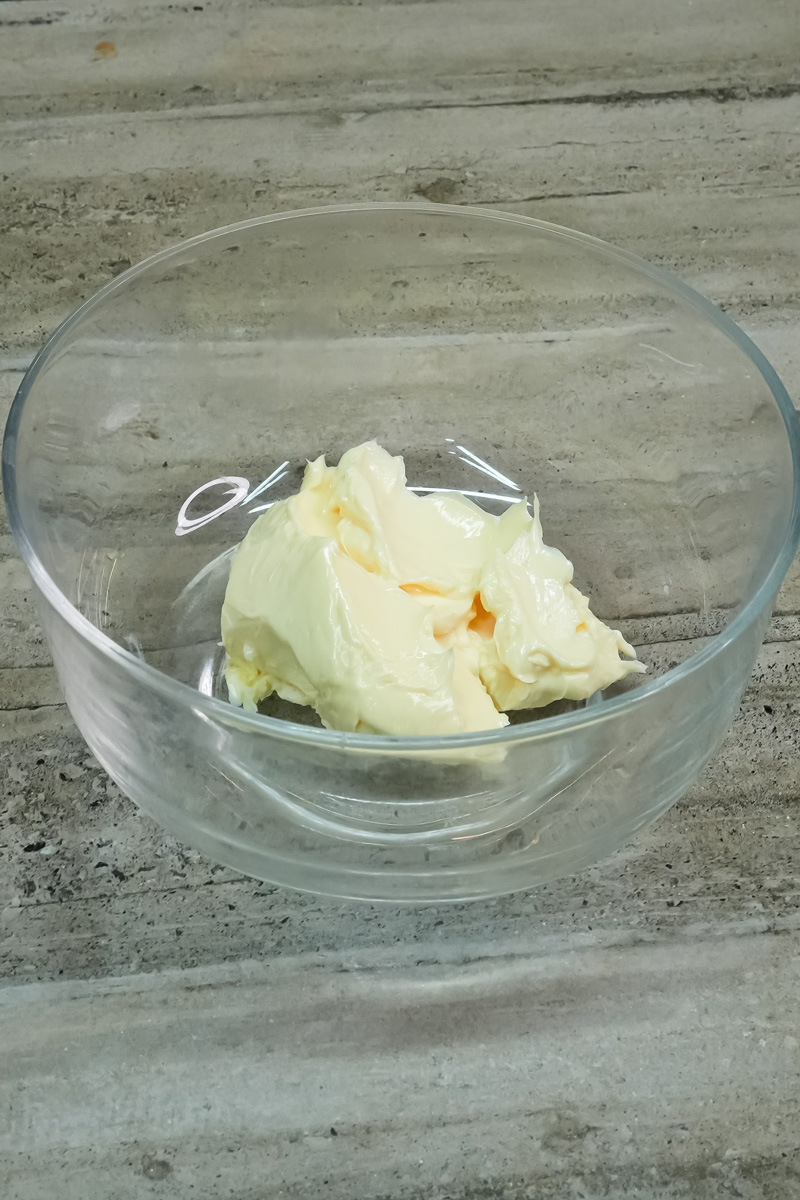
- 1/2 cup Softened Butter: Use good quality butter here. It’s a main flavor note, so don’t skimp!
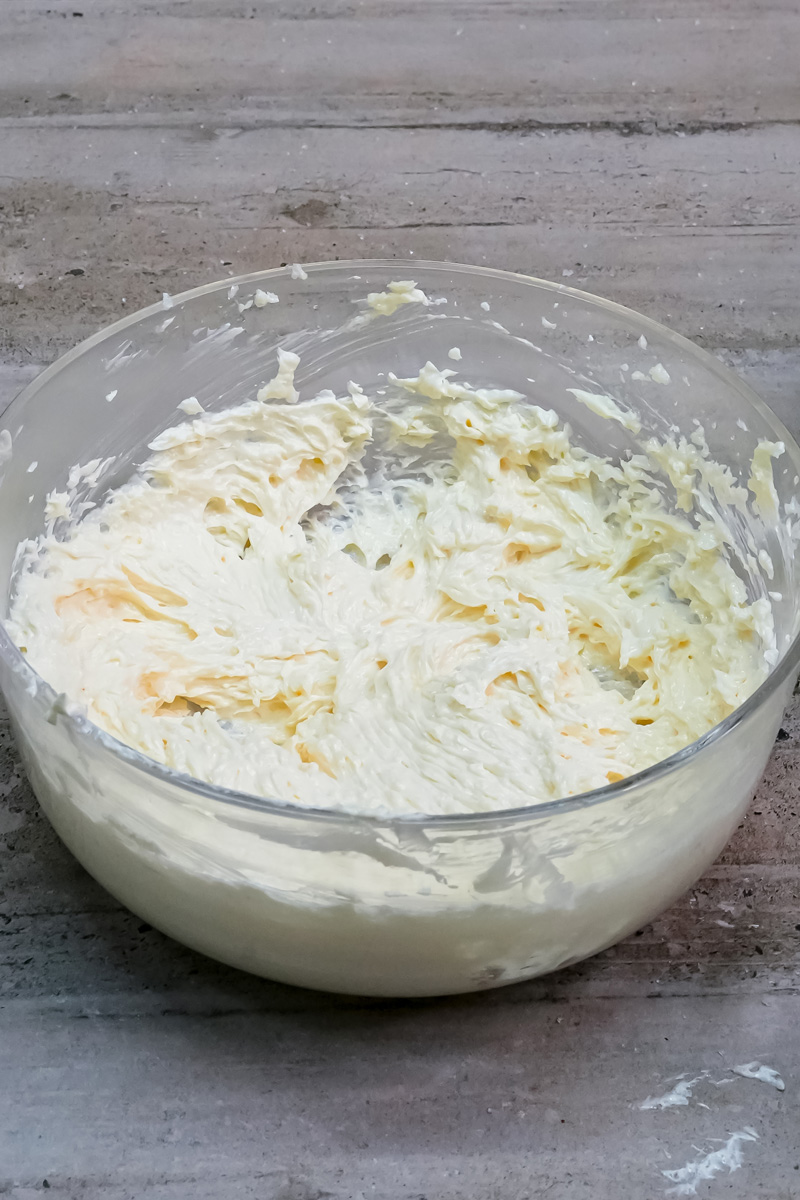
- 1/2 cup Granulated Sugar: When you cream this with the butter, it creates a light and airy base.
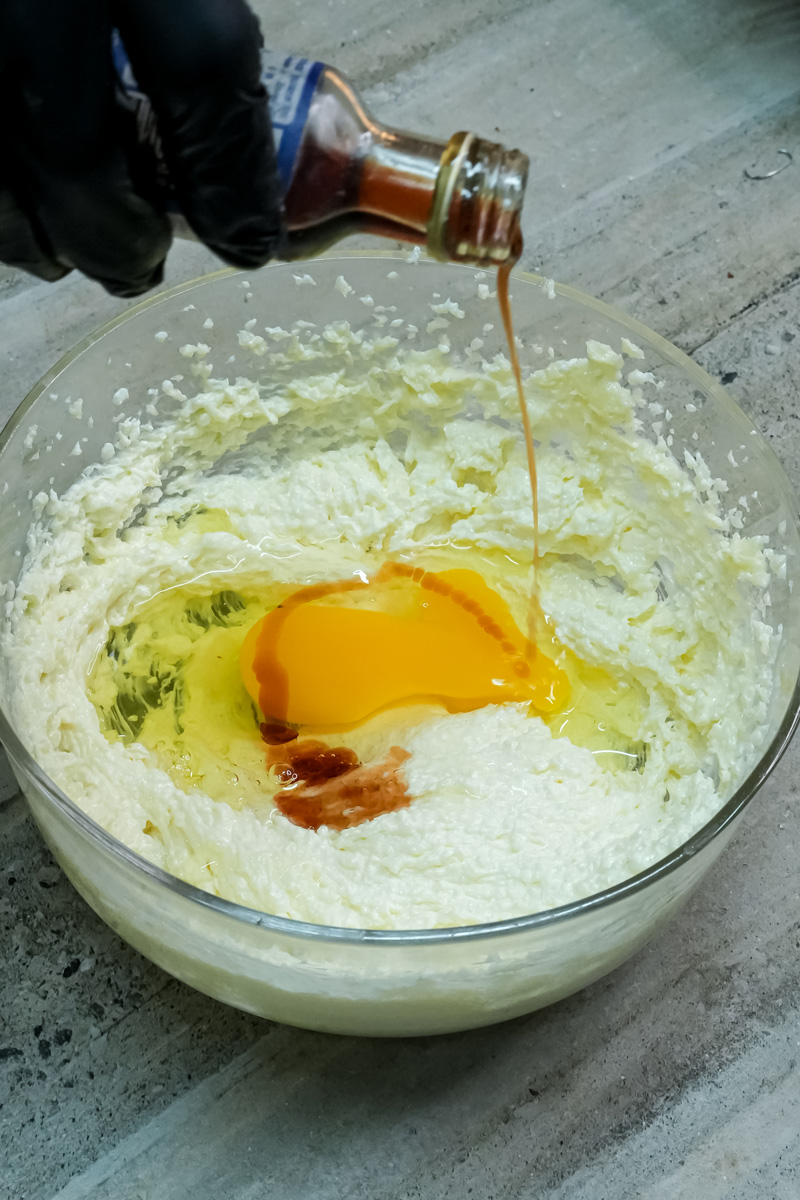
- 2 Eggs: They bind everything together and make the cookies extra rich.
- 1 tsp Vanilla Extract: This just enhances that great cake batter flavor.
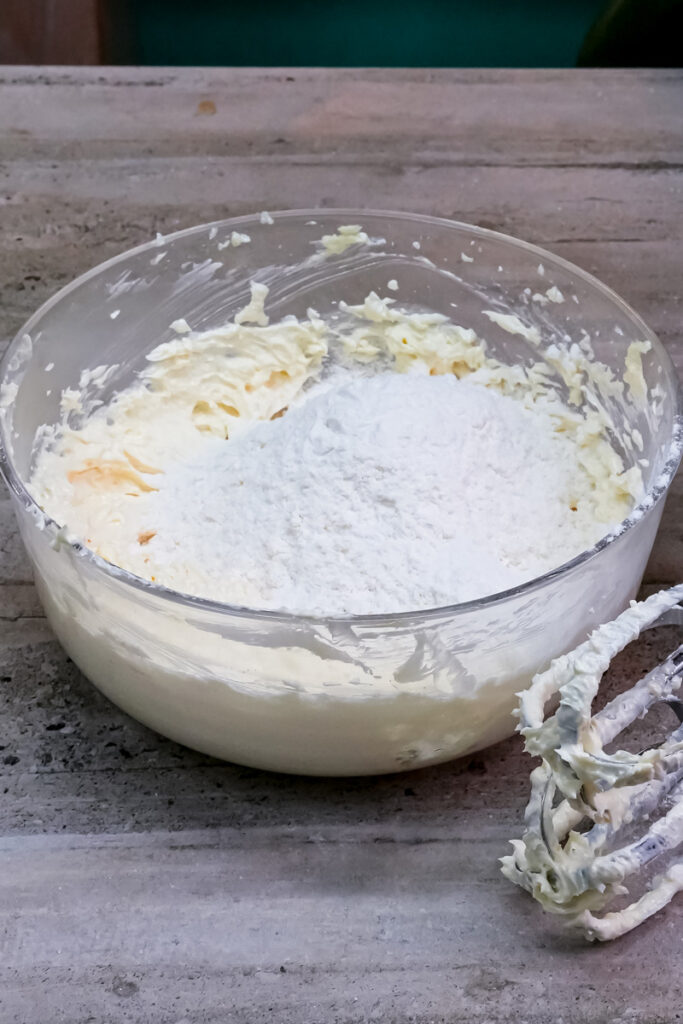
- 3/4 cup All-Purpose Flour: This is what gives the cookies their structure. It prevents them from spreading too much and turns them from a cake-like substance into a perfectly chewy cookie.
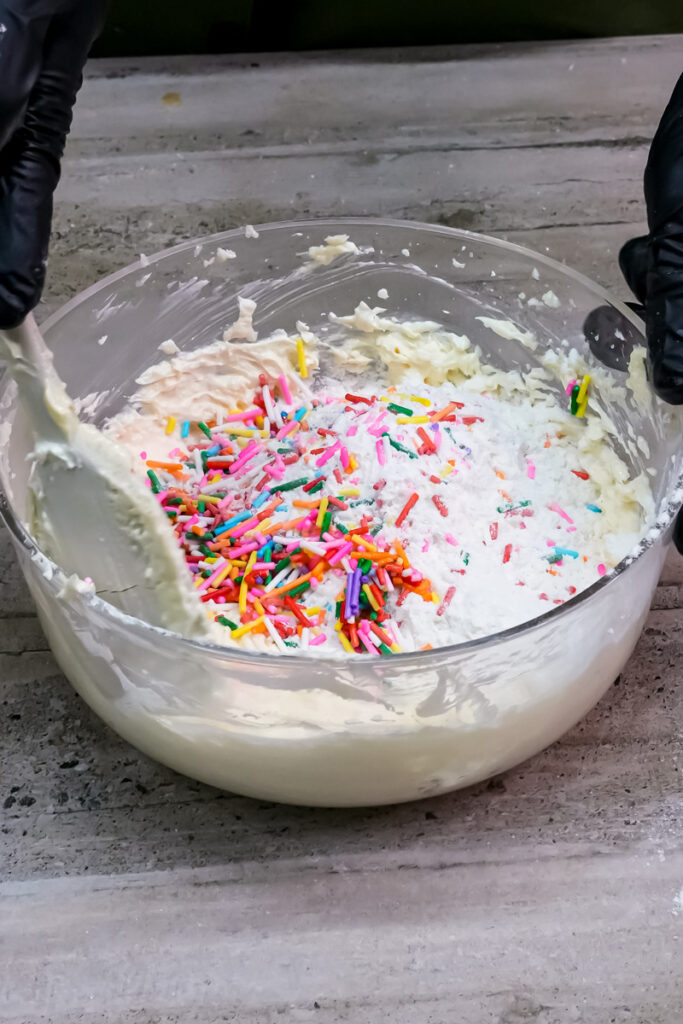
A quick tip: Have some extra sprinkles on hand! You can press them into the tops of the dough balls before you bake for a super festive look.
Step-by-Step Instructions
Let’s get baking! I’ll walk you through each step, just like we’re in the kitchen together.
1. Prep Your Pan
First, preheat your oven to 350°F (175°C) and line a baking sheet with parchment paper. This simple step makes sure your cookies don’t stick and makes cleanup a breeze.
2. Cream the Butter and Sugar
In the bowl of a stand mixer, add your softened butter and granulated sugar. Turn on your mixer and let them cream together for about a minute. You’ll see the mixture change from grainy to light, pale, and fluffy. This is a crucial first step! It adds air to the dough, which is how you get those wonderfully soft cookies.
3. Add the Wet Ingredients
Next, scrape down the sides of the bowl to make sure all that buttery goodness is mixed in. Now, add your two eggs and the vanilla extract. Mix on low speed until everything is just combined. You want a smooth, cohesive mixture. Don’t overmix here! We don’t want to develop too much gluten.
4. Mix in the Dry Ingredients
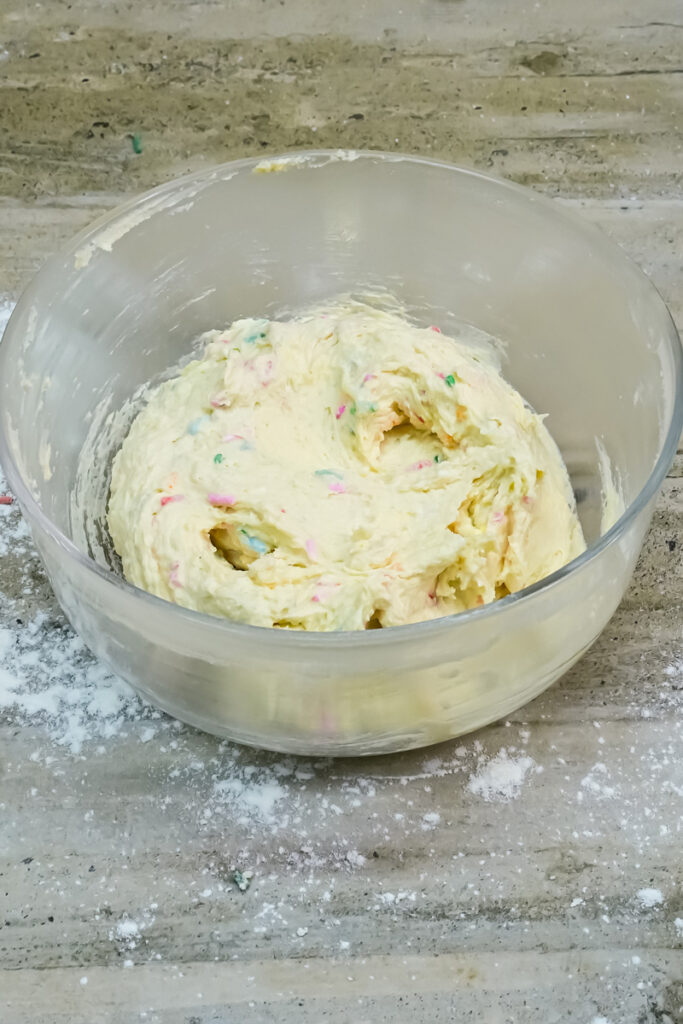
Time for the stars of the show! Add both the cake mix and the all-purpose flour to the bowl. Mix on a low speed until the dough comes together. You’ll see the dry ingredients disappear into the creamy base, and the sprinkles will start to pop with color. The dough should be soft and a little sticky, but firm enough to hold its shape.

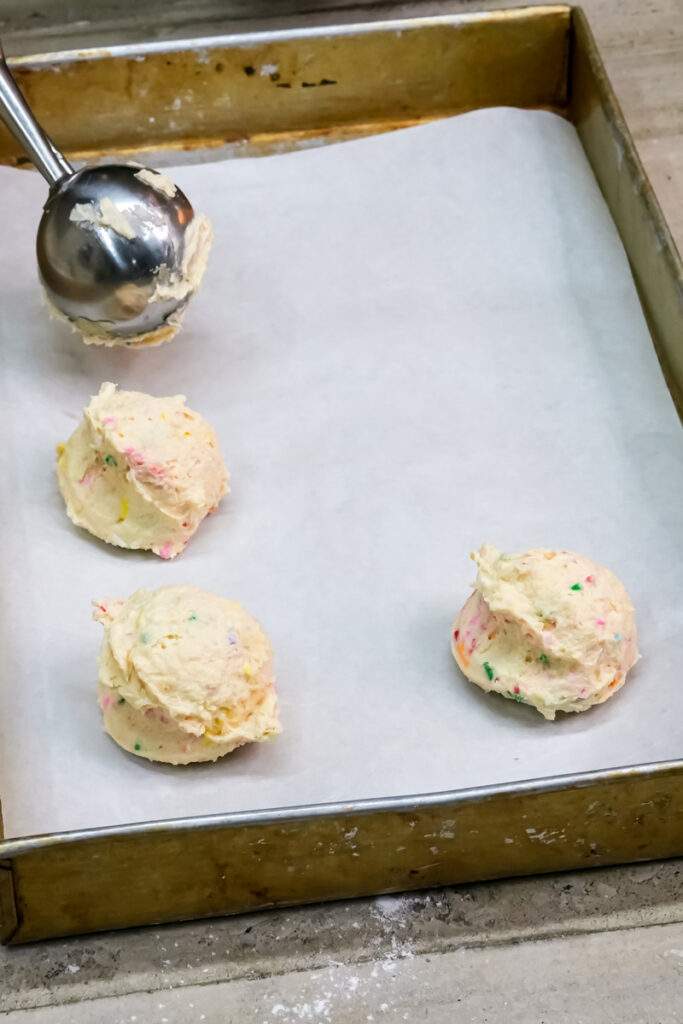
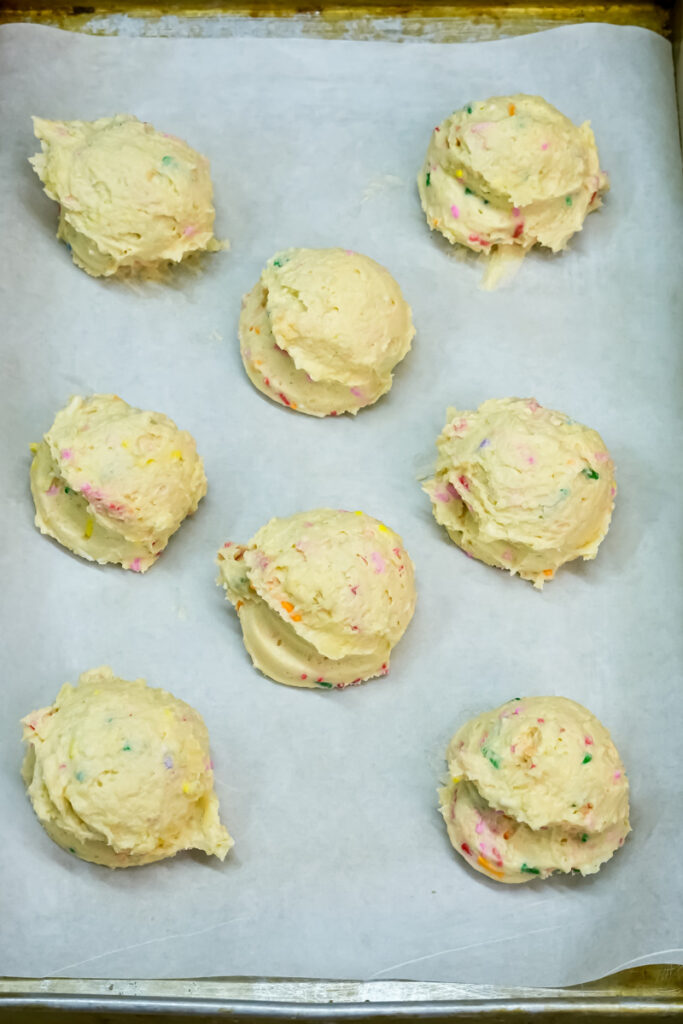
5. Scoop and Bake
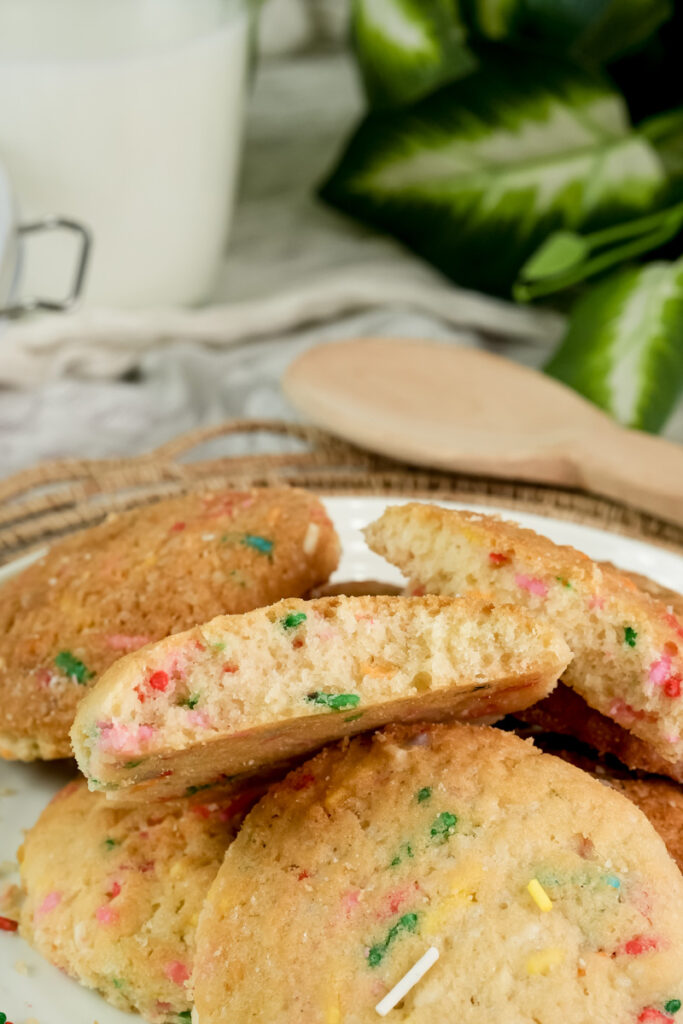
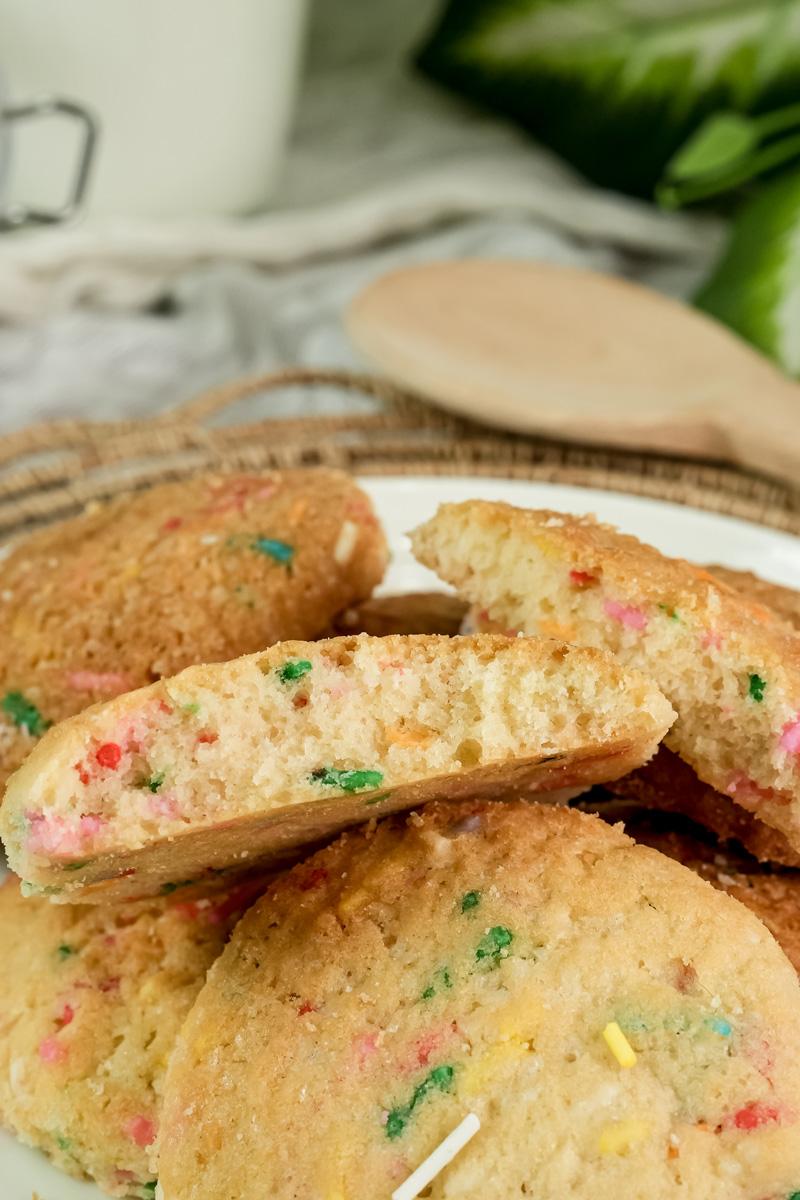
Use a cookie scoop (I use a 2-tablespoon scoop for perfect cookies every time) to portion out the dough. Place the balls on your baking sheet, leaving a little space between them—they will spread slightly. Bake for 10-12 minutes. You’ll know they’re ready when the edges are set and a light golden brown, but the centers still look soft and a little puffy. This is the secret to a chewy cookie!
6. The Final Touch
The cookies will keep cooking on the hot pan as they cool. So, let them rest on the baking sheet for 3-5 minutes before moving them to a wire rack. This lets them firm up without breaking.

Tips, Tricks, and Variations
This recipe is a great blank canvas for your creativity.
For something extra: Want to make them even better? Mix in some white chocolate chips or M&Ms. For a truly unforgettable cookie, top them with a simple glaze or a swirl of buttercream frosting.
Dietary swaps: For a gluten-free version, just use a gluten-free cake mix and flour blend.
Make-ahead dough: The dough can be stored in an airtight container in the fridge for up to 3 days. This is perfect for those times when a cookie craving hits out of nowhere!
Serving and Storing
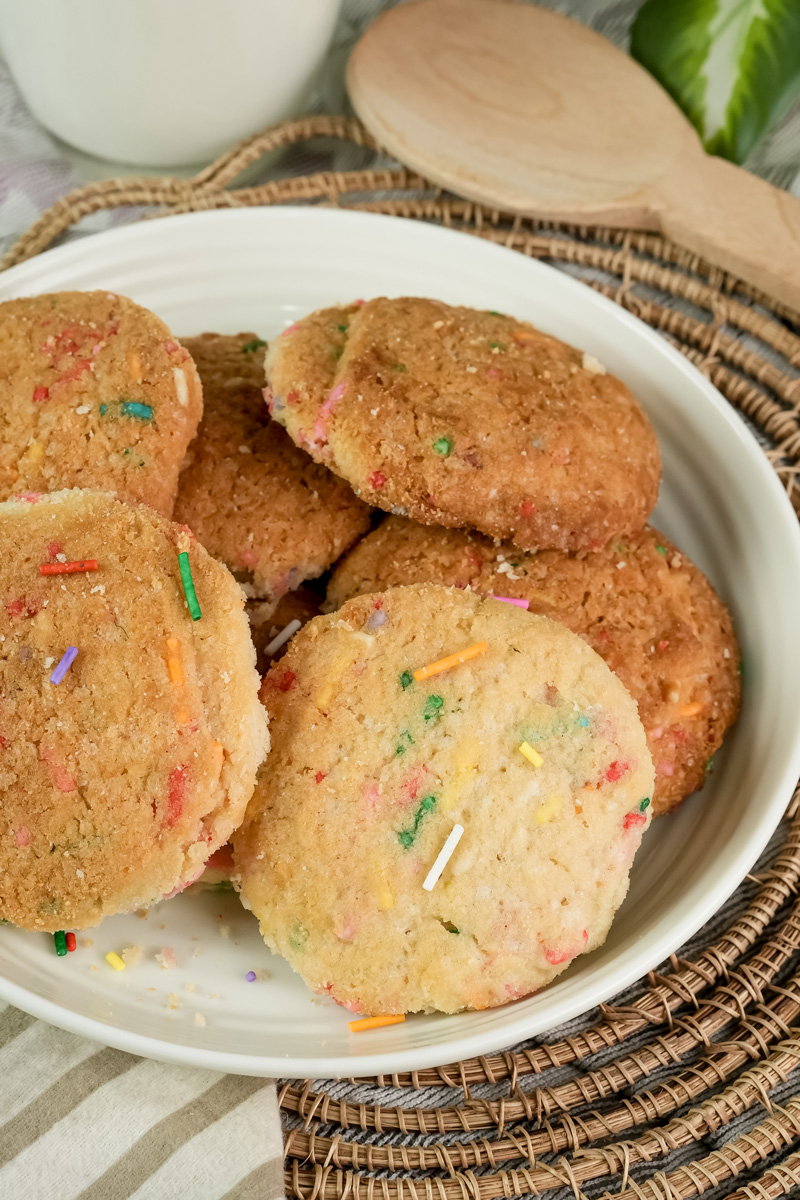
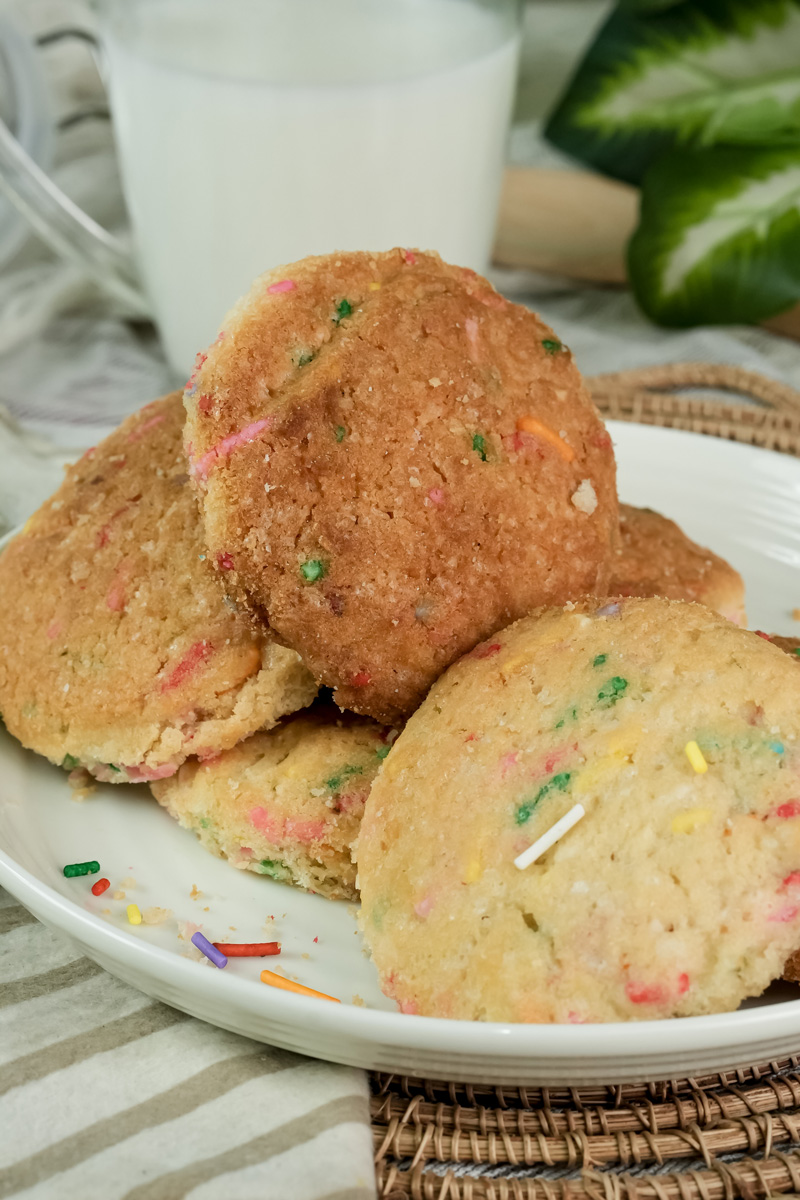
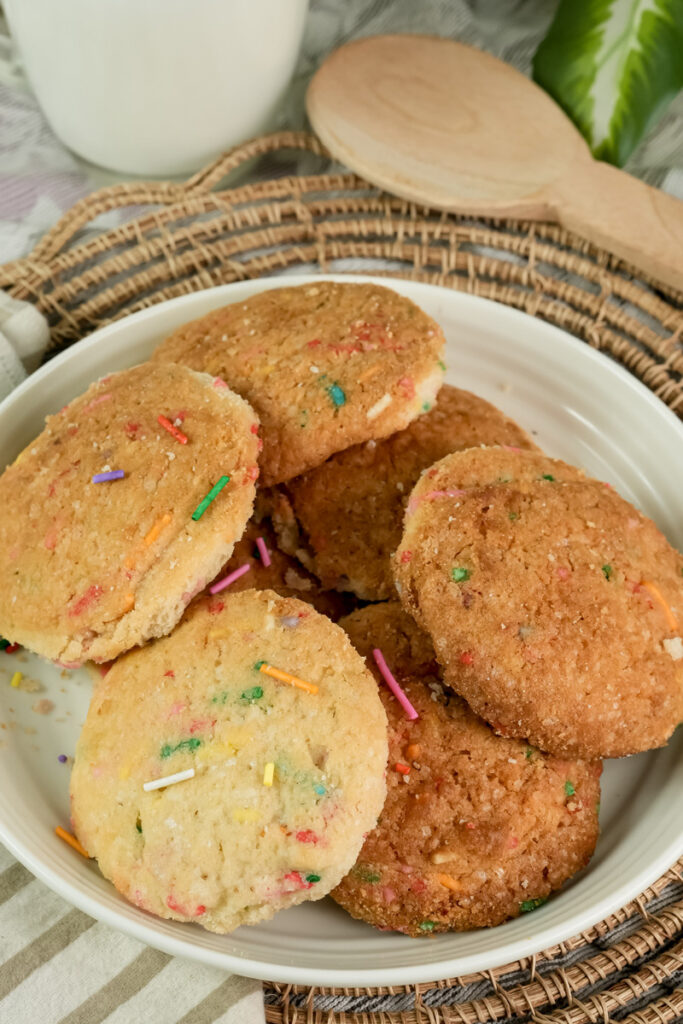
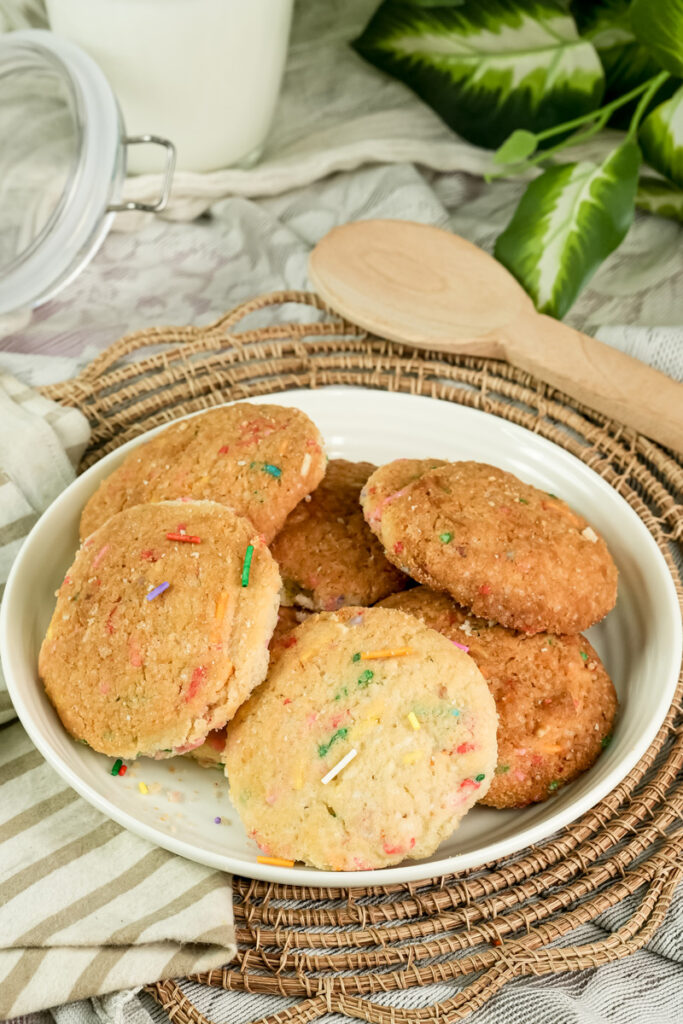
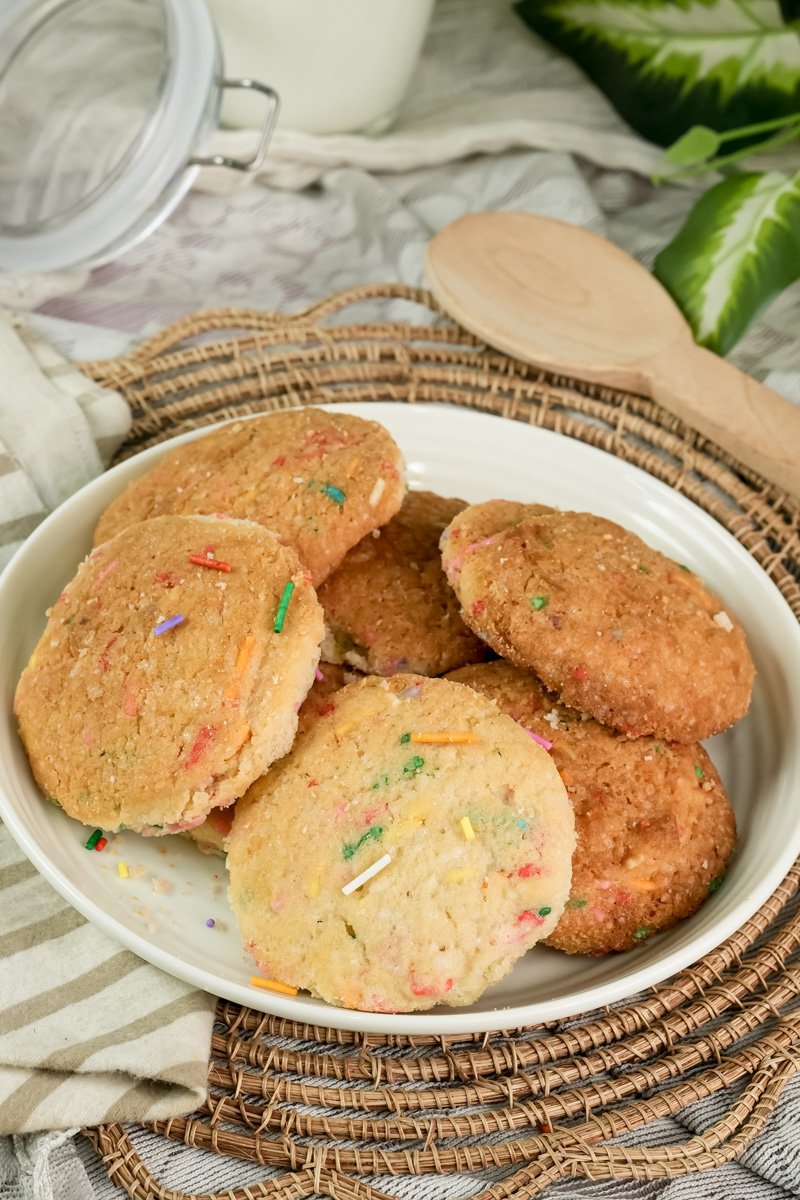
Serving: These cookies look great on their own, but you can arrange them on a colorful plate to show off their festive look. Pair them with a cold glass of milk for a dose of pure nostalgia.
Storing: Once they’re completely cool, store your cookies in an airtight container at room temperature. They’ll stay soft for up to 3 days.
Freezing: You can freeze the baked cookies for up to 3 months. Or, for a fresh-from-the-oven feel, you can freeze the raw dough balls and bake them straight from the freezer—just add a few extra minutes to the bake time. This is a fantastic way to always have freshly baked cookies on demand!
PrintFunfetti Cookies

These funfetti cookies are like a party in your mouth! Made with a simple shortcut—a box of funfetti cake mix—they taste completely homemade. The result is a soft, chewy cookie bursting with classic birthday cake flavor and sprinkles in every bite. They’re super easy to make and perfect for any occasion.
- Prep Time: 15 mins
- Cook Time: 11 mins
- Total Time: 26 mins
- Yield: 16 cookies 1x
- Category: Dessert
- Cuisine: American
Ingredients
- 1 box (16.5 oz) sprinkle cake mix
- 1/2 cup butter, softened
- 1/2 cup granulated sugar
- 2 eggs, room temperature
- 1 tsp vanilla extract
- 3/4 cup all-purpose flour
- Extra sprinkles for topping (optional)
Instructions
- Prep the Oven: Preheat your oven to 350°F (175°C) and line a baking sheet with parchment paper.
- Cream the Base: In a large bowl, use a stand mixer or hand mixer to beat the softened butter and granulated sugar together for about a minute, until the mixture is light and fluffy.
- Mix in Wet Ingredients: Scrape down the sides of the bowl. Add the room-temperature eggs and vanilla extract. Mix on low speed until everything is just combined.
- Add Dry Ingredients: Pour in the cake mix and all-purpose flour. Mix on low until the dough comes together. Be careful not to overmix!
- Scoop and Shape: Use a 2-tablespoon cookie scoop to portion out the dough. Place the balls on your prepared baking sheet, leaving some space between them. For extra sparkle, gently press a few extra sprinkles into the tops of each dough ball.
- Bake: Bake for 10–12 minutes. The cookies are done when the edges look set and a light golden brown, but the centers still look soft.
- Cool: Let the cookies cool on the baking sheet for 3-5 minutes before moving them to a wire rack. They will continue to set as they cool.
Notes
- Serving: These cookies are amazing on their own, or you can serve them with a cold glass of milk for the ultimate nostalgic treat.
- Storage: Once fully cooled, store your cookies in an airtight container at room temperature for up to 3 days. They stay perfectly soft and chewy!
- Freezing: You can freeze the baked cookies in a freezer-safe bag for up to 3 months. You can also freeze the raw dough balls and bake them straight from the freezer for fresh cookies on demand (just add a few extra minutes to the bake time).