Hey there, welcome to my kitchen!
Today, we’re talking about one of my favorite things to make on a lazy weekend morning: pancakes. But not just any pancakes. We’re going to make some seriously fluffy, delicious gluten-free pancakes.
For me, pancakes are pure comfort. They’re the smell of Saturday mornings, the taste of a special birthday breakfast. But when I had to go gluten-free, my pancake world was turned upside down. My first few attempts were… well, let’s just say they were closer to cardboard than clouds. They were dense, a little gritty, and just plain sad.
Does that sound familiar?
If you’ve been on the hunt for a truly great gluten-free pancake, I get it. The struggle is real. But the good news? Your search is over.
This recipe is the one I landed on after tons of trial and error. It’s inspired by those perfect, no-fuss pancakes you get at a classic diner, but made completely gluten-free. And the best part? They are so easy to make. No one will ever guess they’re gluten-free.
So, grab your apron. Let’s make some breakfast.
Your Pancake Game Plan
Before we jump in, here’s a quick look at what to expect.
- How long will this take? This is fast. You’re looking at about 10 minutes to prep the batter and 10 minutes to cook. You can have a warm stack of pancakes on the table in 20 minutes flat.
- How many does it make? This recipe makes about 16-18 medium pancakes, which is perfect for about 8 people. But don’t worry if you’re cooking for a smaller crowd! It’s super easy to scale down.
- Is it hard to make? Nope! I’d call this a beginner-friendly recipe. If you can mix things in a bowl and flip, you’ve got this.
- What gear do I need? You don’t need anything fancy. Just a large mixing bowl, a large measuring cup, and a griddle or a good non-stick pan. A cast-iron skillet also works great for getting those perfectly crispy edges.
Scaling Your Pancake Recipe
Cooking for one, two, or four? Here’s a handy chart to get the measurements just right.
| Servings | Gluten-Free Flour | Sugar | Baking Powder | Butter | Milk (approx.) | Eggs |
| 8 (Full Recipe) | 2 cups | 4 tbsp | 1 tbsp | 4 tbsp | 1 ½ – 2 cups | 2 |
| 4 (Half Recipe) | 1 cup | 2 tbsp | 1 ½ tsp | 2 tbsp | ¾ – 1 cup | 1 |
| 2 (Quarter Recipe) | ½ cup | 1 tbsp | ¾ tsp | 1 tbsp | 6 tbsp – ½ cup | 1 (whisked) |
Gather Your Ingredients
Good pancakes start with good ingredients. Let’s talk about what you’ll need and why.
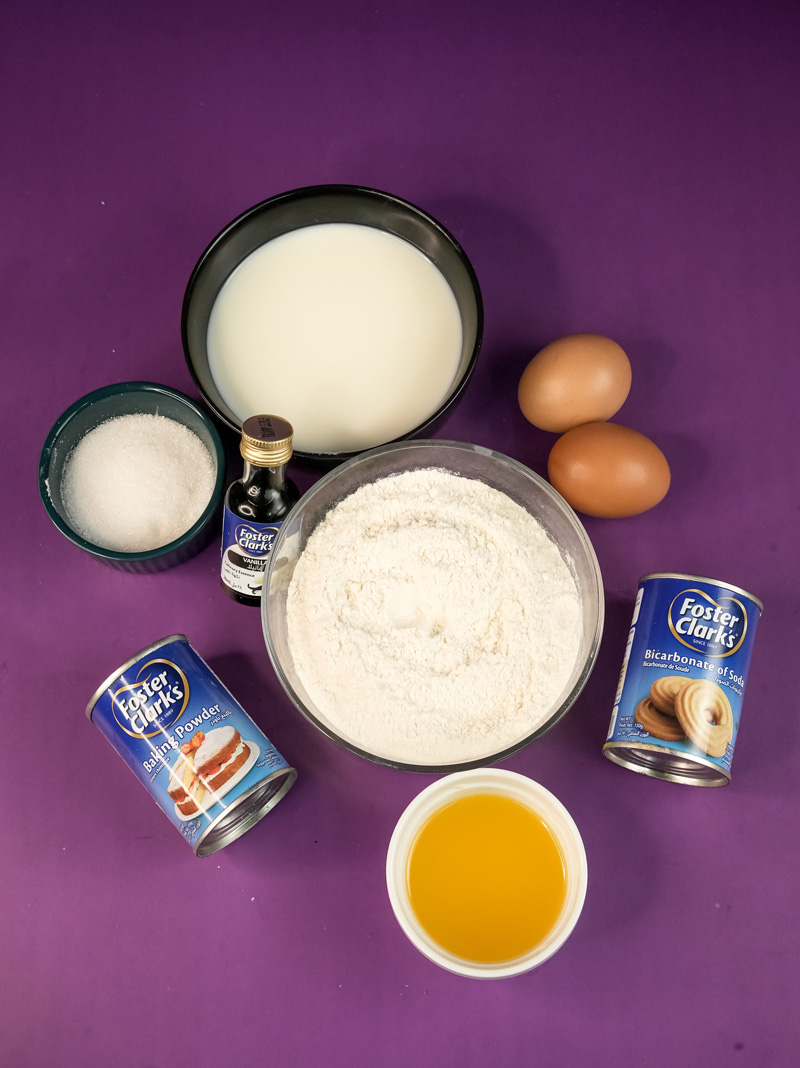
Here’s your shopping list:
- 2 cups gluten-free 1-for-1 flour
- 4 tablespoons sugar
- 1 tablespoon aluminum-free baking powder
- 1 teaspoon sea salt
- 4 tablespoons unsalted butter
- 1 ½ to 2 cups whole milk
- 2 teaspoons pure vanilla extract
- 2 large eggs
The absolute star of the show here is the gluten-free flour. Using a high-quality “1-for-1” or “cup-for-cup” blend is what makes this recipe work. I’ve had the best results with Bob’s Red Mill 1-to-1 Baking Flour. These types of blends already have xanthan gum mixed in, which gives the pancakes the structure that gluten normally provides. The quality of your flour really makes the biggest difference in getting that perfect, non-gritty texture.
For that beautiful puffiness, we use aluminum-free baking powder. It gives the pancakes their amazing lift without any weird metallic taste.
Richness comes from the fats. We’re using unsalted butter for that classic, delicious flavor and large eggs to bind everything together. A quick tip: try to use room temperature eggs. They mix into the batter more evenly and create a smoother final product.
For the liquid, I love using whole milk for its richness. But you can easily swap in your favorite dairy-free milk, like almond or oat. We start with 1 ½ cups and add more if needed, because different flour blends soak up liquid differently.
And finally, a little bit of pure vanilla extract adds that warm, cozy flavor that makes these pancakes impossible to resist.
Let’s Get Cooking, Step by Step
Alright, ready to get started? I’ll walk you through it.
Step 1: Mix the Dry Stuff
First, grab your large mixing bowl. Add your 2 cups of gluten-free flour, 4 tablespoons of sugar, 1 tablespoon of baking powder, and 1 teaspoon of sea salt.
Take a whisk and mix it all together for about 30 seconds. This is a simple but important step! It makes sure the baking powder is spread out evenly, which means every single pancake will get that perfect, even puff.
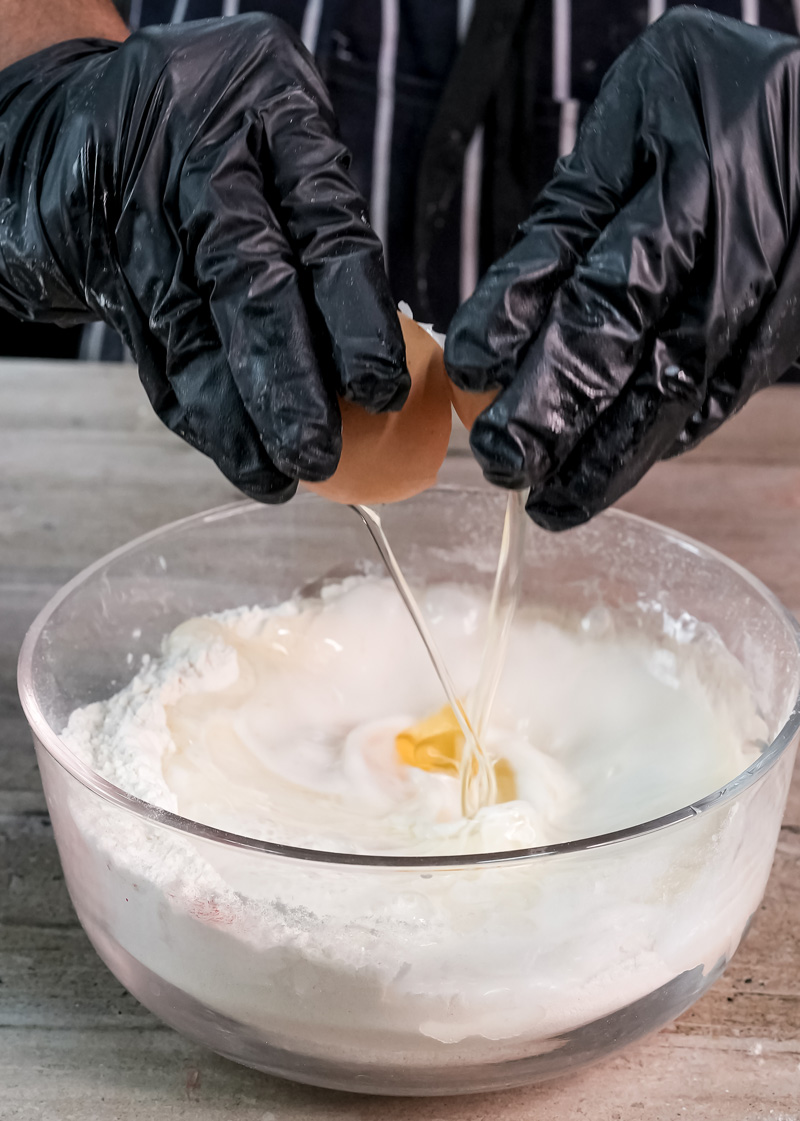
Step 2: Prep the Wet Ingredients
Now, get your large measuring cup. Put the 4 tablespoons of butter in it and melt it in the microwave; 45 seconds should be plenty.
Next, pour in the milk, starting with 1 ½ cups. Pop the whole thing back in the microwave for another 45 seconds. The goal here is to get the milk warm enough to keep the butter melted, but not so hot that it will cook the eggs. It should feel warm to the touch. If it’s steaming hot, just let it cool down for a minute.
Once it’s at the right temperature, whisk in your 2 teaspoons of vanilla and your 2 large eggs until everything is mixed and looks like a pale yellow.
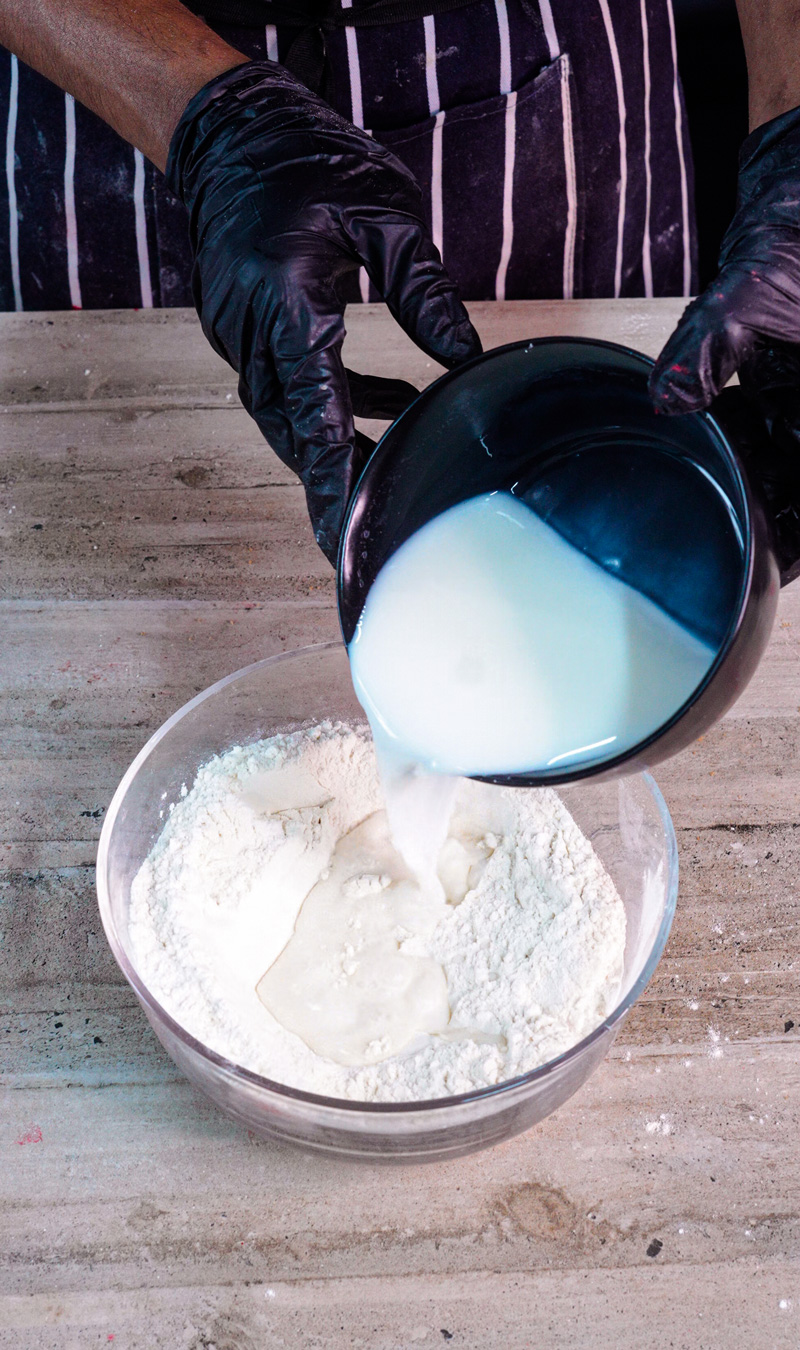
Step 3: Bring It All Together (Gently!)
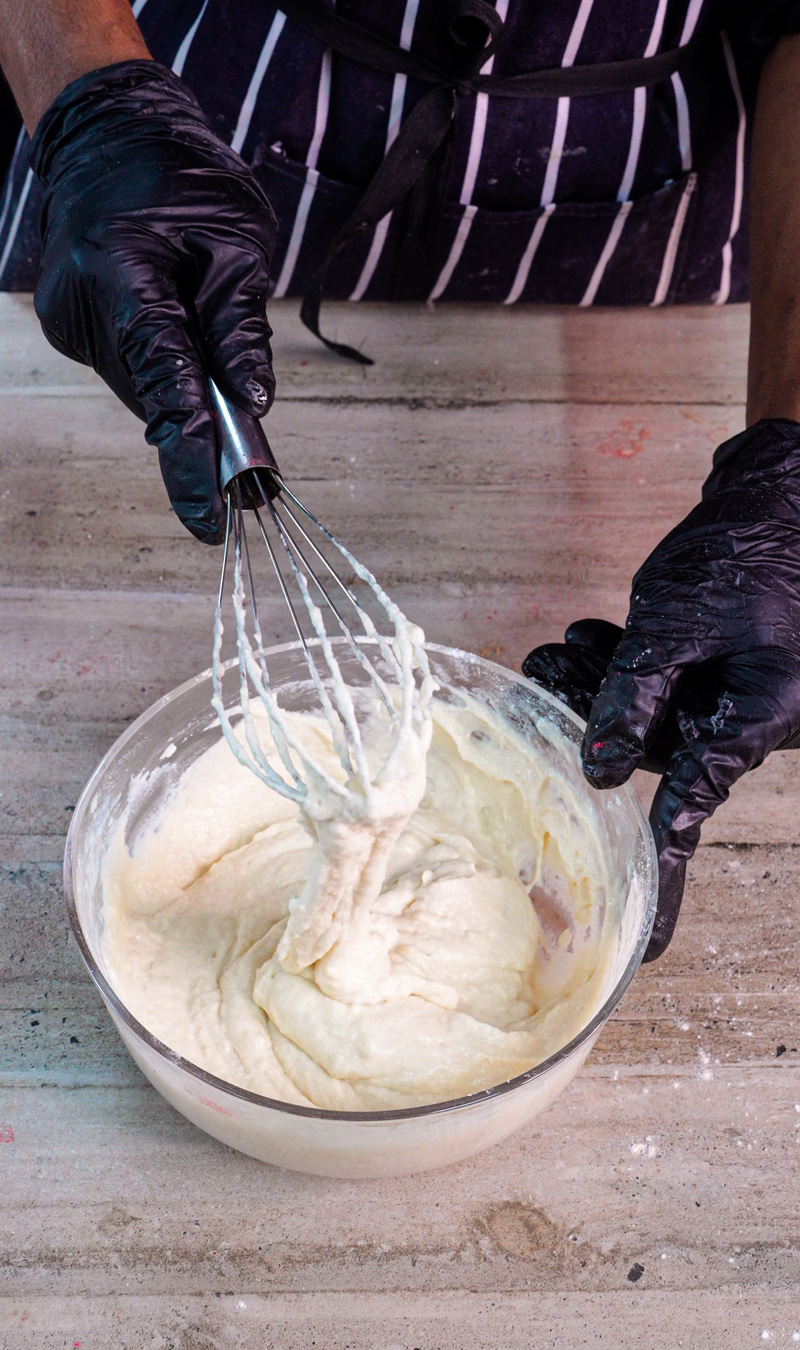
This is the most important part of making pancakes. Pour your wet ingredients into the bowl with your dry ingredients.
Using a whisk or a spatula, mix everything together just until it’s combined. I’m serious about this. Do not overmix! The batter should be a little lumpy. This is not just okay; it’s exactly what you want. Those lumps help keep the pancakes tender and fluffy. Overmixing is your enemy, so be brave and embrace the lumps!
If the batter feels way too thick, like paste, gently fold in another splash of milk until it’s thick but still pourable.
Step 4: The Sizzle and Flip
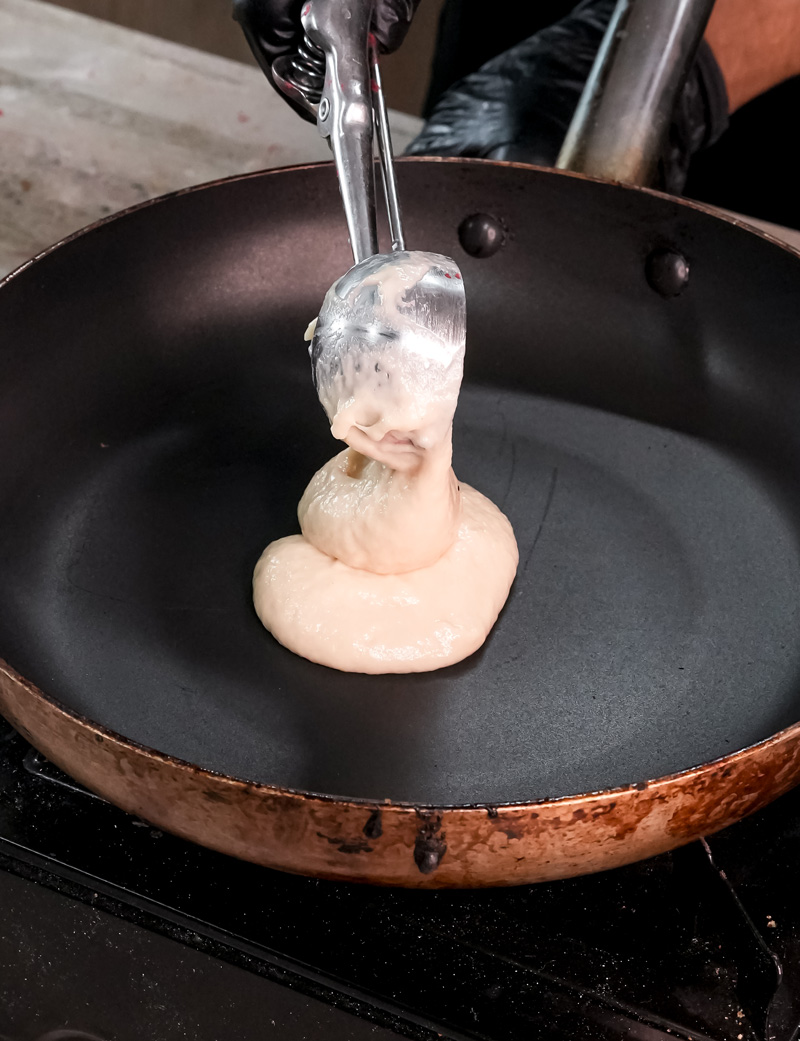
Time for the fun part! Put your griddle or pan over medium heat. A good way to test if it’s ready is to flick a drop of water on it. If it sizzles and disappears right away, you’re good to go. Add a small bit of butter or a little oil to the pan.
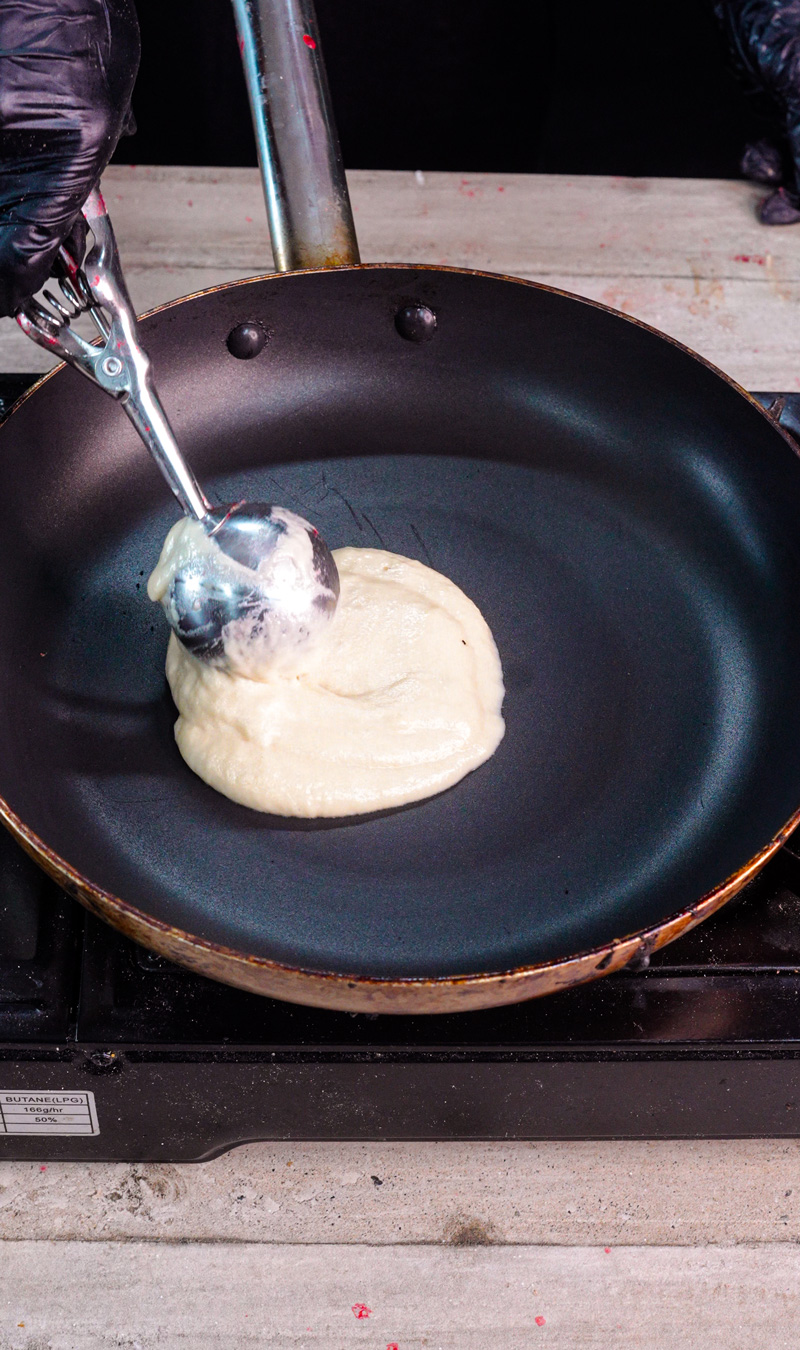
Use a ¼ cup measuring cup to pour your batter onto the hot pan. This helps make all your pancakes the same size. Don’t put too many in the pan at once; give them some room to spread out.
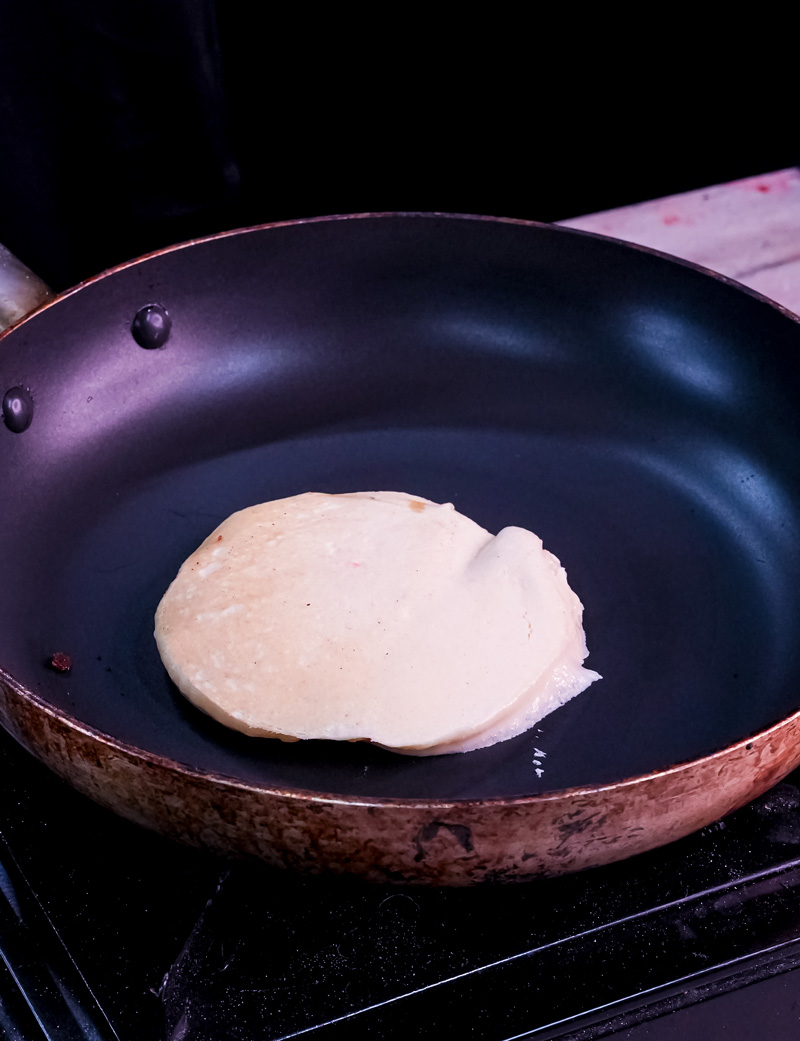
Now, watch closely. You’ll see bubbles start to form on the top. When the edges look a little dry and the middle is bubbly, it’s time to flip. This usually takes about 2-3 minutes. Slide your spatula under and give it a confident flip. Cook for another minute or so on the other side until it’s golden brown.
Make Them Your Own
This recipe is a great starting point, but feel free to get creative! Here are a few ideas:
- Need it dairy-free? Easy. Use your favorite plant-based milk and swap the butter for melted coconut oil or dairy-free butter. For egg-free/vegan pancakes, a flax egg works great (mix 1 tbsp ground flaxseed with 3 tbsp water and let it sit for 5 minutes).
- Want more protein? Turn these into Gluten-Free Protein Pancakes by adding a scoop of your favorite gluten-free protein powder to the dry ingredients. You’ll probably need to add an extra splash of milk to get the batter right.
- Fun Flavor Twists:
- Add a teaspoon of cinnamon for a warmer flavor.
- Toss in a handful of blueberries or chocolate chips after you pour the batter on the griddle.
- Add the zest of a lemon or orange to the dry mix for a bright, citrusy flavor.
- Seasonal Ideas: In the fall, try adding ¼ cup of pumpkin puree and a teaspoon of pumpkin pie spice. In the summer, top your stack with fresh berries and whipped cream.
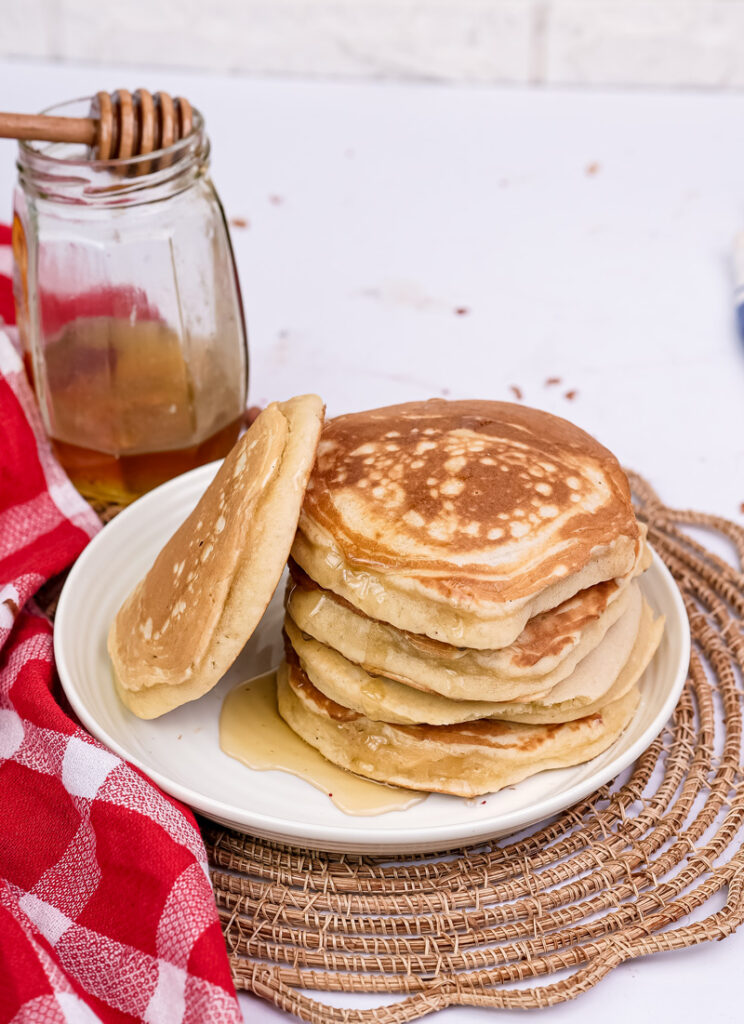
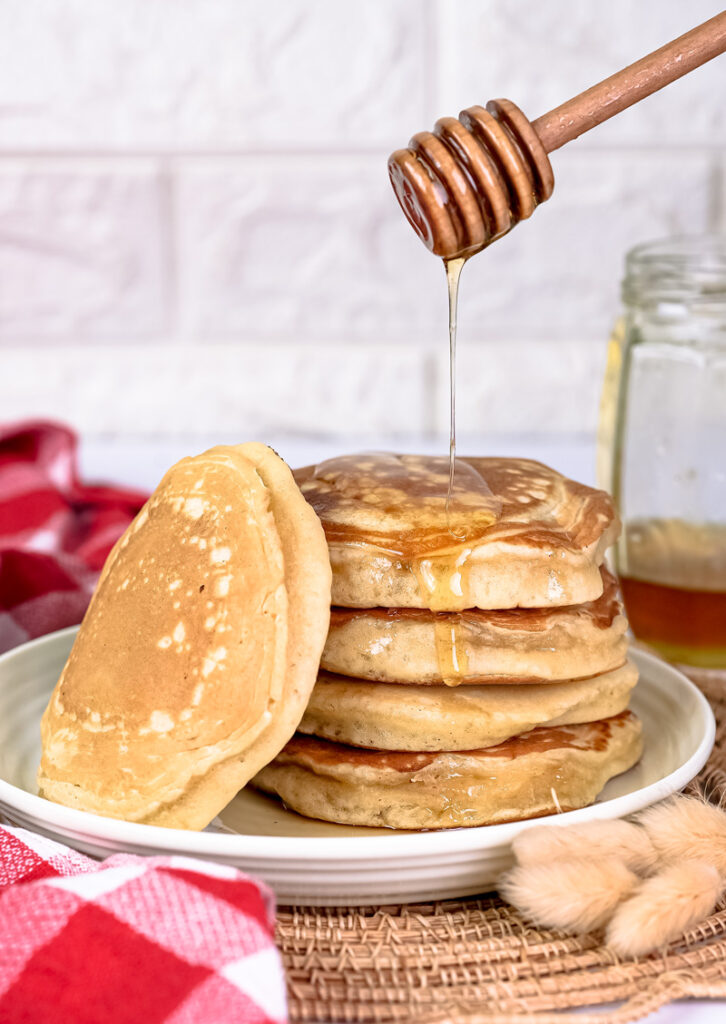
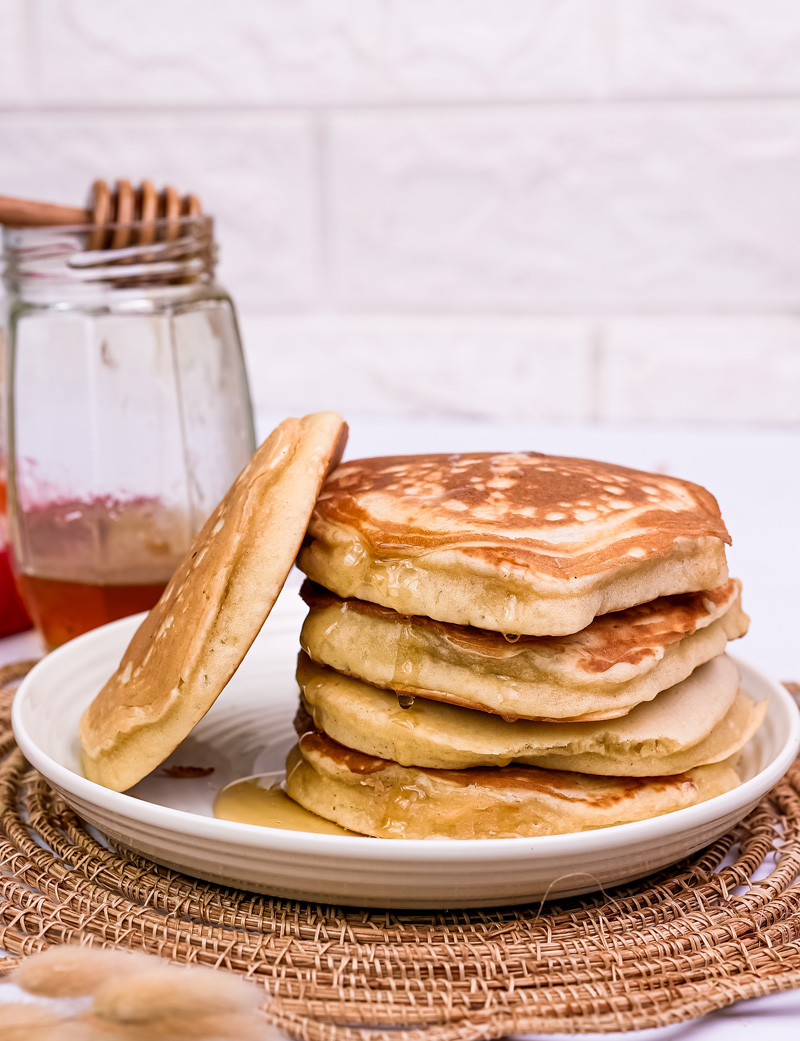
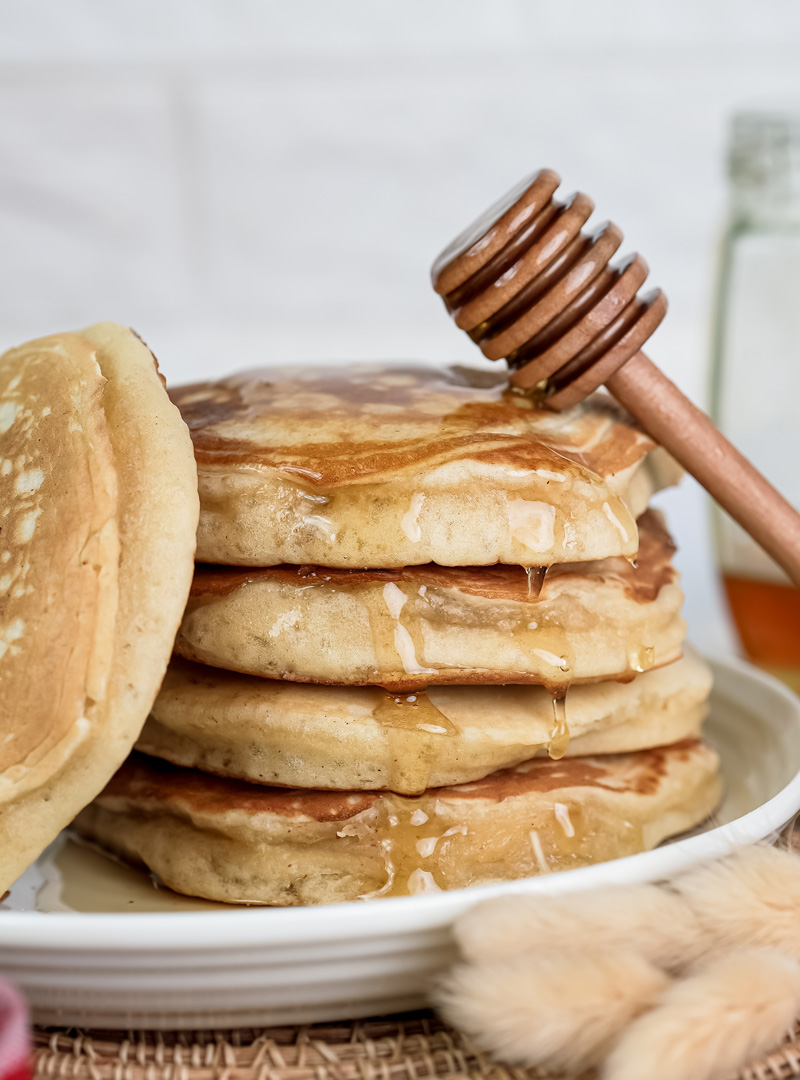
How to Serve and Save Them
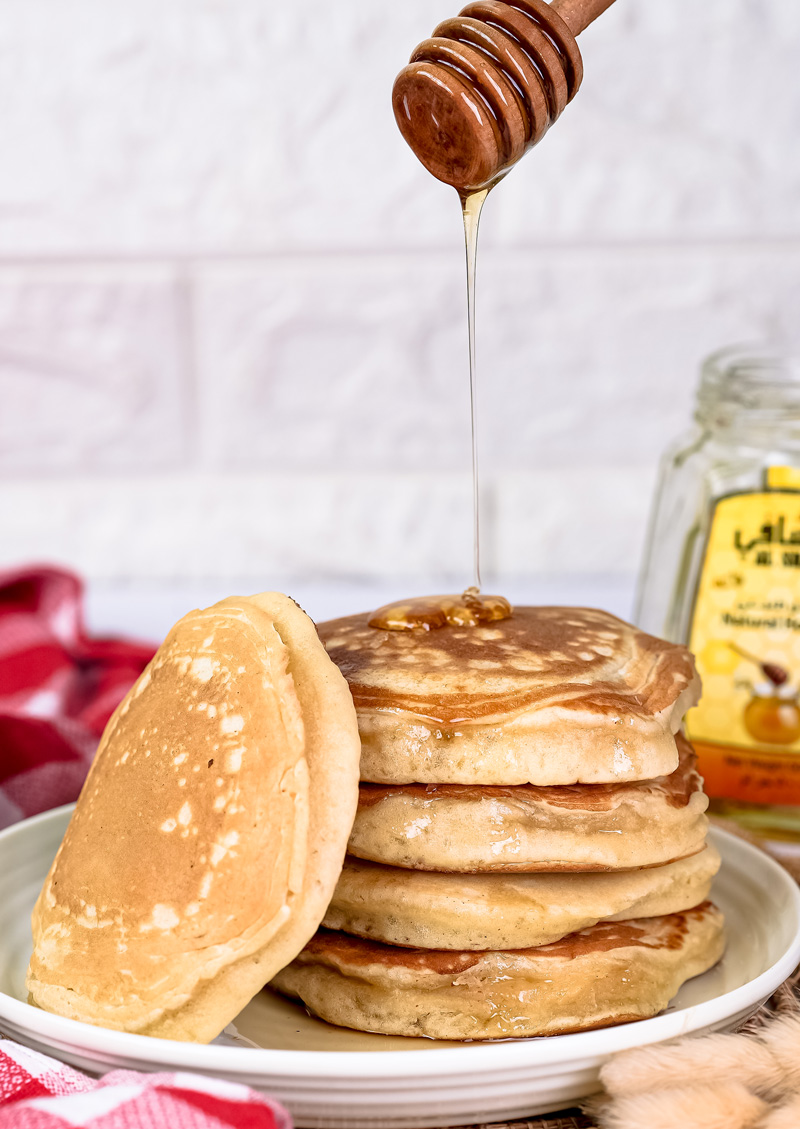
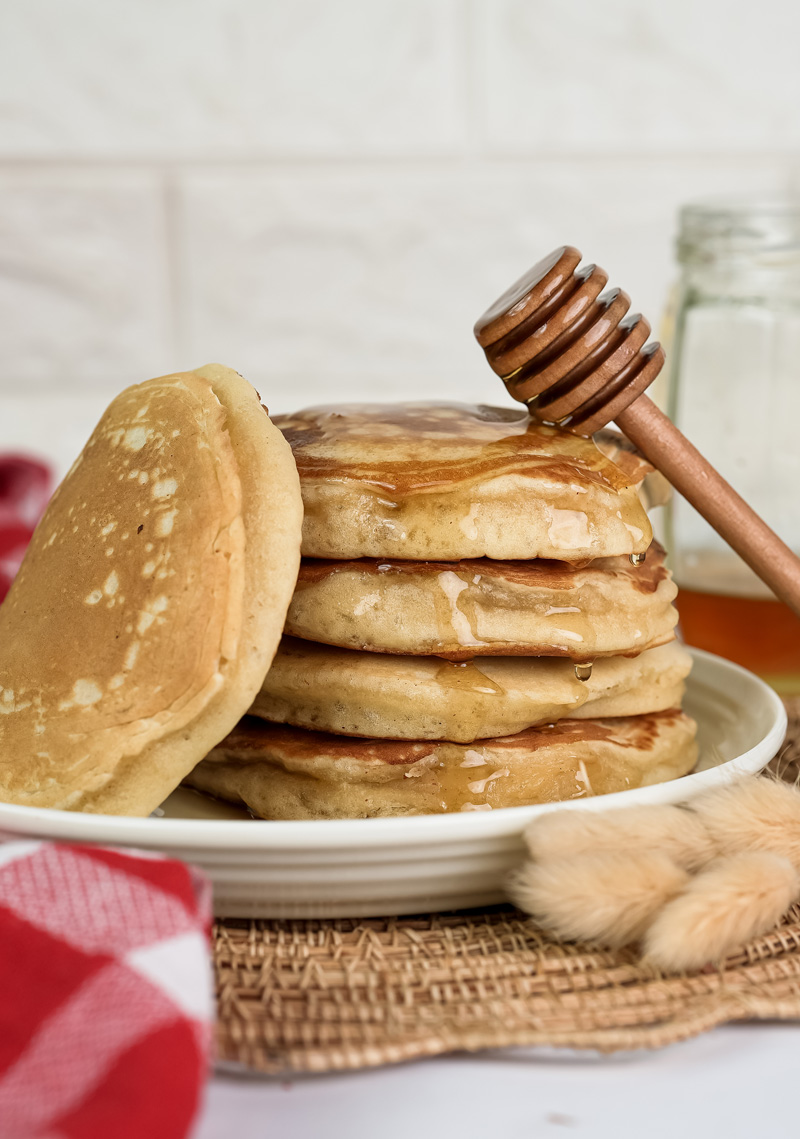
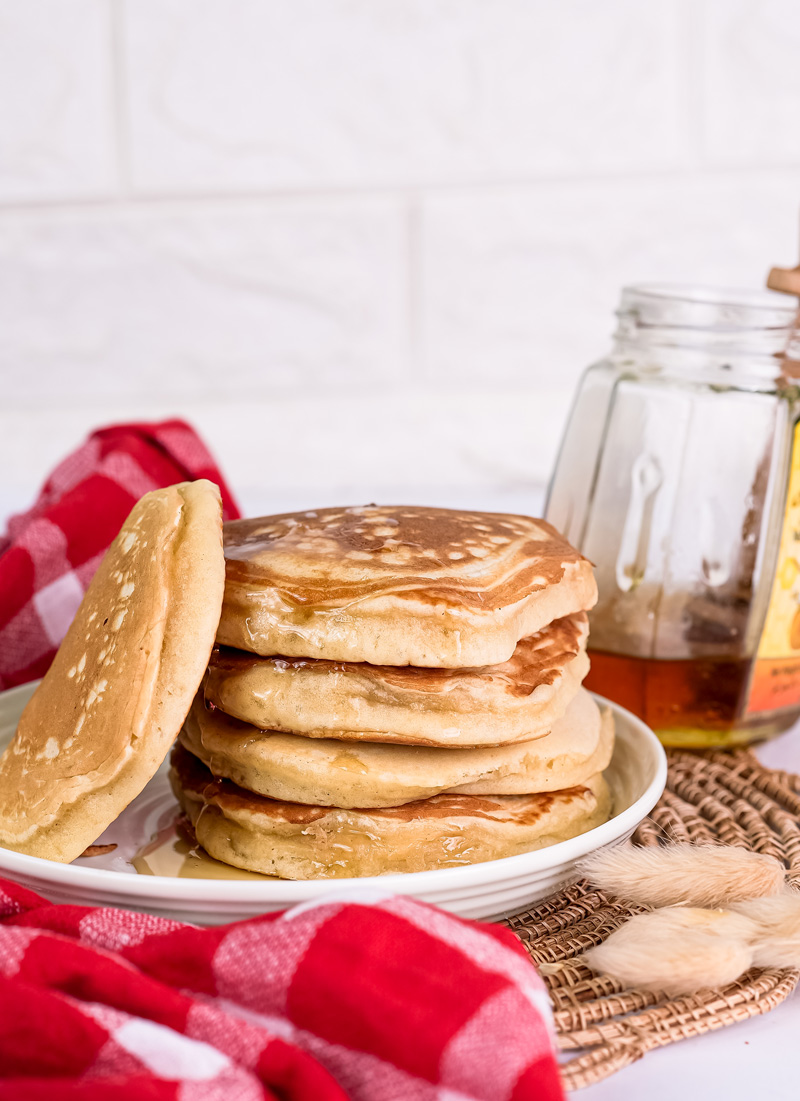
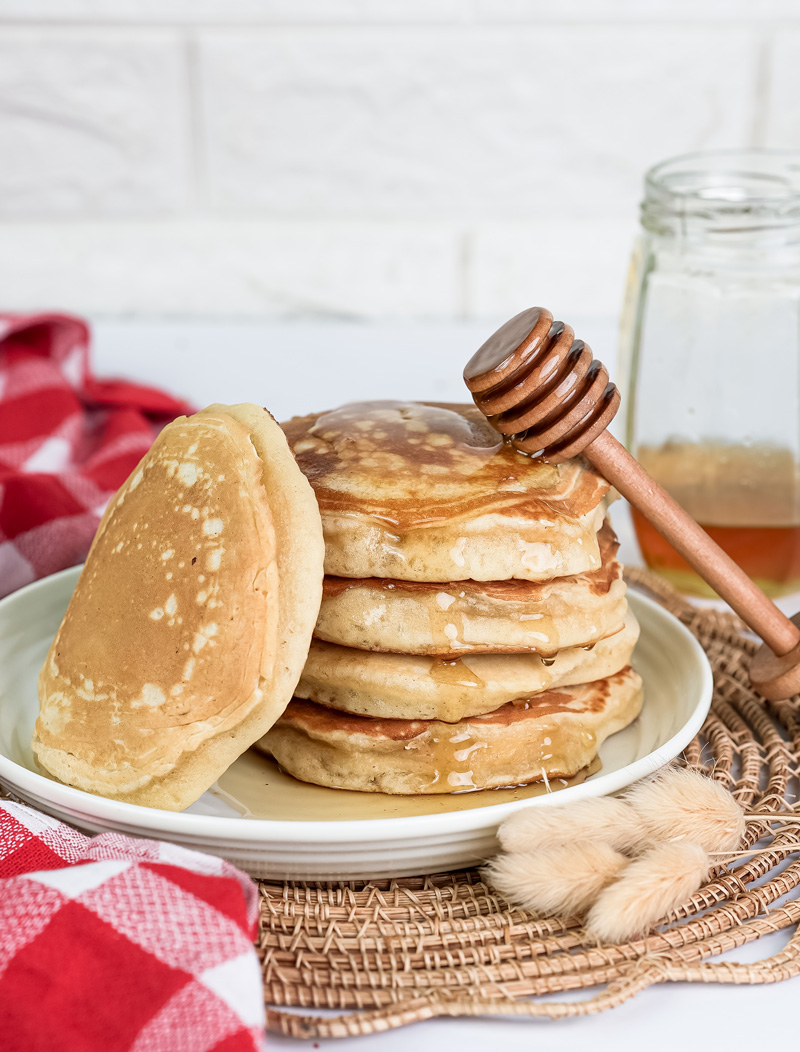
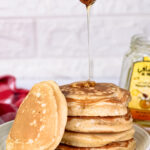
These pancakes are definitely best served right away, warm from the pan. You can’t go wrong with a classic pat of butter and some real maple syrup. They’re also great with fresh fruit, yogurt, or jam.
Have leftovers? You’ve got options.
The leftover batter can be stored in an airtight container in the fridge for 2-3 days. When you’re ready for more, just give it a gentle stir and cook as usual.
If you have leftover cooked pancakes, let them cool completely. You can store them in an airtight container in the fridge for up to 3 days. The easiest way to reheat them? Just pop them in your toaster!
They also freeze beautifully. Lay the cooled pancakes on a baking sheet and freeze until they’re solid. Then, toss them in a freezer-safe bag. They’ll be good for up to 2 months for a super quick breakfast.
Gluten Free Pancakes
Tired of dense, gritty gluten-free pancakes? This recipe is your answer. After tons of experimenting, I landed on this simple method for making perfectly light, fluffy, diner-style pancakes that no one will ever guess are gluten-free. They’re the perfect weekend breakfast!
- Prep Time: 10 minutes
- Cook Time: 10 minutes
- Total Time: 20 minutes
- Yield: 16–18 pancakes 1x
- Category: Breakfast
- Cuisine: American
Ingredients
- 2 cups gluten-free 1-for-1 flour (like Bob’s Red Mill)
- 4 tbsp sugar
- 1 tbsp aluminum-free baking powder
- 1 tsp sea salt
- 4 tbsp unsalted butter, melted
- 1 ½ to 2 cups whole milk
- 2 large eggs
- 2 tsp pure vanilla extract
Instructions
- Combine Dry Ingredients: In a large bowl, whisk together the gluten-free flour, sugar, baking powder, and salt. Mixing this well ensures every pancake gets a nice, even rise.
- Mix Wet Ingredients: In a separate large measuring cup or bowl, combine the melted butter and 1 ½ cups of milk. Warm it in the microwave for about 45 seconds—just until warm, not hot. Whisk in the eggs and vanilla until everything is a pale yellow color.
- Make the Batter: Pour the wet ingredients into the dry ingredients. Gently mix with a spatula or whisk just until combined. A few lumps are perfect! This is the secret to keeping them fluffy. If the batter is too thick, gently fold in another splash of milk.
- Cook the Pancakes: Heat a lightly oiled griddle or non-stick pan over medium heat. Pour ¼ cup of batter for each pancake. Cook for 2-3 minutes, until bubbles form across the surface and the edges look set. Flip confidently and cook for another 1-2 minutes until golden brown.
Notes
- Serving Suggestions: These are best served immediately! A classic stack with butter and warm maple syrup is my favorite way to enjoy them. Fresh berries, a dollop of yogurt, or chocolate chips are also delicious.
- Tips & Tricks: The most important tip is do not overmix the batter. Lumps are your friend! For the best texture, let the batter rest for 5 minutes after mixing while your pan heats up. This lets the flour hydrate.
- Storage & Reheating:
- Fridge: Store cooked, cooled pancakes in an airtight container for up to 3 days. To reheat, just pop them in the toaster!
- Freezer: Freeze cooled pancakes in a single layer on a baking sheet, then transfer to a freezer bag. They’ll last for up to 2 months. Reheat in the toaster or microwave.