Hey there! Today, we’re going to tackle a pastry that sounds fancy but is totally doable at home: the Kouign Amann.
If you’ve never had one, let me try to explain. Imagine a croissant went on vacation, met a crème brûlée, and they had a beautiful, buttery, caramelized baby.
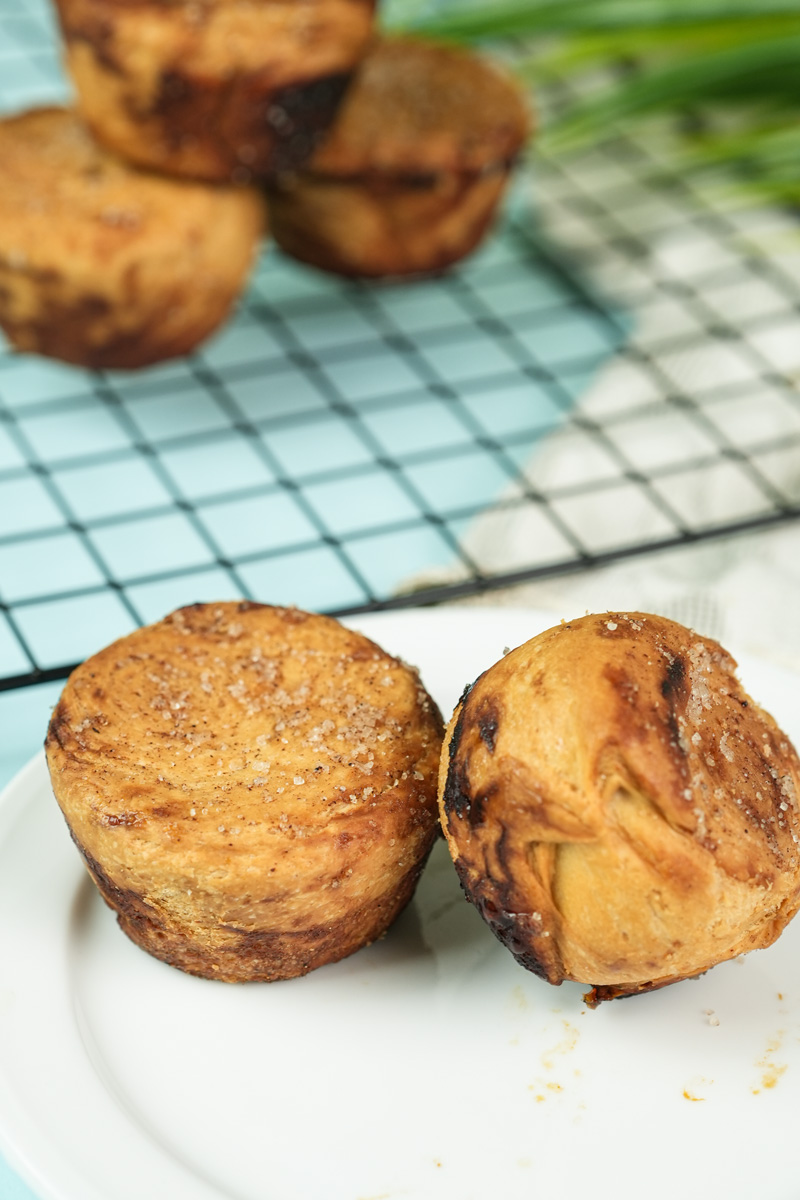
You bite through a crackly, sugary crust. Then you hit hundreds of soft, flaky, buttery layers inside. It’s a texture explosion. And it is unbelievably delicious.
This pastry comes from a region in France called Brittany, which is famous for its amazing butter.1 The name literally means “butter cake” in the local language. I love that. No messing around, it tells you exactly what you’re getting. Legend says a baker in the 1860s was short on ingredients, so he just laminated—or folded—a crazy amount of butter and sugar into some bread dough. And… poof! A happy accident was born.
The ingredient list is super simple. Just flour, water, yeast, salt, butter, and sugar. The real secret is in the technique. I know it can look intimidating, but I’m going to walk you through it step-by-step. Let’s do this together!
What to Expect: A Quick Look at Our Day
This isn’t a 30-minute cookie recipe. Think of it as a fun weekend project. Patience is your best friend here. Here’s a rough breakdown of the time you’ll need:
| Step | Time | Notes |
| Mixing the Dough | ~20 minutes | Active time |
| First Chill (Dough) | 1 hour | Inactive (freezer) |
| Lamination & Folds | ~30 minutes | Active, includes a 10-min rest |
| Final Proof (Shaped Pastries) | ~1 hour | Inactive |
| Baking | ~1 hour | Active (watching the oven) |
| Total Estimated Time | ~4 hours | A perfect afternoon bake! |
This recipe makes about 8 pastries. You can halve it for a smaller batch. If you want to make more, I’d suggest making two separate batches instead of one giant one. It’s just easier to handle that way.
Difficulty? I’d say it’s a bit of a challenge, but so, so rewarding. If you’ve made croissants, you’ll feel right at home. If not, don’t sweat it. I’ll make it easy to follow.
What tools will you need?
- Stand Mixer: This is pretty important for getting the dough just right.
- Rolling Pin: Any kind works, but a heavy one is your friend.
- Parchment Paper: We’ll use this to shape our butter.
- Bench Scraper: Super helpful for keeping things neat.
- Plastic Wrap: For chilling.
- Muffin Tin: A standard tin is perfect for shaping the pastries.
Can you make it ahead? Absolutely! This is my favorite part.
- Day 1: Make the dough and the butter block. Let the dough chill in the fridge overnight.
- Day 2: Do the folds, shape the pastries, and bake them fresh.
You can even freeze the unbaked pastries! Shape them, pop them on a tray in the freezer until solid, then move them to a freezer bag. You can bake them right from frozen—just add 10-15 minutes to the baking time.
The Ingredients: What You’ll Need
The magic of this recipe is in using a few simple, good-quality ingredients.
For the Dough (Our Foundation):
- 400g bread flour: Bread flour has more protein. This helps build a strong, stretchy dough that can hold all that butter without tearing.
- 236g ice water: Ice water is key! It keeps everything cold from the start, which is exactly what we want.
- 14g butter, softened: Just a little bit to make the dough itself tender.
- 10g salt: For flavor and to help control the yeast.
- 5g instant yeast: This gives the pastry its lift and tender, bready interior.
For the Butter Block & Sugar Coating (The Stars of the Show):
- 339g (3 sticks) high-quality, high-fat butter: This is where you want to use the good stuff. I love using a European-style butter like Kerrygold or Plugrá. They have less water, which means flakier layers and a richer taste. Make sure it’s cold, straight from the fridge.
- 250g granulated sugar: This is what creates that crunchy, caramelized shell.
- 1/4 tsp salt: Mixing a little salt with the sugar is a great trick. It cuts the sweetness and makes the butter taste extra nutty and amazing.

The Method: Let’s Get Baking!
Aprons on? Let’s get started. I’ve broken it down into four main stages.
Stage 1: Making the Dough
First up, the dough. Throw all your dough ingredients—flour, ice water, softened butter, salt, and yeast—into your stand mixer bowl. Using the dough hook, mix it on low for about 2 minutes, just until it comes together in a messy ball.
Now, turn the mixer up to medium and let it run for 15-20 minutes. I know, it feels like a long time. But trust me. This is where you build the strong gluten network that this recipe needs. The dough is ready when it’s smooth, stretchy, and pulls away from the sides of the bowl.
Take the dough out and, on a lightly floured surface, pat it into an 8×8-inch square. Wrap it up tightly in plastic wrap and put it in the freezer for one hour. We want it very cold, but not frozen solid. Pro tip: flip it over after 30 minutes to make sure it chills evenly.
Stage 2: Making the Butter Block
While the dough chills, let’s get the butter ready. Fold a big piece of parchment paper in half. Place your three cold sticks of butter inside.
Now for the fun part. Use your rolling pin to pound and roll the butter into an 8×8-inch square. Try to get it as even as possible. Use a bench scraper to square off the sides. Once you’re happy with your butter square, pop it in the fridge for about 20 minutes. You want it firm but still a little flexible, like cold modeling clay.
Stage 3: Lamination (The Folds!)
This is where the magic happens. We’re about to create all those incredible layers.
Get your chilled dough from the freezer and your butter block from the fridge. Place the dough square on your counter. Now, place the butter block on top, but turn it 45 degrees so it looks like a diamond sitting on a square.
Fold the four corners of the dough over the butter so they meet in the middle, like you’re closing an envelope. Pinch the seams together really well. You don’t want any butter escaping!
Lightly flour your counter and carefully roll your dough packet into a long rectangle, about 8 inches wide and 24 inches long. Now for the first “turn”: fold the rectangle into thirds, just like folding a business letter.

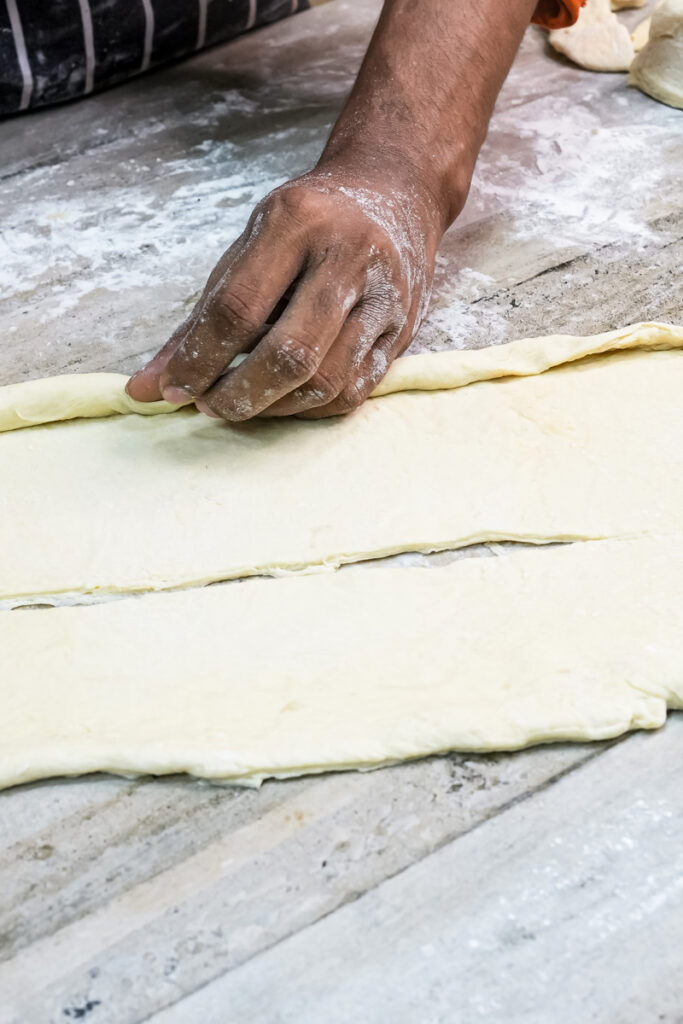
Rotate the dough 90 degrees. We’re going to do that exact same thing again. Roll it out into another 8×24-inch rectangle and fold it into thirds. That’s your second turn.
The dough is probably feeling a little stiff now. That’s normal. Wrap it in plastic and let it rest in the freezer for 10 minutes to chill out.
For our last fold, we’re adding the sugar. Sprinkle a good amount of your sugar-salt mix onto your counter. Place the dough on top, and sprinkle more sugar on it. Roll it out one last time and do one final letter fold. This is the sugar that will create that amazing crust.
Stage 4: Shaping and Baking
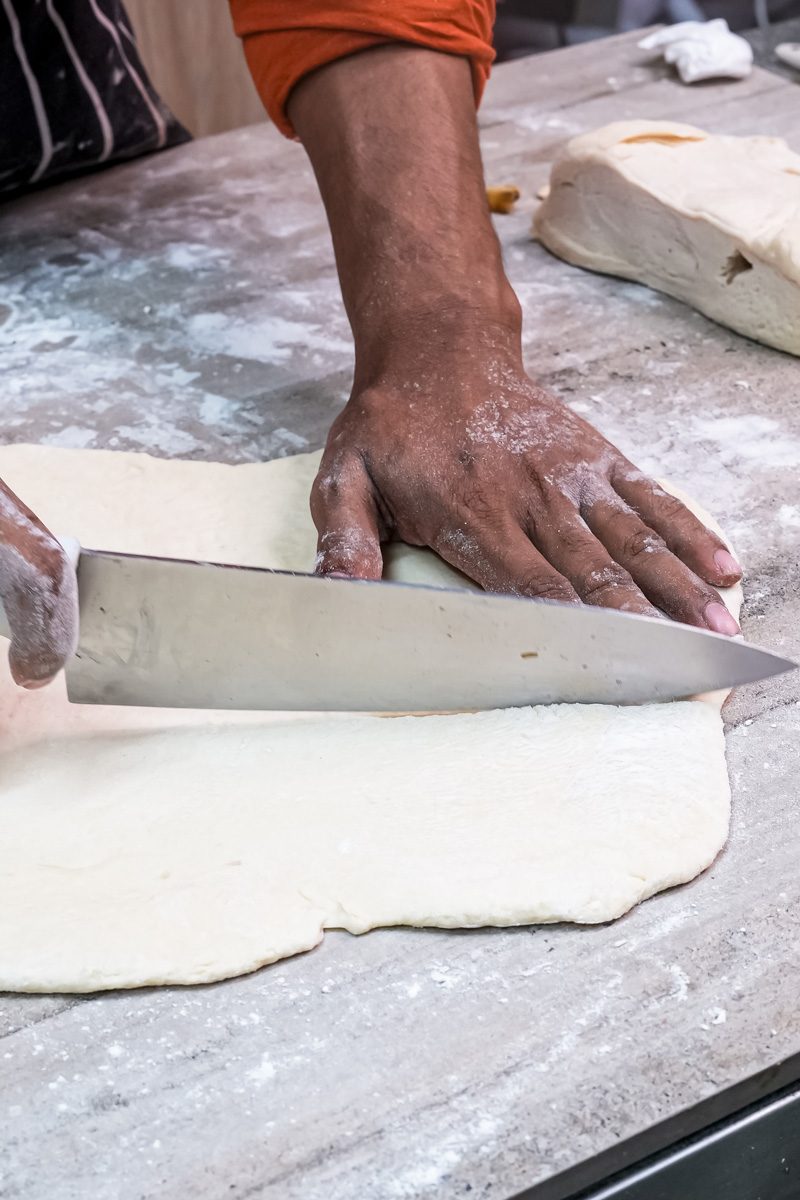
You’re so close! Take your final dough, rotate it 90 degrees one last time, and roll it into a rectangle that’s about 10×16 inches.
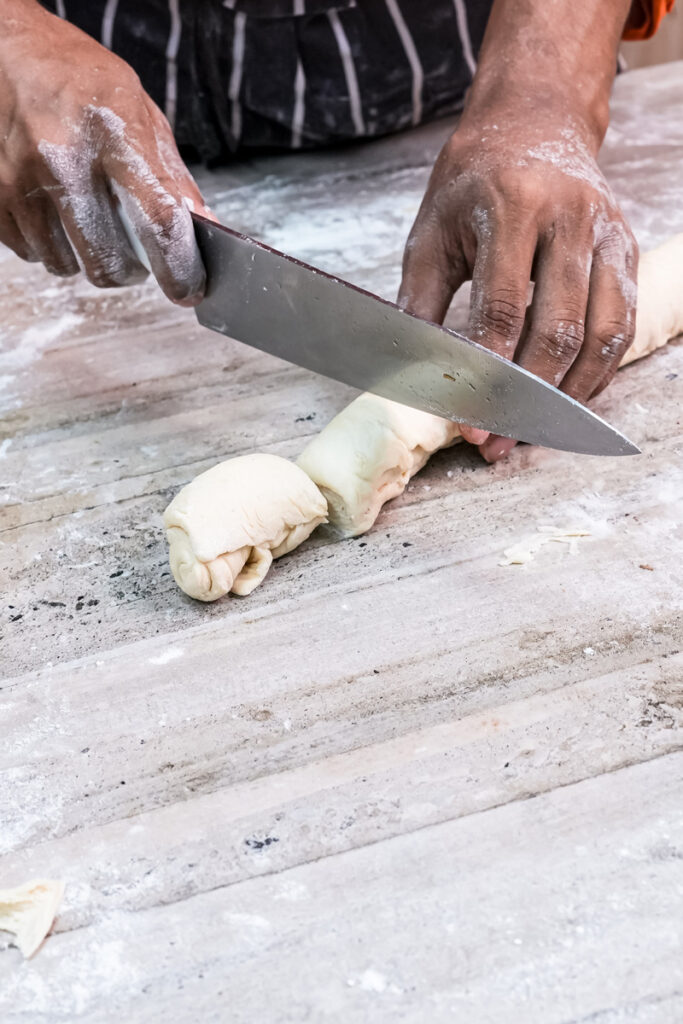
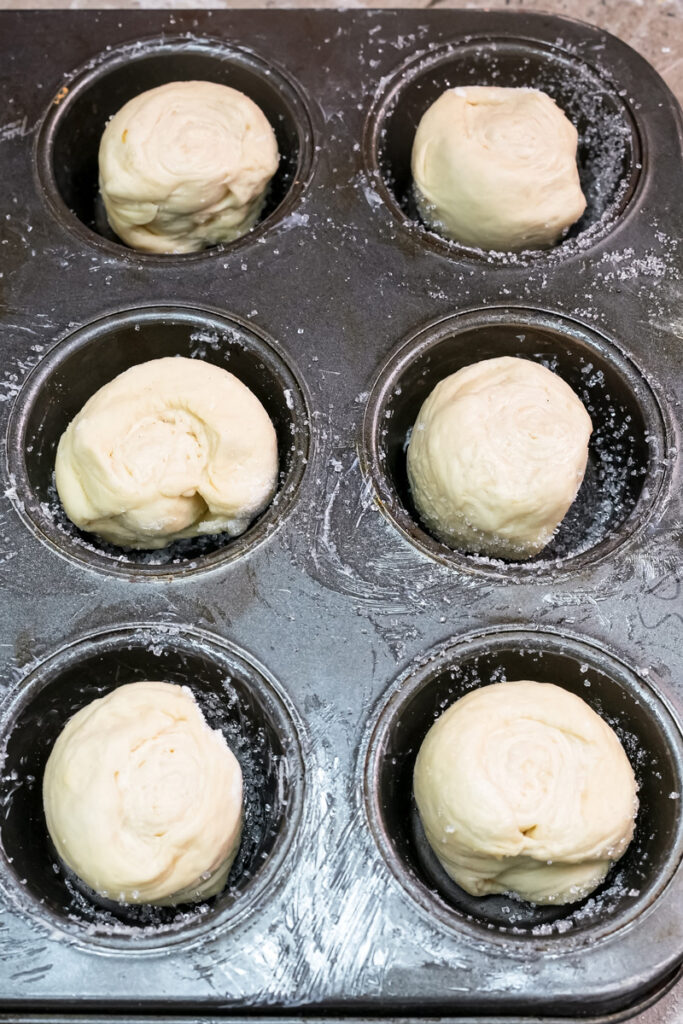
Use a sharp knife or a pizza cutter to trim the edges—this helps the layers puff up beautifully. Then, cut the rectangle into 8 strips, each 2 inches wide.
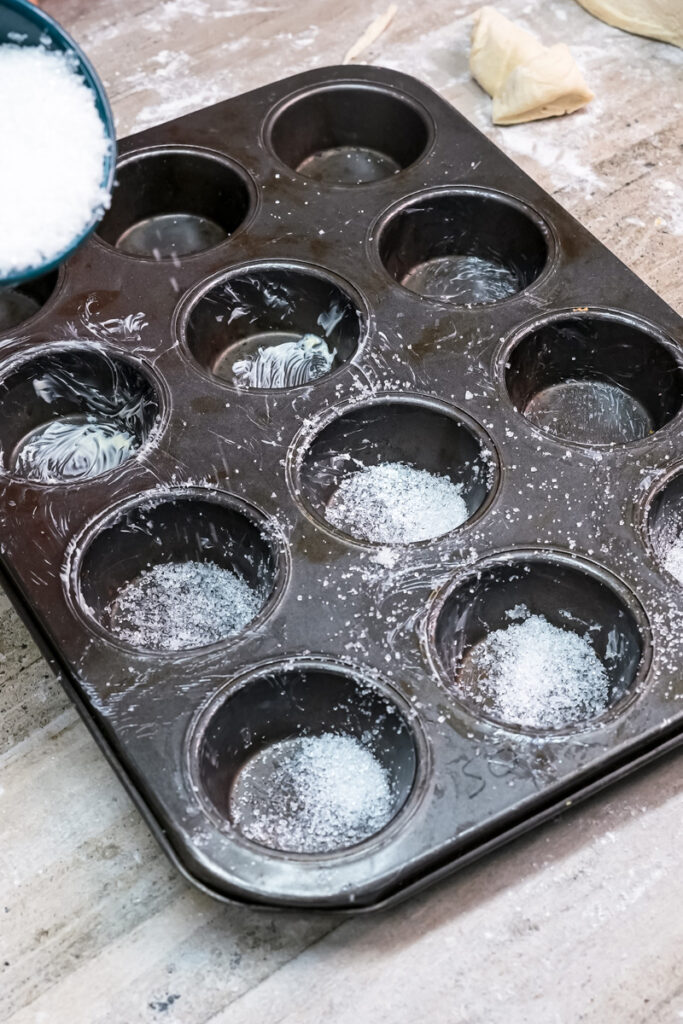
Simply roll up each strip like a tiny cinnamon roll. Place each one in a greased muffin tin. Let them sit at room temperature for 45-60 minutes to “proof” or puff up a bit.

While they’re proofing, preheat your oven to 375°F (190°C).
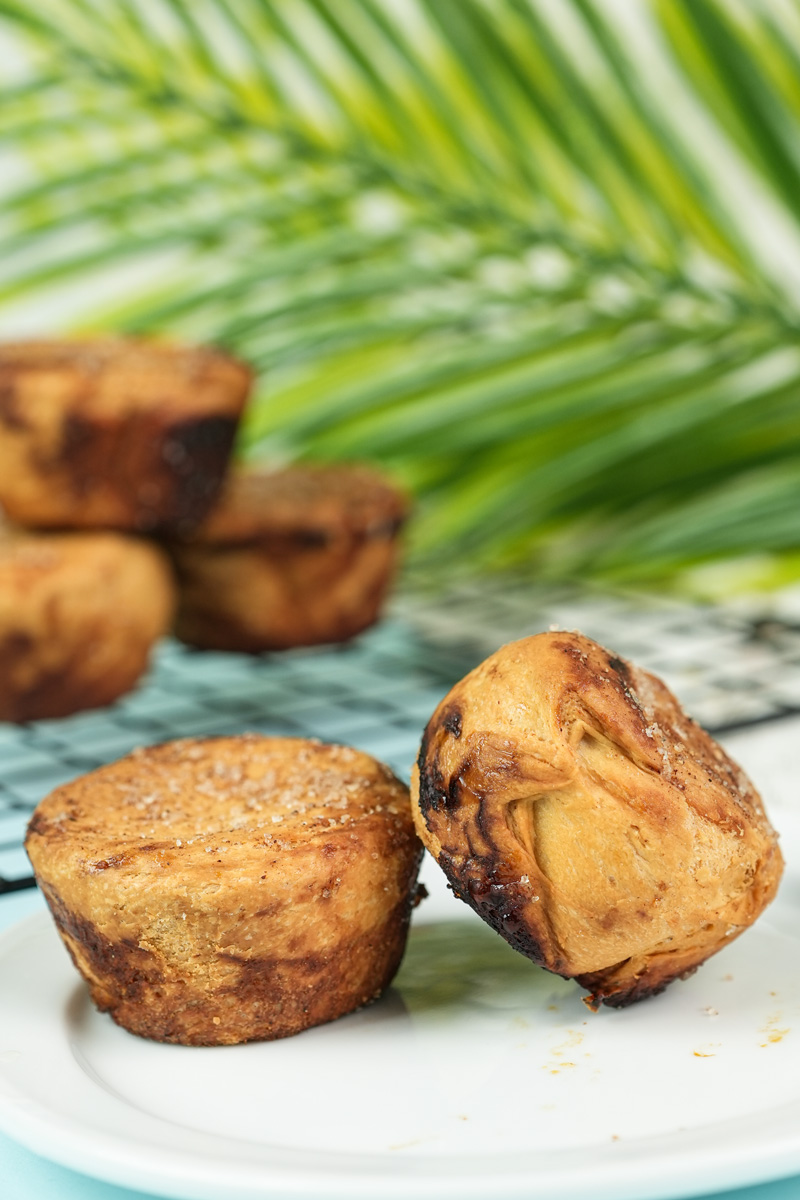
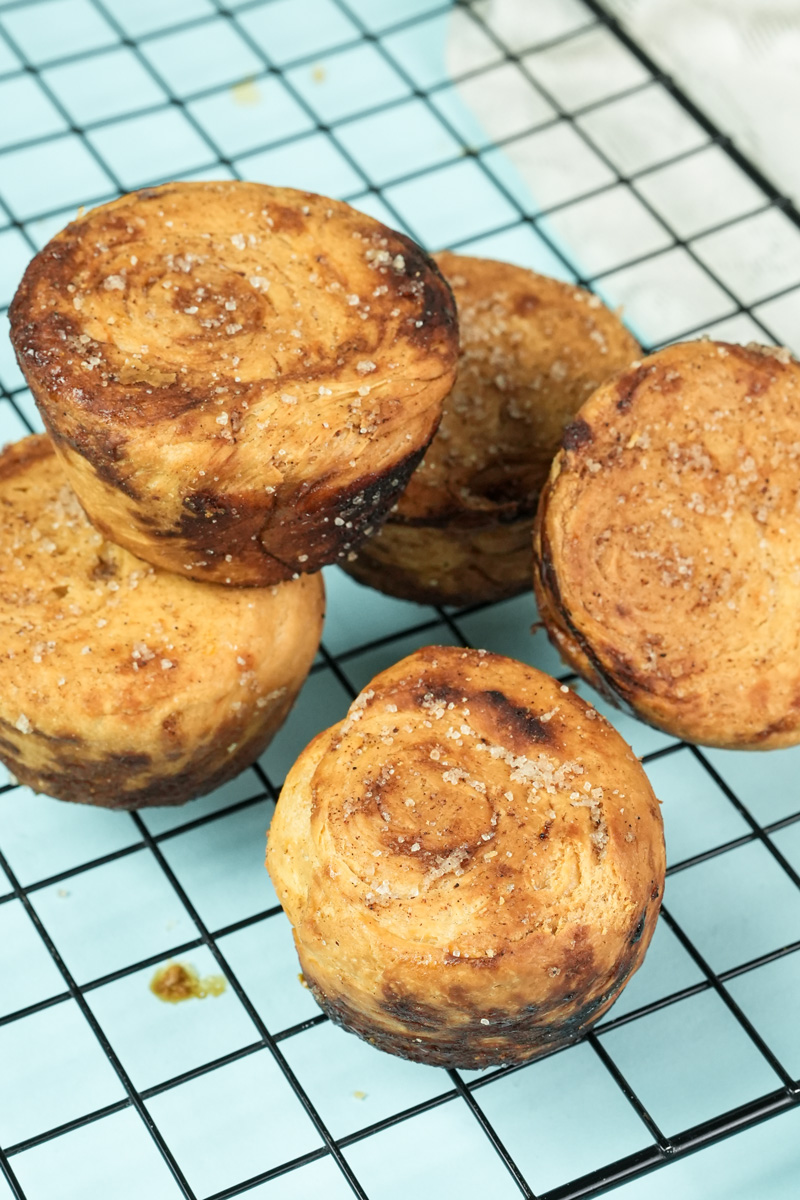
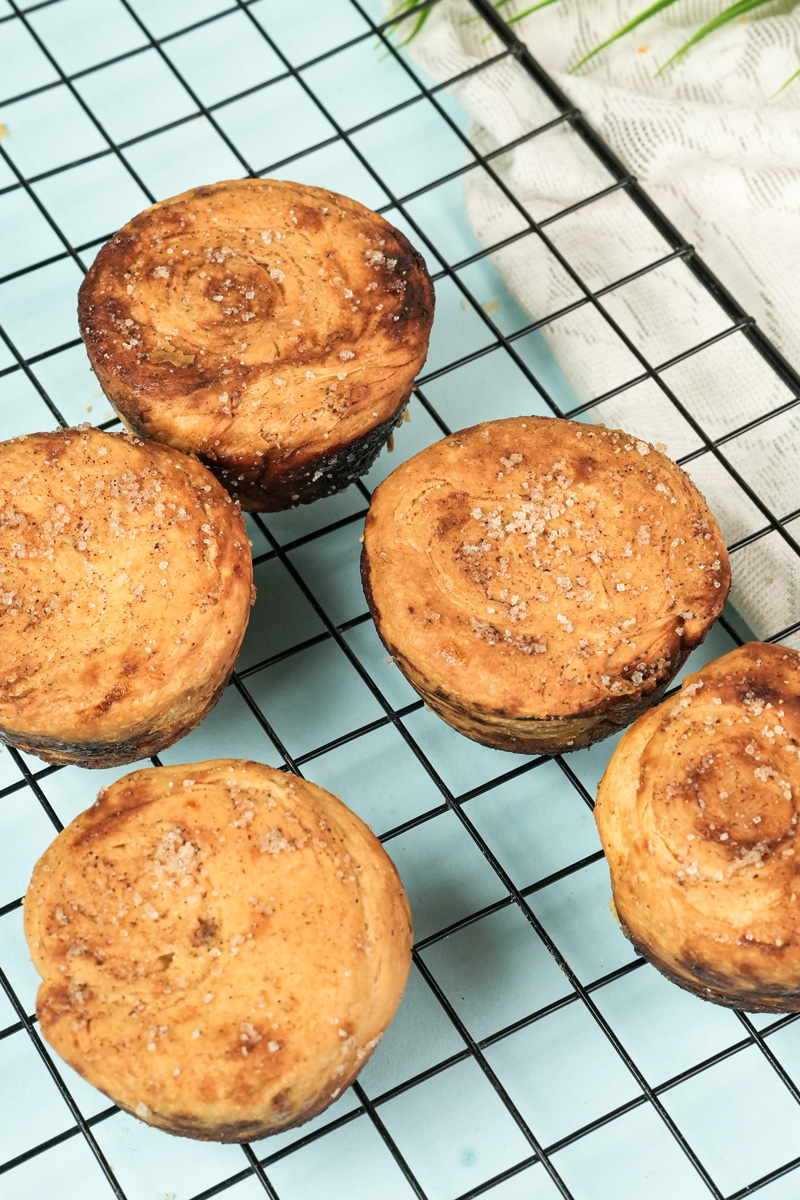
Bake for 45-60 minutes. They’re ready when they are a deep, beautiful golden-brown on top. But here’s a crucial check: carefully lift one out and look at the bottom. It should also be golden brown and caramelized. If it’s pale, the inside isn’t cooked yet.
This final step is the most important one! As soon as they come out of the oven, get them out of the muffin tin immediately. Use tongs and be SO careful—the melted sugar is incredibly hot. If you let them cool in the pan, the sugar will turn into cement and they will be stuck forever. I learned that the hard way.
Place them on a wire rack to cool. And that’s it. You did it. You made Kouign Amann!
Want to Mix It Up?
Once you nail the classic recipe, you can start having fun with it.
- Add Spices: Mix a teaspoon of cinnamon or cardamom into the sugar.
- Add Zest: The zest of an orange or lemon in the sugar is fantastic.
- Add Fillings: Try tucking a small piece of apple or a few cranberries in the center before you roll them up.
How to Eat & Store Them
Kouign Amann are best the day they are made, maybe even still a little warm from the oven.
- Storage: If you somehow have leftovers, keep them in an airtight container at room temperature for up to two days. Don’t put them in the fridge; it will make the crunchy shell soft.
- Reheating: To bring back that amazing crunch, just pop them in a 350°F (175°C) oven for 3-5 minutes. An air fryer also works great.
Thank you for baking along with me. I hope you feel super proud of what you just made. Go on, take a bite! You deserve it. Happy baking!
PrintKouign Amann

Meet your new favorite pastry! Kouign Amann (pronounced “kween ah-mon”) are the perfect mix of a croissant and crème brûlée. Think crackly, caramelized sugar on the outside with soft, buttery, flaky layers inside. This simplified guide makes this bakery classic totally achievable at home!
- Prep Time: 2 hrs 30 mins
- Cook Time: 1 hr
- Total Time: 3 hrs 30 mins
- Yield: 8 pastries 1x
- Category: Pastry, Breakfast, Dessert
- Cuisine: French
Ingredients
For the Dough:
- 400g bread flour
- 236g ice water
- 14g butter, softened
- 10g salt
- 5g instant yeast
For the Butter & Sugar Layers:
- 339g (3 sticks) cold, high-fat European-style butter
- 250g granulated sugar
- 1/4 tsp salt
Instructions
- Make the Dough: In a stand mixer with a dough hook, combine all dough ingredients. Mix on low until a shaggy ball forms, then on medium for 15-20 minutes until the dough is smooth and elastic.
- First Chill: Shape the dough into an 8×8-inch square, wrap it tightly, and freeze for 1 hour.
- Prep the Butter: While the dough chills, pound and roll the cold butter between parchment paper into an 8×8-inch square. Chill it in the fridge for 20 minutes.
- First & Second Folds: Place the butter block on the dough. Fold the dough corners over to completely enclose the butter. Roll into an 8×24-inch rectangle and perform a “letter fold” (in thirds). Rotate the dough 90 degrees, roll it out again, and do a second letter fold.
- Rest & Sugar Fold: Wrap the dough and let it rest in the freezer for 10 minutes. On a surface sprinkled with the sugar-salt mix, roll the dough out again, adding more sugar on top, and perform one final letter fold.
- Shape the Pastries: Roll the final dough into a 10×16-inch rectangle. Trim the edges and cut it into eight 2-inch wide strips. Roll each strip up and place it in a cavity of a well-greased muffin tin.
- Proof & Bake: Let the pastries sit at room temperature for 45-60 minutes until they puff up slightly. Bake at 375°F (190°C) for 45-60 minutes, until deep golden-brown on the top and bottom.
- Cool Immediately: This is critical! As soon as they’re out of the oven, carefully use tongs to move the pastries from the tin to a wire rack. The hot sugar will harden like cement if you wait, so do it right away!
Notes
- Serving: These are absolute heaven served warm with a cup of coffee. The contrast between the crunchy shell and the soft, buttery inside is the best part!
- Tips & Tricks: Using good European-style butter makes a huge difference in flakiness. Don’t rush the chilling steps—they’re the secret to perfect layers. A pale bottom means a doughy center, so make sure they’re golden all over!
- Storage & Reheating: Store leftovers in an airtight container at room temperature for up to 2 days (don’t refrigerate). To revive that amazing crunch, reheat them in an oven or air fryer at 350°F (175°C) for 3-5 minutes.