Ever had a truly great Tiramisu? The kind that’s light as a cloud and just melts in your mouth? I bet you think the secret is the coffee or the mascarpone cream.
Nope.
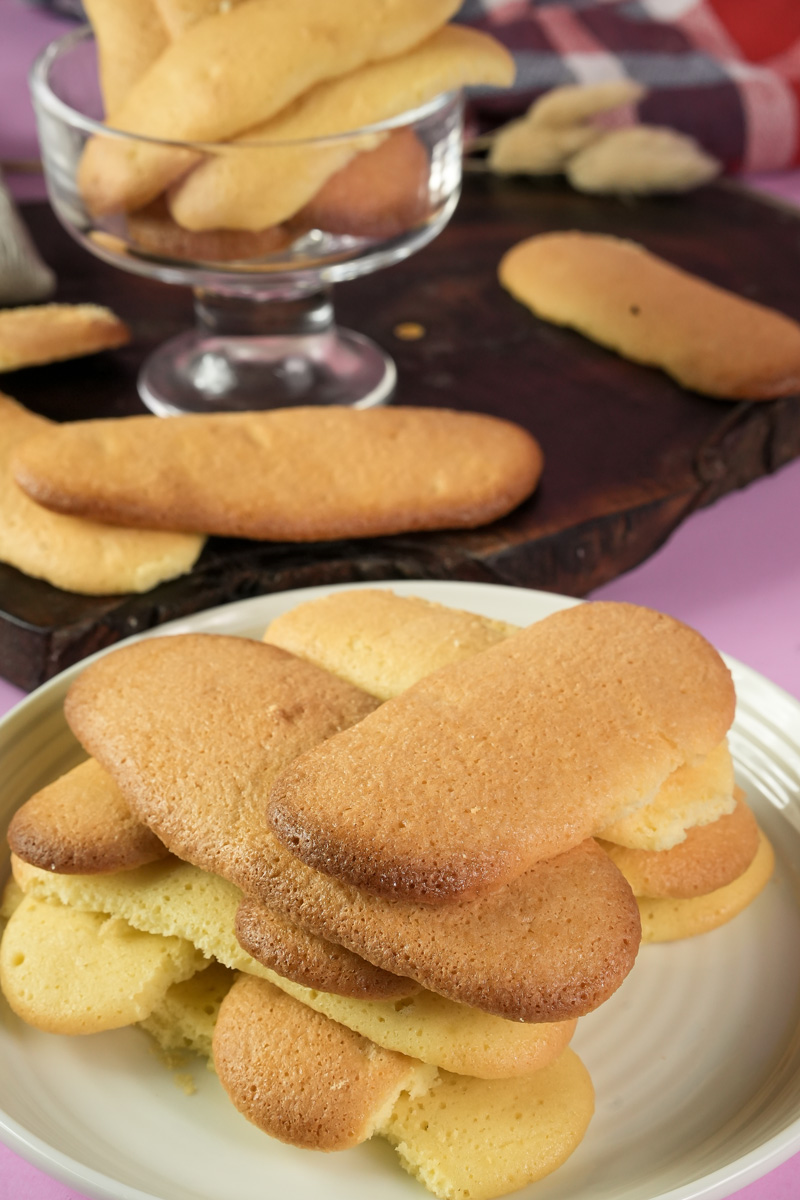
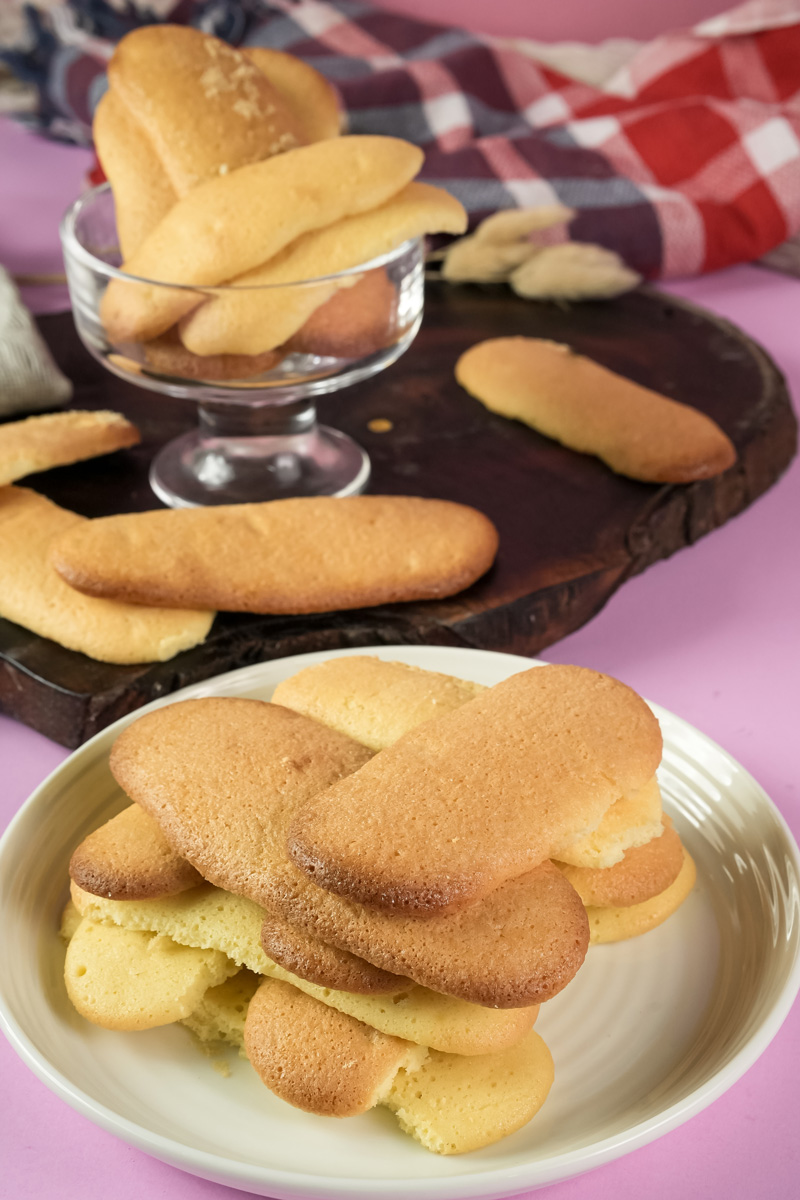
The real secret is the ladyfingers. The store-bought ones are often dry, crunchy, and bland. But homemade? They’re a whole different story. They’re light, airy, a little chewy, and they soak up flavor like a tiny sponge.
The official name for these cookies is Savoiardi. Legend says they were invented way back in the 15th century for a visit from the King of France. So yes, you’re basically baking cookies fit for royalty!
Don’t let the fancy name scare you. Making them is surprisingly simple. It’s all about the technique, not a long list of weird ingredients. I’m going to walk you through every single step. Once you try these, you’ll never look at that package in the store the same way again.
What to Expect
Let’s do a quick fly-by before we start cracking eggs. Knowing the game plan always makes baking less stressful.
- How long will this take? Not long at all! Once you get going, things move fast. Plan on about 20 minutes to get everything mixed and piped, and another 17 minutes for baking. In under 40 minutes, you’ll have amazing cookies.
- How many does it make? This recipe makes a big batch—about 50 cookies that are 4 inches long. That’s plenty for a big Tiramisu, with some left over for snacking. I really suggest making the full batch, as the batter works best this way. You can always freeze the extras!
| Batch Size | Eggs | Sugar | Flour | Cornstarch |
| Full Batch (50) | 6 large | 1 cup (200g) | 1 ½ cups (187g) | 2 Tbsp |
| Half Batch (25) | 3 large | ½ cup (100g) | ¾ cup (94g) | 1 Tbsp |
- Is it hard to make? I’d call it intermediate. Not because the ingredients are tricky, but because there are two moments that need your full attention: whipping the egg whites properly and folding everything together without losing all that air. But don’t worry. I’ve got all the tips to make it feel easy.
- What gear do I need? Just basic baking stuff. You’ll need mixing bowls, an electric mixer (a handheld one is totally fine), a spatula, and baking sheets with parchment paper. A piping bag with a simple ½-inch round tip makes them look classic, but you can absolutely use a Ziploc bag with the corner snipped off. Your cookies will just look a little more rustic and homemade, which I personally love.
What You’ll Need (And Why It Works)
The ingredient list is short and sweet, but each one has a really important job.
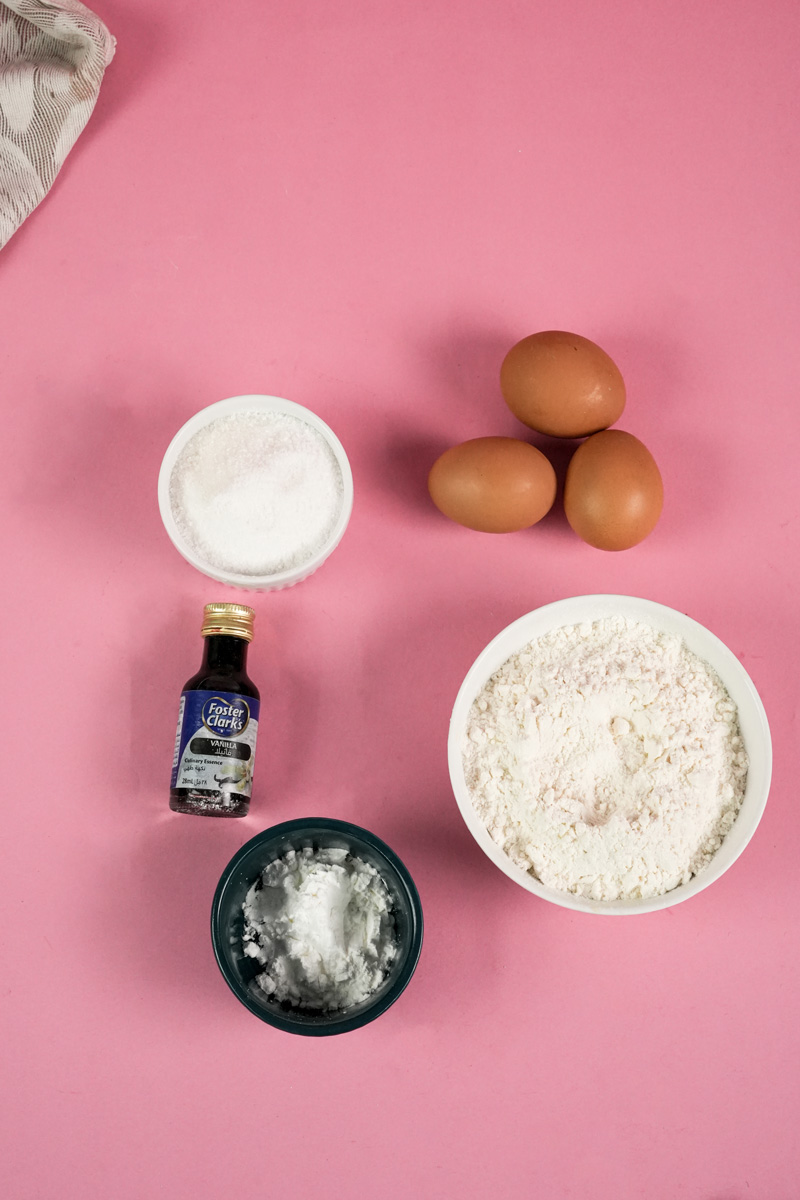
We start with 6 large eggs. They’re the star of the show. Here’s a weird but important tip: separate the yolks from the whites while the eggs are cold—they separate much more cleanly. But then, let the whites sit on the counter and come to room temperature before you whip them. Room-temp whites whip up much bigger and fluffier, which is key to that light texture.
Next is 1 cup of granulated sugar. We’re going to split it. Half goes into the egg whites to make a strong, stable meringue. The other half gets beaten with the egg yolks to make them rich and creamy.
For the dry stuff, we’re using 1 ½ cups of all-purpose flour and 2 Tablespoons of cornstarch. The cornstarch is my little secret! It makes the flour a bit softer, which gives the cookies a more tender, delicate texture instead of being tough.
Finally, 1 teaspoon of vanilla extract is the supporting cast. They just make everything taste better. And for the finishing touch? A little extra granulated sugar to sprinkle on top right before baking. This gives them that awesome, crackly crust.
The Step-by-Step Guide
Okay, let’s do this. Grab your apron.
Step 1: Whip Up the Meringue
First, get your oven preheating to 350°F (175°C) and line two baking sheets with parchment paper.
Now for the egg whites. Grab your bowl of room-temp whites and make sure the bowl is spotlessly clean. I mean it. Any little bit of grease or a tiny speck of yolk, and your whites just won’t whip up.
Start beating the whites on medium speed with your mixer. They’ll go from clear to foamy to white. You’re looking for “soft peaks.” That’s when you lift the beaters and the peak that forms just kinda slumps over at the top.
Once you hit soft peaks, keep the mixer running on medium and start adding half of your sugar (½ cup), just a spoonful at a time. Don’t rush this part! Adding it slowly helps the sugar dissolve and makes the meringue strong. After all the sugar is in, crank the speed to high and beat until you have “stiff, glossy peaks.” This time, when you lift the beaters, the peak should stand straight up. It’ll look thick and shiny. Perfect. Set that bowl aside.
Step 2: Make the Yolk Base
In another bowl, dump your egg yolks, the rest of the sugar, the vanilla. Beat this on medium-high for a few minutes. You’ll see it go from a dark yellow to a pale, creamy yellow. It will also get much thicker. You’re ready for the next step when you can lift the beaters and the batter falls off in a thick “ribbon” that sits on the surface for a second before melting back in.
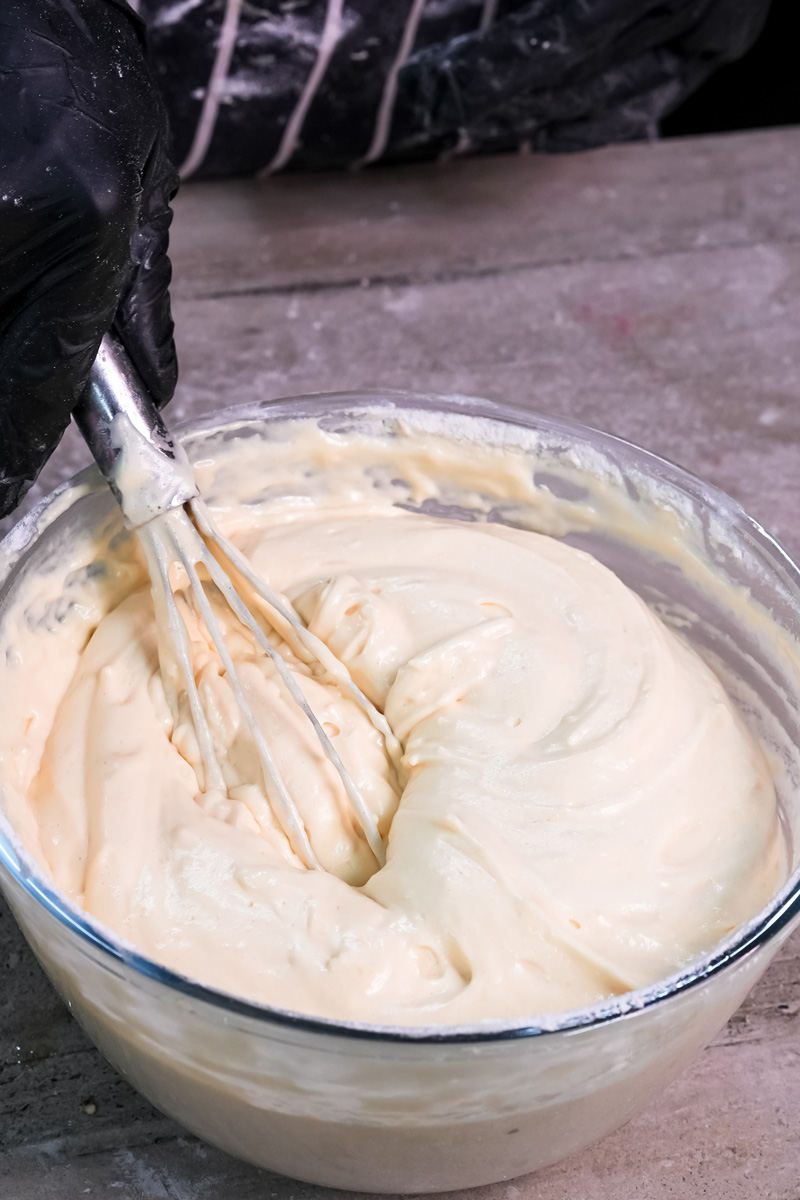
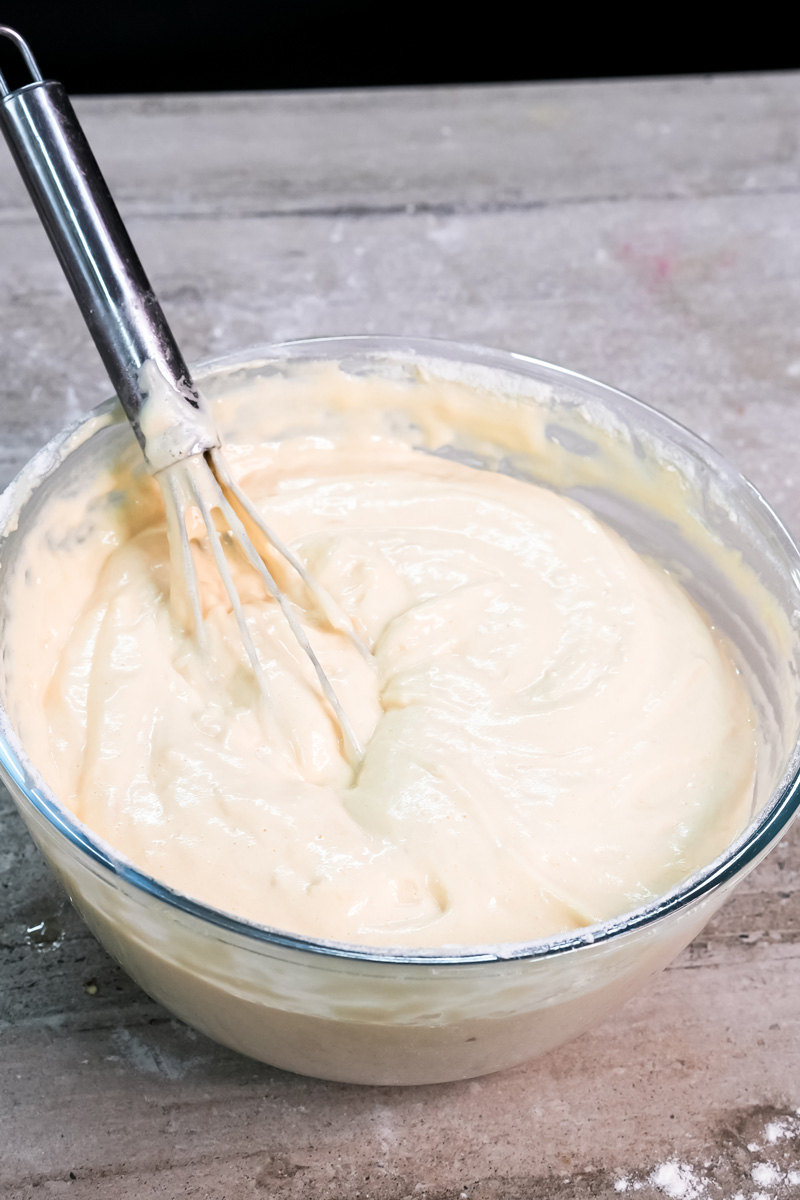
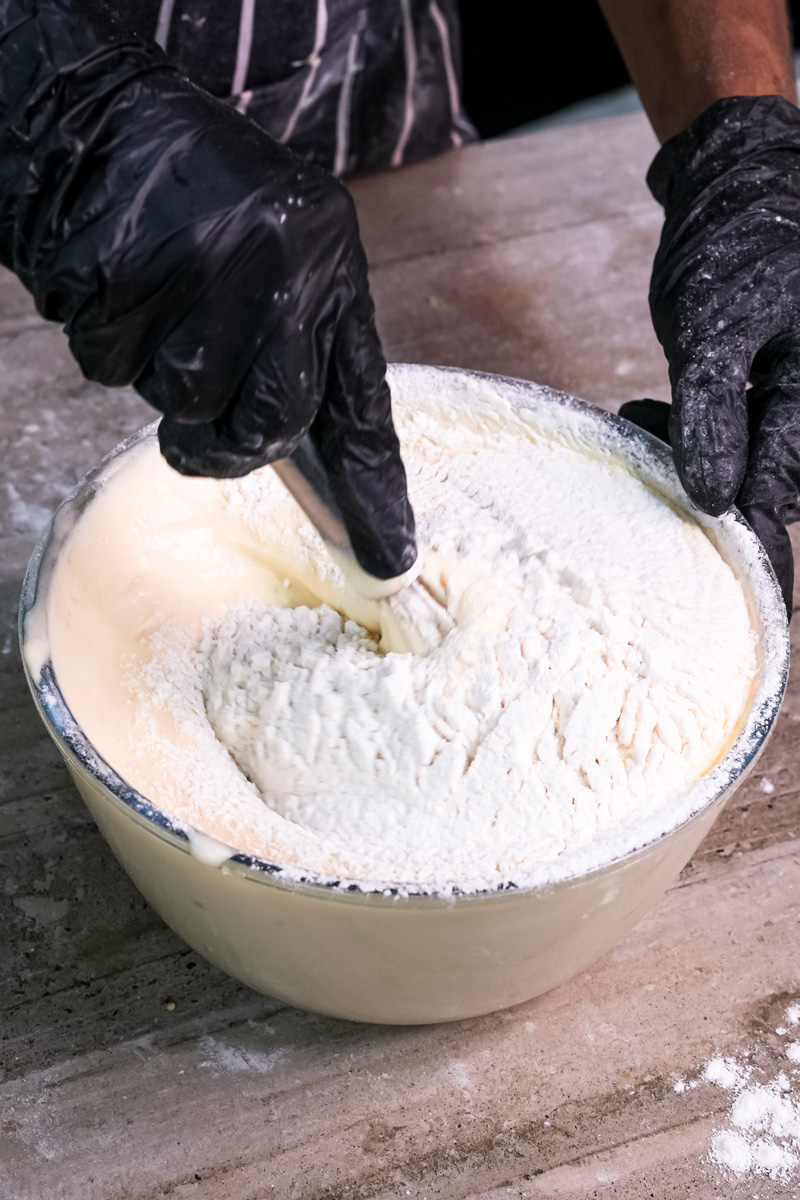
Step 3: The Fold (Be Gentle!)
Okay, this is the most important part. Pay attention here.
Pour the yolk mixture all over your beautiful meringue. Then, sift the flour and cornstarch right on top of everything. Do not skip the sifting. It gets rid of lumps and makes folding so much easier.
Now, put the mixer away. You’re done with it. Grab a big spatula. We are going to fold, not stir.
Here’s how: Cut your spatula down the side of the bowl to the bottom, then sweep it up through the middle and “fold” it over. Turn the bowl a quarter turn and do it again. Keep doing this gentle motion until you don’t see any more streaks of flour or yolk.
Don’t make this mistake: If you get impatient and start stirring, you will knock all the air out of the meringue. All that hard work, gone! Your cookies will be flat and sad. Imagine you’re trying not to wake a sleeping baby. That’s how gentle you need to be.
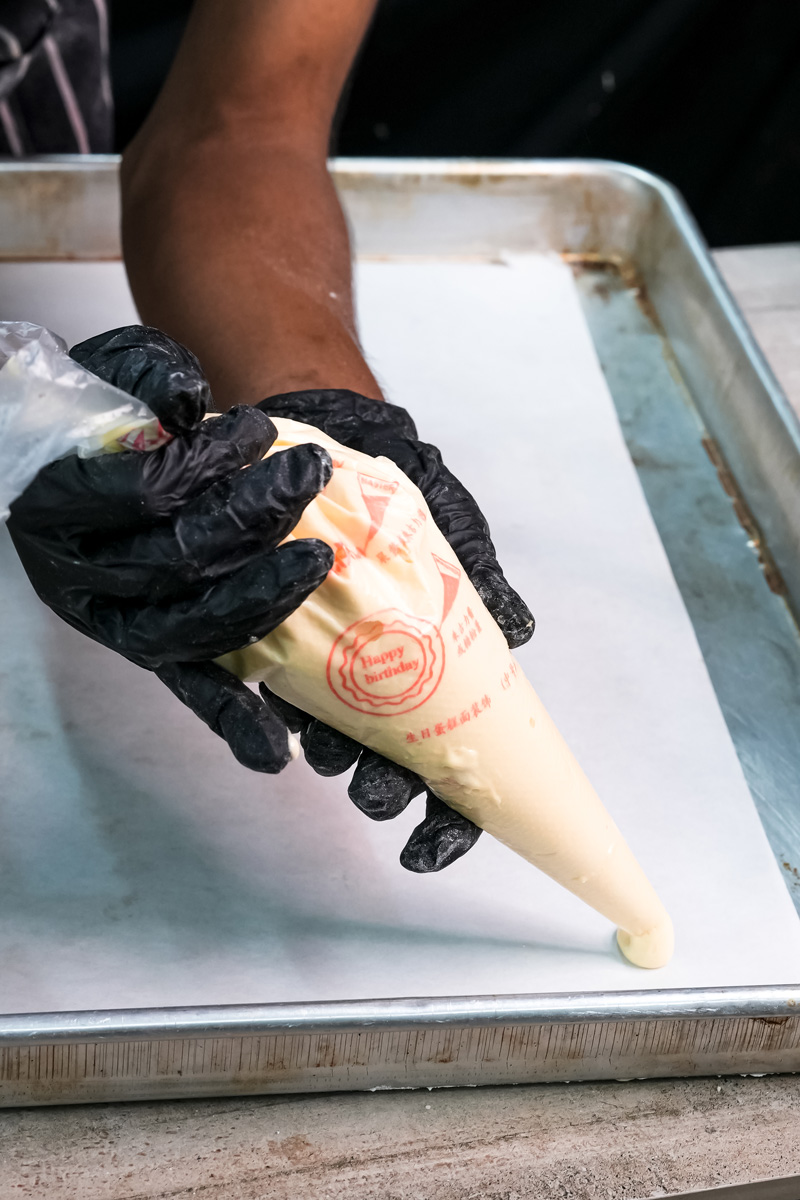
Step 4: Pipe and Bake
Scoop your light, airy batter into your piping bag. A handy trick is to put the bag into a tall drinking glass and fold the edges over the rim; this holds it open for you while you fill it.
Hold the bag at about a 45-degree angle to the baking sheet and pipe out 4-inch long lines. Make sure to leave about 2 inches of space between them because they’ll puff up in the oven.
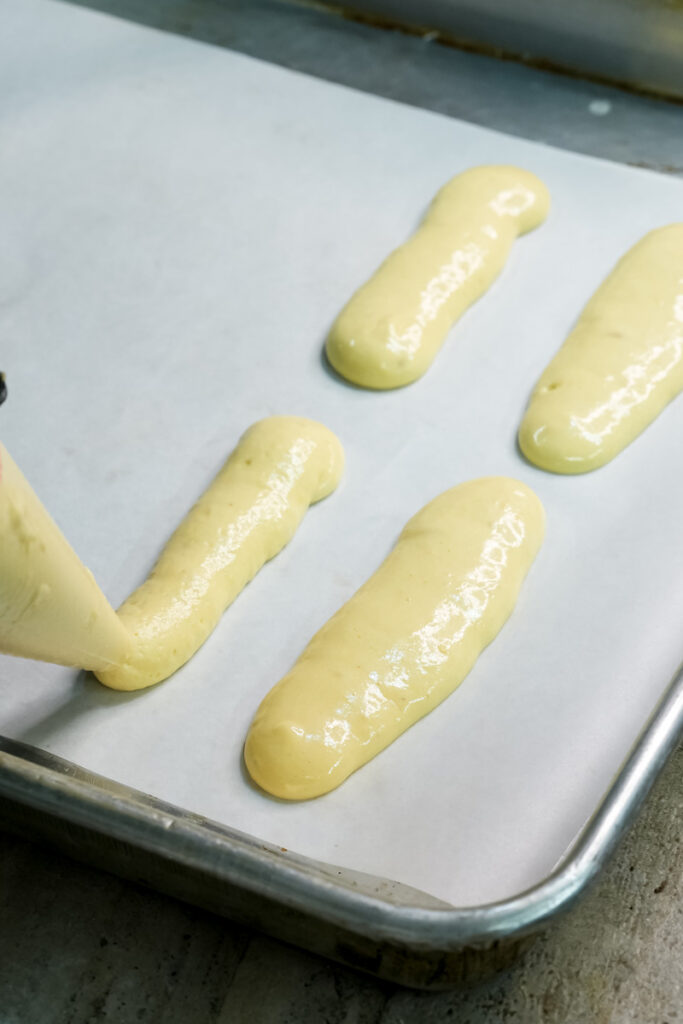
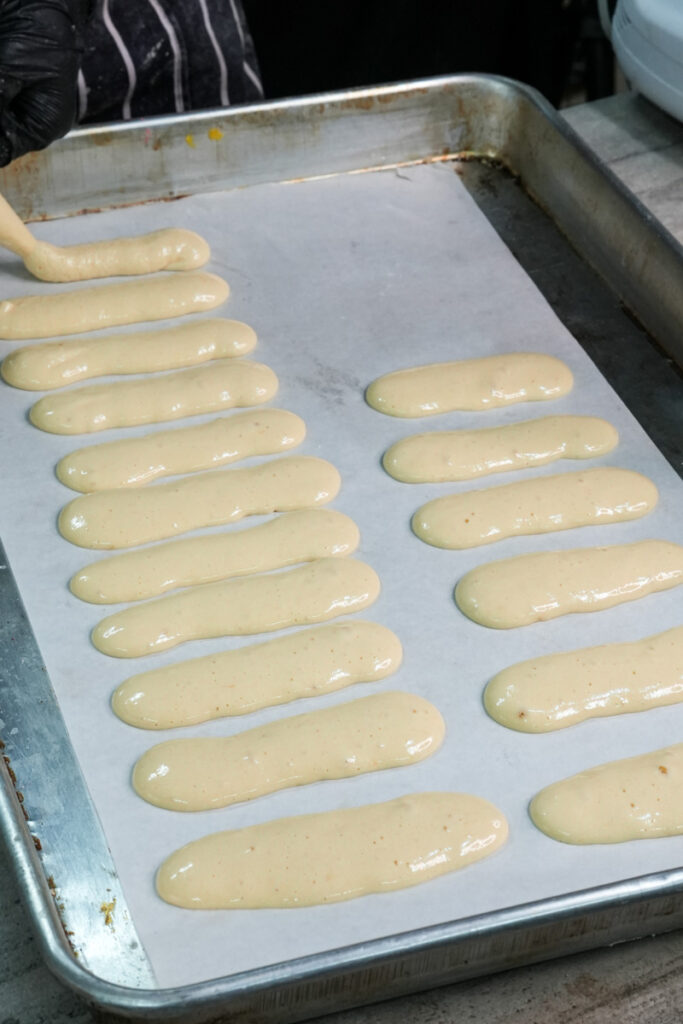
Sprinkle the piped cookies with a little extra sugar. This gives them that signature crunch.
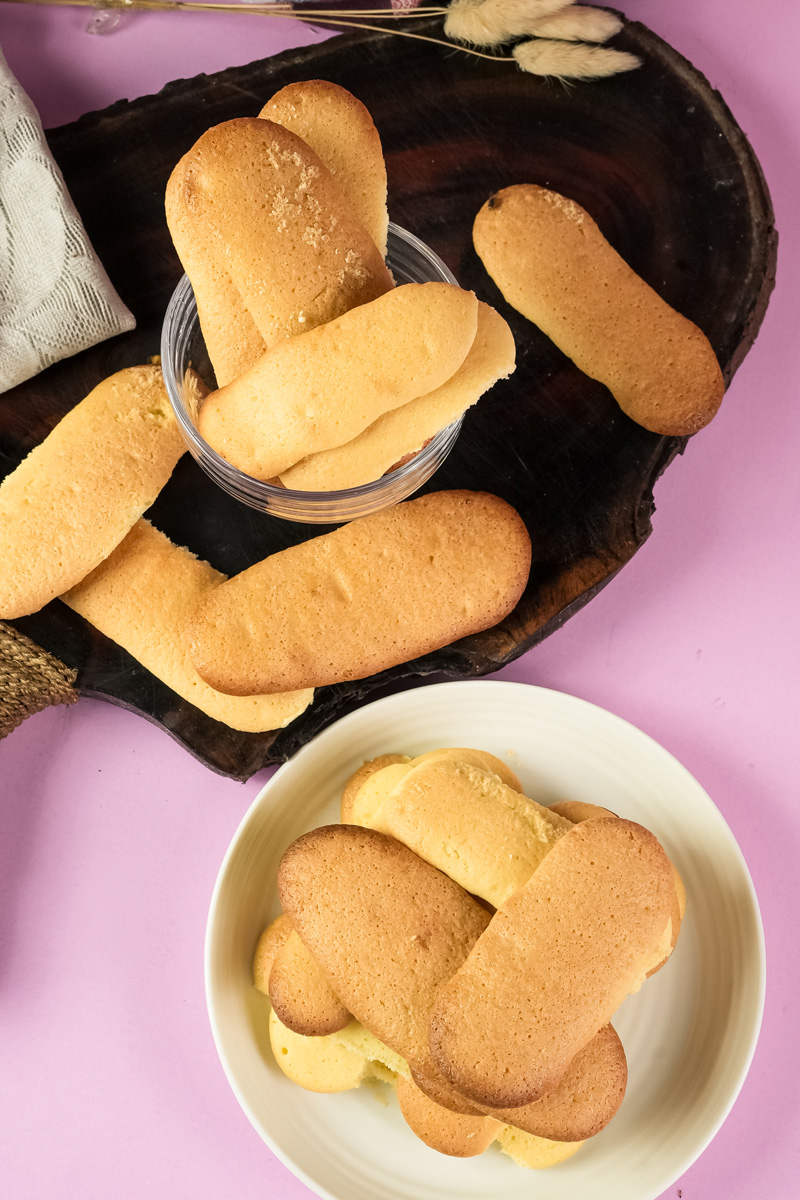
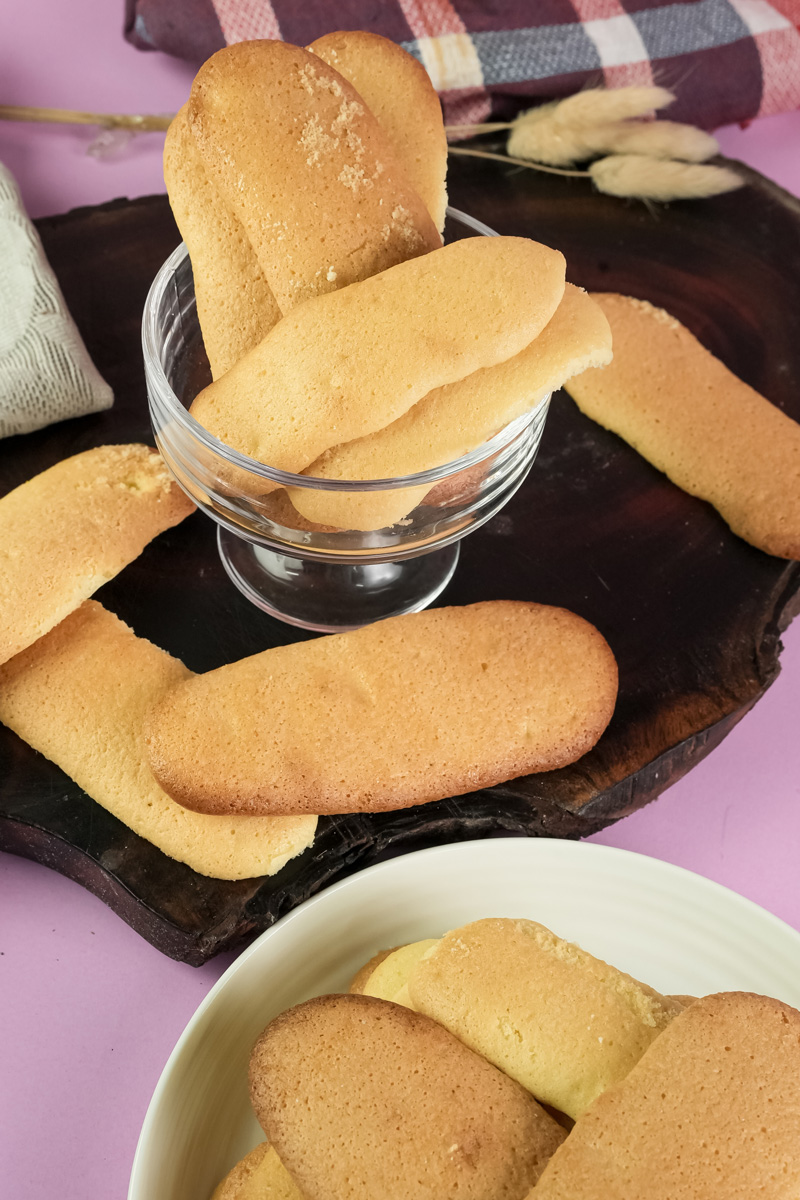
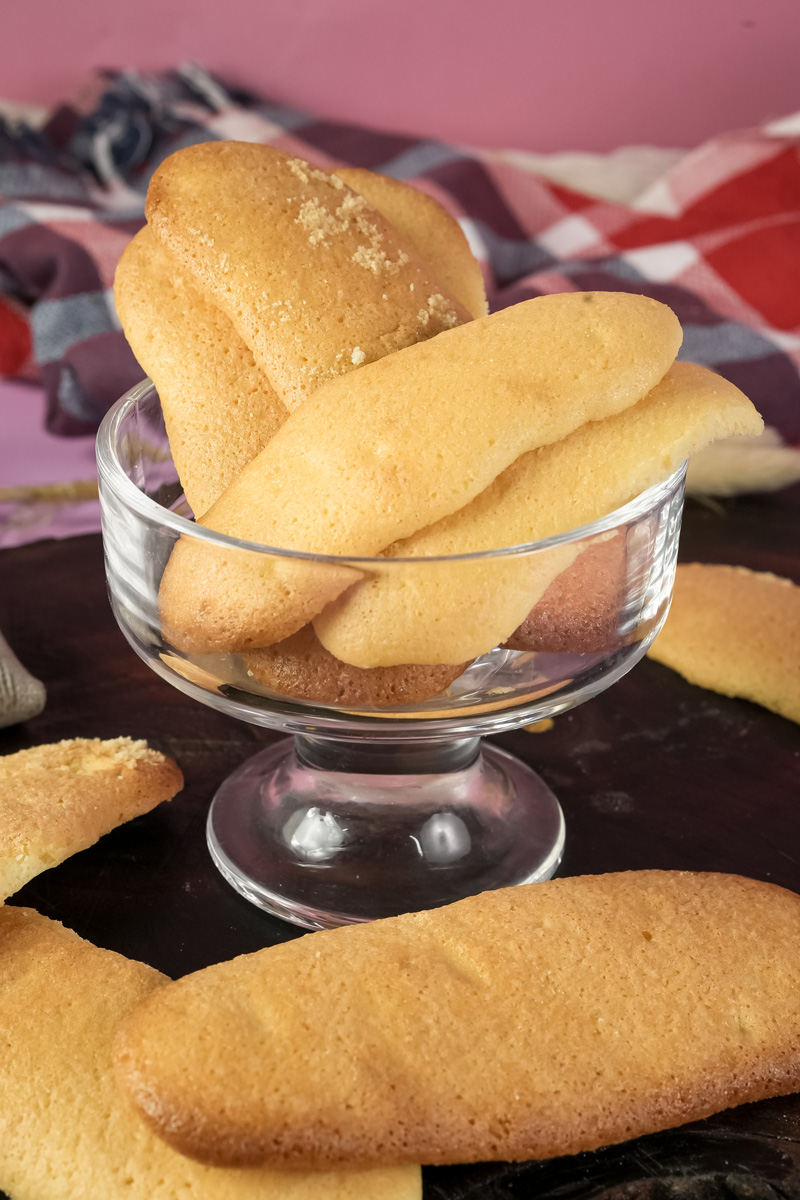
Bake in your 350°F (175°C) oven for 15-18 minutes. They’re done when they’re a pretty golden brown and feel firm if you gently poke one. Your kitchen will smell incredible! Let them cool on the pan for a few minutes before moving them to a wire rack to cool completely.
Want to Mix It Up?
The classic version is amazing, but these cookies are fun to play with!
- Citrus Twist: Add the zest of one lemon or orange to the yolk mixture.
- Chocolate Lover: Swap the cornstarch for the same amount of unsweetened cocoa powder (and sift it in with the flour).
- Gluten-Free: You can use a good quality 1-to-1 gluten-free flour blend. The texture will be a little different, but still great.
- Fall Spices: In the fall, try sprinkling them with cinnamon-sugar or pumpkin pie spice before baking.
How to Serve and Store Them
Obviously, Tiramisu is the number one use for these. But don’t stop there! They are fantastic for dipping into coffee or tea. They’re also great served with a bowl of ice cream or fruit mousse.
When it comes to storing them, it depends on the plan.
- For snacking: Keep them in an airtight container on the counter for up to 3 days. This keeps them from getting too hard.
- For Tiramisu: Leave them uncovered on the counter overnight. Seriously! You want them to get a little stale. This helps them soak up the coffee without turning into complete mush.
And yes, they freeze perfectly! Let them cool completely, then pop them on a baking sheet in the freezer. Once they’re frozen solid, you can toss them all into a freezer bag. They’ll be good for up to a month. Just pull them out and let them sit on the counter for 30 minutes to thaw.
PrintLadyfingers (Savoiardi)

Skip the store-bought kind! These homemade ladyfingers are delightfully light, airy, and crisp, with a soft, spongy center. They’re the secret to an unforgettable Tiramisu but are also perfect for dipping in your morning coffee.
- Prep Time: 20 minutes
- Cook Time: 17 minutes
- Total Time: 37 minutes
- Yield: about 50 cookies 1x
- Category: Dessert, Cookies
- Cuisine: Italian, French
Ingredients
- 6 large eggs, separated, with whites at room temperature
- 1 cup (200g) granulated sugar, divided in half
- 1 tsp vanilla extract
- 1 ½ cups (187g) all-purpose flour
- 2 Tbsp cornstarch
- Extra granulated sugar, for sprinkling
Instructions
- Get Ready: Preheat your oven to 350°F (175°C). Line two large baking sheets with parchment paper.
- Make the Meringue: In a completely clean, grease-free bowl, use an electric mixer to beat the egg whites until soft peaks form. With the mixer on medium, slowly add half of the sugar (½ cup). Increase speed to high and beat until stiff, glossy peaks form.
- Mix the Yolk Base: In a separate bowl, beat the egg yolks with the remaining sugar and vanilla until the mixture is pale yellow, thick, and falls from the beaters in a slow ribbon.
- Fold the Batter: Pour the yolk mixture over the meringue. Sift the flour and cornstarch over the top. Using a spatula, GENTLY FOLD everything together until no streaks remain. Be careful not to deflate the air!
- Pipe the Cookies: Transfer the batter to a piping bag fitted with a ½-inch round tip. Pipe 4-inch lines onto your baking sheets, leaving about 2 inches of space between them.
- Bake: Lightly sprinkle the cookies with extra sugar. Bake for 15-18 minutes, or until they are golden brown and firm to the touch. Let them cool on the pan for 10 minutes before moving to a wire rack to cool completely.
Notes
Tips & Tricks
- Don’t Deflate! The most important step is folding gently. Do not stir or whisk the batter after adding the flour.
- No Piping Tip? A large Ziploc bag with a ½-inch corner snipped off works just as well for a more rustic look.
- Room Temp Whites: Make sure your egg whites are at room temperature. They’ll whip up with much more volume.
Serving & Storage
- For Tiramisu: These are the gold standard! For best results, let the cookies sit out uncovered overnight. This dries them out a bit so they can soak up the espresso without getting mushy.
- For Snacking: Store cooled cookies in an airtight container at room temperature for up to 3 days. They are perfect for dipping in coffee or serving with ice cream.
- To Freeze: Arrange the cookies in a single layer on a baking sheet and freeze until solid. Transfer to a freezer-safe bag for up to 1 month. Thaw at room temperature.