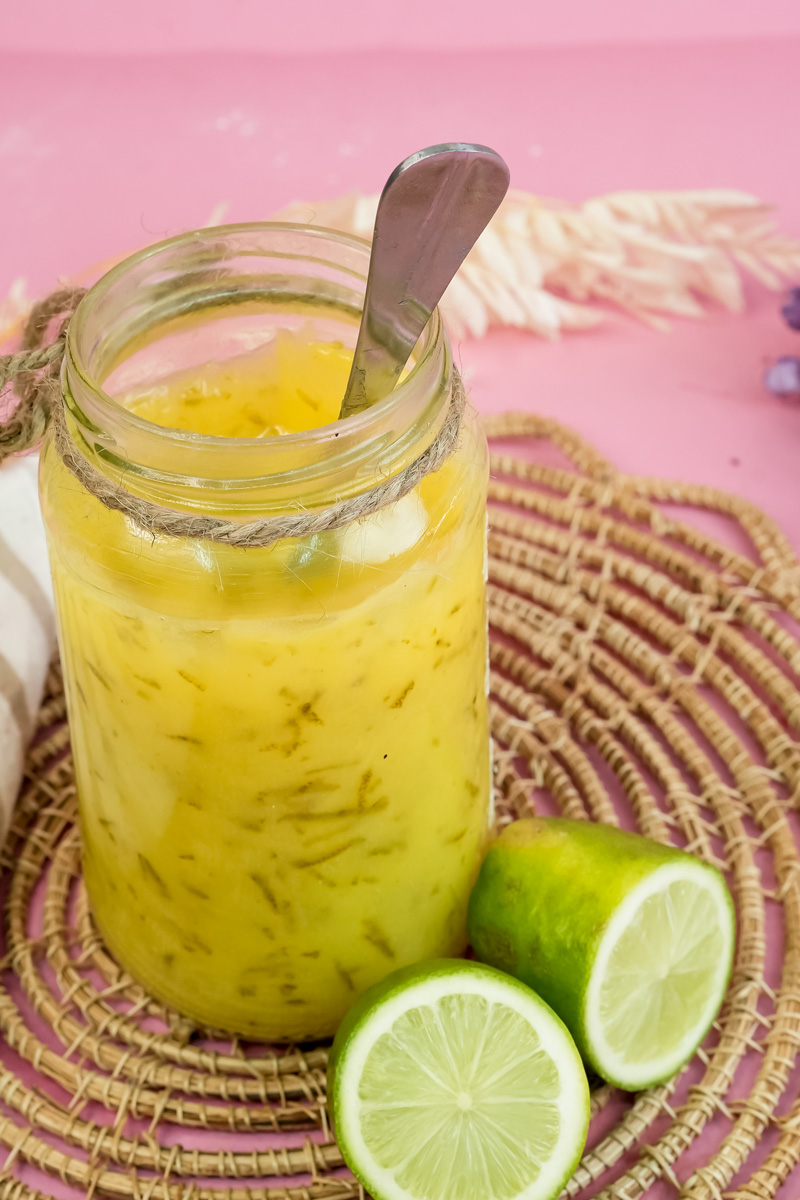
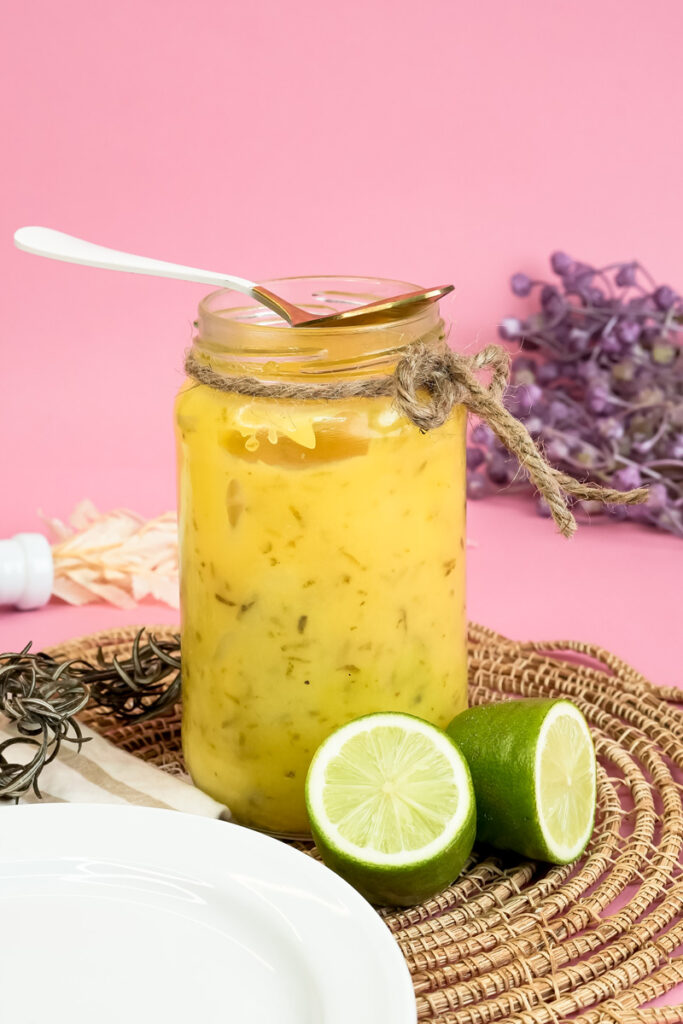
Have you ever tasted something so bright and flavorful it feels like actual sunshine on your tongue? That’s what a spoonful of real, homemade lemon curd is like.
There’s something so special about it. The color alone is enough to make you happy, a vibrant, cheerful yellow. And the taste? It’s this perfect balance of sharp, tangy lemon and creamy sweetness.
I remember the first time I tried proper lemon curd. It wasn’t the stuff you get in a jar at the supermarket. It was at a tiny little bakery, served with a warm scone, and it absolutely blew my mind. I knew I had to figure out how to make it myself. It turns out, it’s way easier than you’d think.
The recipe I’m sharing today is the one I’ve tweaked and perfected over the years. It’s all about using rich egg yolks and cold butter to get the silkiest texture and the most intense lemon flavor. Forget the store-bought versions. We’re about to make something truly special.
So, grab your whisk. Let’s do this.
What to Expect
Before we jump in, here’s a quick rundown. This recipe is pretty simple, but the secret is all in the technique. Don’t worry, I’ll walk you through every little step.
- How long will this take? You’ll need about 15 minutes to get everything ready and then 10 minutes of cooking. The hardest part? Letting it cool down for 2 hours. That’s when the magic happens and it sets up perfectly. All in, you’re looking at about 2 hours and 25 minutes.
- How much does this make? This recipe makes about 1¼ cups. It’s the perfect amount for a small jar, either for yourself or to give as a gift.
- Is this hard to make? Honestly, no. If you’ve never made a custard, cooking eggs on the stove can sound a little scary. But trust me. We’ll use low heat and keep whisking, and you’ll see how forgiving it really is. You’ve got this.
- What gear do I need? No fancy gadgets required. You’ll just need:
- A decent pot, preferably one with a heavy bottom so things don’t burn.
- A whisk.
- A wooden spoon.
- A fine-mesh strainer (like a sieve).
- A jar or heat-proof bowl to store your beautiful curd.
- Can I make it ahead of time? Good news! You have to make it ahead. It needs that chill time to set. It’s a fantastic way to get a head start on a dessert or brunch for the weekend.
Need to Make More?
Want to make a double batch or enough for the whole neighborhood? I got you. Here’s a handy chart.
| Servings (approx.) | Sugar | Lemon Zest | Egg Yolks | Lemon Juice | Butter |
| 1¼ cups (1x) | 1 cup | 2 tbsp | 6 | ½ cup | ½ cup |
| 2½ cups (2x) | 2 cups | 4 tbsp | 12 | 1 cup | 1 cup |
| 5 cups (4x) | 4 cups | 8 tbsp | 24 | 2 cups | 2 cups |
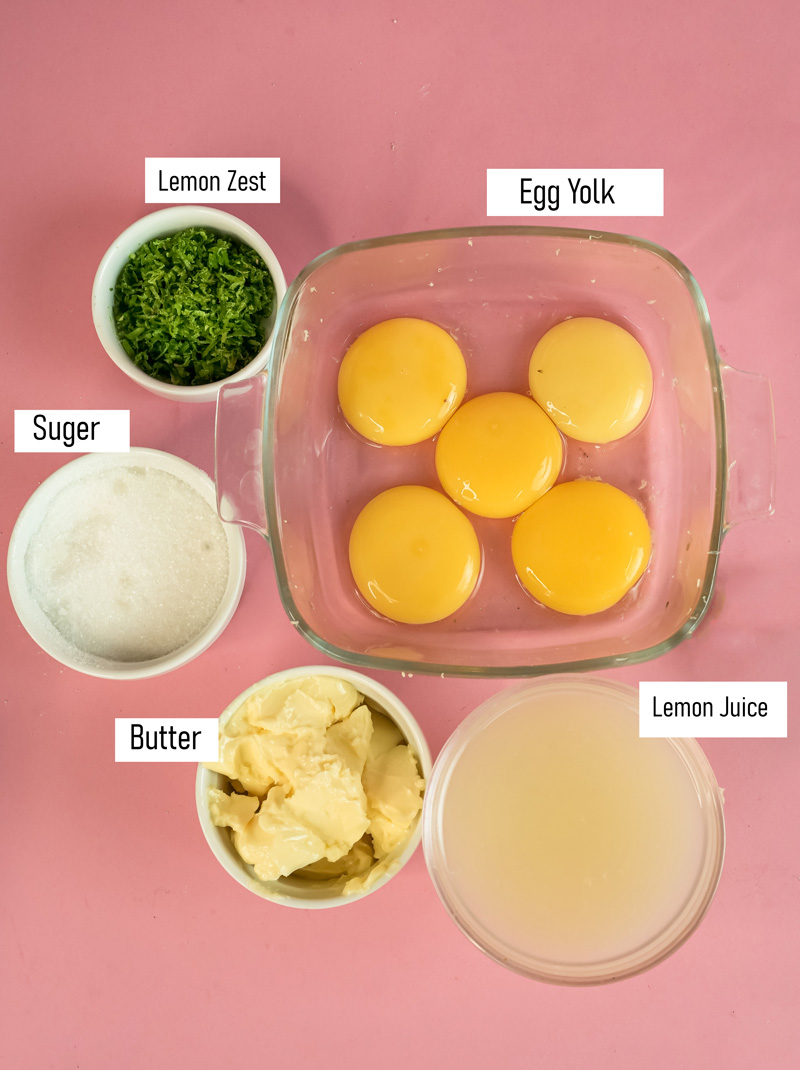
The All-Star Ingredients
The best part about this recipe is how simple the ingredients are. Just a few quality things make something amazing.
First up is one cup of plain old granulated sugar. This gives us the sweetness we need to balance out all that lemon.
Next, the star of our show: lemons! You’ll need two tablespoons of lemon zest and half a cup of freshly squeezed lemon juice. And please, please, use real lemons for this. The bottled juice just doesn’t have the same bright, zippy flavor. A little tip I learned the hard way: zest your lemons before you cut and juice them. It’s a million times easier.
For that incredibly rich and creamy texture, we’ll use six large egg yolks. Using just the yolks gives the curd its beautiful color and custardy body. And don’t you dare throw out those egg whites! They’re perfect for a healthy omelet or for making a batch of meringues.
Finally, you’ll need half a cup of cold, unsalted butter, chopped into small cubes. Using unsalted butter means we control the saltiness. And keeping it cold is key. We’ll stir it in at the very end while the curd is hot. This is the secret to getting that signature velvety smooth finish.
Let’s Get Cooking: The Step-by-Step Guide
Alright, time for the fun part. Put on some music, and let’s make some magic.
Step 1: Get That Flavor Going
First, let’s get that lemon flavor cranked up to eleven. Separate your eggs and put the yolks in a small bowl.
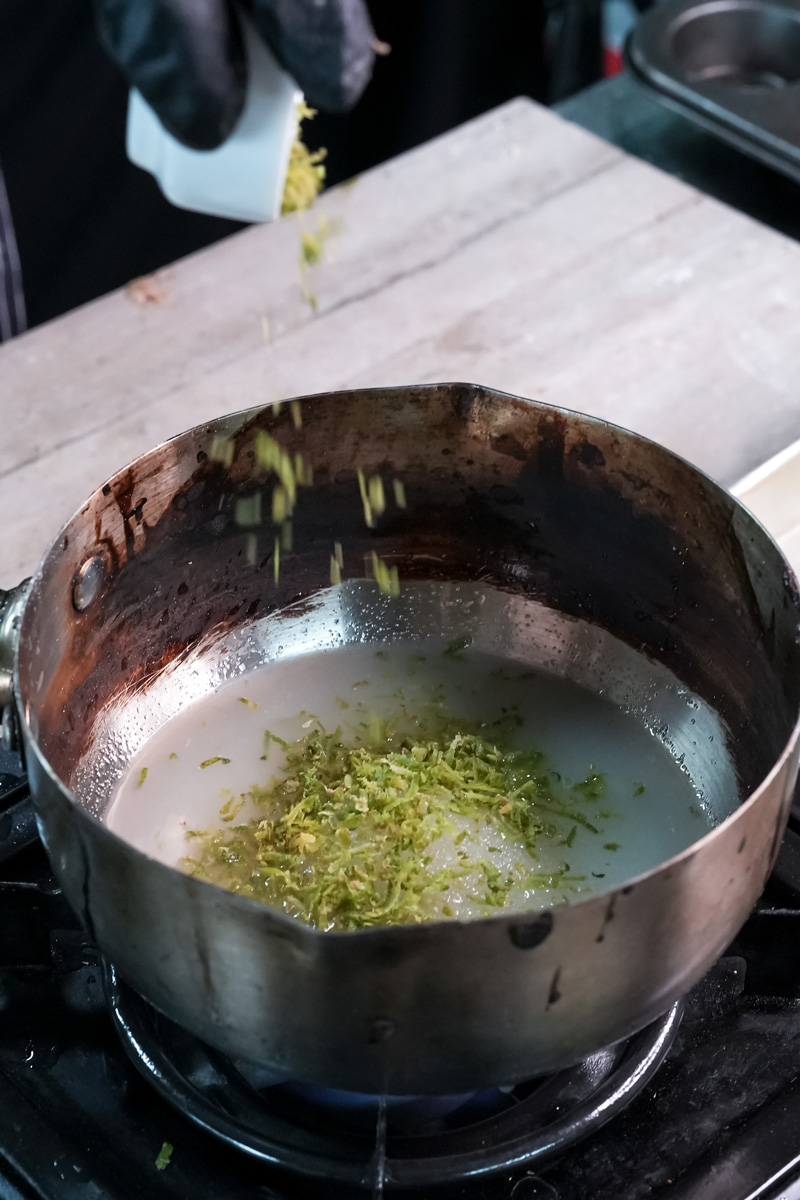
Now, for the lemons. Wash and dry them, then zest them right into a bowl with your sugar. Here’s a trick I love: use your fingertips to rub the zest into the sugar. You’ll smell it immediately—the oils from the zest infuse the sugar, and it’s just incredible. If you have a little food processor, you can pulse the sugar and zest together a few times for the same effect.
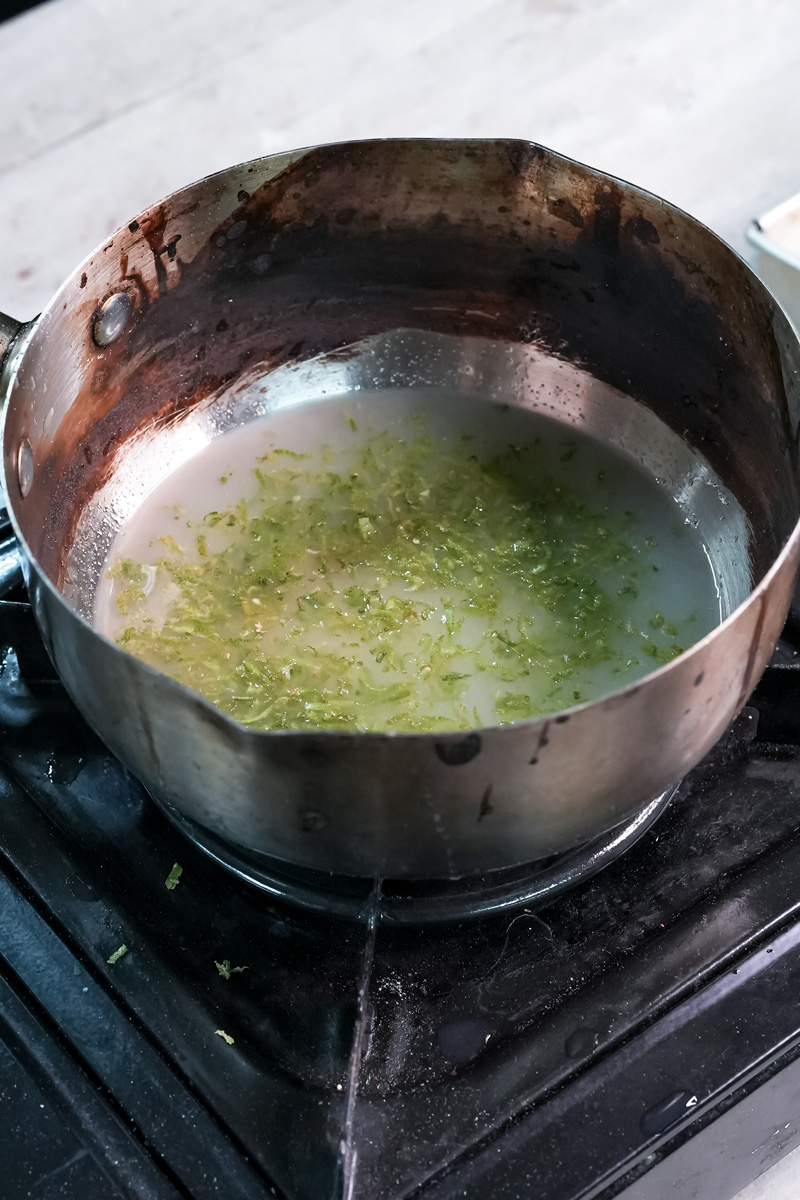
Once that’s done, juice your lemons and strain out any pips.
Step 2: Make the Custard Base
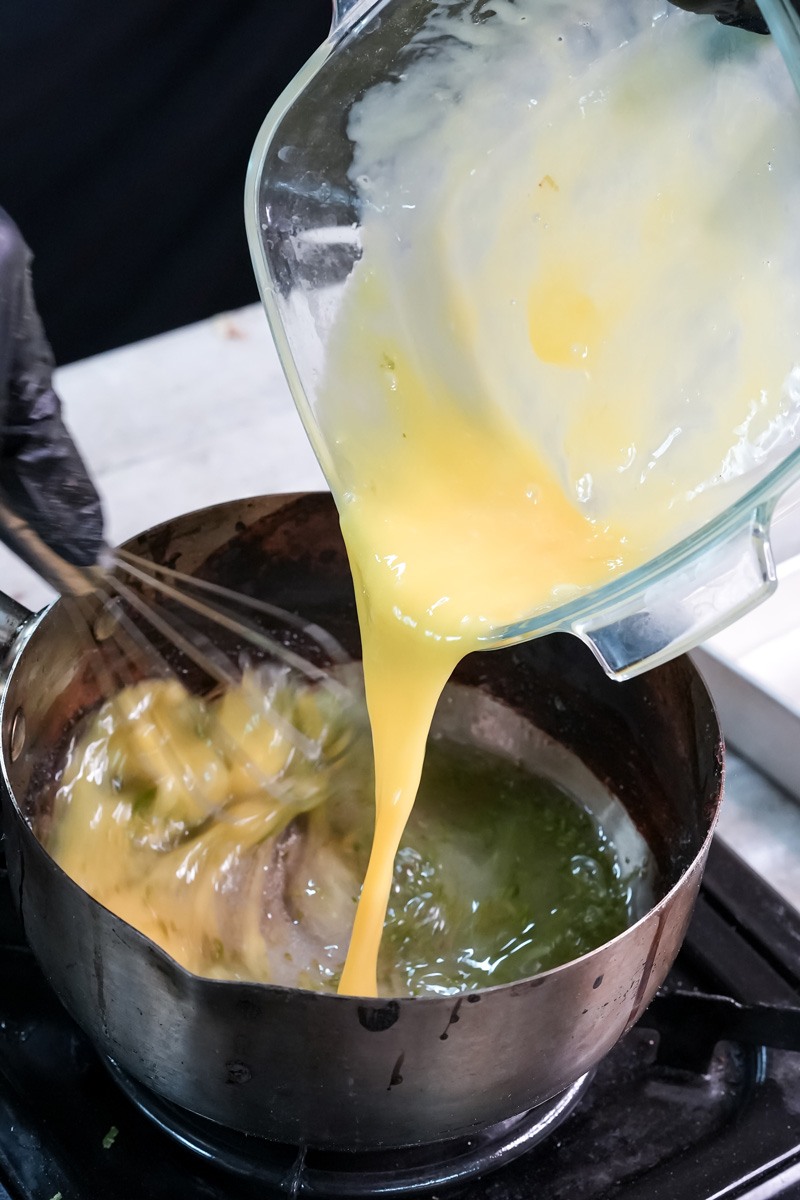
Grab your pot. I like to strain the egg yolks into the pot, just to make sure no little stringy bits or bits of shell sneak in. Add your fragrant lemon-sugar mixture and whisk it vigorously. You’ll see it thicken up and turn a beautiful pale yellow.
Now, slowly pour in the lemon juice while whisking gently. Keep going until it’s all one smooth mixture.
Step 3: The Most Important Part
Okay, this is where you need to pay attention. Don’t walk away to check your phone!
Put the pot on low heat. Low and slow is the name of the game here. Start whisking. You need to keep it moving constantly, especially around the edges of the pot.
For the first few minutes, it will look pretty thin and maybe a little foamy. Be patient. Then, after about 5 to 7 minutes, you’ll feel it. The mixture will start to thicken. It’s a pretty cool moment when it goes from a liquid to a velvety cream.
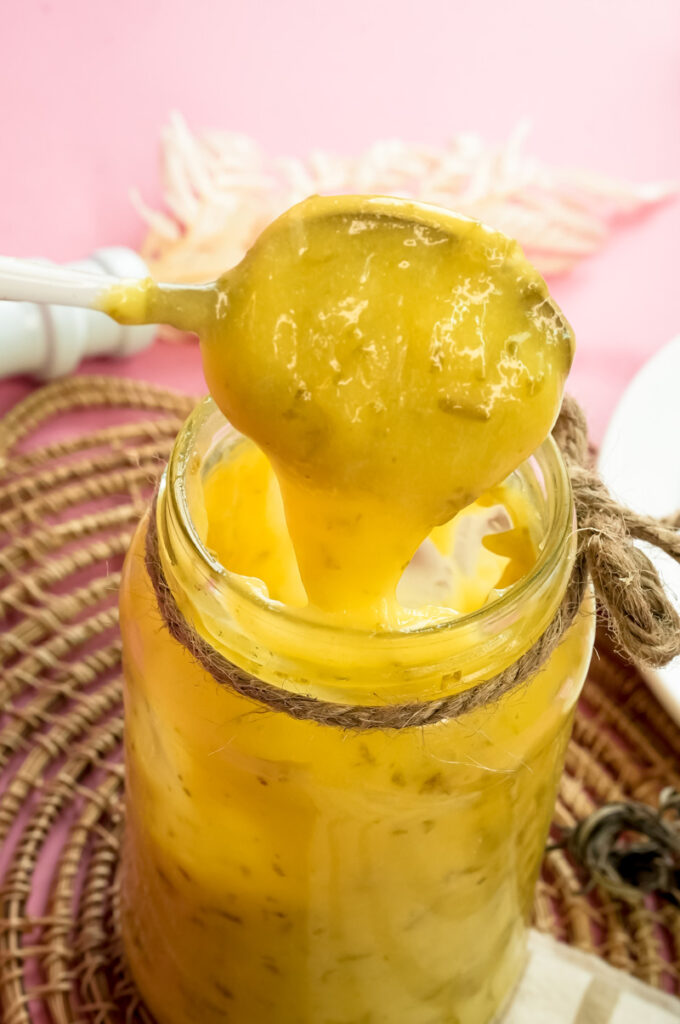
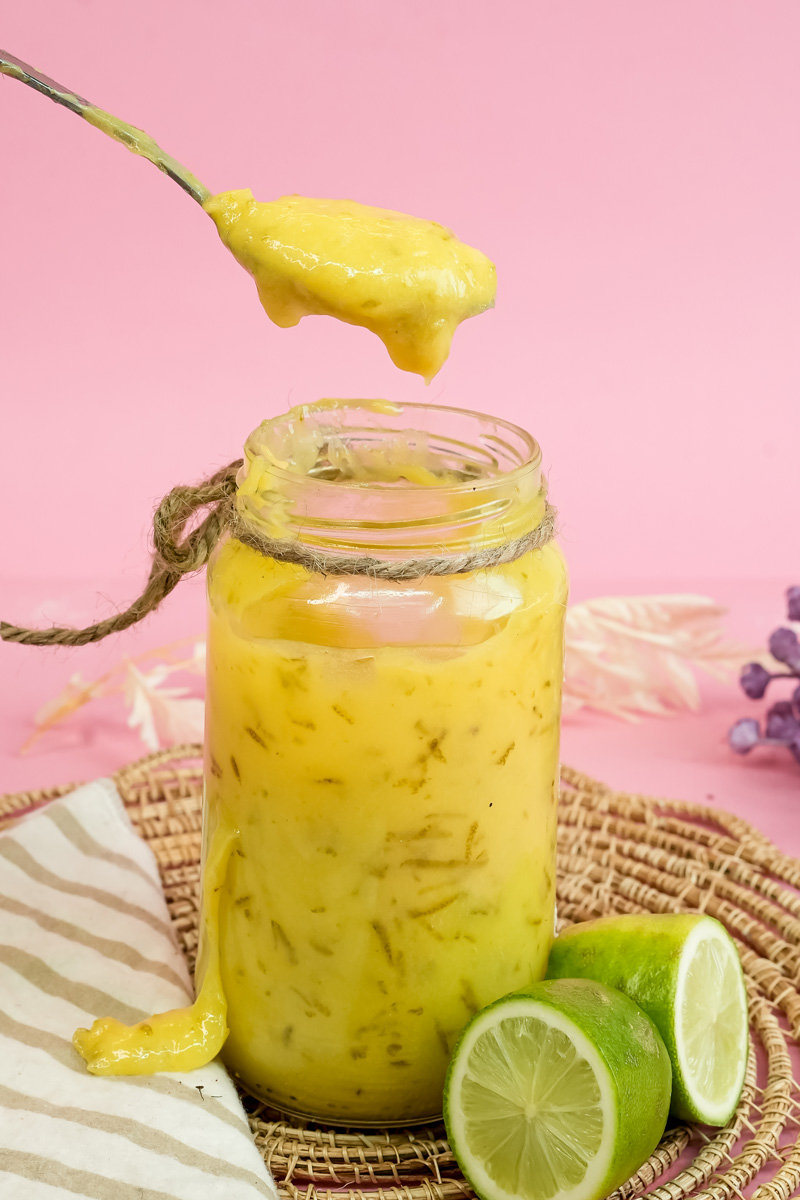
How do you know when it’s done? The old-school test is best. Dip a wooden spoon into the curd. It should be thick enough to coat the back of the spoon. Then, run your finger through it. If the line holds its shape and the curd doesn’t run back together, it’s perfect! You’re done.
One last thing, and this is important: Do not let it boil! If it boils, the eggs can scramble, and you’ll lose that silky texture.
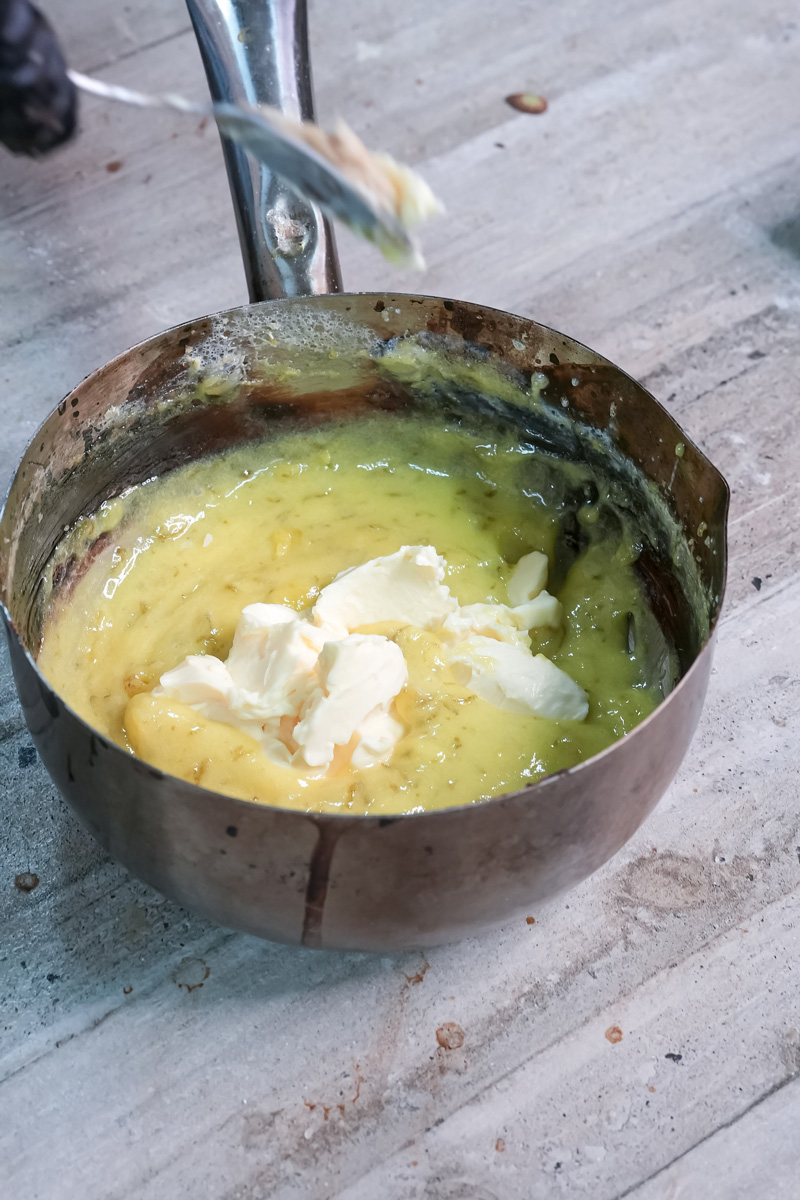
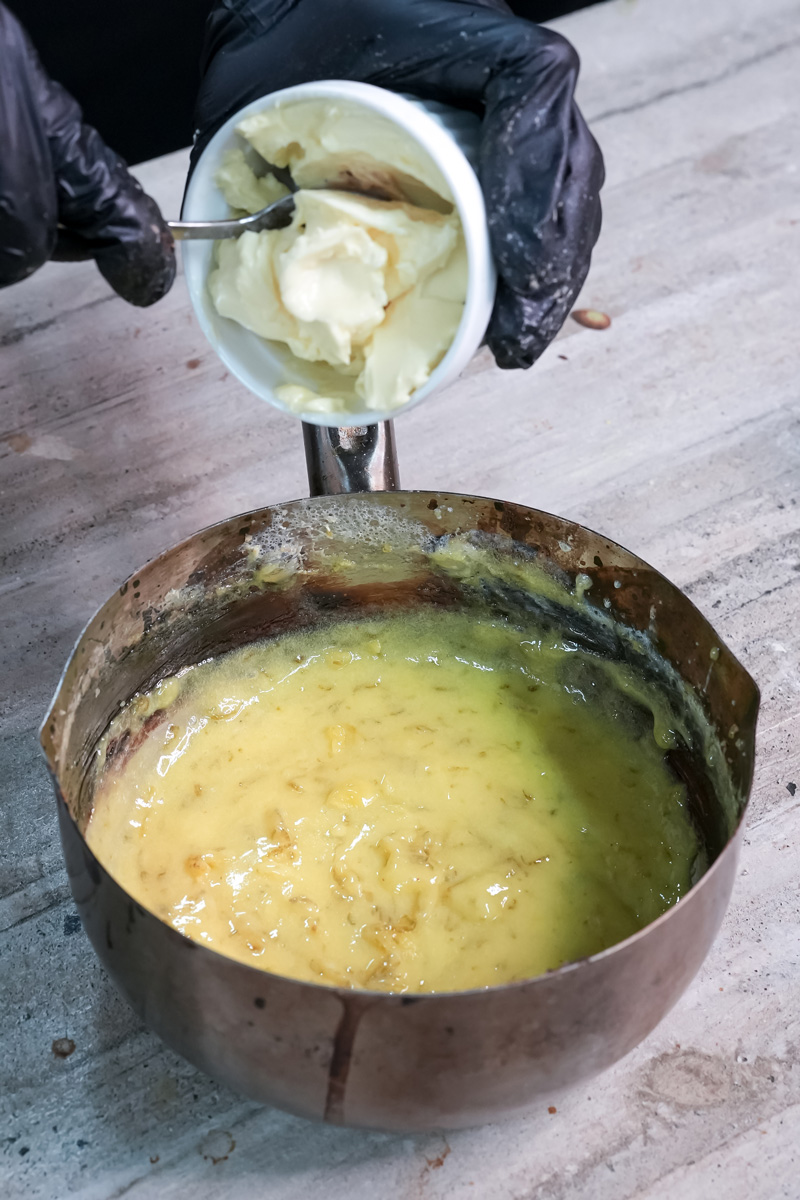
Step 4: The Silky Butter Finish
The second your curd is thick enough, take the pot right off the heat.
Grab your cold, cubed butter and toss it all in at once. Start whisking. The cold butter not only adds an amazing richness and shine but also helps cool the curd down and stops the eggs from cooking any further. Keep stirring until every last piece of butter has melted and the curd is glossy and completely smooth.
Step 5: Strain for Perfection (You Should Totally Do This)
Want that super-duper, professionally-smooth texture? Don’t skip this step.
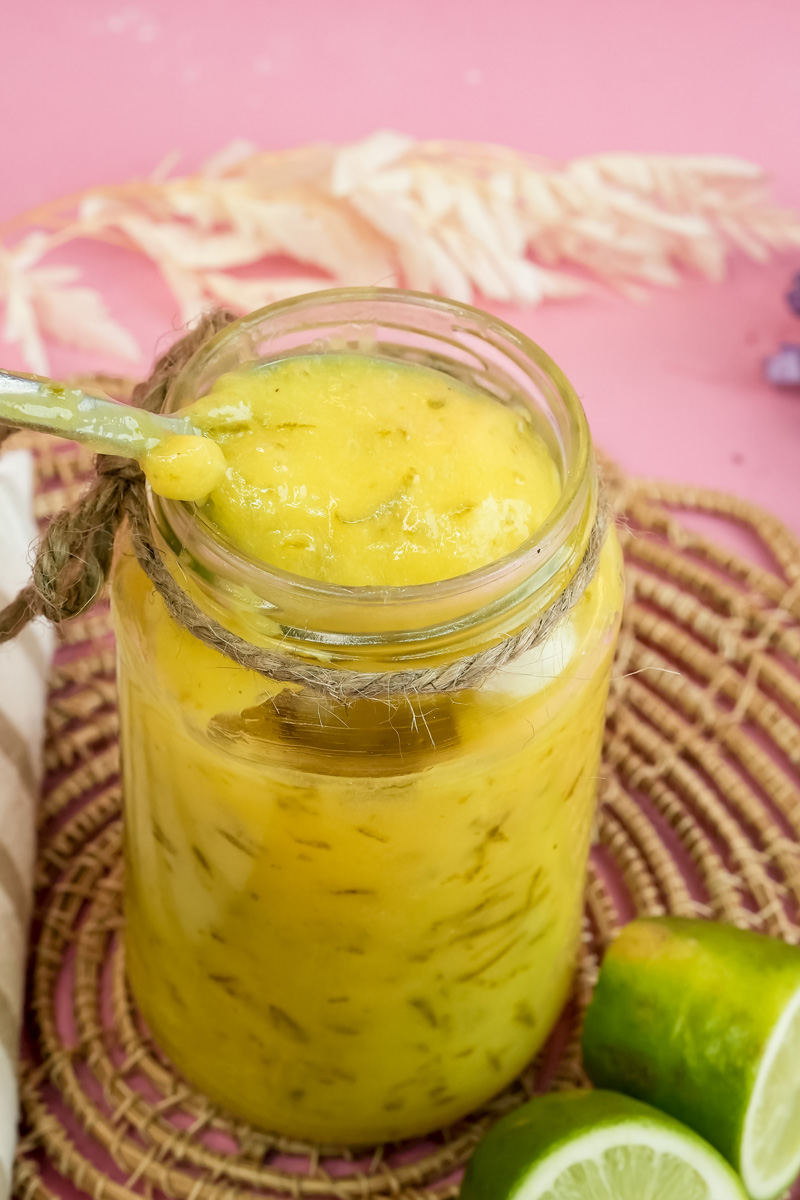
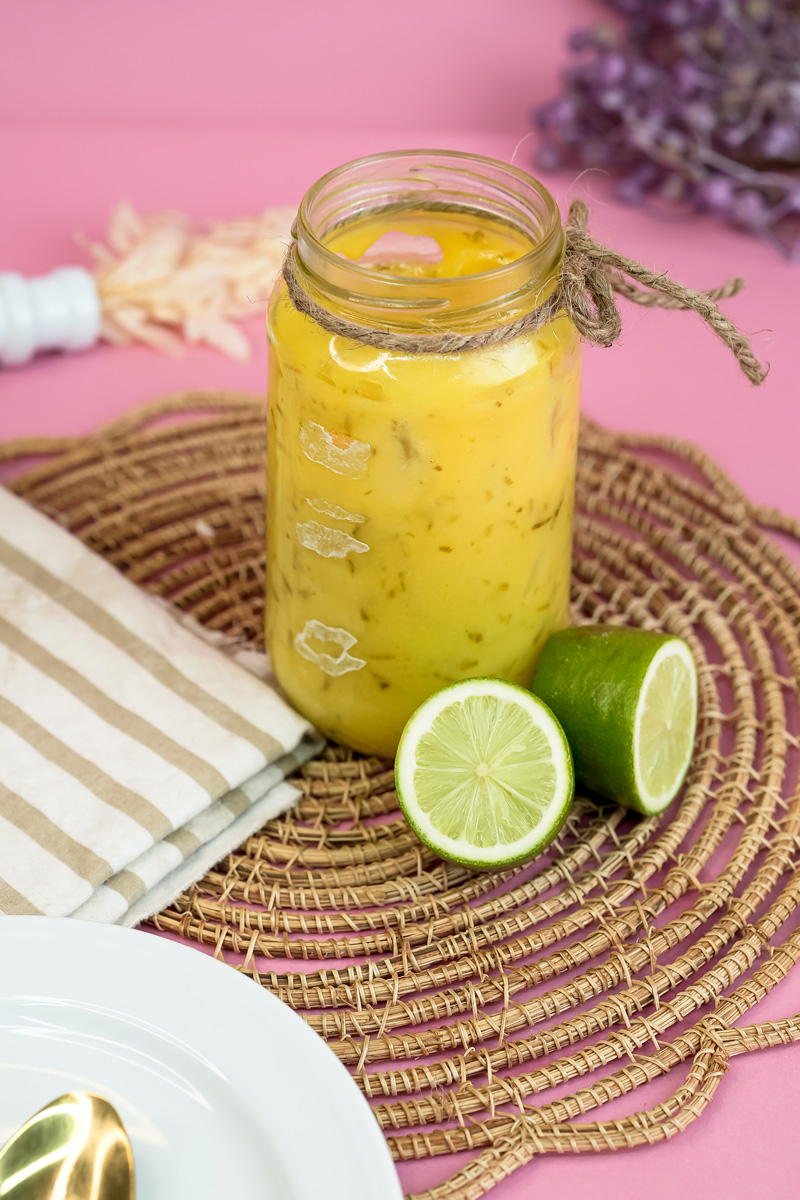
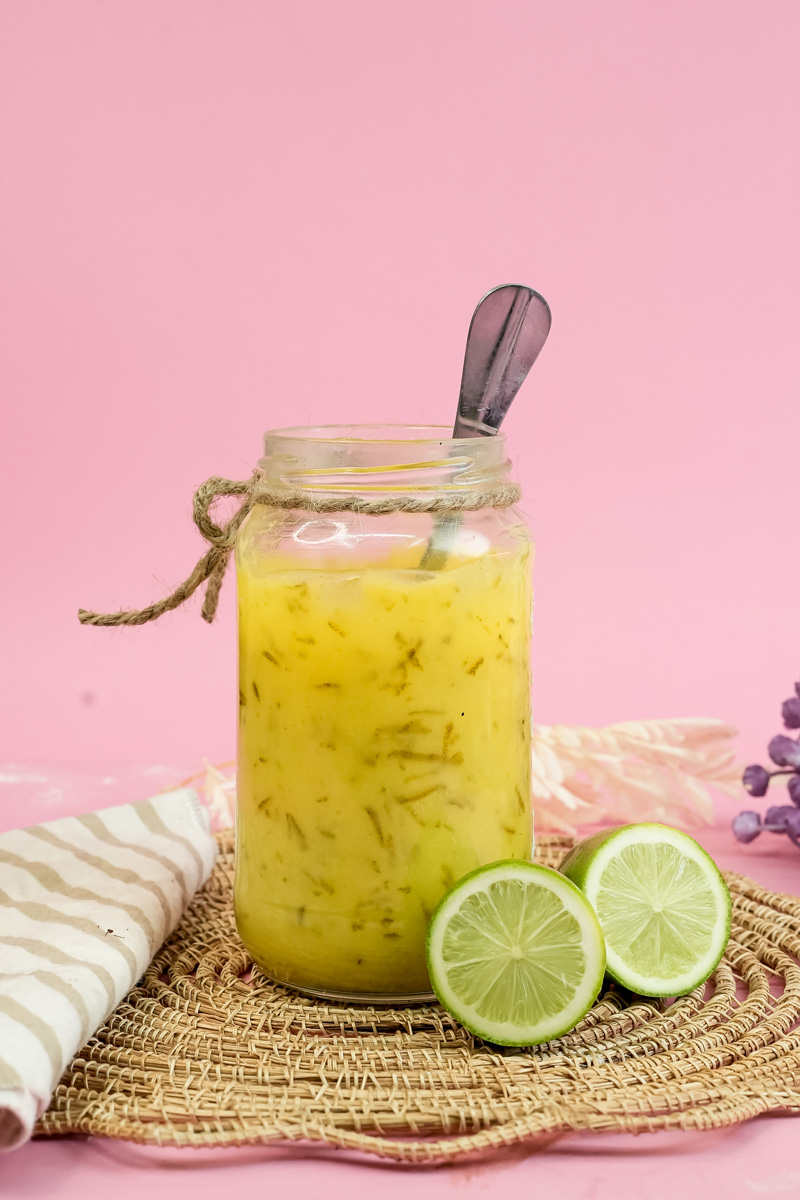
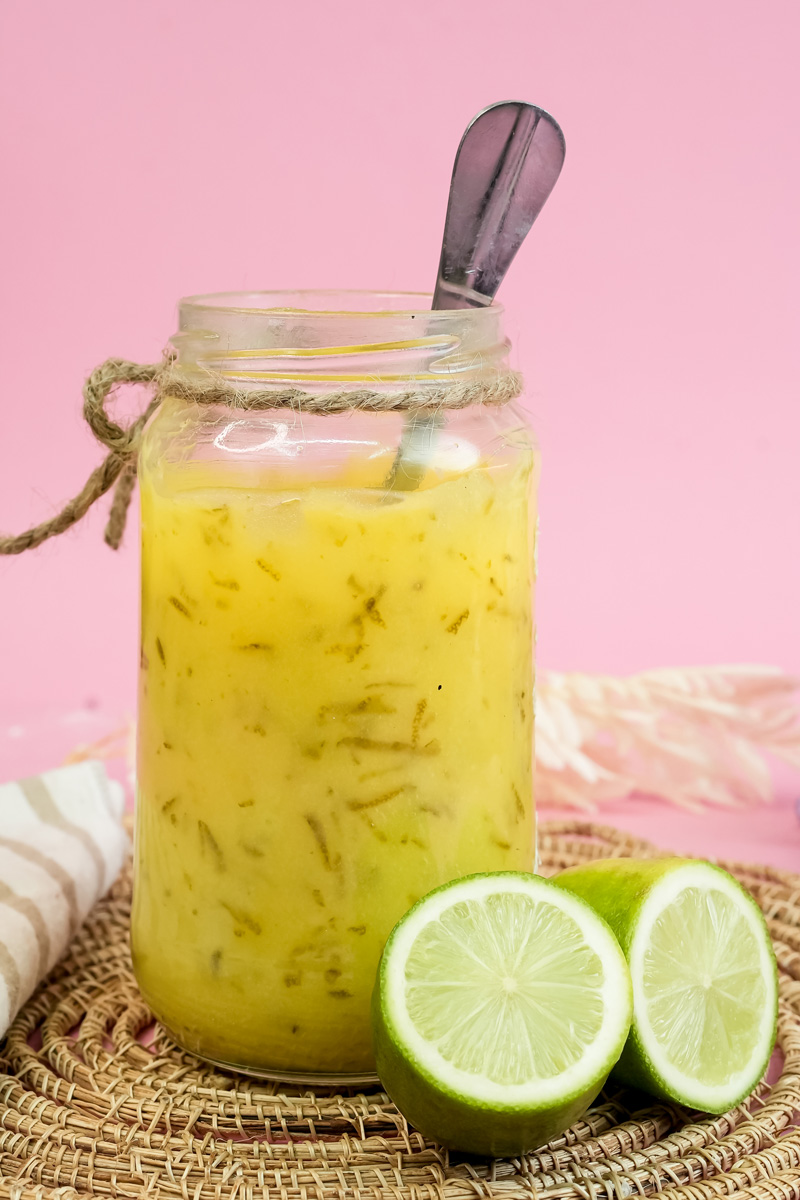
Place a fine-mesh strainer over the jar or bowl you’re going to store the curd in. Pour the warm curd through it, using a spatula to help push it all through. This little step catches any last bits of zest or any tiny pieces of egg that might have overcooked. It’s your guarantee of a flawless, silky curd.
Feeling Creative? Mix It Up
Once you’ve made this once, you’ll see how easy it is to play around with. Think of this recipe as your starting point.
- Try other citrus! Lime curd is amazing and gives off major key lime pie vibes. Blood orange or grapefruit curd would be so elegant. You could even do a lemon-lime combo.
- Add some herbs. A little bit of lavender, thyme, or even rosemary steeped in the lemon juice can add a beautiful, surprising scent.
- Make it boozy. For a grown-up twist, a splash of a liqueur like Grand Marnier or Limoncello stirred in with the butter is just lovely.
This recipe is already gluten-free! For a dairy-free version, you could try a high-quality, firm plant-based butter.
How to Serve and Store It
You did it! You have a jar of incredible, homemade sunshine. Now for the best part—eating it.
The possibilities are pretty much endless. Here are a few of my favorites:
- Spoon it while it’s still a little warm over vanilla ice cream.
- Swirl it into a bowl of Greek yogurt with some crunchy granola.
- Use it as a filling for a tart or some cupcakes.
- And of course, the classic: serve it with warm scones and clotted cream.
To store it, let the curd cool completely, then transfer it to an airtight jar and pop it in the fridge. It’ll keep for up to two weeks. If you store it in a bowl, press a piece of plastic wrap directly on top of the curd to keep a “skin” from forming.
And the best news of all? You can freeze it. Lemon curd freezes beautifully. Just put it in a freezer-safe container, and it will last for up to a year. Thaw it overnight in the fridge when you’re ready to use it.
PrintLemon Curd

Bright, creamy, and bursting with zesty flavor, this homemade lemon curd is like bottling sunshine. It’s surprisingly simple to make and tastes a world better than anything from a store. Perfect for spreading on scones, filling a tart, or just eating with a spoon!
- Prep Time: 15 minutes
- Cook Time: 10 minutes
- Total Time: 2 hours 25 minutes (includes cooling)
- Yield: 1¼ cups 1x
- Category: Dessert, Condiment
- Cuisine: English/American
Ingredients
- 1 cup Granulated Sugar
- 2 tbsp Fresh Lemon Zest
- 6 large Egg Yolks
- ½ cup Freshly Squeezed Lemon Juice (from about 3–4 lemons)
- ½ cup Cold Unsalted Butter, cut into cubes
Instructions
- Infuse the Sugar: In a small bowl, rub the lemon zest into the sugar with your fingertips until it feels like damp sand and smells incredibly fragrant. This little step makes a huge difference!
- Create the Base: In a medium, heavy-bottomed pot, whisk the egg yolks until smooth. Whisk in the lemon sugar, followed by the lemon juice, until everything is combined.
- Cook Gently: Place the pot over low heat and whisk constantly. Don’t walk away! The mixture will seem thin at first, then after 5-7 minutes, it will thicken enough to coat the back of a spoon. If you draw a line through it with your finger, the line should hold. Do not let it boil.
- Add Butter: Immediately remove the pot from the heat and add the cold butter cubes all at once. Whisk until the butter is completely melted and the curd is glossy and smooth.
- Strain and Chill: For the smoothest texture, pour the curd through a fine-mesh strainer into a jar or bowl. Let it cool, then cover and refrigerate for at least 2 hours to set completely.
Notes
- Serving Suggestions: This curd is amazing swirled into yogurt, spread on toast or warm scones, used as a filling for cupcakes and tarts, or spooned over ice cream.
- Tips & Tricks: Always zest your lemons before you juice them. Using a heavy-bottomed pot or a double boiler helps prevent the eggs from scrambling. Low and slow heat is your best friend here!
- Storage: Store your lemon curd in an airtight jar in the refrigerator for up to 2 weeks. To prevent a skin from forming, you can press a piece of plastic wrap directly onto the surface of the curd. It also freezes beautifully for up to a year; just thaw it in the fridge overnight.