There is something a little rebellious about making a cake in a mug. It breaks all the old rules. You don’t have to preheat the oven. You don’t have to wait forty minutes. You just get dessert, right now.
I remember the first time I tried this. It was late at night, I was exhausted, and I desperately needed chocolate. I didn’t want a “bready” muffin, though. I wanted something rich.
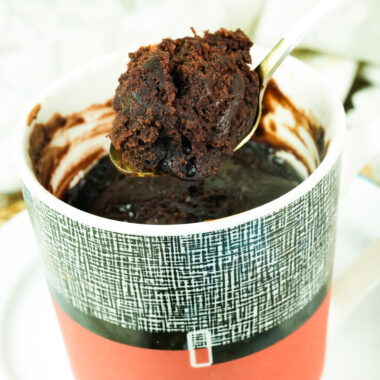
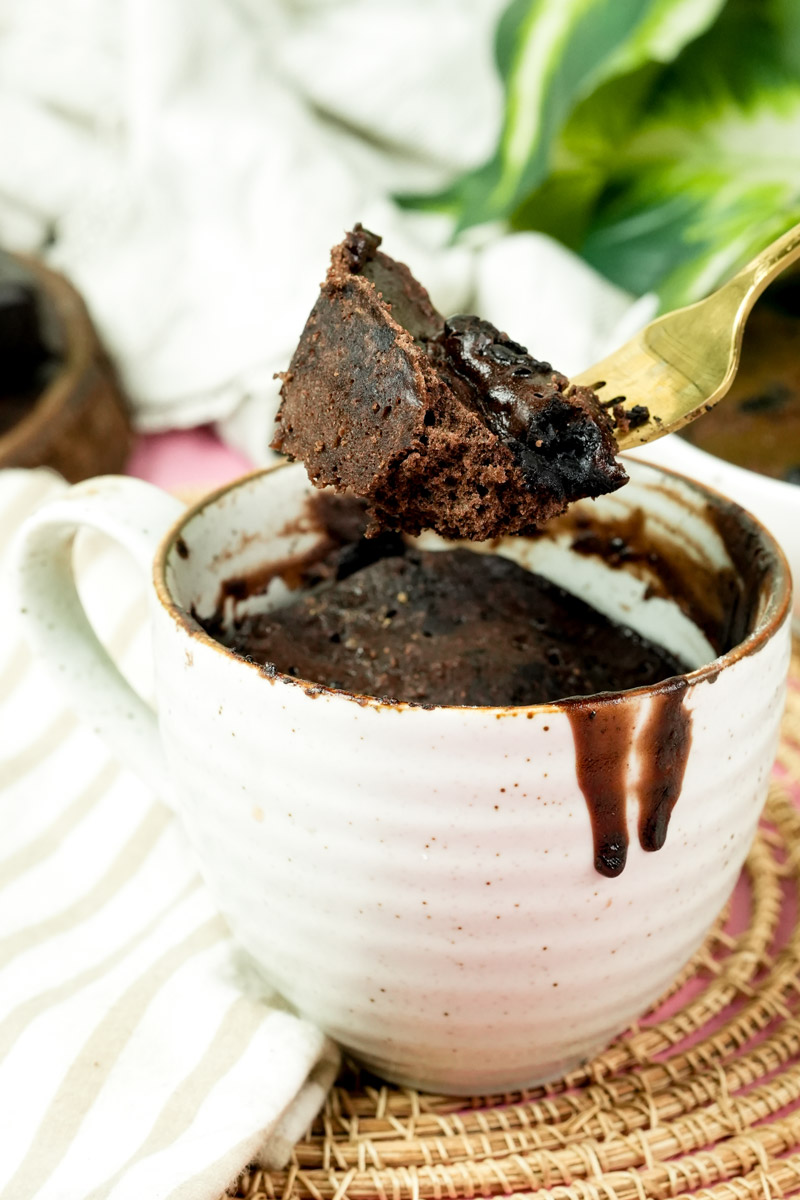
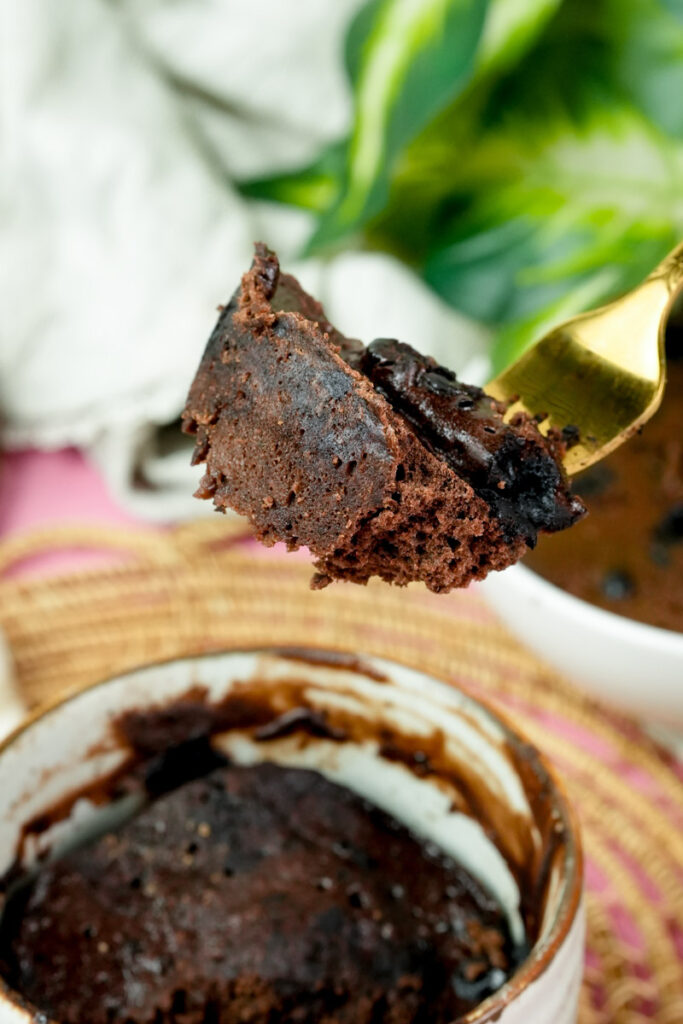
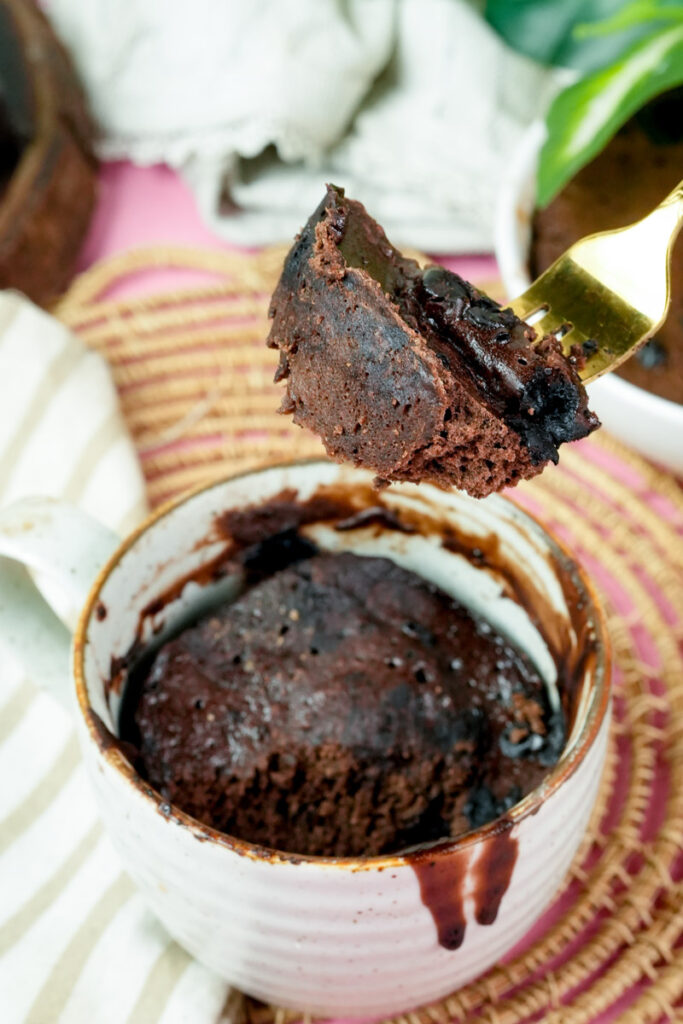
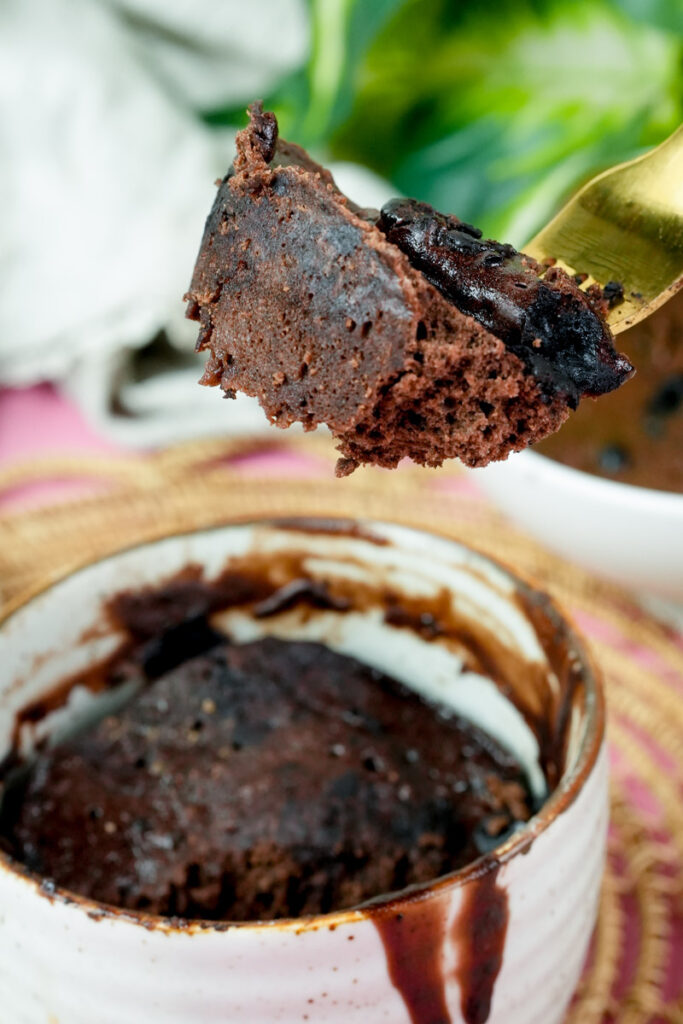
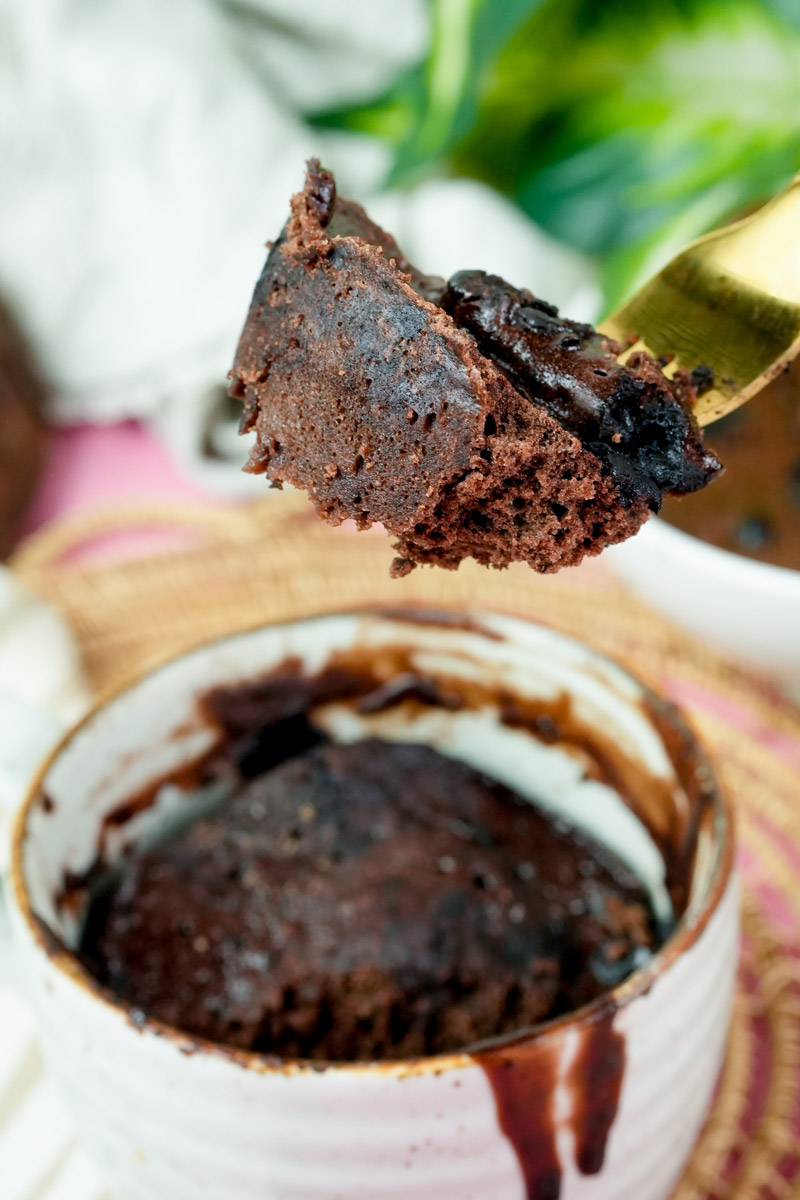
That’s why this version is a total winner. It’s a flourless, souffle-style cake. By skipping the flour, we let the hazelnut fats and the egg do all the heavy lifting. The result? It feels less like a snack and more like a fancy, molten lava cake you’d get at a nice restaurant.
The best part? It’s simple. It’s like a modern, microwave version of the famous Italian Torta Gianduja. Whether you’re celebrating a small win or just had a long day, this recipe is your new best friend. It’s dark, rich, and makes your whole kitchen smell like toasted hazelnuts.
Recipe Overview
Before we start mixing, let’s look at the plan. This really is a 5-minute process from start to finish. Since there’s no flour to mess up, the difficulty level is very low. It’s perfect for kids, but the taste is “grown-up” enough for anyone.
Quick Stats
| Feature | Details |
| Prep Time | 4 Minutes |
| Cook Time | 60 – 75 Seconds |
| Difficulty | Beginner Friendly |
| Yield | 1 Serving |
| Best Equipment | 12oz Ceramic Mug |
Pro tip: Make these one at a time. I’ve tried doubling the batter in one big mug, and it never works right. Microwaves are picky about heat. Two separate mugs will always give you a better texture than one giant, messy one. If you don’t have a mug, a glass ramekin works too. Plus, you can see the “lava” layers through the glass!
The Ingredients: Quality Matters
Since this list is so short, every ingredient has to work hard. You can’t hide cheap ingredients here.
The Stars of the Show:
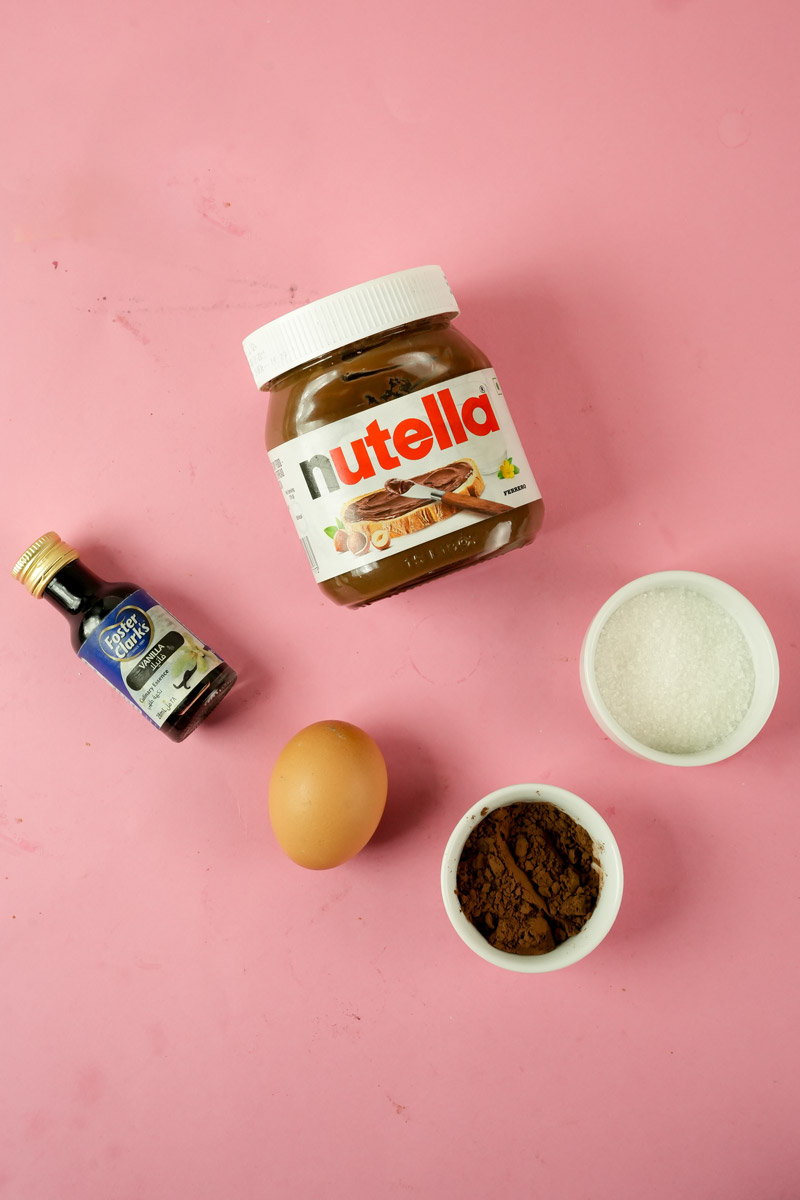
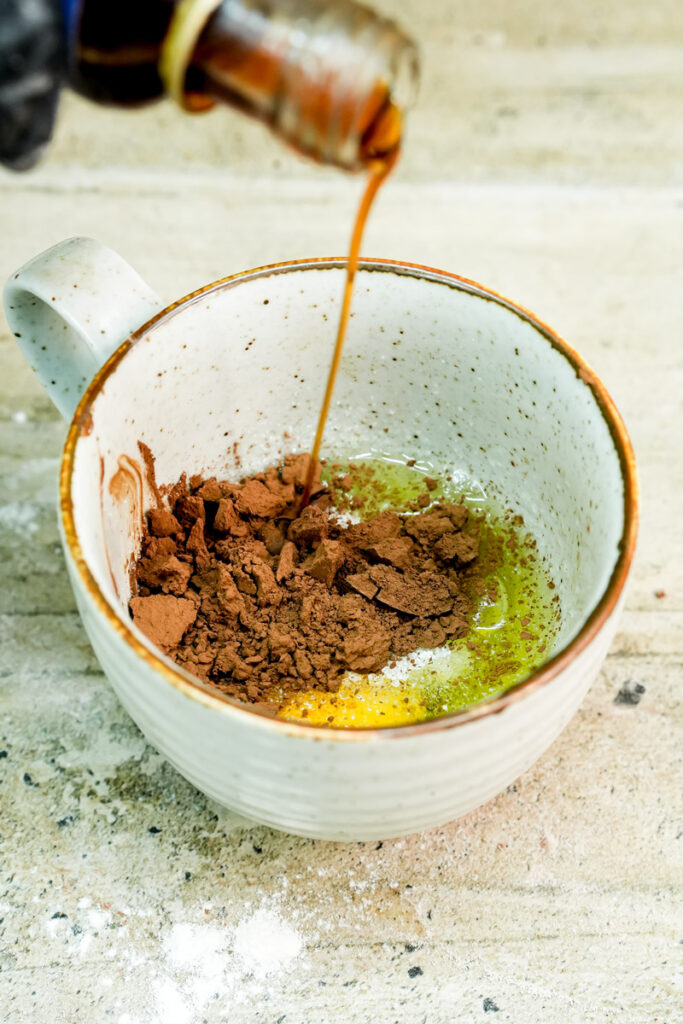
- Nutella: You need 2½ tablespoons. If you use an organic brand, stir it well. You don’t want oily cake.
- One Large Egg: Try to use one at room temperature. I once used a cold egg and ended up with little white “eggy” streaks. Not cute. A room-temp egg mixes much better.
The Flavor Balancers:
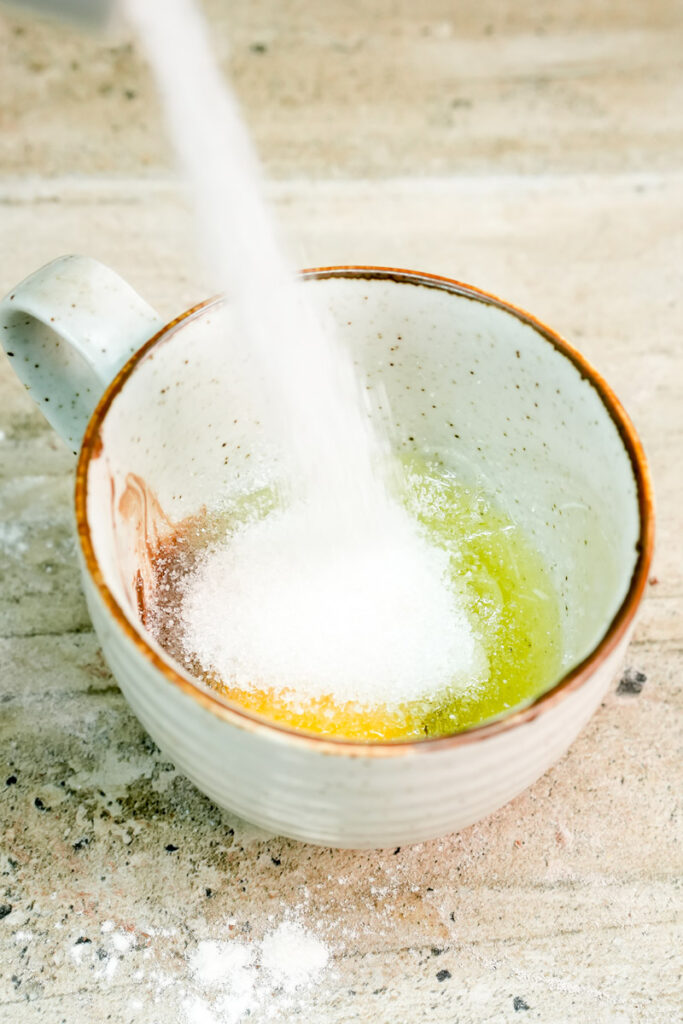
- Sugar: Just 1 to 2 teaspoons. The Nutella is sweet, but the sugar helps the “crumb” stay together.
- Unsweetened Cocoa Powder: Use 1 tablespoon. I prefer Dutch-processed. It gives it that dark, Oreo-style look.
- Vanilla & Salt: Half a teaspoon of vanilla and a pinch of sea salt. These are the secret weapons. The salt cuts the sugar, and the vanilla makes the chocolate pop.
Quick Substitutions:
- Nut Allergy? Use chocolate sunflower seed butter instead.
- Sweetener: You can use honey, but the cake will be more like a custard.
- Cocoa Mix: If you only have the sweetened stuff for hot cocoa, skip the extra sugar entirely.
Step-by-Step Method
Cooking should be fun, even if it’s just in a microwave! Here is how you get that perfect, springy finish.
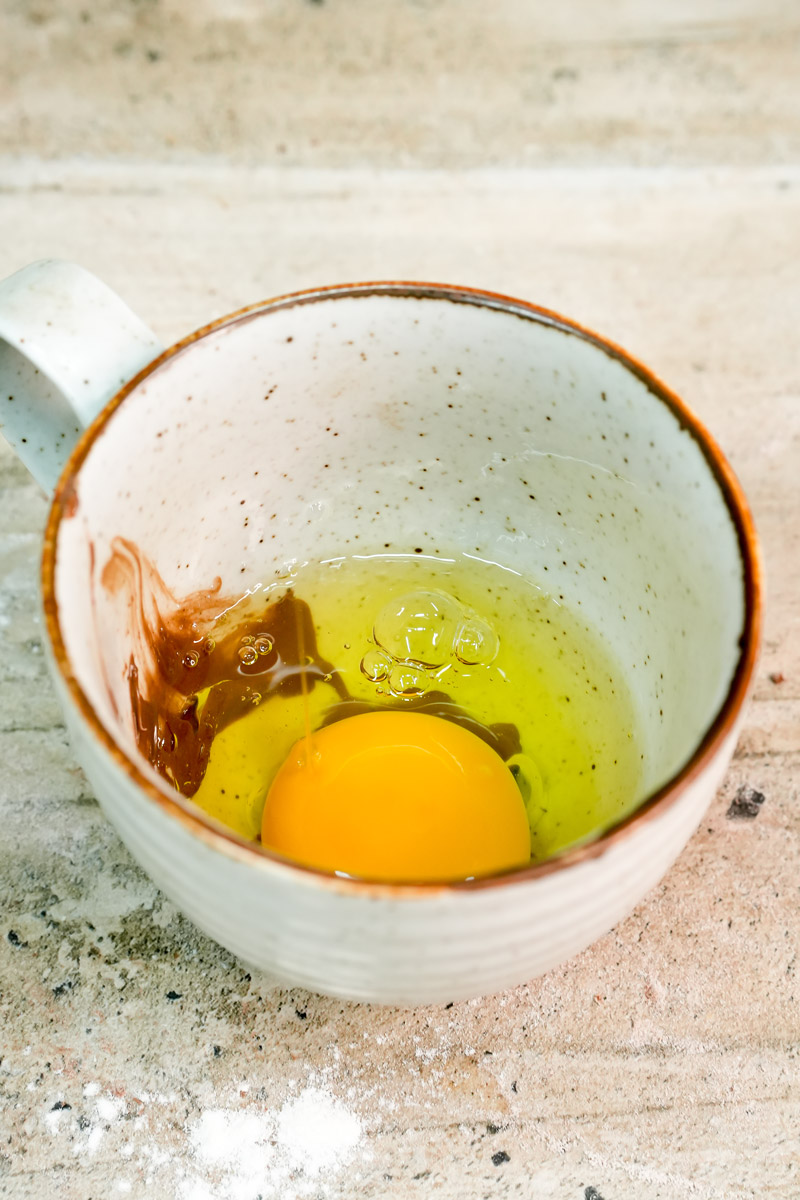
Step 1: The Emulsion
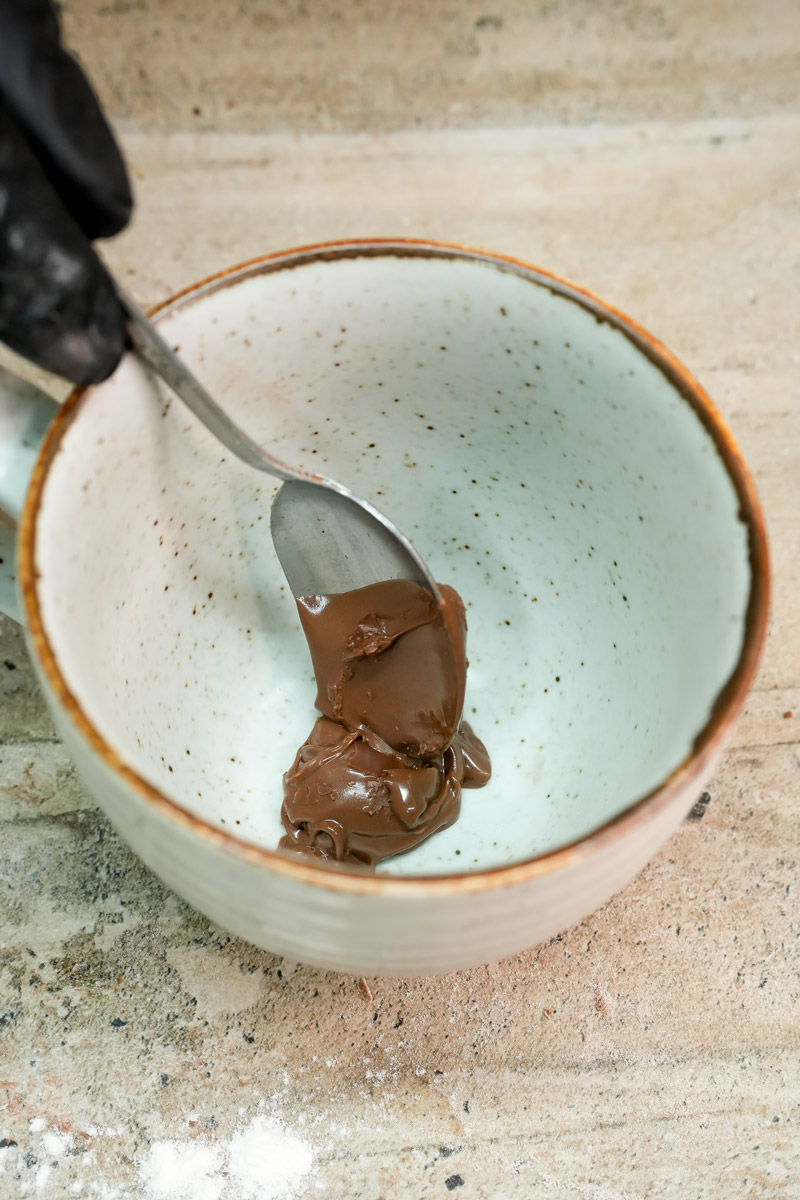
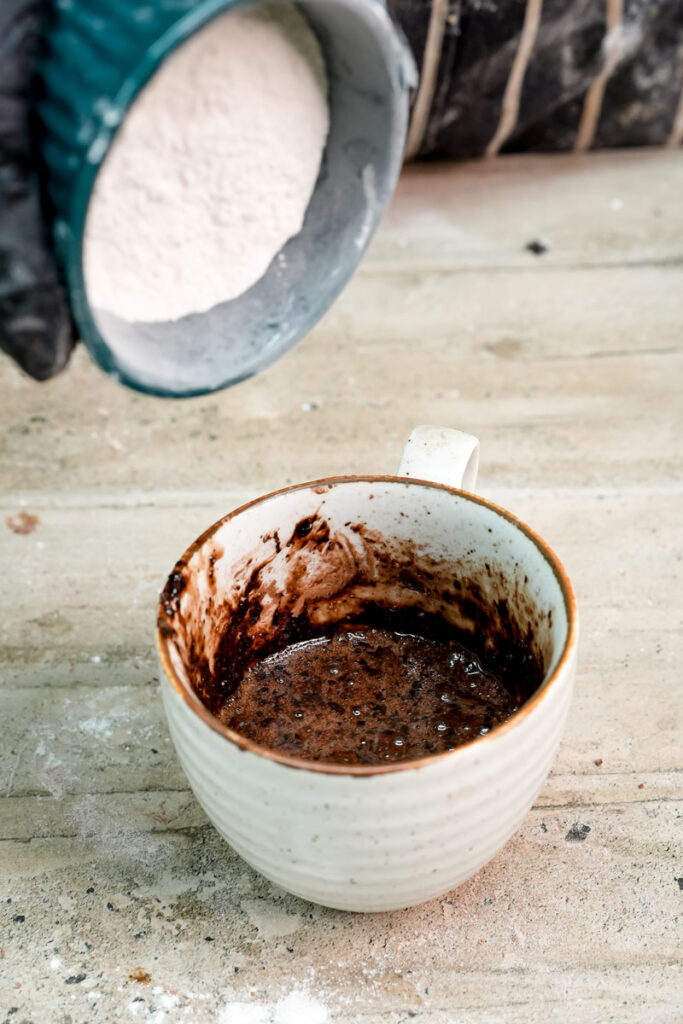
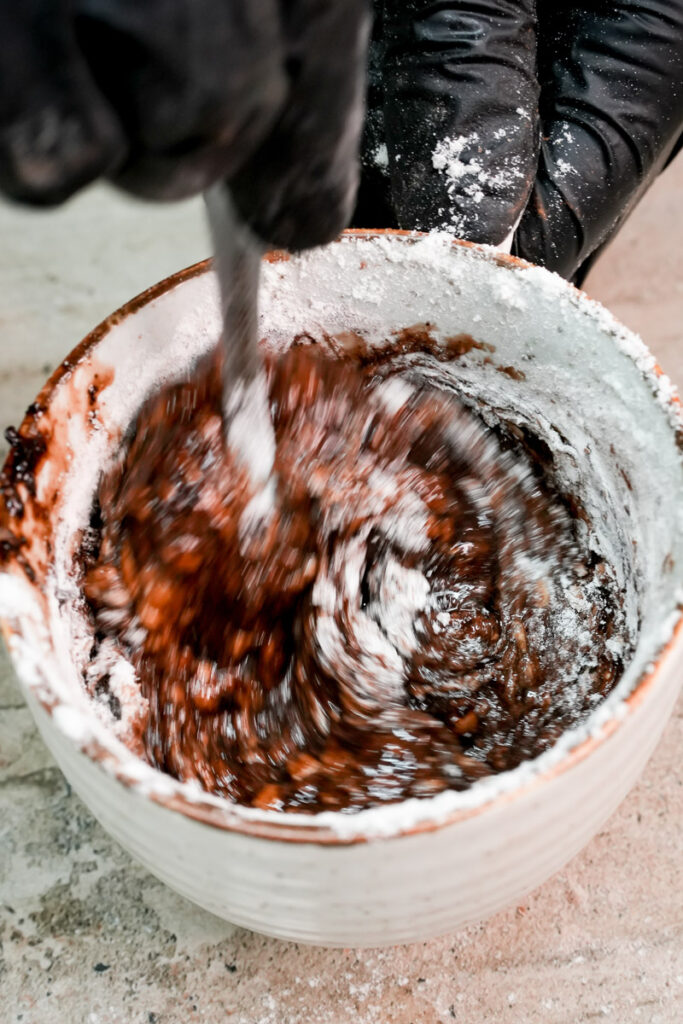
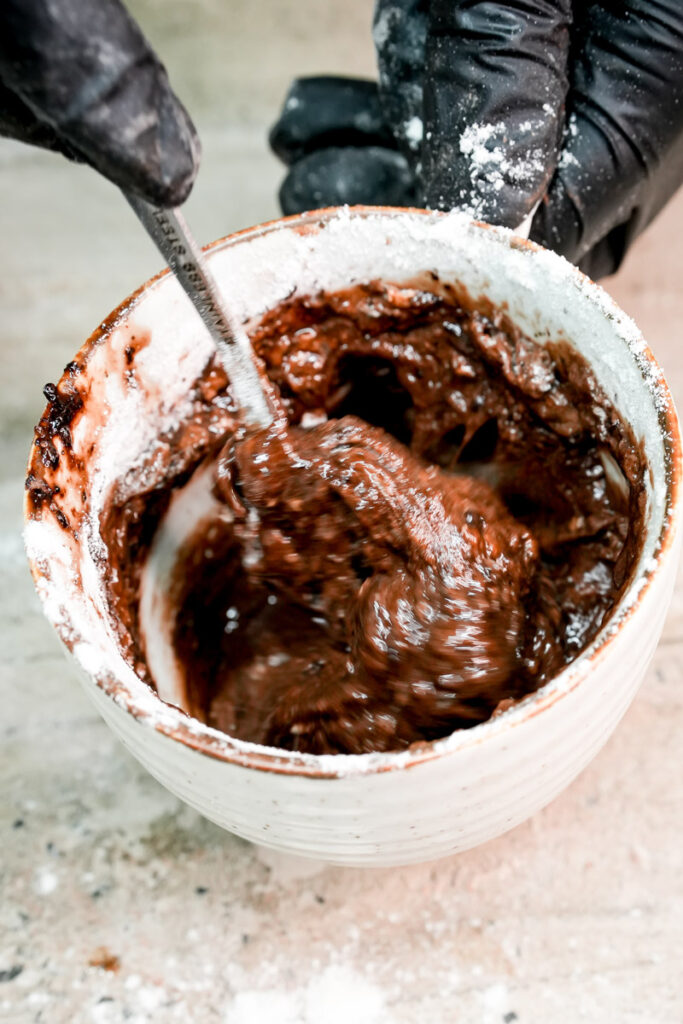
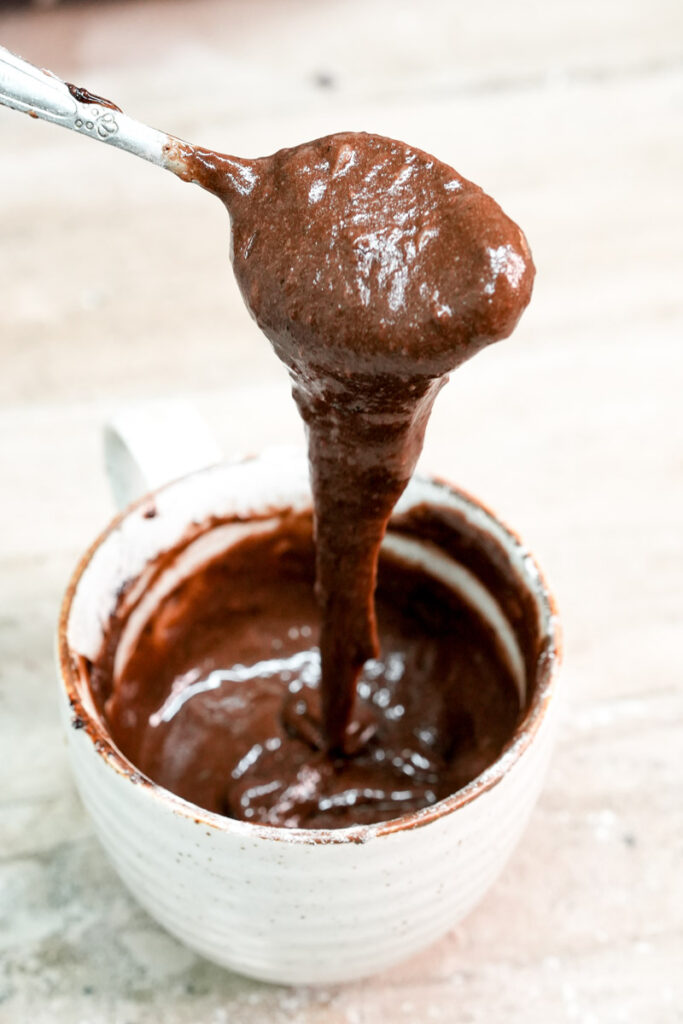
Don’t use the mug yet. Crack your egg into a small bowl and whisk it. Add the Nutella, sugar, cocoa, vanilla, and salt. Whisk it until it looks like glossy, thick chocolate syrup. If it’s hard to mix, zap the Nutella for 10 seconds first to soften it up.
Step 2: The Transfer
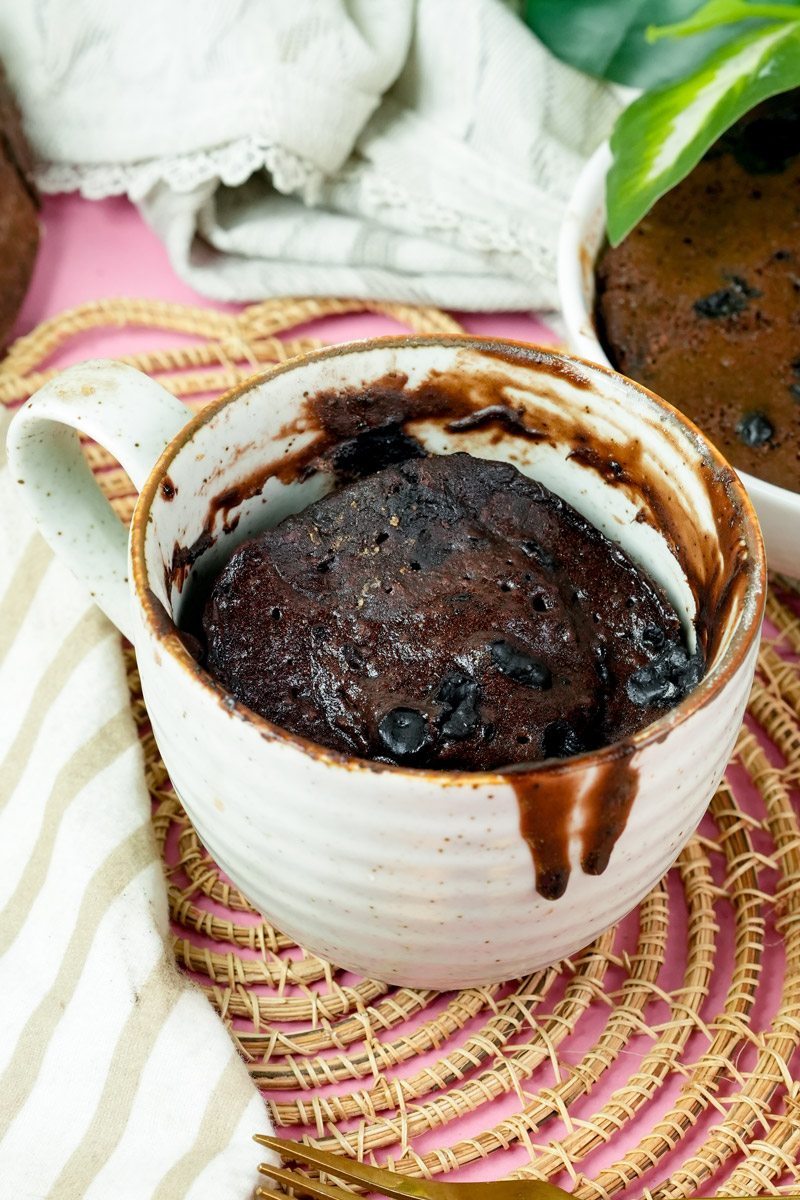
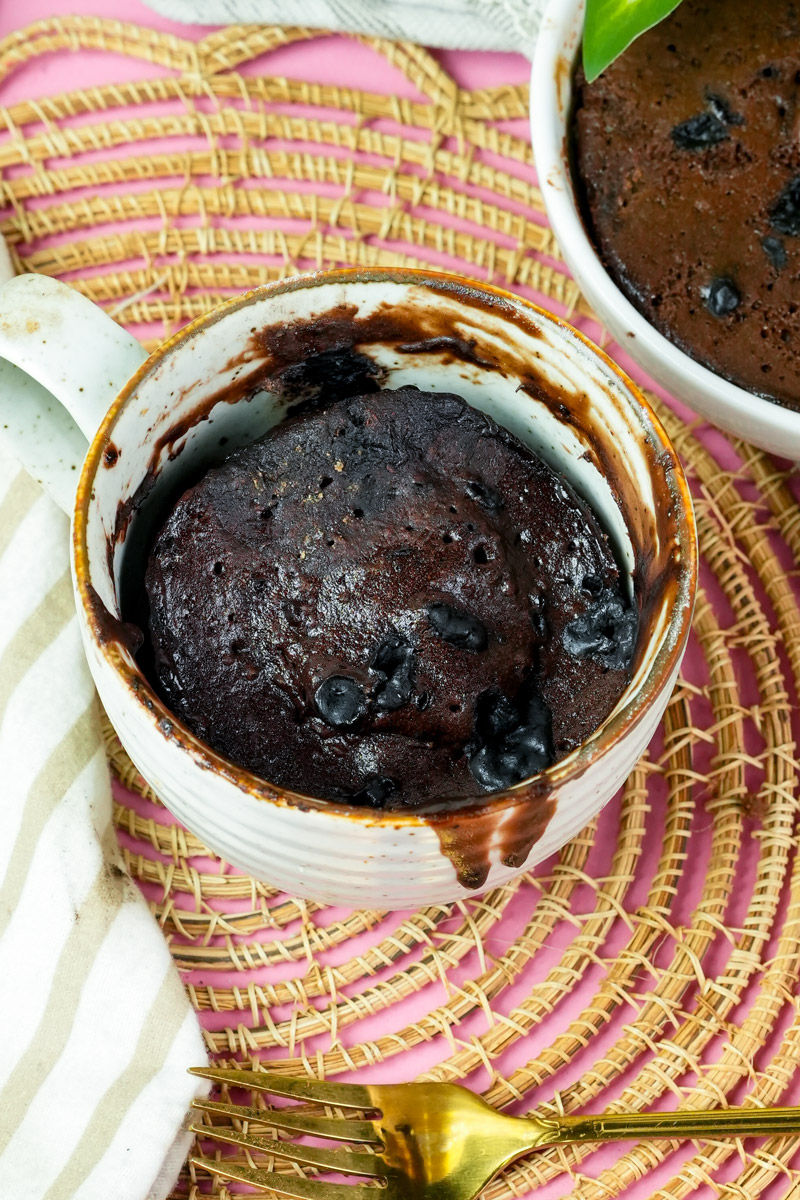
Pour that glossy mix into your mug. Make sure the mug is only about half-full. The cake is a riser. It uses steam to puff up. If the mug is too small? You’ll have a chocolate volcano all over your microwave.
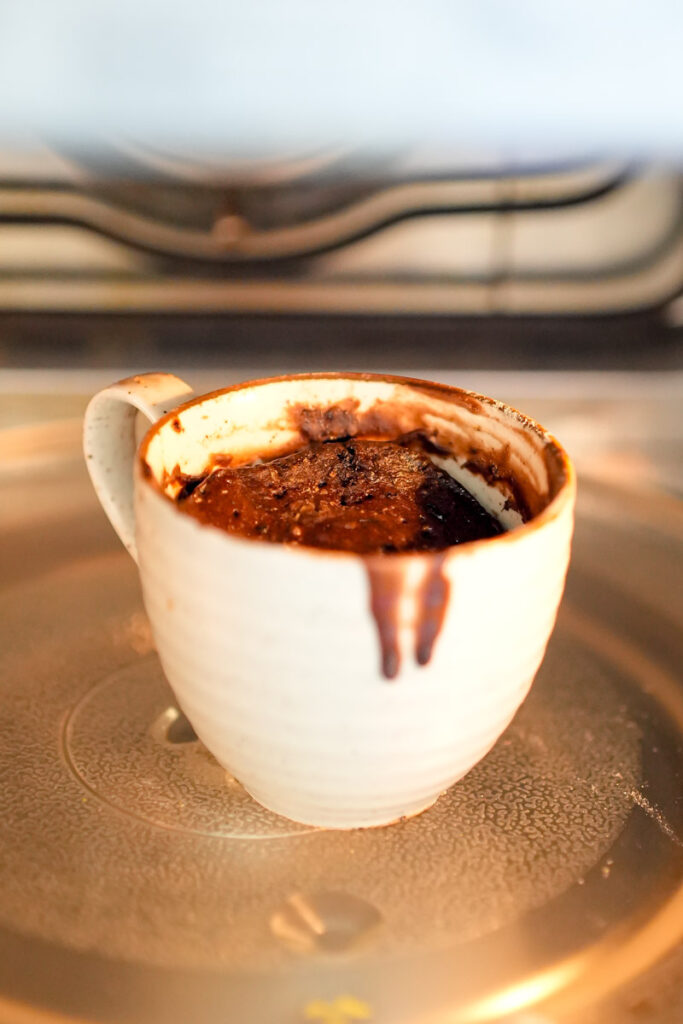
Step 3: The Microwave Dance
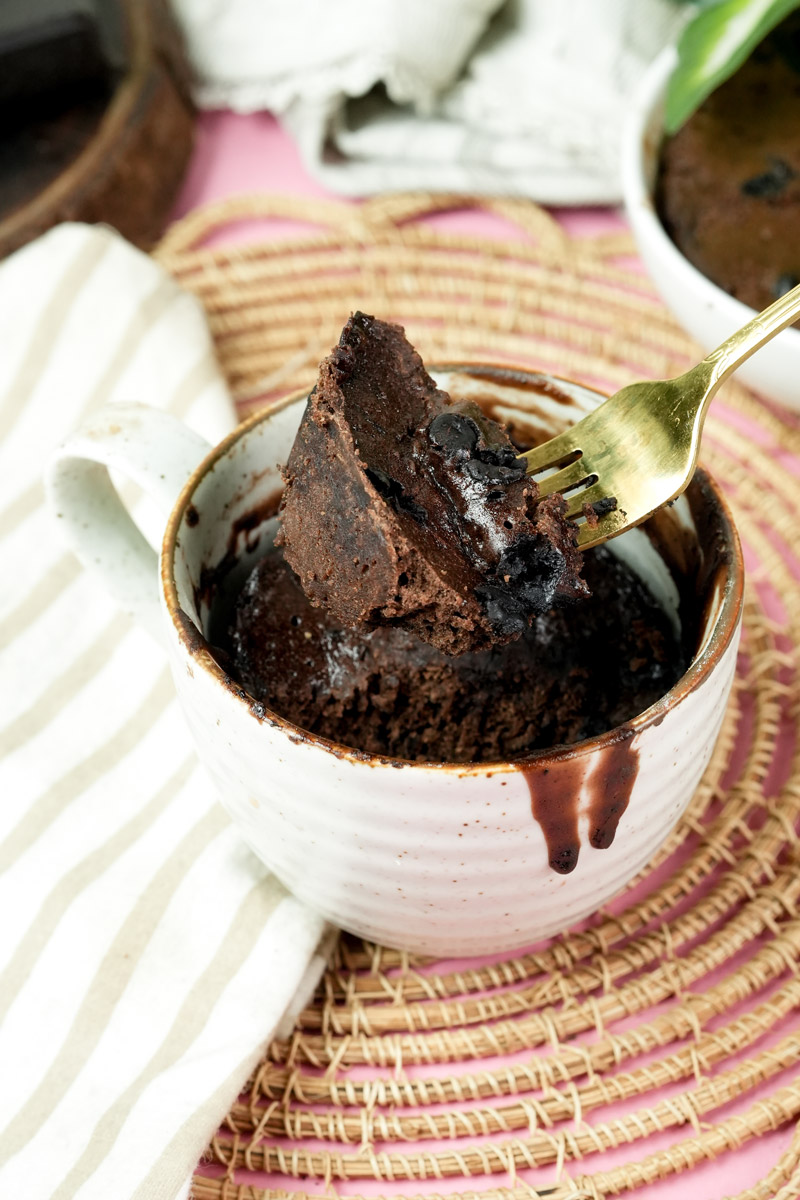
Put the mug on the edge of the turntable, not the center. It cooks more evenly that way. Set it for 60 to 75 seconds. Watch it! Around the 50-second mark, it will grow past the rim. Don’t panic. That’s supposed to happen. Just don’t go past 90 seconds, or your “cloud” will turn into a hockey puck.
Step 4: The Cooling Rest
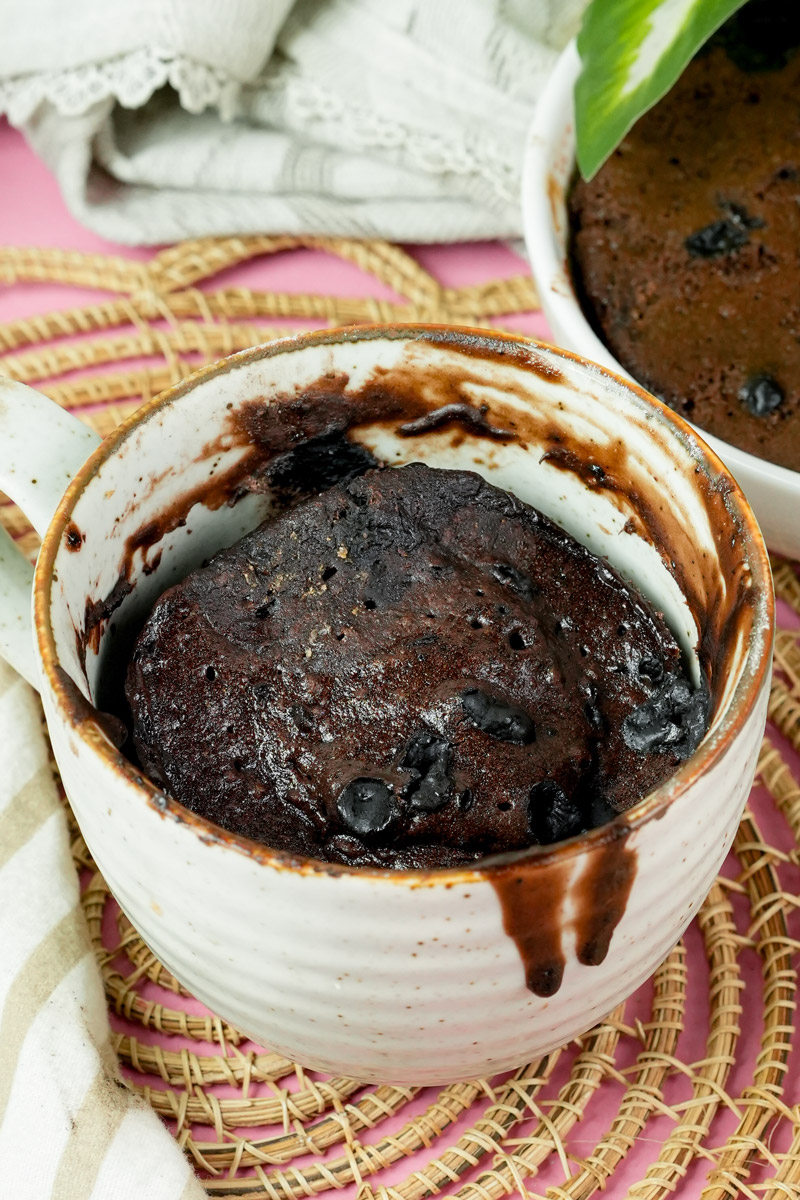
The hard part? Waiting. Let it sit for 2 or 3 minutes. The steam needs to settle so the cake can “set.” If you jump in too fast, you’ll burn your tongue and the texture will be too wet. As it rests, it will sink back down. That’s exactly what you want.
Customizing Your Cake
This recipe is very flexible.
- Gluten-Free? You’re already good to go! There’s no flour here.
- Vegan? Use a “flax egg” (1 tbsp ground flax + 3 tbsp water). It’ll be denser, like a brownie.
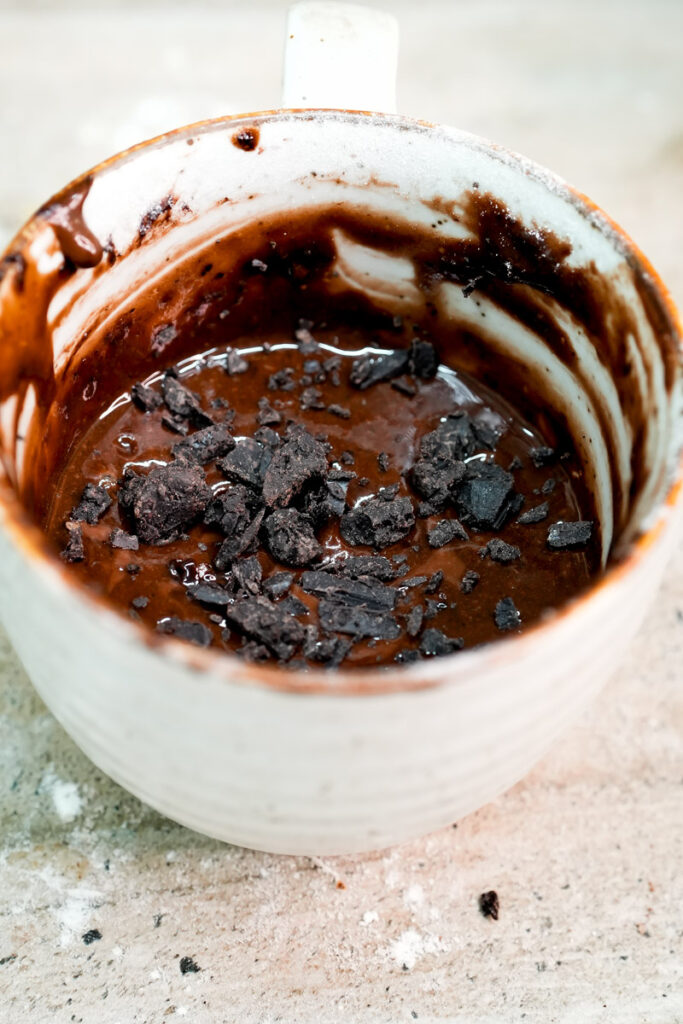
- The Surprise: Push a Ferrero Rocher or a spoonful of peanut butter into the middle before you cook it.
- Winter Vibes: Add a pinch of cinnamon and cayenne for a Mexican Hot Chocolate feel.
Serving & Storage
You can eat it straight from the mug. If you want to be fancy, run a knife around the edge and flip it onto a plate.
The Best Sides:
- The Classic: A big dollop of whipped cream or cold vanilla ice cream.
- The Sophisticate: Salted caramel and crushed hazelnuts.
- The Minimalist: A little dusting of powdered sugar.
Storage:
Mug cakes are best fresh. If you have leftovers, cover it with plastic wrap for up to 24 hours. Reheat it in 10-second bursts. If you want to prep ahead, keep the whisked batter in a jar in the fridge for 2 days. When you’re ready, just pour and zap!
PrintNutella Mug Cake
Forget everything you know about baking. No heavy flour, no preheating the oven for an hour, and no mountain of dishes. This recipe is for those late-night cravings when you want something that tastes like a fancy molten lava cake but only have five minutes to spare. By skipping the flour, we lean into the hazelnut goodness of the Nutella and the lift from a single egg to create a rich, fudgy, souffle-style dessert.
- Prep Time: 4 mins
- Cook Time: 75 secs
- Total Time: ~5 mins
- Yield: 1 person
- Category: Dessert
- Cuisine: Italian-Inspired
Ingredients
- Nutella (or hazelnut spread): 2½ tablespoons
- Large Egg: 1 (room temperature is best for a smooth mix)
- Granulated Sugar: 1 to 2 teaspoons
- Unsweetened Cocoa Powder: 1 tablespoon (Dutch-processed for a darker color)
- Vanilla Extract: ½ teaspoon
- Sea Salt: A tiny pinch
Instructions
- Whisk the Batter: In a small bowl, crack the egg and give it a quick whisk. Stir in the Nutella, sugar, cocoa, vanilla, and salt. Keep mixing until it’s completely glossy and you don’t see any yellow egg streaks.
- Prep the Mug: Pour your chocolate mixture into a microwave-safe mug (12oz is perfect). It should only fill about half the mug.
- The Zap: Microwave on high for 60 to 75 seconds. Watch it closely! It will puff up high and then settle back down.
- The Rest: Let it sit for 2 to 3 minutes. This is the secret to the perfect texture—it lets the center set so it’s fudgy, not liquid.
Notes
Serving Suggestions:
- The Classic: Top with a big scoop of vanilla ice cream or whipped cream.
- The Fancy: Sprinkle with extra sea salt and crushed hazelnuts.
- The “Surprise”: Push a square of dark chocolate or a teaspoon of peanut butter into the center before microwaving.
Tips & Tricks:
- Check the mug: Use a wide mug rather than a tall, narrow one for even cooking.
- Don’t overbake: If it looks slightly damp in the very center when you take it out, that’s good! It will finish cooking as it rests.
- Egg Temp: If your egg is cold, the Nutella might seize up. If that happens, zap the mixture for 5-10 seconds to loosen it.
Storage & Reheating:
- Fresh is best: Mug cakes are meant to be eaten immediately.
- Leftovers: If you have to wait, cover with wrap at room temperature for up to 24 hours. Reheat for 10 seconds to bring back the gooeyness.