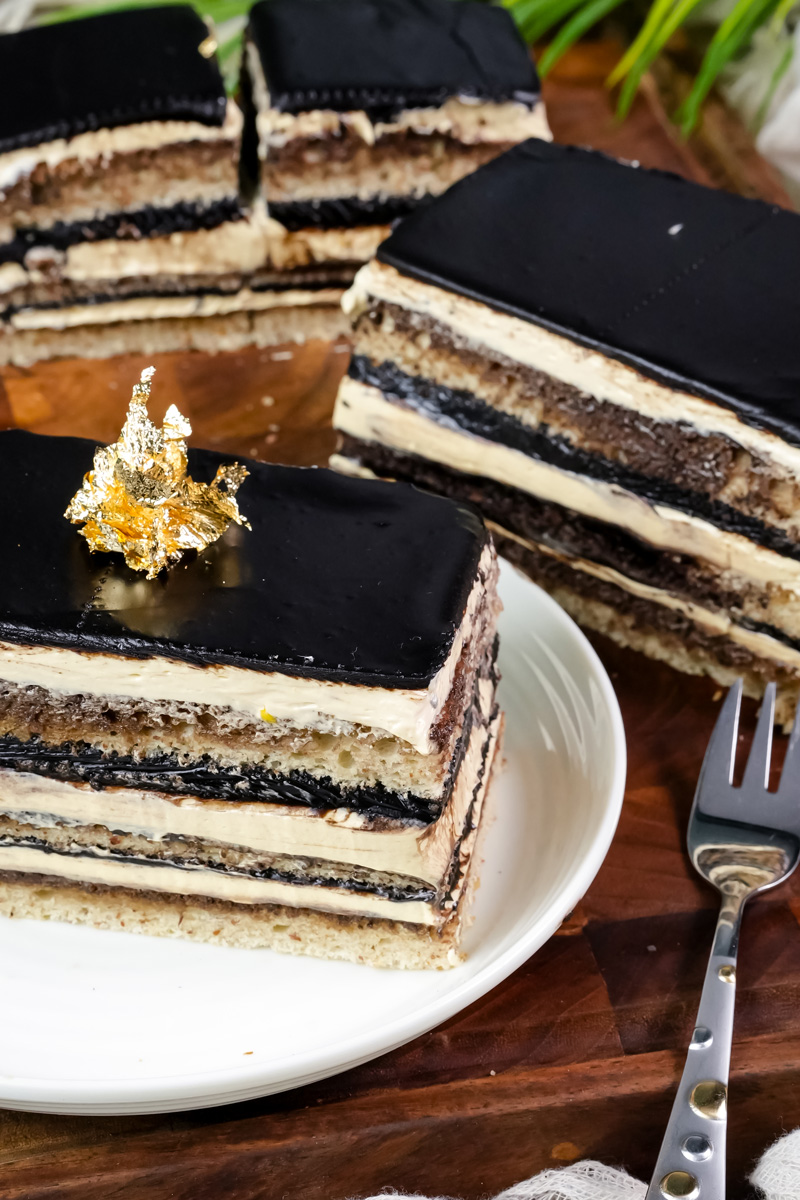
Have you ever stared at a French Opera Cake in a bakery window? You know the one. With its razor-sharp layers and a chocolate top so glossy you can see your reflection? And did you think, “Nope. Not for me.“
I get it. I’ve been there. Those perfect, clean layers look like something only a pro with a fancy hat could pull off.
But I’m here to tell you a secret. You can absolutely make this cake.
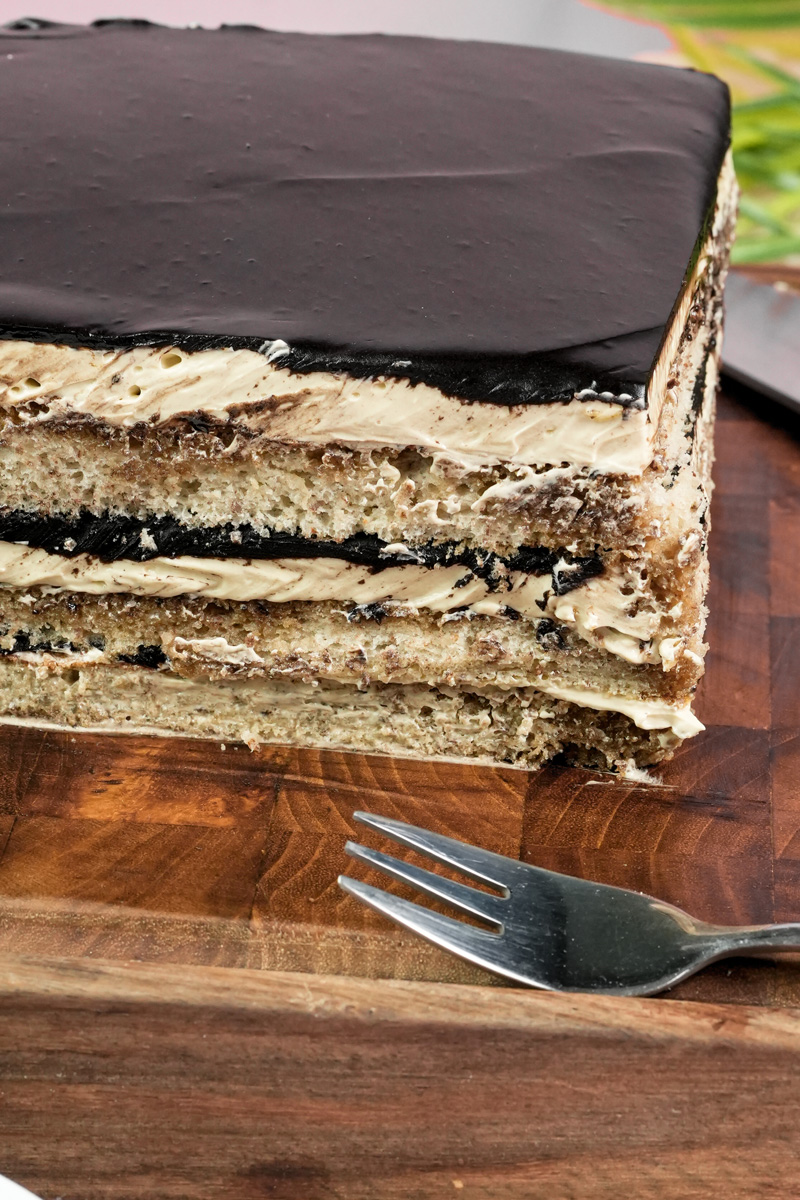
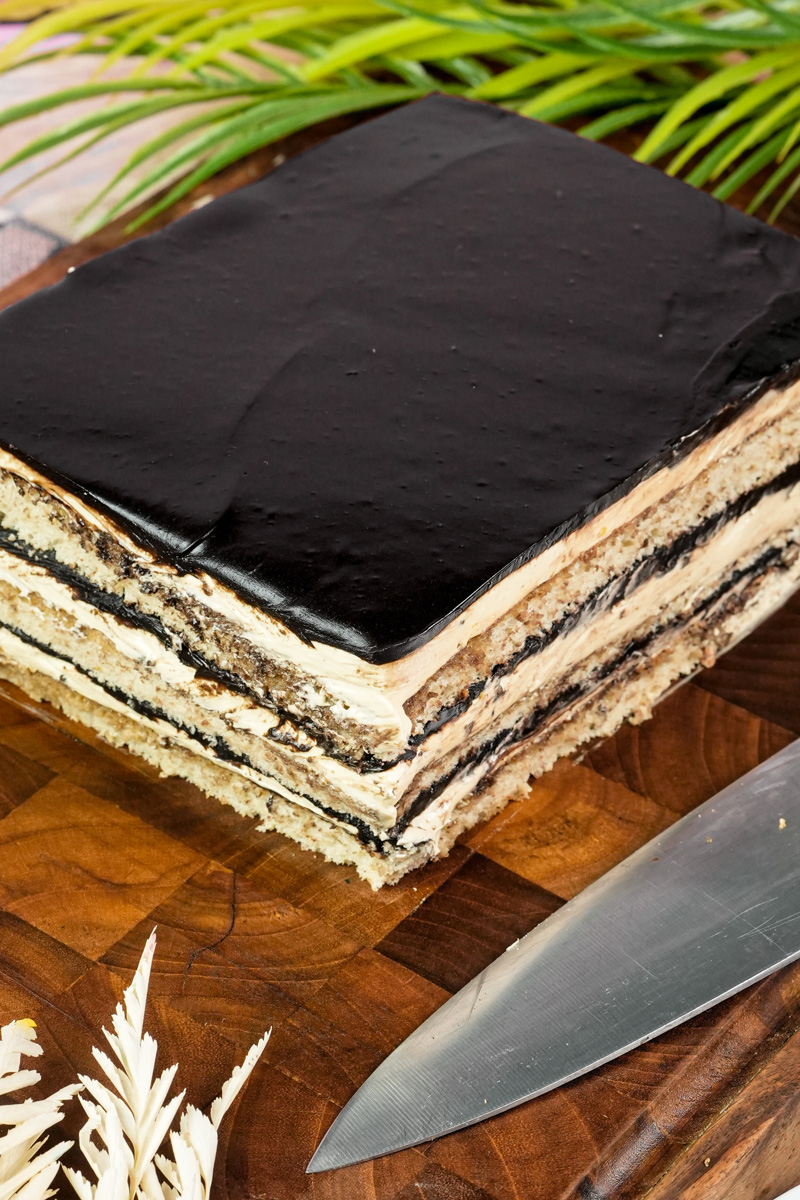
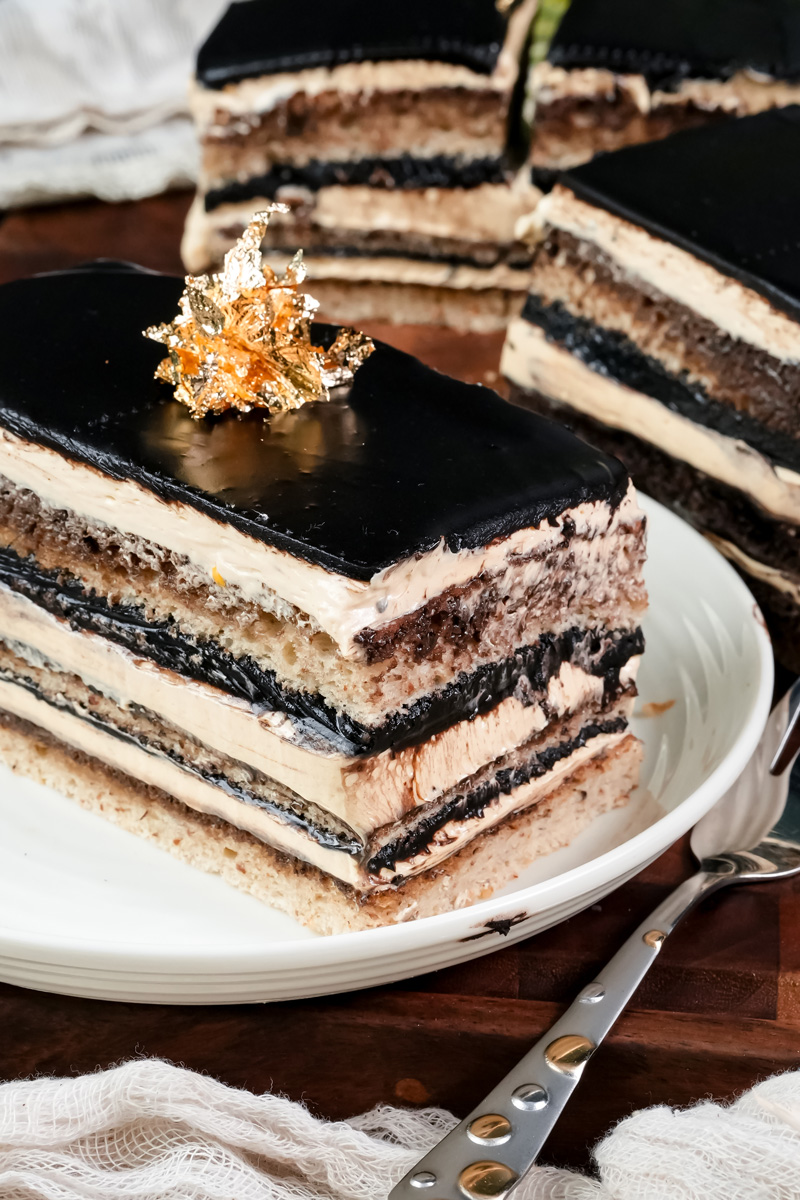
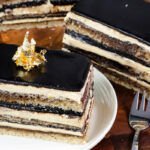
The Opera Cake is a beautiful stack of amazing flavors and textures. It has six layers, each doing something special:
- Three layers of a light, tender almond sponge cake (called a Joconde)
- Each sponge is soaked in a strong coffee syrup
- A rich, velvety coffee buttercream
- A layer of deep, dark chocolate ganache
- And finally, that shiny chocolate glaze on top
The name apparently comes from the Paris Opéra, with the layers looking like the levels of the famous opera house.1 Cool, right?
Listen, this cake asks for your patience. It asks for your attention. But none of the steps are actually that hard on their own. The real magic is in how you put them all together. Think of me as your baking buddy, standing right next to you. We’re not just baking a cake; we’re tackling a fun project and making something seriously impressive.
The Game Plan: What to Expect
Before we get our hands dirty, let’s look at the game plan. Knowing what’s coming makes the whole process way less stressful.
Time Commitment: You’ll want to set aside an afternoon for this. In total, it’s about 2 hours and 40 minutes, but most of that is chilling time. The active, hands-on part is about 2 hours and 25 minutes. Chilling is key—it’s what makes those layers so clean.
How Much Cake? This recipe makes one cake that you can slice into 12 small, elegant pieces. Trust me, it’s so rich that a small slice is more than enough. If you want a smaller cake, you can easily cut the recipe in half and bake it in a 9×9 inch pan.
Is It Hard? I won’t lie to you—this is an advanced recipe. There are a few different things to make and assemble. But I’ve broken every single step down. The real key to success? Read the entire recipe before you start. Just work slow and steady. You’ve got this.
Tools of the Trade: Having the right gear makes a huge difference. Here’s what you’ll ideally want:
- A Stand Mixer with a whisk. A hand mixer works too, it’ll just give your arm a workout.
- A Half-Sheet Pan (that’s about 18×13 inches) for the sponge.
- A Candy Thermometer. For the buttercream, this is a must-have. Seriously, don’t skip this!
- An Offset Spatula (or palette knife) for spreading everything nice and flat.
- A Pastry Brush for the coffee syrup.2
- A Sieve or fine-mesh strainer to get any lumps out of your flour.3
The Secret to a Stress-Free Bake: Make it Ahead!
Want to know how to tackle this cake without feeling overwhelmed? Split the work over two days. It’s the best trick in the book.
Day 1: Make the almond sponge, the chocolate ganache, and the coffee syrup.
- Let the ganache and syrup cool, then pop them in airtight containers in the fridge.
- Wrap the sponge tightly in plastic wrap and leave it on the counter overnight. You can even freeze it for up to a month!
Day 2: Make the coffee buttercream and assemble your cake. Easy.

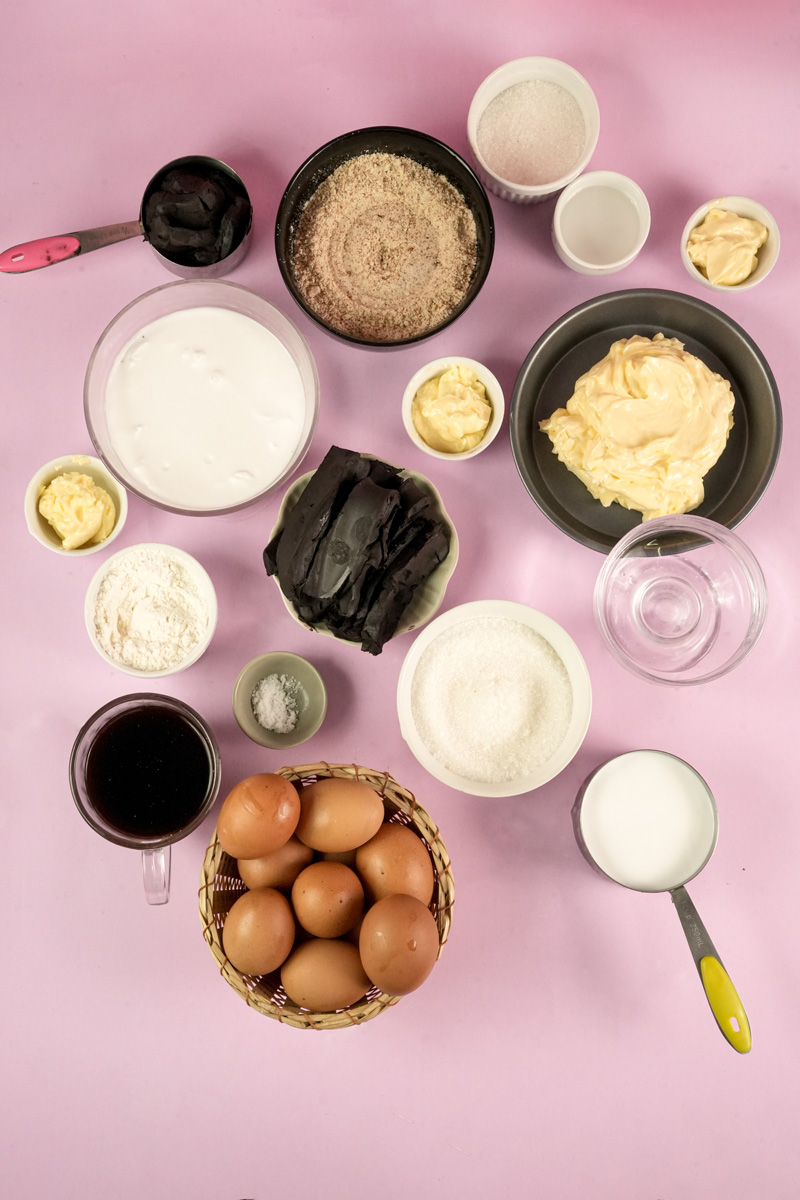
The Ingredients List
Great baking always starts with great ingredients. Let’s run through what you’ll need.
For the Chocolate Ganache and Glaze, grab some good quality dark chocolate. Anything in the 55-70% cacao range is perfect. You’ll also need heavy cream and a little unsalted butter to make it silky smooth. For the glaze, a touch of corn syrup is what gives it that mirror-like shine. Some bakers add a crisp chocolate base on the bottom—it’s just melted chocolate and a little oil—to keep the cake from getting soggy. A neat little pro trick!
The heart of the cake is the Joconde Sponge.4 This isn’t your typical sponge. It’s made with almond flour, which makes it super tender and flavorful. Make sure your almond flour is nice and fine. We add a little cake flour for structure. The cake gets its lift from two places: whole eggs whipped up until they are thick and pale, and a classic meringue made from egg whites and sugar.
And for that incredible coffee kick, we have two components. The Coffee Syrup is a simple mix of sugar, water, and strong espresso powder. I love adding a splash of Amaretto because it goes so well with the almond sponge, but you can just use water if you prefer. The real star, in my opinion, is the Coffee French Buttercream. It’s made by whipping hot sugar syrup into egg yolks (a great way to use the yolks left over from the meringue!) and then adding lots of soft, unsalted butter. A little more espresso powder makes it perfect.
One last tip before we start: Make sure your eggs and butter are at room temperature. This is really important for getting the right light and airy texture.
Scaling The Recipe
| Servings | Sponge Pan Size | Almond Flour | Granulated Sugar (total) | Eggs (whole) | Egg Whites/Yolks | Unsalted Butter (total) | Dark Chocolate (total) |
| 12 Slices (Full) | 18×13″ (Half Sheet) | 2 41 cups / 200g | 1 43 cups / 350g | 5 | 6 | 2 sticks + 3 tbsp | 10 oz / 290g |
| 6 Slices (Half) | 9×13″ (Quarter Sheet) | 1 81 cups / 100g | 87 cup / 175g | 2-3 | 3 | 1 stick + 1.5 tbsp | 5 oz / 145g |
Your Step-by-Step Guide to Baking an Opera Cake
Alright, aprons on. Let’s do this. We’ll build the cake one piece at a time.
Stage 1: The Rich Chocolate Ganache
First up, the ganache. We’re doing this first because it needs time to cool down and get thick enough to spread.
Place your 130g of chopped dark chocolate in a medium bowl. In a small pot, gently heat 160ml of heavy cream until it’s steaming and you see tiny bubbles around the edge. Don’t let it boil!
Pour the hot cream over the chocolate and—this is important—just walk away for two minutes. Let the heat do the work. Then, start stirring, making small circles in the center of the bowl. You’ll see it magically turn into a glossy, smooth chocolate sauce. Keep stirring until it’s completely smooth. Finally, mix in the 15g of room temperature butter. Set the ganache aside to cool completely.

Stage 2: The Light-as-Air Joconde Sponge
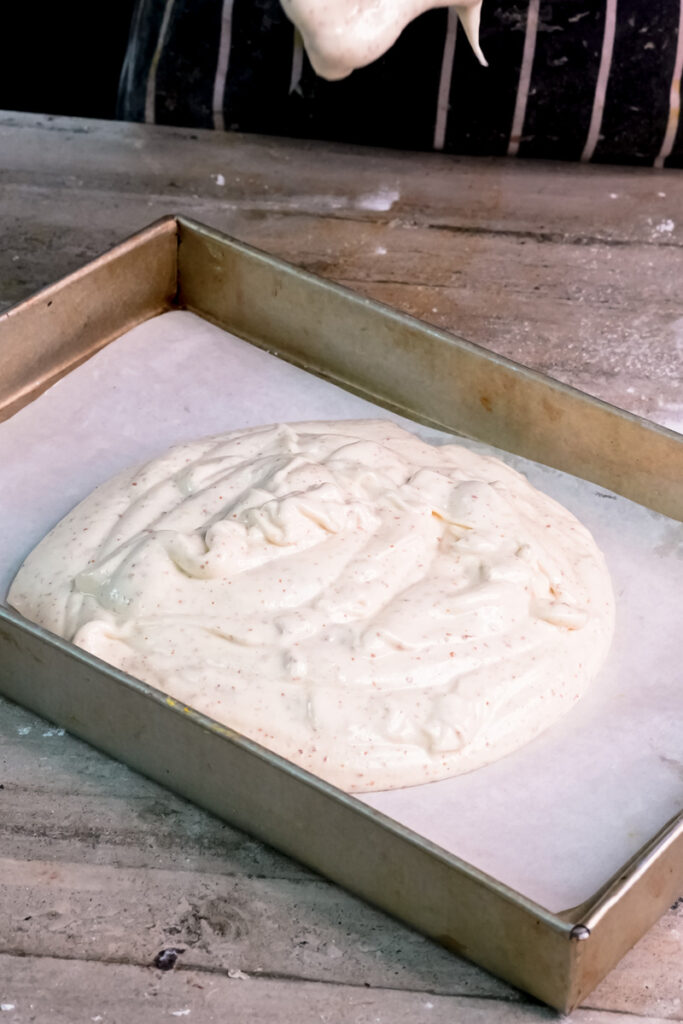
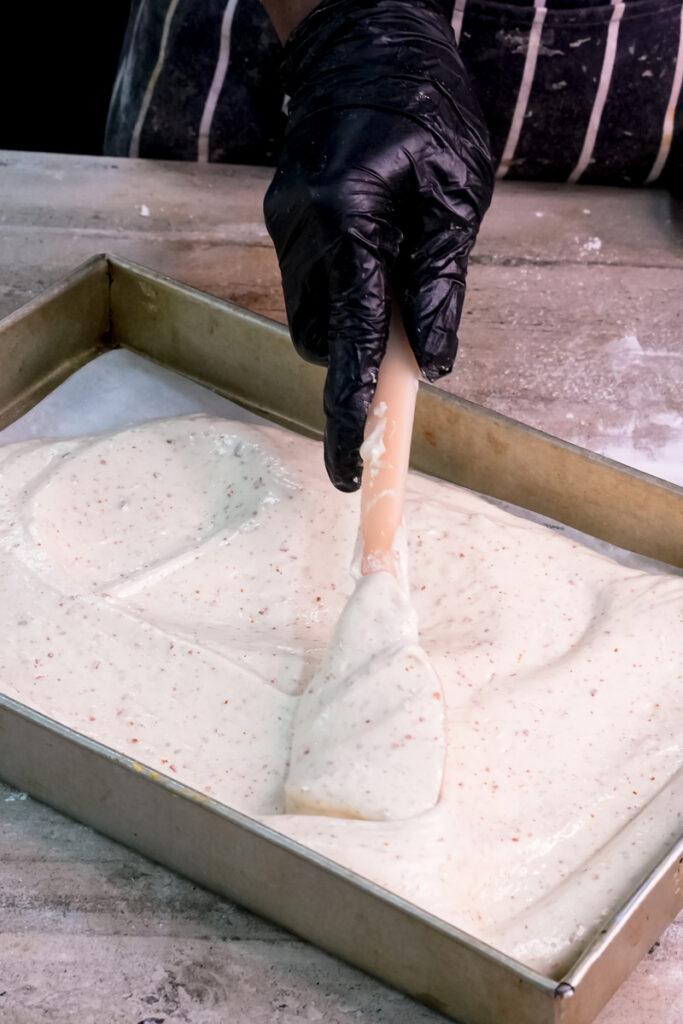
Preheat your oven to 400°F (200°C). Grease your half-sheet pan and line it with parchment paper.
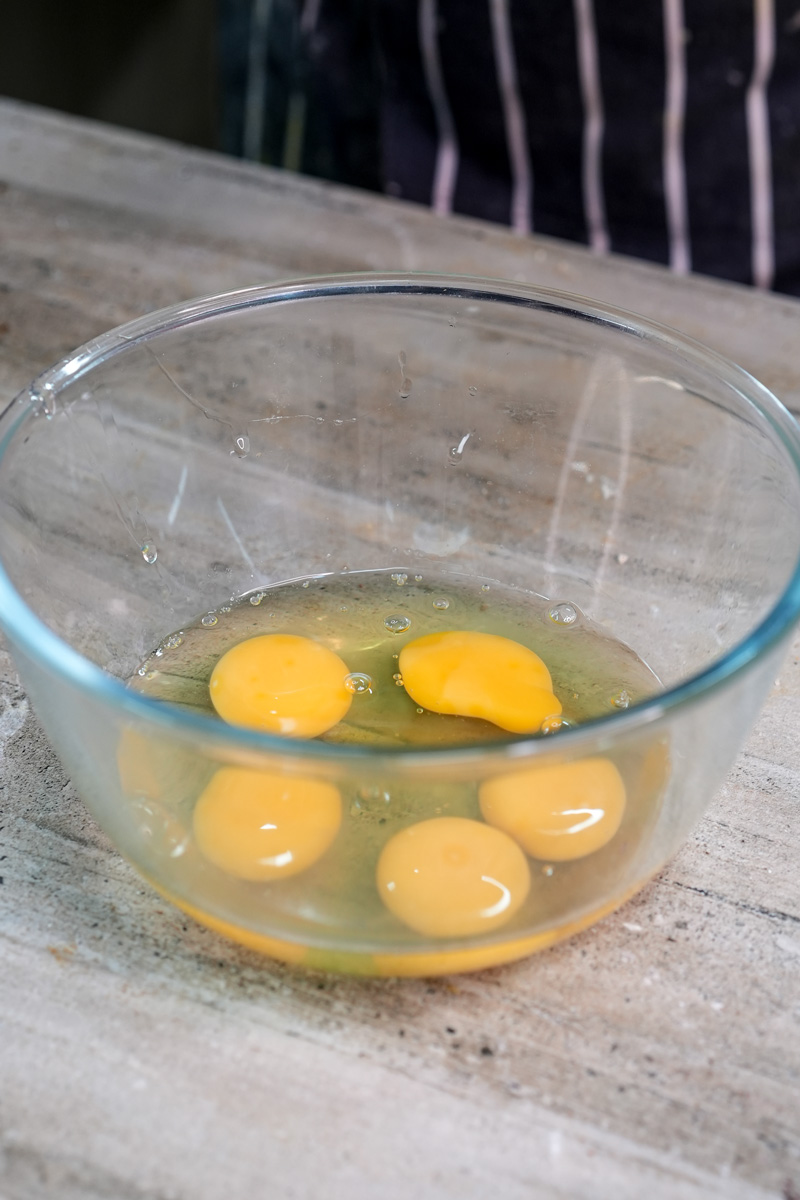
Now for the meringue. In your mixer, whip 6 egg whites on high. Once they’re foamy, slowly sprinkle in about 65g of granulated sugar. Adding it slowly helps it dissolve and makes the meringue stable and shiny. You want firm peaks, but with a little curl at the tip. Be careful not to over-whip, or it can get dry. Scrape the meringue into a separate large bowl.
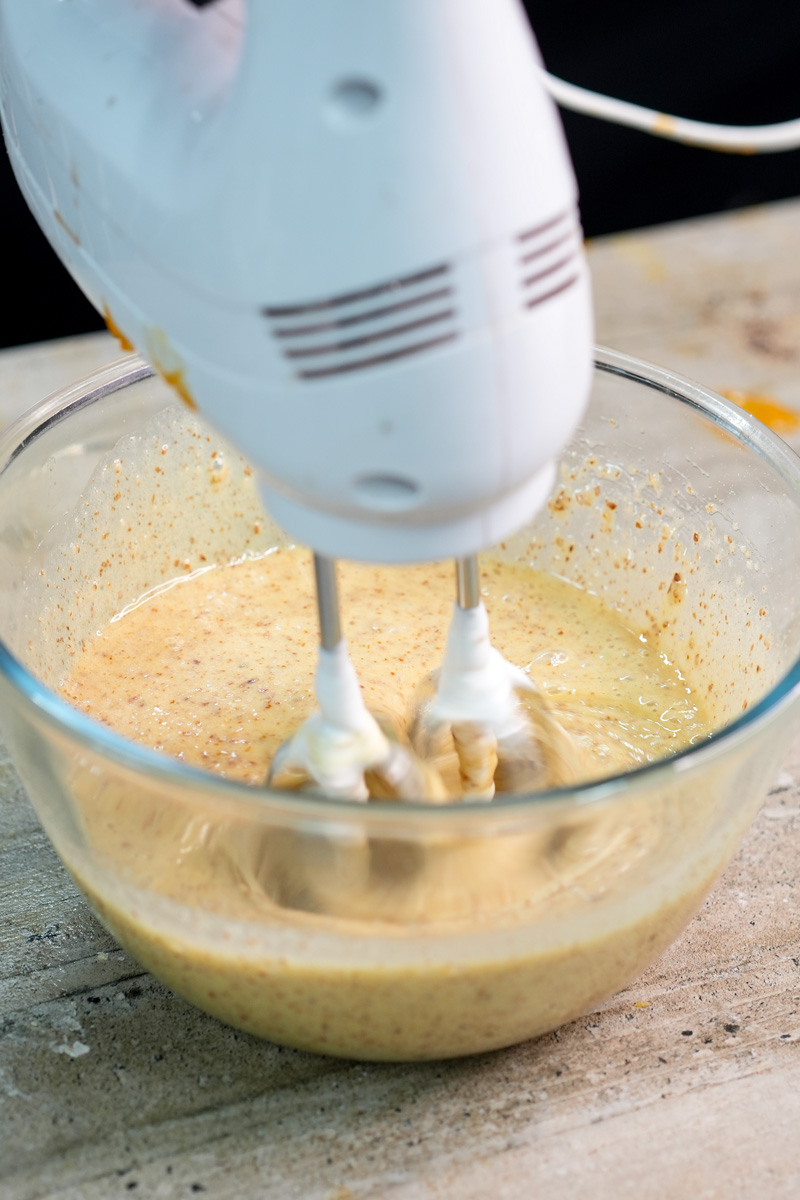
You don’t even need to clean the mixer bowl. Add the 5 whole eggs, 200g of almond flour, and the remaining 135g of sugar. Whip this on high speed for about 5-7 minutes. You’re looking for the “ribbon stage.” This means when you lift the whisk, the batter falls off in a thick stream that sits on the surface for a few seconds before sinking back in.
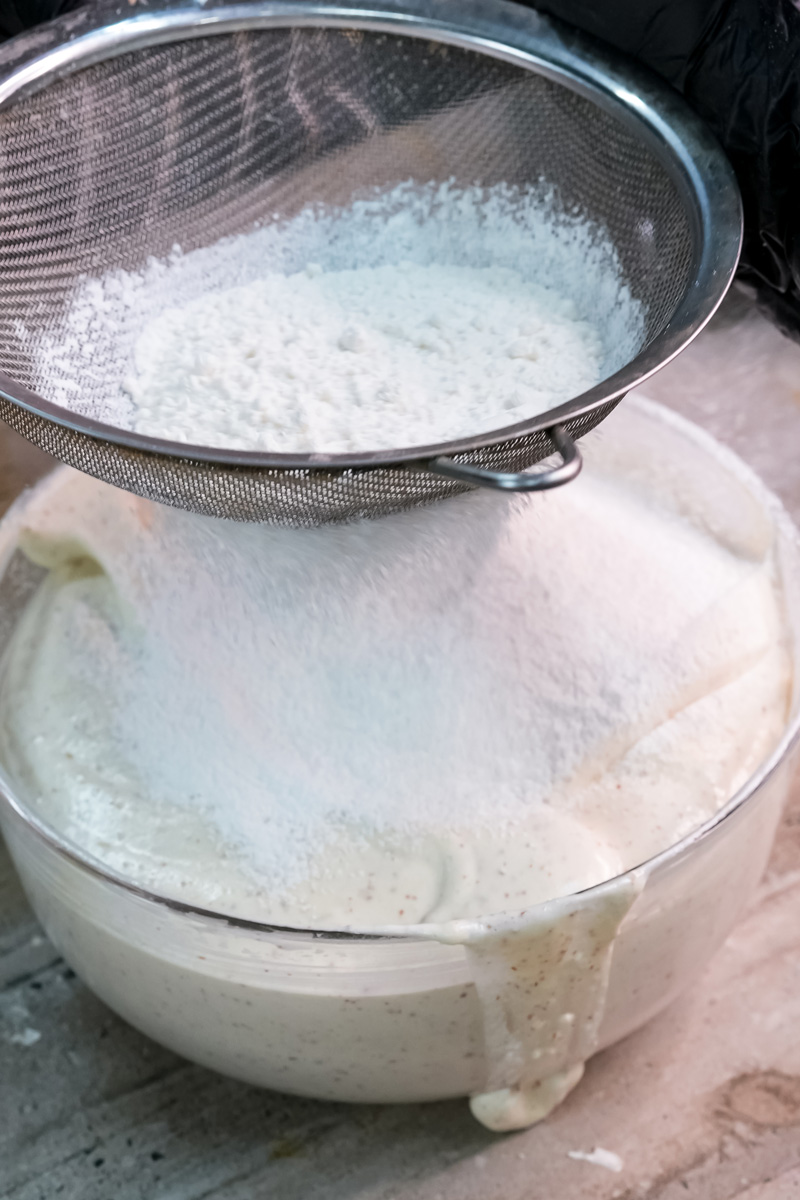
Time to combine. Gently fold half of your meringue into the yolk mixture, then fold in the other half. Don’t go crazy mixing; a few white streaks are fine. Sift the 40g of cake flour over the batter and fold it in.
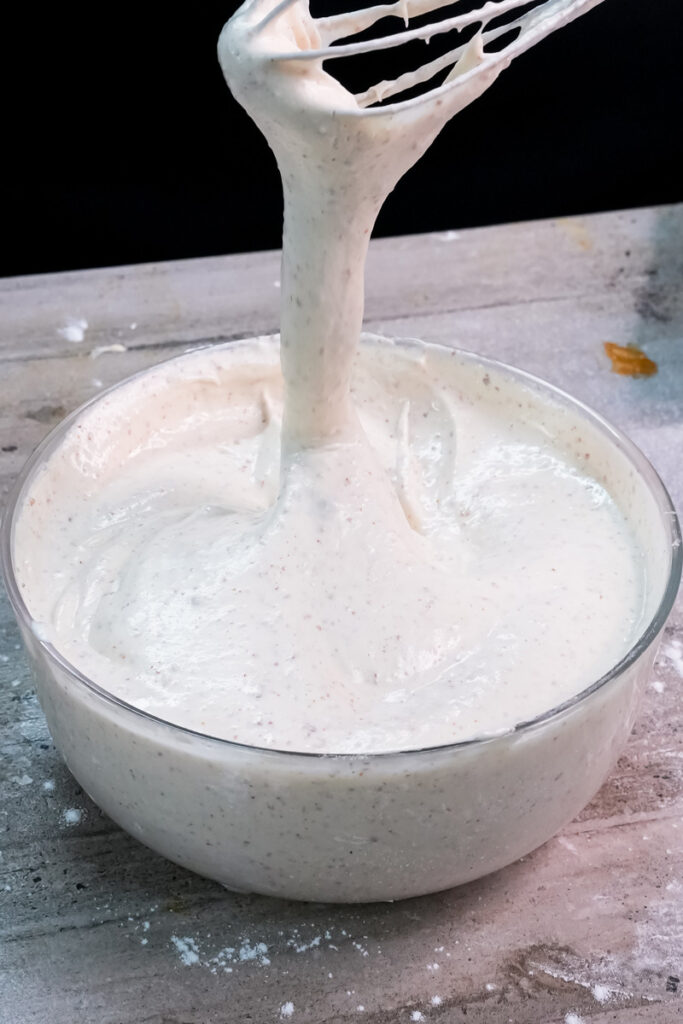
Now for a little pro technique. Take a big scoop of the batter and mix it into your bowl of 30g of melted, cooled butter. This lightens up the butter so it’s easier to fold into the main batter without deflating it. Gently fold this butter mixture back into the rest of the batter.
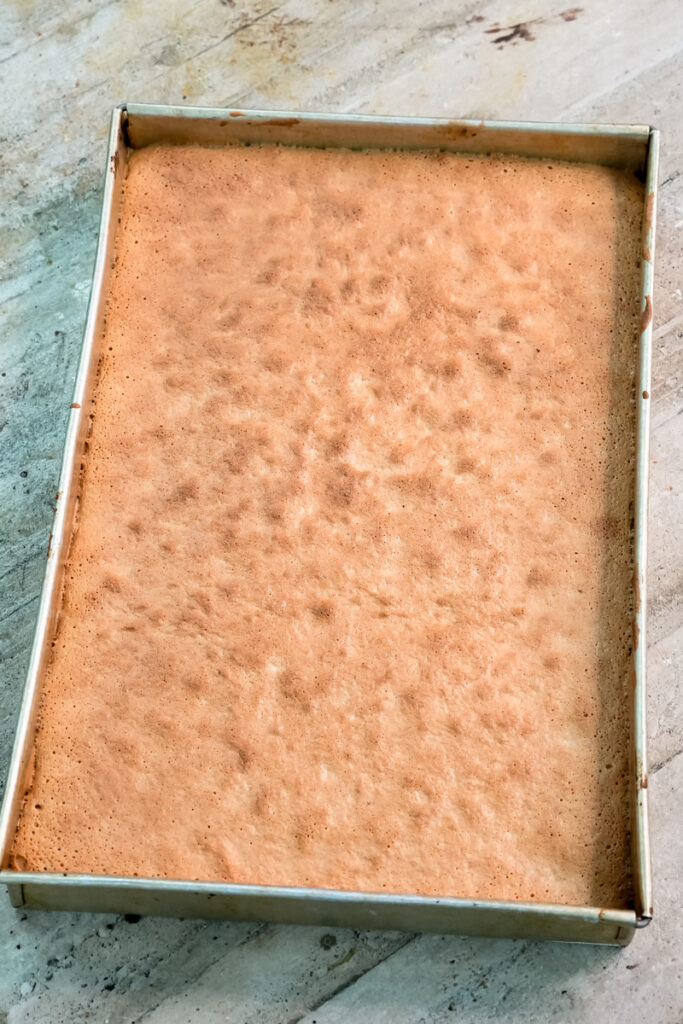
Spread it evenly in your prepared pan. It won’t level itself, so use your offset spatula. Bake for 12-16 minutes, until it’s golden and springs back when you touch it. Let it cool completely.
Stage 3: The Coffee Syrup & French Buttercream
While the sponge cools, make the syrup. Dissolve 2 tbsp of espresso powder in a tiny bit of hot water. In a small pot, boil 100g of sugar and 120ml of water until the sugar is dissolved. Take it off the heat and stir in the espresso and the optional 2 tbsp of Amaretto. Set it aside to cool.
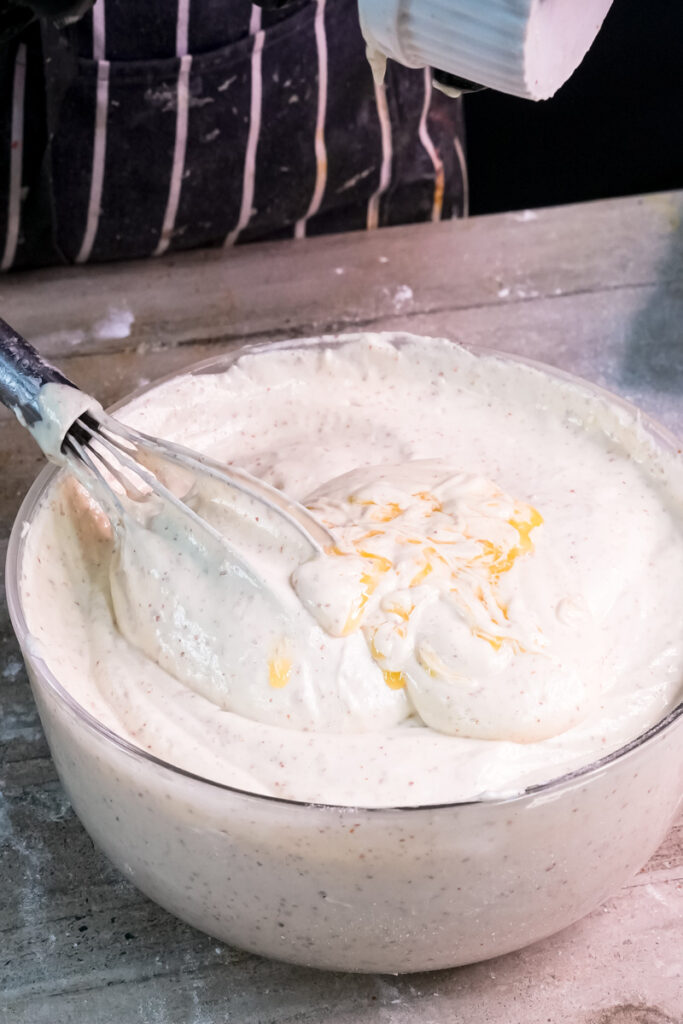
For the buttercream, whip 6 egg yolks until they’re thick and pale yellow. While they’re whipping, put 150g of sugar and 60ml of water in a saucepan with a candy thermometer. This next part is crucial: heat the syrup to exactly 240°F / 115°C.
The moment it hits the temperature, turn your mixer to low and pour the hot syrup down the side of the bowl in a slow, steady stream. Try not to hit the whisk. Once all the syrup is in, crank the mixer to high and whip until the outside of the bowl feels cool, which takes about 10 minutes.
Now, with the mixer still on high, add the 227g of cubed, room-temperature butter, one piece at a time. The mixture might look curdled for a second. Don’t panic! This is normal. Just keep whipping, and it will suddenly come together into a thick, smooth, glossy buttercream. I promise.
Finish by whipping in 1 tsp of vanilla extract, a pinch of salt, and 1 ½ tbsp of espresso powder (dissolved in a tiny splash of water).
Stage 4: The Grand Assembly
This is the moment! Lay out all your beautiful, cooled components.
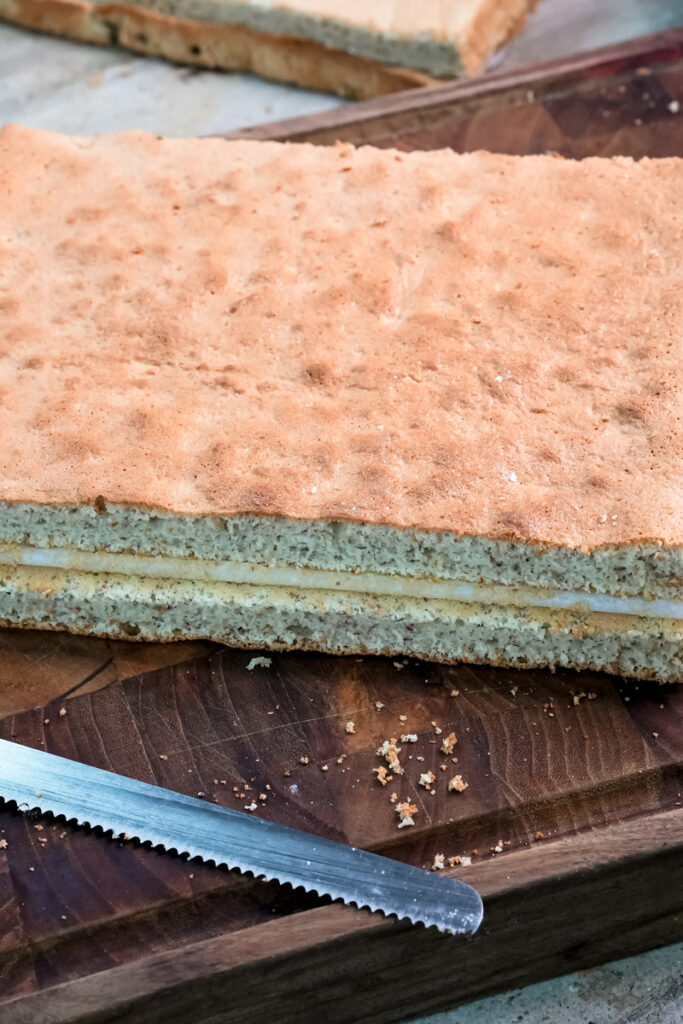
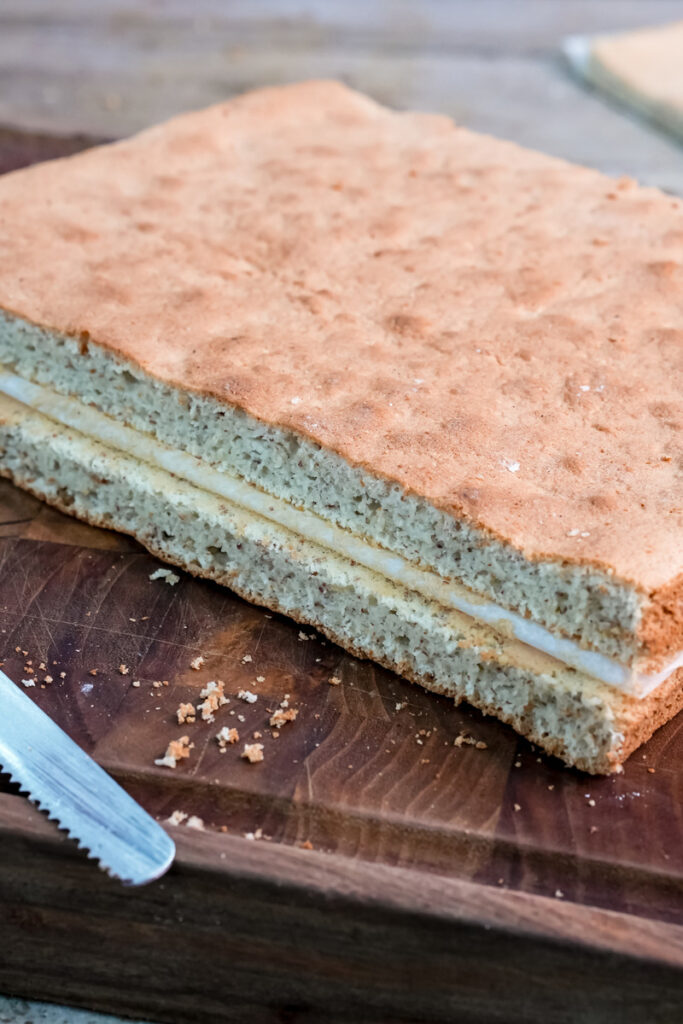
Cut your sponge into three perfectly equal rectangles. A ruler is your friend here! If you’re using the optional chocolate base, melt 3 oz of dark chocolate with 2 tsp of vegetable oil, spread it on one rectangle, and pop it in the fridge until it’s hard. This will be your bottom layer.
- Place your bottom layer on a sheet of parchment paper, chocolate-side down. Poke holes all over it with a skewer and brush it generously with the coffee syrup.
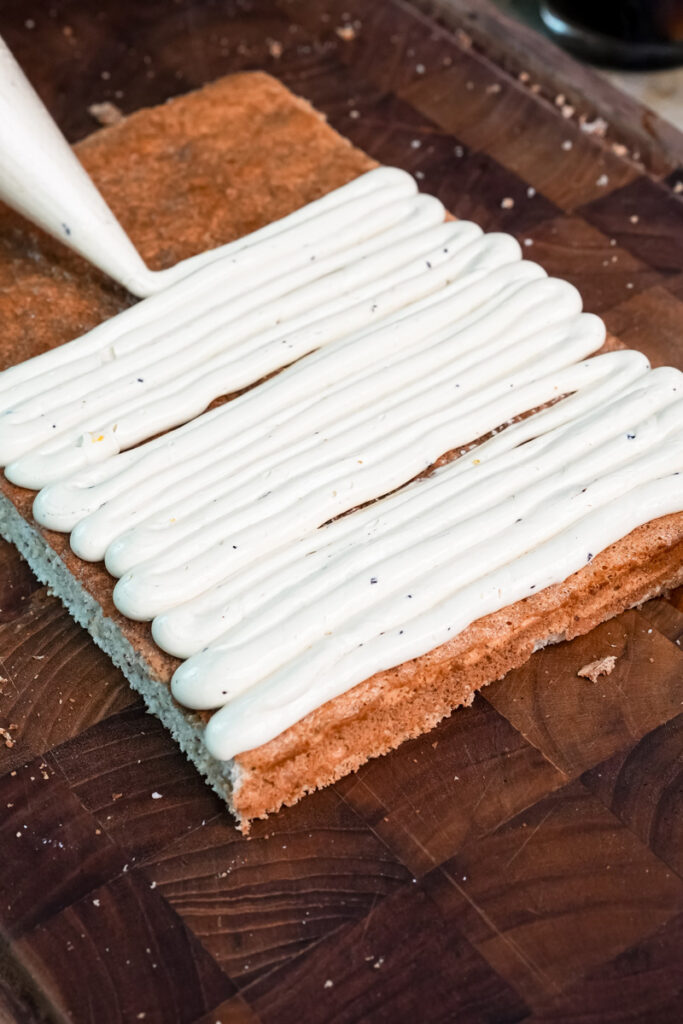
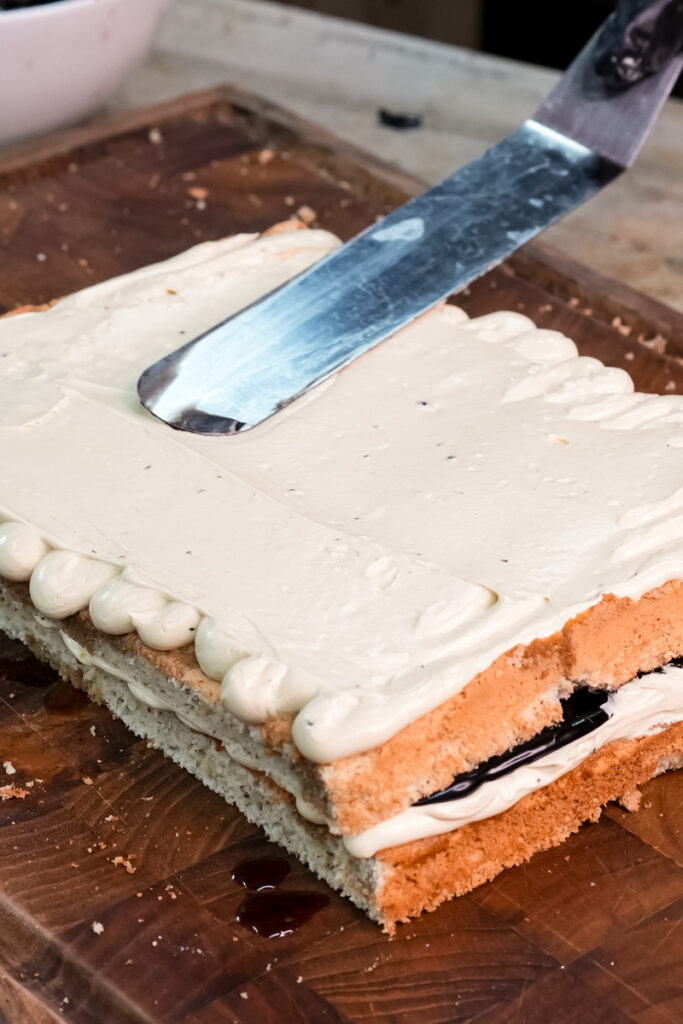
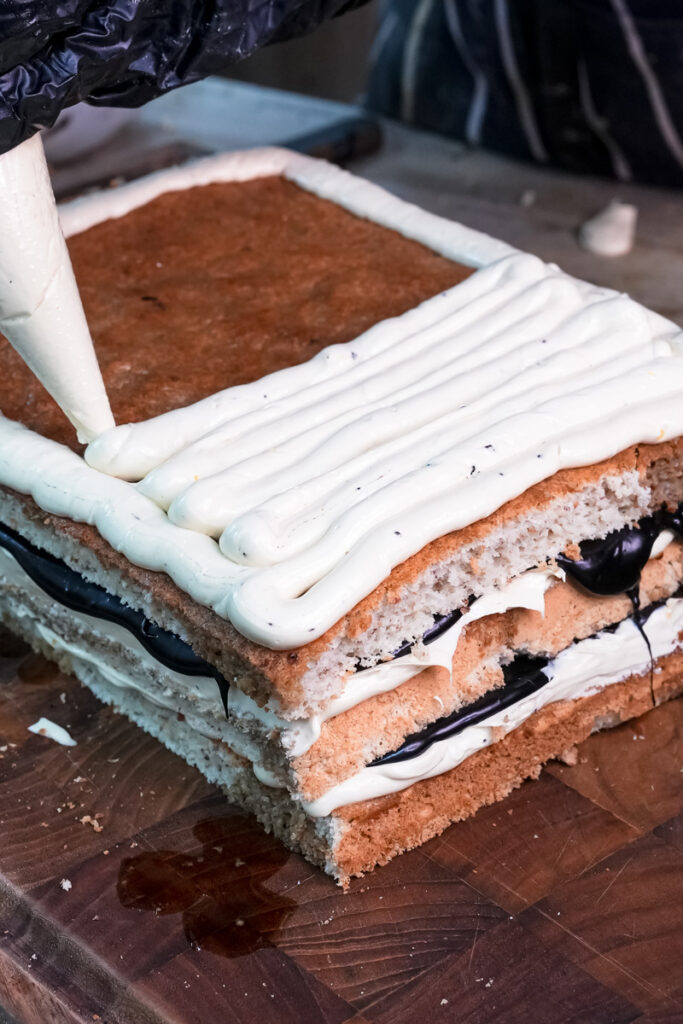
- Spread half of your amazing coffee buttercream on top. Try to get it perfectly even.
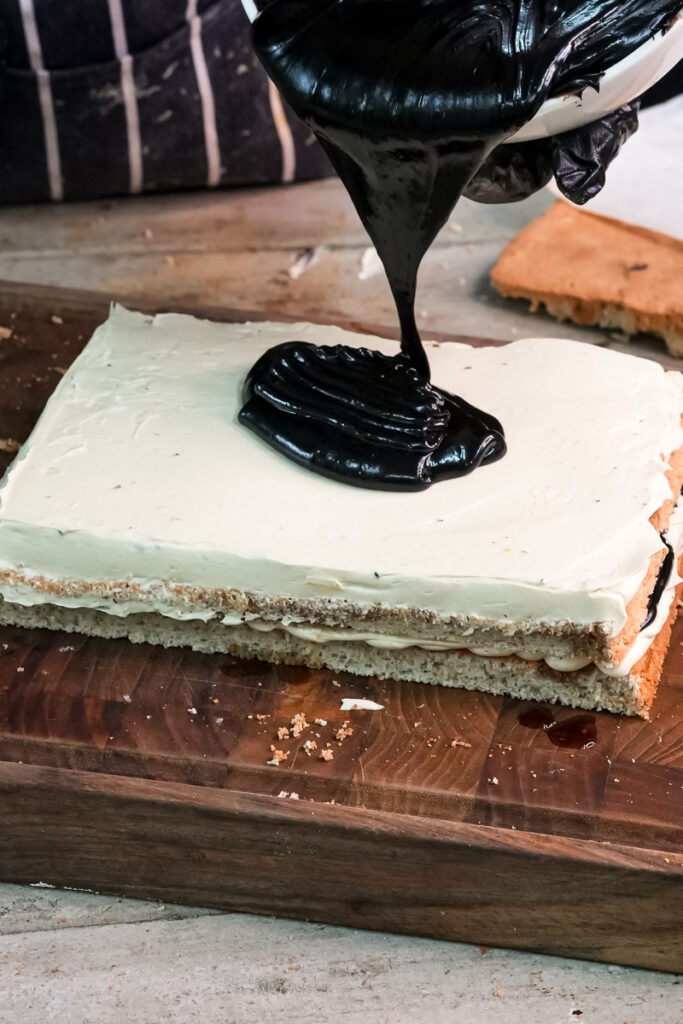
- Place the second sponge layer on top. Poke and soak it with syrup. Now spread all of the cooled chocolate ganache over it.
- Top with the final sponge layer. Poke it, soak it, and spread the rest of the buttercream over the top in a smooth, finished layer.
- Pop the whole cake in the fridge for 30 minutes to let everything firm up.
Stage 5: The Glossy Glaze & Final Cut
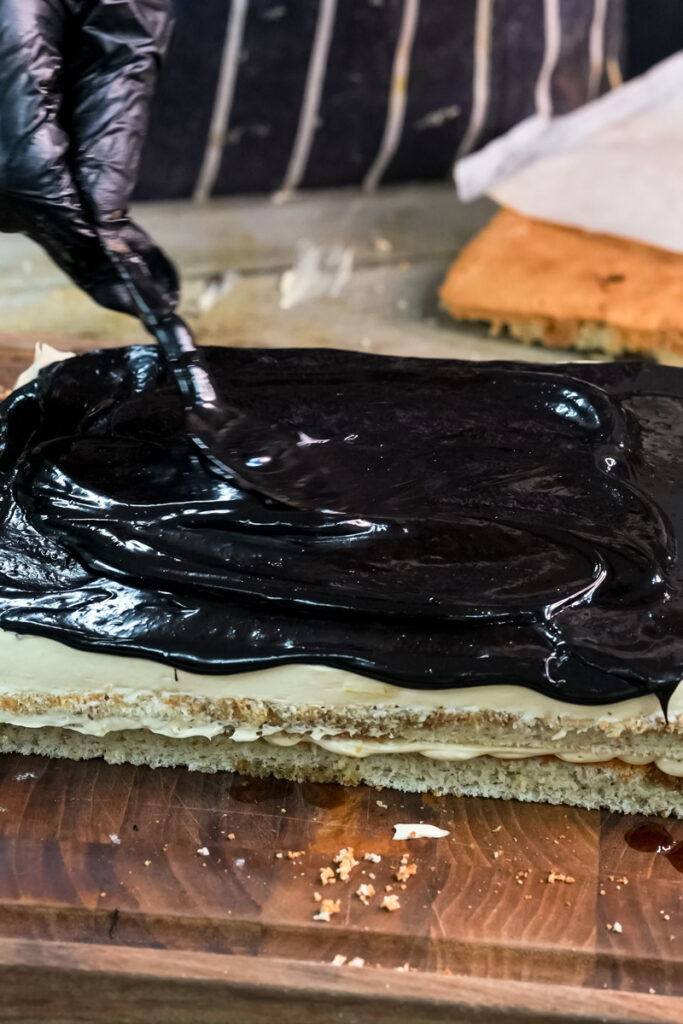
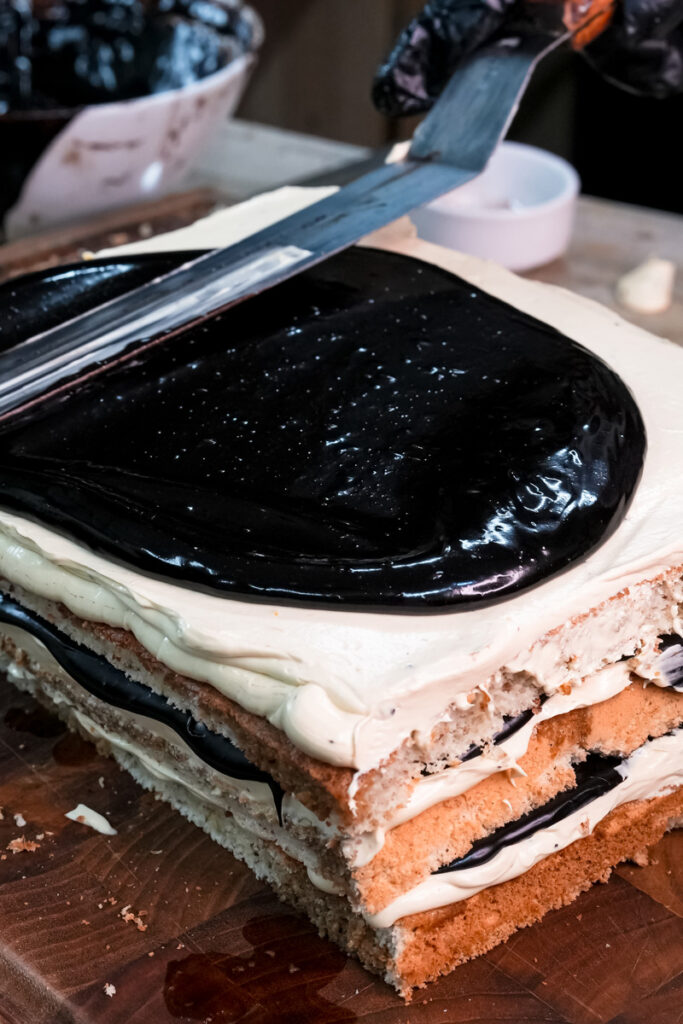
After 30 minutes, make the glaze. It’s almost the same as the ganache. Heat 160ml of cream and pour it over 160g of chocolate, 15g of butter, and 1 tbsp of corn syrup. Stir until it’s a glossy river of chocolate.
Pour the glaze over your chilled cake. Spread it to the edges with your offset spatula. Give it one final, confident swipe to make it smooth. Chill it for 10 more minutes to set the glaze.
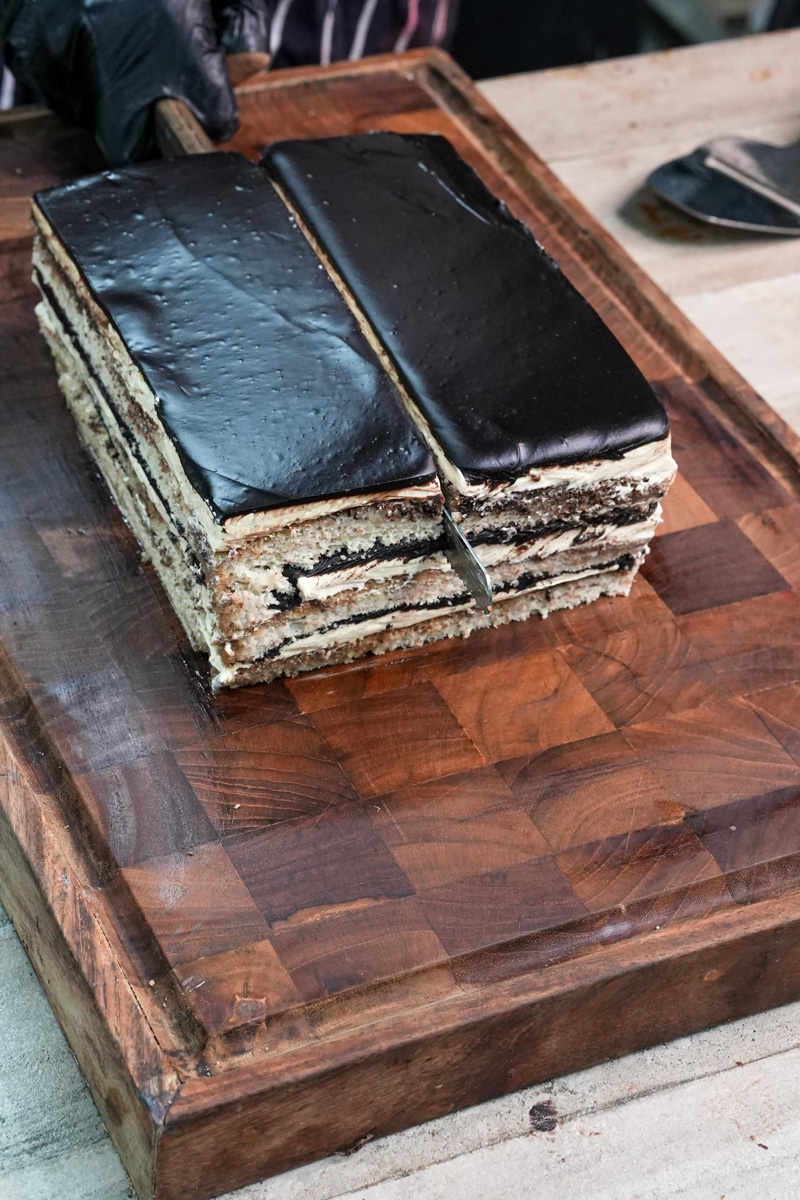
For those perfect, clean edges, use a long, sharp knife. Dip the blade in hot water, wipe it dry, and press straight down in one firm motion. Wipe and re-warm the knife between every single cut. This is the secret! Trim a thin slice off all four sides, then cut the cake into 12 perfect portions.

A Few Fun Variations
The classic is amazing, but feel free to make it your own!
- Gluten-Free? Just swap the cake flour for a good 1-to-1 gluten-free baking flour.
- Flavor Twists? Try a different liquor, like Kahlúa for a bigger coffee hit or Grand Marnier for a touch of orange.
- A Simpler Look? You can skip the final glaze and just dust the top with good cocoa powder.
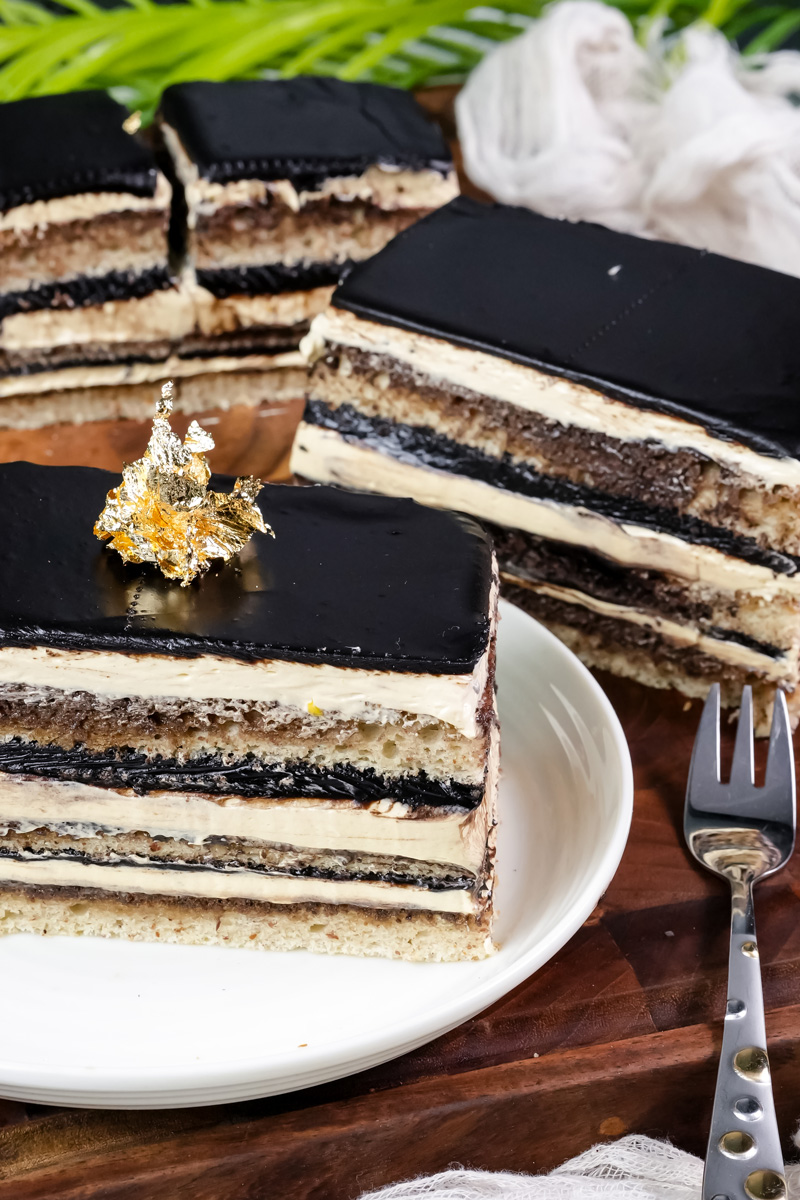
- Feeling Fancy? Use leftover glaze to pipe the word “Opéra” on top, or add a little fleck of edible gold leaf.

How to Serve and Store Your Masterpiece
You did it! The cake is best served slightly chilled, but not straight from the fridge. Let it sit out for about 30-60 minutes before serving. This lets the buttercream soften up for the best possible flavor and texture. All it needs is a good cup of coffee on the side.
Store any leftovers in an airtight container in the fridge for up to 4 days. You can also freeze the whole cake! Wrap it well in plastic wrap and foil, and it’ll keep for a month. Just thaw it overnight in the fridge before serving.
Enjoy every bite. You should be incredibly proud of the stunning, delicious work of art you just created.
PrintOpera Cake
A truly special baking project, this French Opera Cake features delicate layers of coffee-soaked almond sponge, silky coffee buttercream, and rich chocolate ganache. While it looks incredibly impressive, it’s a rewarding and achievable bake for any passionate home baker.
- Prep Time: 2 hours 25 minutes
- Cook Time: 15 minutes
- Total Time: 2 hours 40 minutes (+ chilling time)
- Yield: 12 slices 1x
- Category: Dessert
- Cuisine: French
Ingredients
For the Chocolate Ganache:
- 130g Dark Chocolate (55-70% cacao), chopped
- 160ml Heavy Cream
- 15g Unsalted Butter, room temperature
For the Joconde (Almond) Sponge:
- 6 large Egg Whites
- 65g Granulated Sugar
- 5 large Whole Eggs
- 200g Fine Almond Flour
- 135g Granulated Sugar
- 40g Cake Flour
- 30g Unsalted Butter, melted and cooled
For the Coffee Syrup:
- 2 tbsp Espresso Powder
- 100g Granulated Sugar
- 120ml Water
- 2 tbsp Amaretto (optional)
For the Coffee French Buttercream:
- 6 large Egg Yolks
- 150g Granulated Sugar
- 60ml Water
- 227g Unsalted Butter, cubed and at room temperature
- 121 tbsp Espresso Powder
- 1 tsp Vanilla Extract
- Pinch of Salt
For the Chocolate Glaze:
- 160g Dark Chocolate, chopped
- 160ml Heavy Cream
- 15g Unsalted Butter
- 1 tbsp Corn Syrup
Instructions
- Make the Ganache: Place chopped chocolate in a heatproof bowl. Heat cream until just steaming (not boiling) and pour over the chocolate. Let it stand for 2 minutes, then stir from the center out until smooth and glossy. Mix in the butter. Set aside to cool and thicken to a spreadable consistency.
- Make the Joconde Sponge: Preheat oven to 400°F(200°C). Line an 18×13-inch baking sheet with parchment.
- Whip egg whites until foamy. Slowly add the 65g of sugar and whip to firm, glossy peaks. Transfer to another bowl.
- In the same mixer bowl, whip whole eggs, almond flour, and the remaining 135g of sugar on high for 5-7 minutes, until thick and pale (the “ribbon stage”).
- Gently fold the meringue into the yolk mixture in two additions. Sift the cake flour over top and fold in.
- Mix a scoop of batter into the melted butter, then fold this mixture back into the main batter.
- Spread evenly on the prepared pan. Bake for 12-16 minutes, until golden and springy. Let cool completely.
- Make Syrup & Buttercream: While the sponge cools, make the syrup by boiling sugar and water, then stirring in dissolved espresso powder and optional Amaretto. Set aside to cool.
- For the buttercream, whip egg yolks until pale. Meanwhile, heat sugar and water in a saucepan to exactly 240°F(115°C) on a candy thermometer.
- With the mixer on low, slowly stream the hot syrup into the whipping yolks. Then, whip on high until the bowl is cool to the touch.
- Add the room-temperature butter one cube at a time, whipping until the buttercream is thick and smooth. (Don’t worry if it looks curdled at first—just keep whipping!) Mix in vanilla, salt, and dissolved espresso powder.
- Assemble the Cake: Cut the cooled sponge into three equal rectangles.
- Place one sponge layer down. Pierce with a fork and generously brush with coffee syrup. Spread with half of the coffee buttercream.
- Add the second sponge layer, soak with syrup, and spread with all of the cooled chocolate ganache.
- Add the final sponge layer, soak with syrup, and cover with the remaining buttercream in a smooth, even layer.
- Chill the cake for at least 30 minutes to firm up.
- Glaze and Finish: To make the glaze, heat cream until steaming and pour over the chocolate, butter, and corn syrup. Stir until smooth. Pour the warm glaze over the chilled cake, spreading it evenly. Chill for another 10 minutes to set.
Notes
- Serving Suggestion: For the best flavor and texture, let the cake sit at room temperature for 30-60 minutes before serving. This allows the buttercream to soften slightly. It’s perfect with a cup of espresso.
- Tip for Clean Slices: This is the secret to a professional look! Use a long, sharp knife. Dip the blade in hot water and wipe it completely dry between every single cut. Press down firmly in one motion.
- Make-Ahead Trick: Don’t do it all in one day! On Day 1, bake the sponge and make the ganache and syrup. On Day 2, make the buttercream and assemble.
- Storage: Store the cake in an airtight container in the refrigerator for up to 4 days. You can also freeze the whole, uncut cake for up to a month. Thaw overnight in the fridge before serving.