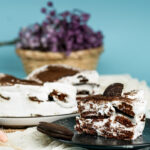
Oreo Icebox Cake
Seriously, this might be the easiest and most delicious dessert you’ll ever make! Layers of Oreos magically soften into a cake-like treat nestled in fluffy whipped cream. It’s a total crowd-pleaser and perfect for cooling down. No oven needed!
- Prep Time: 15 minutes
- Cook Time: None
- Total Time: 4 hours 15 minutes (includes freezing & chilling)
- Yield: 8-9 slices 1x
- Category: Dessert
- Cuisine: American (No-Bake)
Ingredients
Scale
- 2 cups Heavy Cream (Make sure it’s super cold!)
- 1/2 cup Powdered Sugar (Also called confectioners’ sugar)
- 1 tsp Pure Vanilla Extract (The good stuff makes a difference!)
- 30–35 Oreo Cookies (Regular works great! Plus a few extra for topping)
Instructions
- Prep Your Pan: Line an 8×8 inch square pan (or a 9×5 loaf pan) with plastic wrap or parchment paper. Leave some hanging over the sides to use as handles later. Set it aside. Easy cleanup? Yes, please!
- Whip the Cream: Pour the very cold heavy cream into a big, chilled bowl. Start mixing on low with an electric mixer. Gradually add the powdered sugar and vanilla as it thickens slightly.
- Get Stiff Peaks: Turn the mixer up to medium-high. Beat until the cream is thick, fluffy, and holds its shape when you lift the beaters (that’s called ‘stiff peaks’). Careful! Don’t mix too long, or it’ll get grainy. Stop right when it looks like perfect clouds.
- First Layer: Spread a thin layer of whipped cream on the bottom of your lined pan. Arrange about half the Oreos (15-18) on top, breaking some to fill gaps. Snug ’em in there!
- Add More Cream: Gently spread about half of the remaining whipped cream over the Oreos. Cover them completely, right to the edges.
- Second Cookie Layer: Place the rest of the Oreos (another 15-18) on top of the cream layer. Fill in those gaps again. Almost done!
- Top it Off: Spread the last bit of whipped cream evenly over the top cookie layer. Make it look pretty! Crush those extra Oreos (whack ’em in a bag or pulse in a food processor) and sprinkle them all over the top.
- Freeze Time! Cover the pan tightly with plastic wrap. Pop it in the freezer for at least 4 hours. This is key! It needs this time to firm up so you can slice it like a dream. Overnight works great too.
Notes
- Serving: Let the cake sit out for 5-10 minutes before slicing. Use a sharp knife (run it under hot water for cleaner cuts!). Perfect with coffee or milk.
- Why Cold Cream? Seriously, ice cold heavy cream whips up way better and fluffier. Don’t skip this! Chilling the bowl helps too.
- Lining the Pan: Don’t skip lining the pan! Those plastic wrap ‘handles’ make it so much easier to lift the whole cake out for slicing.
- Storage: This cake loves the freezer! Keep leftovers tightly covered in the freezer for up to 1 month. It stays firm like an ice cream cake. You can keep it in the fridge for 2-3 days, but it will get much softer.
- No Reheating: Serve this one chilled or frozen!
Find it online: https://recipesh.com/oreo-icebox-cake/
