Hey there. Welcome! Today, we’re making something that tastes like a lazy weekend morning feels: Fluffy Peanut Butter Pancakes.
There’s just something special about a fresh stack of pancakes, right? The sound of the batter hitting the pan, that sweet smell filling the whole house. Now, what if we took that classic comfort and swirled in the rich, nutty flavor of peanut butter?
It’s a total game-changer.
I can’t tell you how many Saturday mornings were spent experimenting to get this just right. We’re going for that perfect balance—pancakes that are light and airy, but with a peanut butter flavor that’s impossible to miss. They’re simple, satisfying, and packed with a little extra protein.
So, grab an apron. I’m going to show you how to make easy peanut butter pancakes that will have everyone reaching for a second stack.
What to Expect
Before we jump in, let’s do a quick fly-by. Knowing the plan makes the whole process smoother and way more fun.
- Time Commitment: This is fast. Seriously. You only need about 10 minutes to prep and another 10 minutes to cook. That’s a grand total of 20 minutes between you and pancake heaven.
- How Much It Makes: This recipe gives you about 6 medium-sized pancakes, which is usually perfect for 2-3 people. Cooking for more? No problem. The recipe is super easy to double or triple. I’ve even made a handy chart for you.
| Servings | Pancakes (approx.) | Flour | Baking Powder | Salt | Peanut Butter | Sugar | Oil | Egg(s) | Milk |
| 3 | 3 | ½ cup | 1 tsp | ¼ tsp | ¼ cup | 1¼ Tbsp | 1 Tbsp | 1 | ½ cup |
| 6 | 6 | 1 cup | 2 tsp | ½ tsp | ½ cup | 2½ Tbsp | 2 Tbsp | 1-2 | 1 cup |
| 12 | 12 | 2 cups | 4 tsp | 1 tsp | 1 cup | 5 Tbsp | ¼ cup | 2-3 | 2 cups |
- Difficulty Level: I’d call this one Easy. If you’re new to the kitchen, this is a fantastic place to start. The steps are simple, and the results are always delicious.
- What You’ll Need: You probably have all this stuff already!
- Two big mixing bowls
- A whisk and a spatula
- Measuring cups and spoons
- A griddle or a big non-stick frying pan.
- Meal Prep Tips: Want to get a head start? I love this. You can mix the dry ingredients and keep them in an airtight container. When you’re ready, just add the wet stuff. Even better? Cook the whole batch and freeze them for busy mornings. We’ll talk more about that later!
The Heart of the Batter: Your Ingredients
Amazing pancakes come from simple, good ingredients. Let’s talk about what we’re using and why it matters.
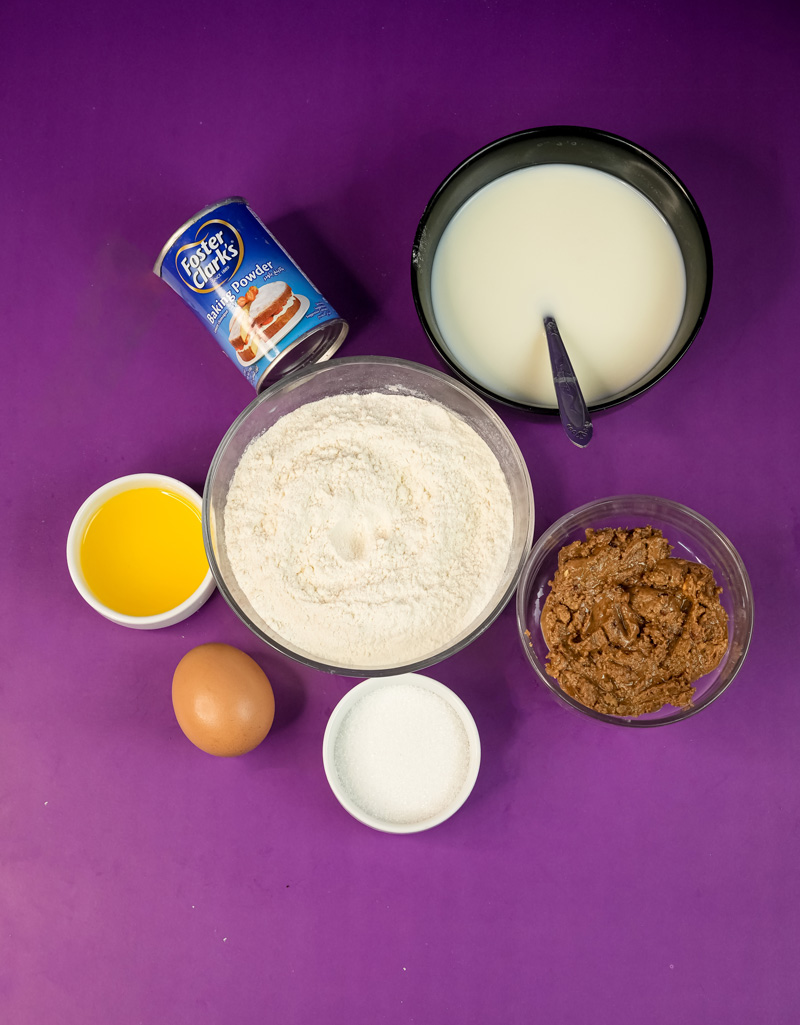
For this recipe, you’re going to need:
- 1 cup of all-purpose flour
- 2 teaspoons of baking powder
- ½ teaspoon of salt
- ½ cup of creamy peanut butter
- 2 ½ tablespoons of granulated sugar
- 2 tablespoons of vegetable oil
- 1 large egg
- 1 cup of milk
The flour is our foundation. The baking powder is what makes them super fluffy—it’s the lift-off! And the salt just makes everything else taste better.
For the star of the show, the peanut butter, I stick with the classic creamy brands like Jif or Skippy. Why? They blend into the batter like a dream. If you’re using natural peanut butter, just make sure you stir it really, really well before you measure it.
A little sugar adds sweetness. You can totally swap this for brown sugar or even maple syrup if you want. If you use maple syrup, just pull back on the milk a tiny bit. The oil makes them tender, but melted butter works great, too. And finally, the egg holds it all together while the milk creates that perfect pancake batter consistency.
A little tip: Try to let your egg and milk sit on the counter for a bit to come to room temperature. It helps the batter mix together more evenly.
Your Step-by-Step Guide to Pancake Perfection
Okay, time for the fun part. Let’s make some pancakes.
Step 1: Combine the Dry Ingredients
Grab one of your big bowls. Dump in the flour, baking powder, and salt. Now take your whisk and give it all a good mix for about 20 seconds.
This seems small, I know. But it’s my secret to making sure every pancake is perfectly fluffy. No weirdly flat or salty spots!
Step 2: Mix the Wet Ingredients
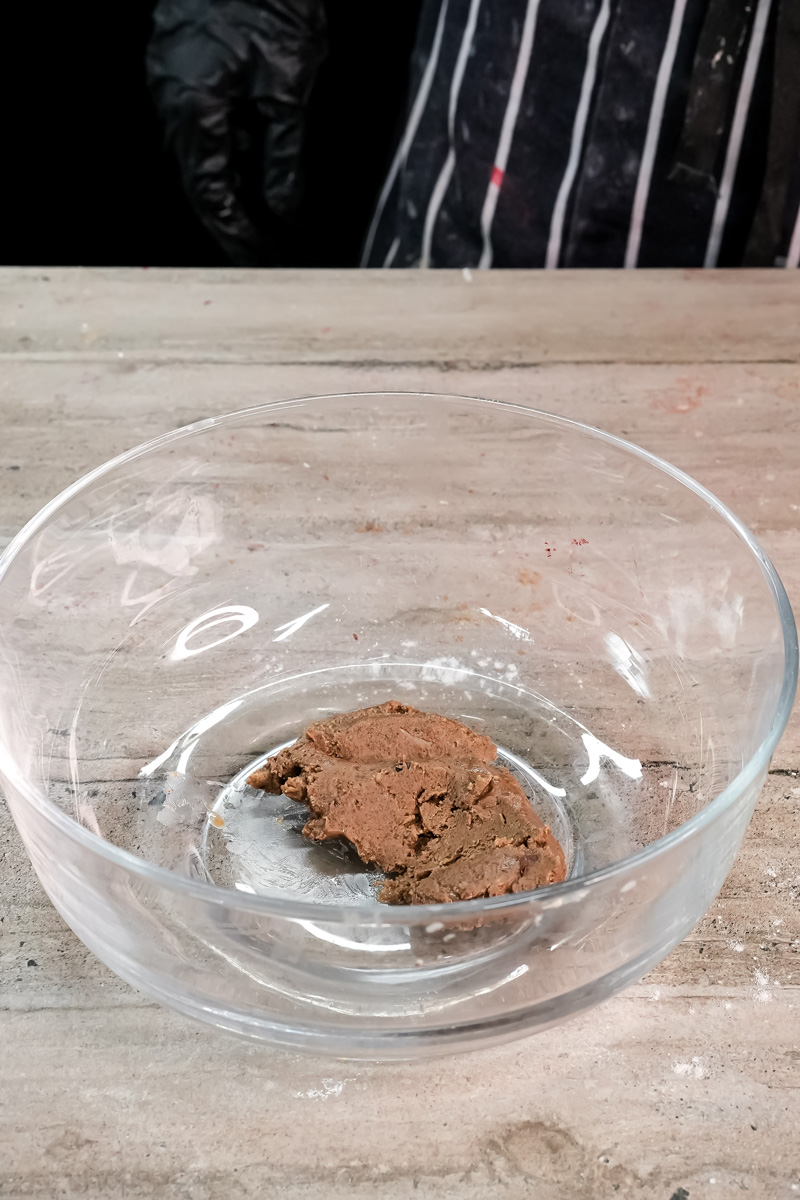
Set that bowl aside and grab your second one. This is where the flavor comes together.
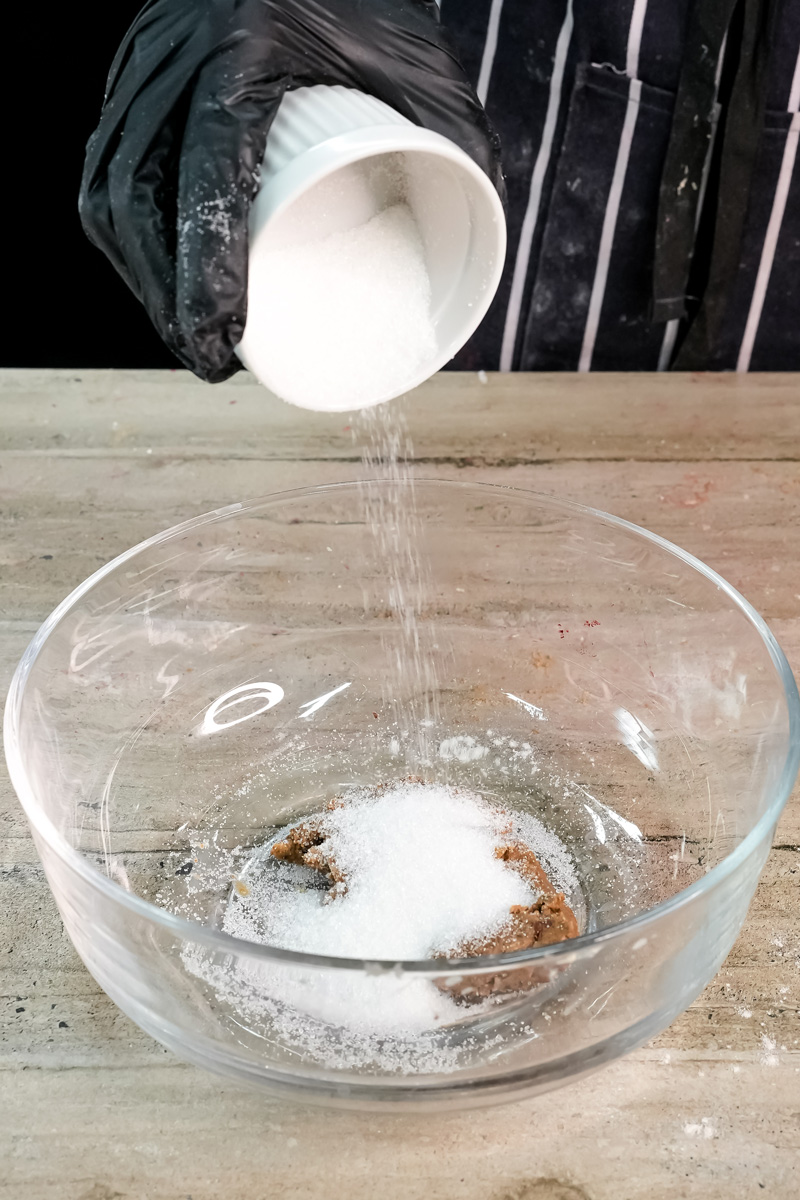
Add the peanut butter, sugar, and oil. Whisk them up until the mixture is totally smooth and looks like glossy, sweet peanut butter. Now, crack in your egg, pour in the milk, and whisk it all again until it’s blended. It might look a little thin. Don’t worry, that’s normal.
Pro Tip: I learned this trick a while back and it’s a lifesaver. If your peanut butter is a bit stiff, scoop it into a small bowl with a little of the milk and microwave it for 20-30 seconds. It makes getting a smooth, lump-free mix so much easier.
Step 3: Bring It All Together (Gently!)
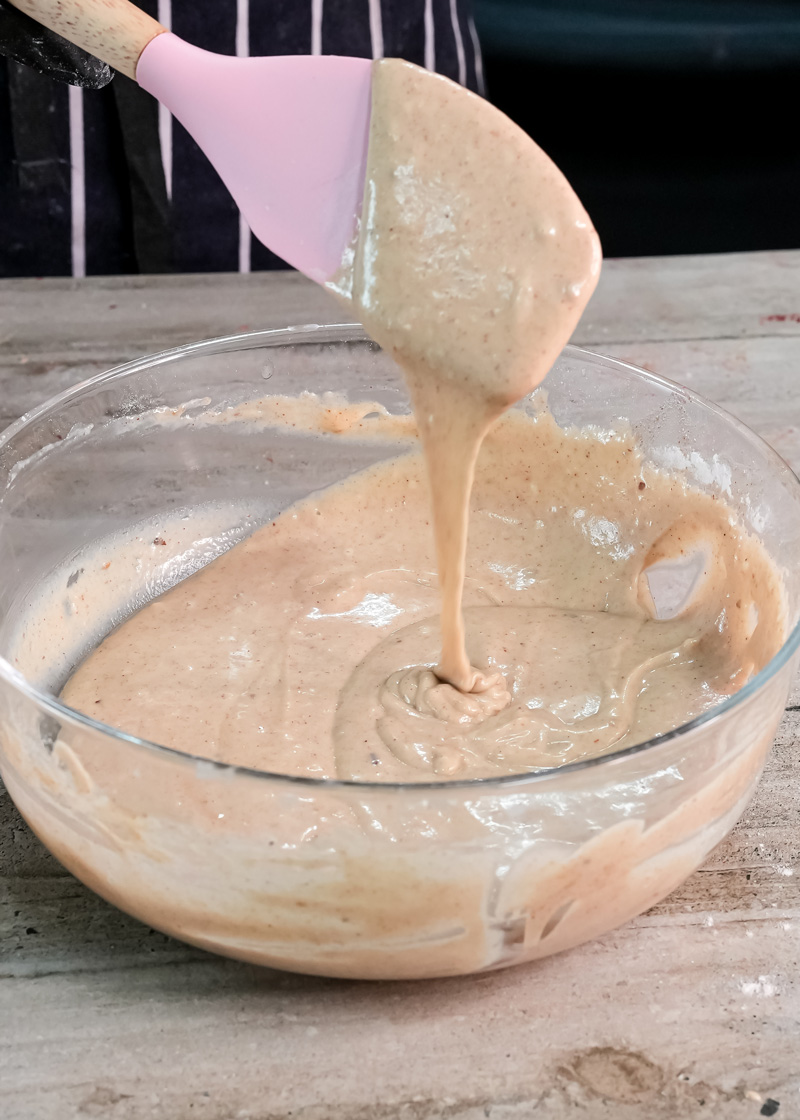
Ready? Pour the wet ingredients into the bowl with the dry ingredients.
And now for the most important part. Switch from your whisk to a spatula. Gently fold everything together until it’s just combined. You still want to see some small lumps in there.
Seriously. Do. Not. Overmix.
If you mix until it’s perfectly smooth, the pancakes will be tough. A lumpy batter is a happy batter! Those lumps are your ticket to light, tender pancakes.
Step 4: Griddle and Cook
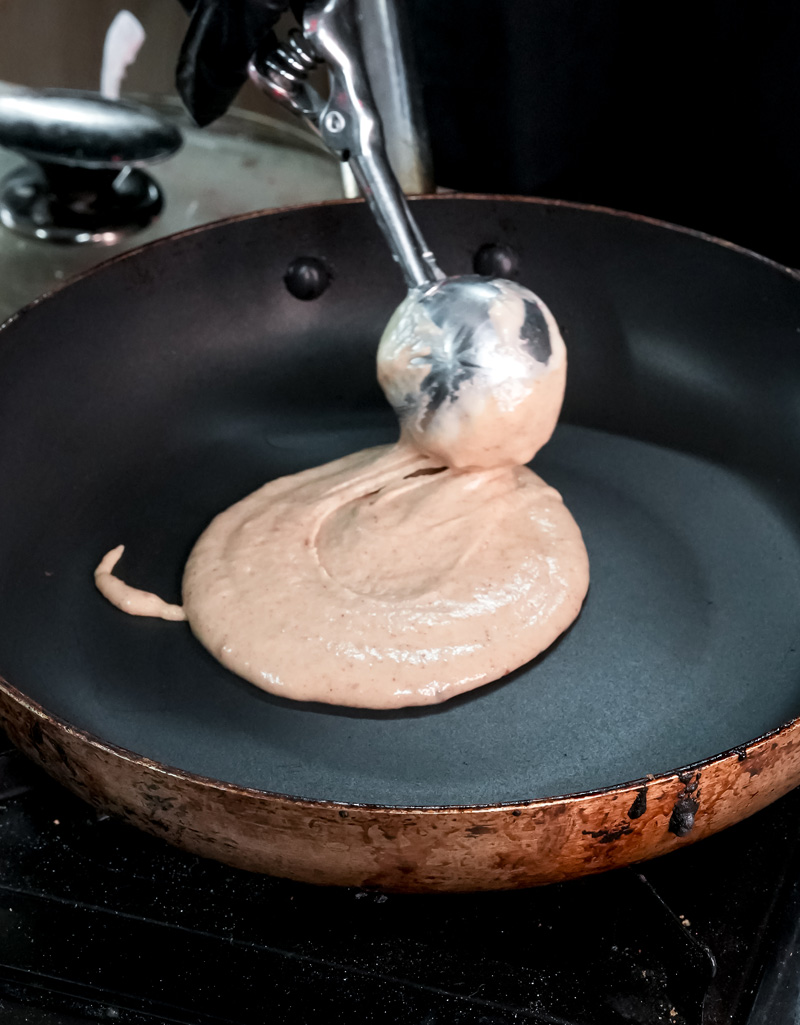
Get your griddle or non-stick pan heating over medium heat. A good way to test if it’s ready? Flick a tiny drop of water on it. If it sizzles and dances, you’re good to go. Lightly grease the pan with a bit of butter or oil.
Using a ¼ cup measure, pour the batter onto the hot pan. Give each pancake some space to do its thing.
Now, you just watch. After about 2-3 minutes, you’ll see two things happen: the edges will start to look dry, and little bubbles will pop up on the surface. That’s your signal.
Time to flip. Slide your spatula under the pancake and turn it over. And please, whatever you do, resist the urge to press down on it with your spatula! You’ll just smash out all that wonderful air we worked so hard to create. The second side cooks faster, usually just another minute or two until it’s golden brown.
Move the finished pancake to a plate and keep going until the batter is all gone.
Make It Your Own
This recipe is a great starting point, but feel free to play with it!
- Feeling decadent? Fold a handful of chocolate chips into the batter. Peanut butter and chocolate is always a win.
- Love classics? Add half a mashed ripe banana to the wet ingredients.
- Want some warmth? A teaspoon of vanilla extract or a half-teaspoon of cinnamon is a beautiful addition.
What about dietary changes?
Easy peasy.
- Gluten-Free: Just swap the regular flour for a good 1-to-1 gluten-free baking flour.
- Vegan: For the egg, use a “flax egg.” Just mix 1 tablespoon of ground flaxseed with 3 tablespoons of water and let it sit for 5 minutes. Then use your favorite plant-based milk, like almond or soy.
Serving & Storage
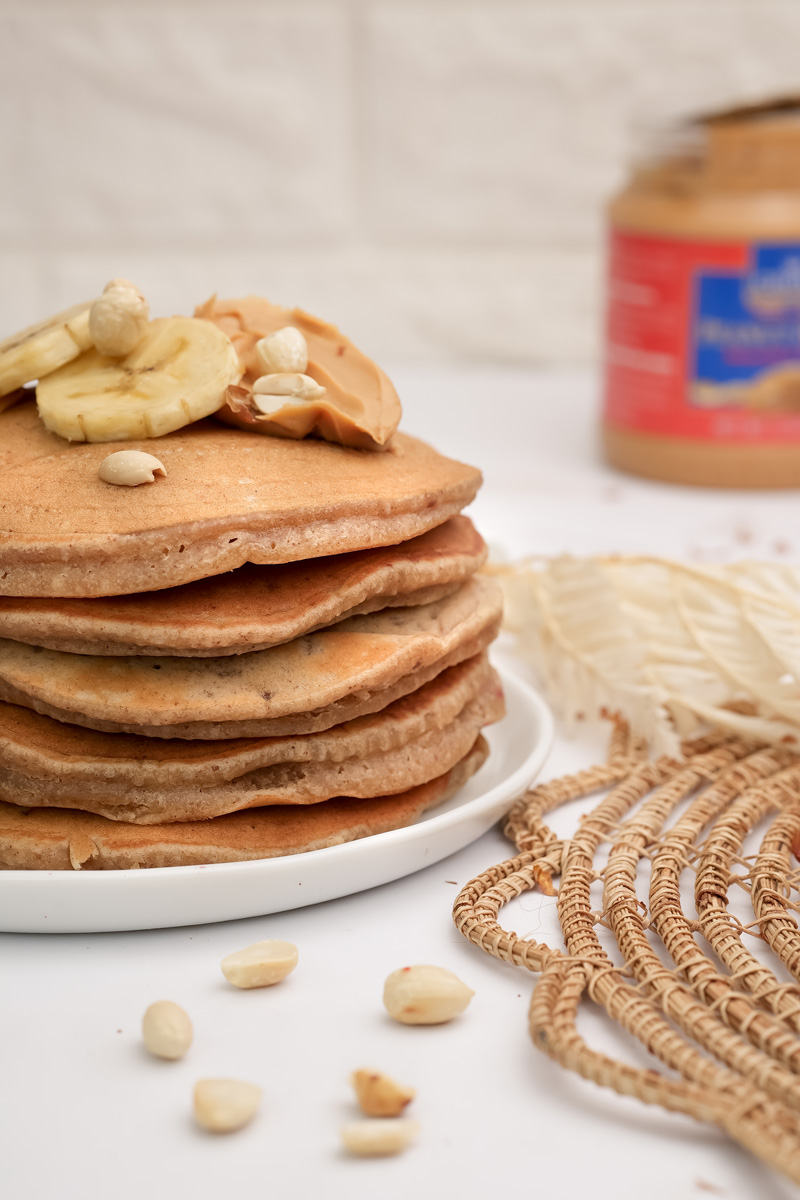
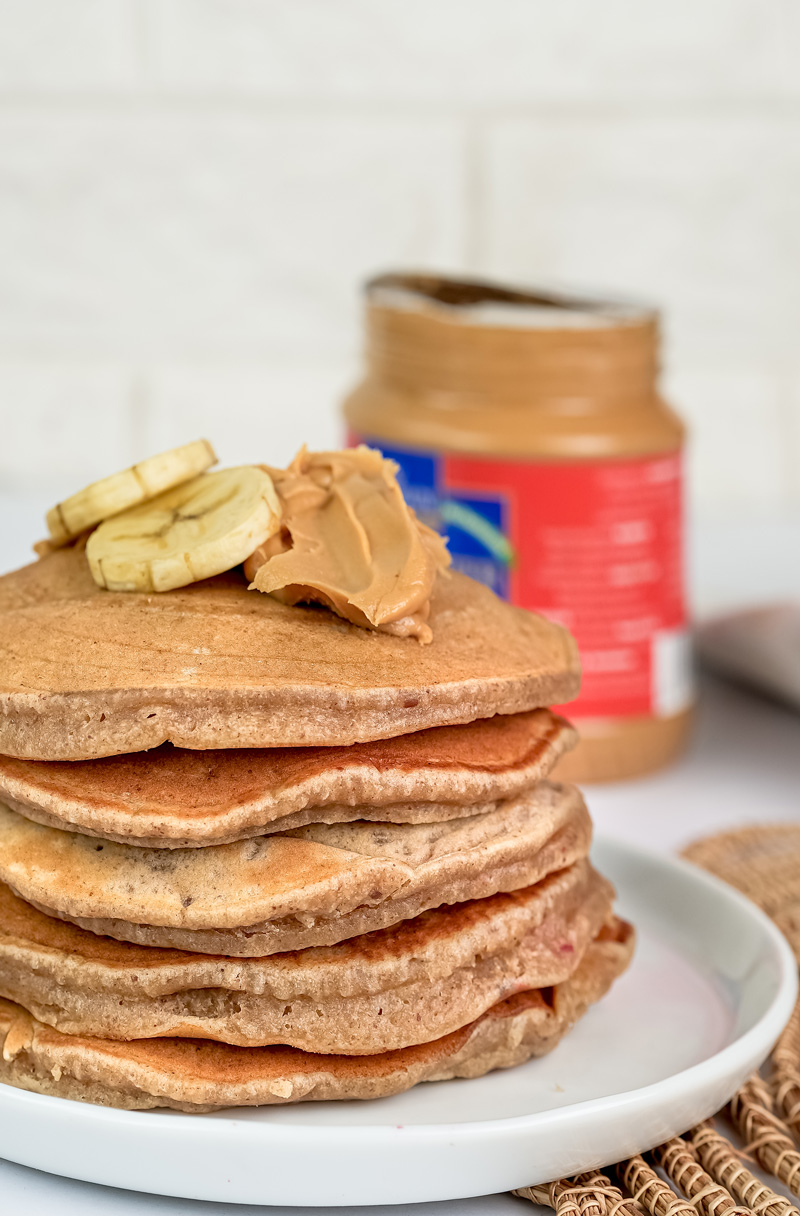
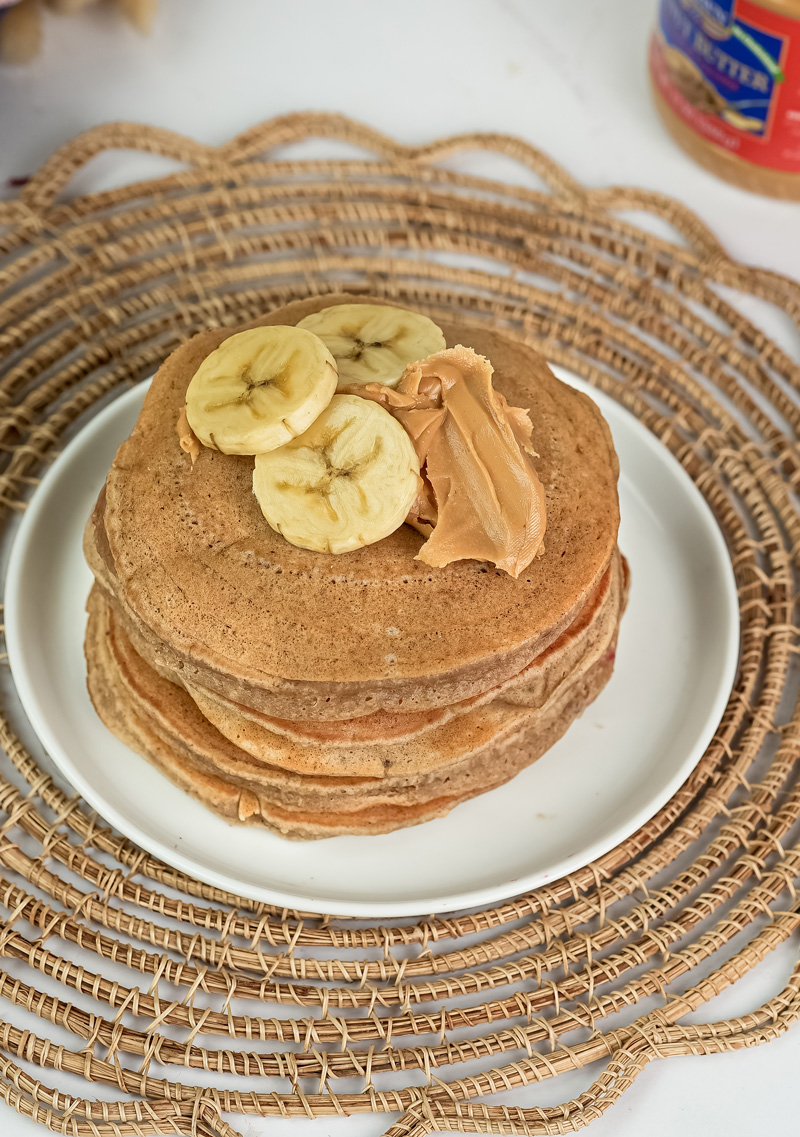
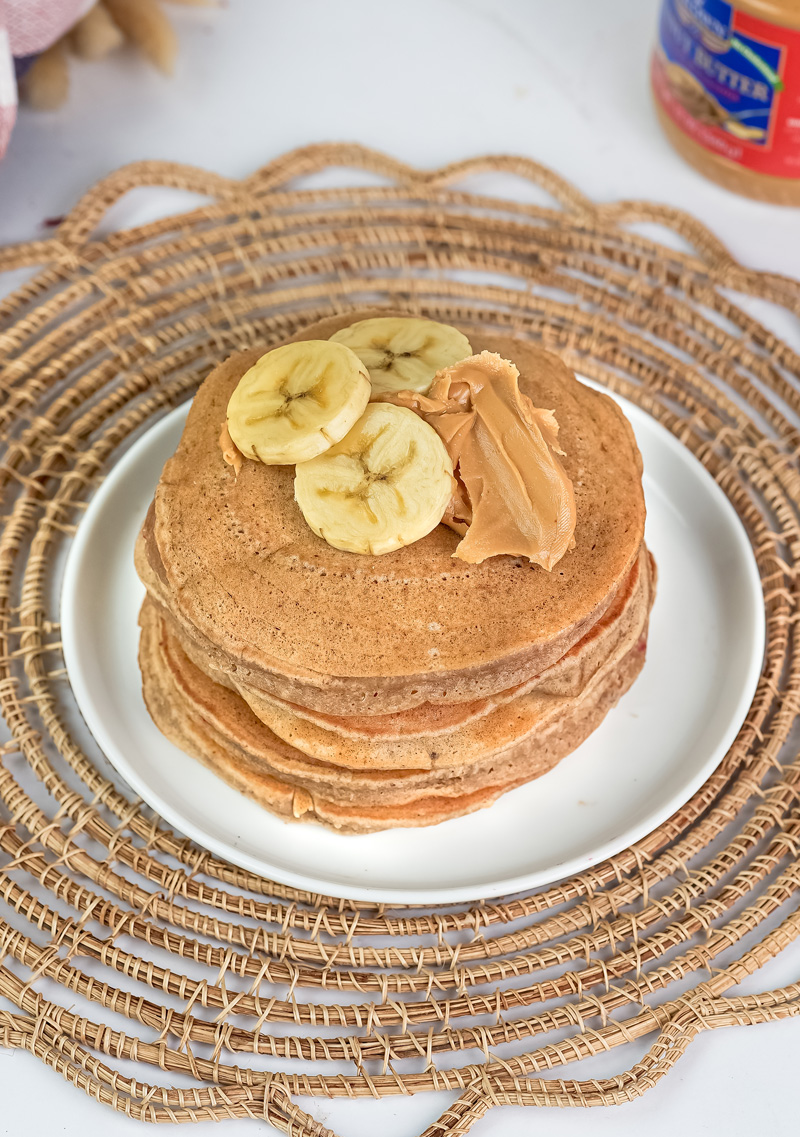
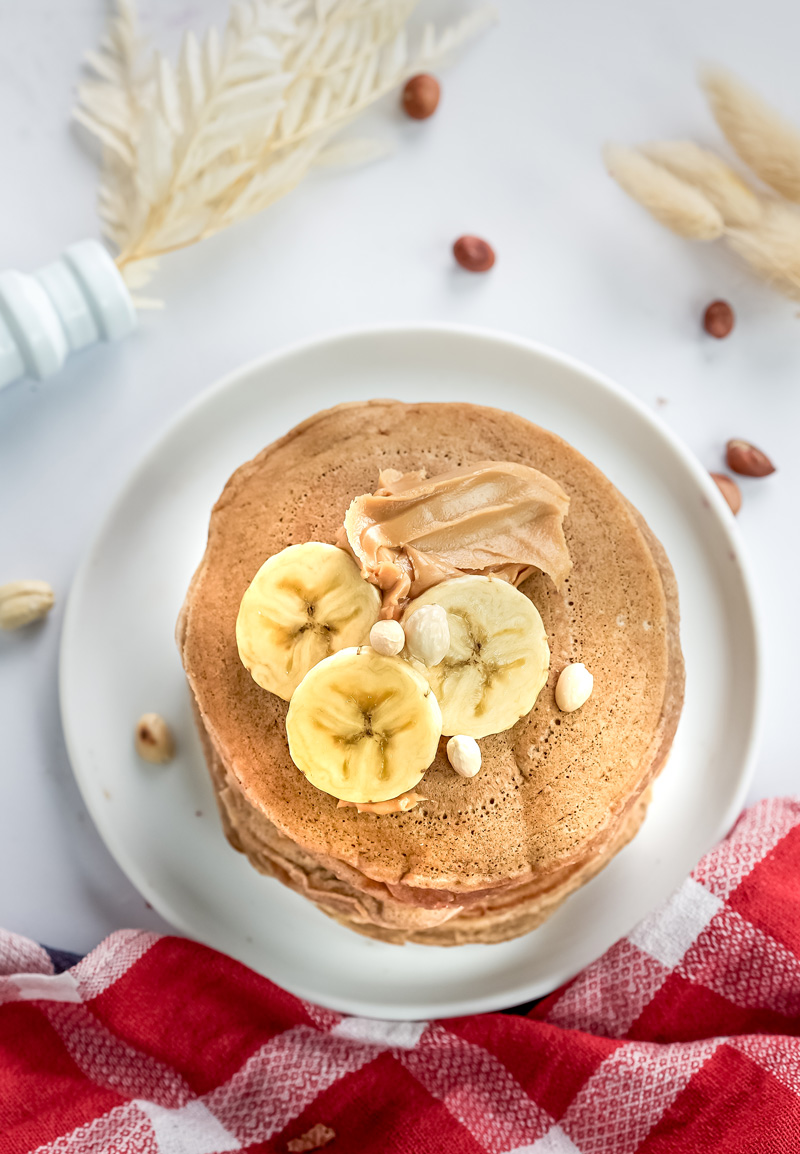
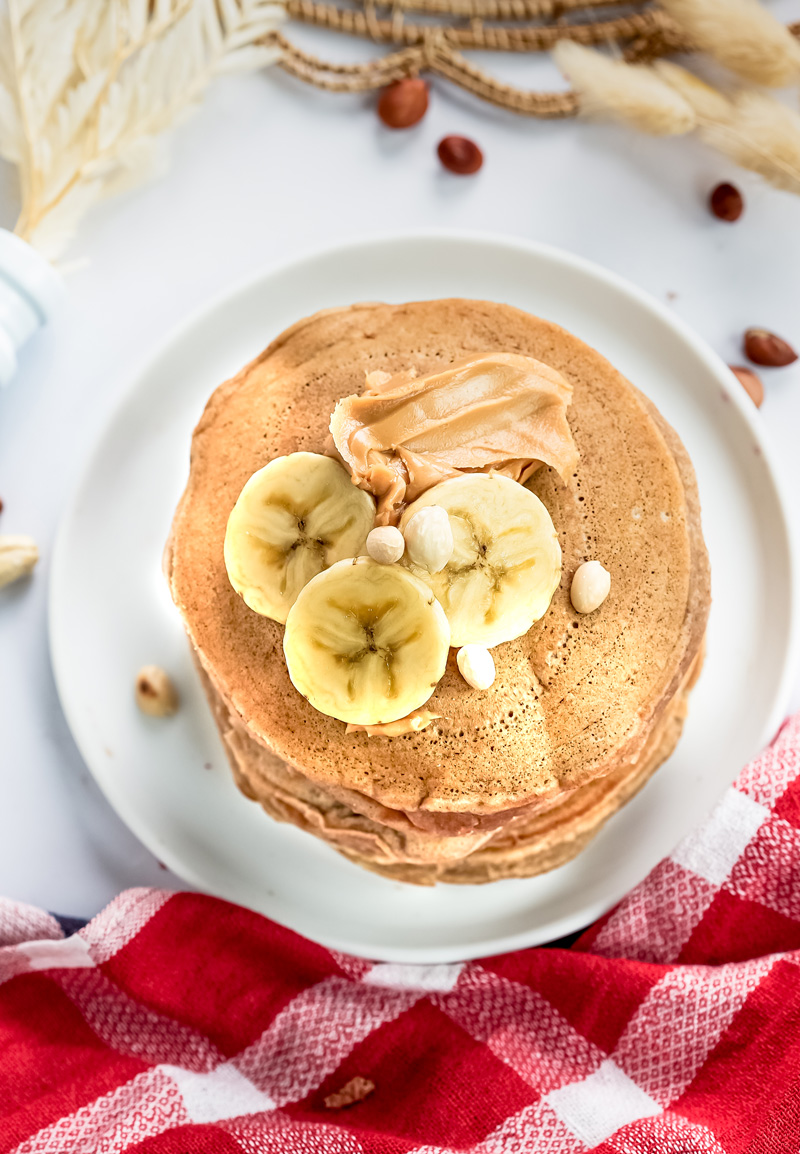
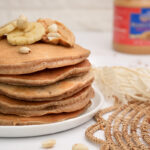
The best way to eat these? Stacked high, fresh from the pan. A pat of melting butter and a good drizzle of warm maple syrup is my go-to. But sliced bananas, berries, or even whipped cream are also amazing.
If you really want to go all out, whip up a quick peanut butter syrup. Just thin out some peanut butter with a little maple syrup and warm water. You can thank me later.
Got leftovers? Lucky you.
- In the Fridge: Let the pancakes cool down completely, then pop them in an airtight container. They’ll be good for about 3 days.
- In the Freezer: This is my favorite for busy mornings. Lay the cooled pancakes on a baking sheet and freeze them solid. Then, toss them into a freezer bag. They’ll keep for up to 2 months.
- To Reheat: You can zap them in the microwave, but for the best texture, I like to put them in the toaster or a 350°F (175°C) oven until they’re warm and a little crispy again.
I really hope you love making—and eating—these pancakes. Happy cooking!
PrintPeanut Butter Pancakes
These aren’t your average pancakes. We’re talking incredibly light, fluffy pancakes packed with a rich, creamy peanut butter flavor. It’s the perfect, easy breakfast that feels like a warm hug on a plate. Simple to make and impossible to forget!
- Prep Time: 10 minutes
- Cook Time: 10 minutes
- Total Time: 20 minutes
- Yield: 6 medium pancakes 1x
- Category: Breakfast
- Cuisine: American
Ingredients
- 1 cup all-purpose flour
- 2 tsp baking powder
- ½ tsp salt
- ½ cup creamy peanut butter (like Jif or Skippy)
- 2 ½ Tbsp granulated sugar
- 2 Tbsp vegetable oil
- 1 large egg
- 1 cup milk
Instructions
- Mix Dry First: In a large bowl, whisk together the flour, baking powder, and salt. This helps make every pancake fluffy.
- Combine Wet: In a separate bowl, stir the peanut butter, sugar, and oil until smooth. Whisk in the egg and milk until just combined.
- Don’t Overmix: Pour the wet ingredients into the dry ingredients. Gently fold with a spatula until just blended. A few lumps are good—that’s the secret to tender pancakes!
- Cook ‘Em Up: Heat a lightly oiled griddle or non-stick pan over medium heat. Pour about ¼ cup of batter for each pancake. Cook for 2-3 minutes, or until you see bubbles on the surface and the edges look dry.
- Flip Once: Flip the pancakes and cook for another 1-2 minutes until golden brown. Remember, don’t press them down with the spatula!
Notes
- Serving Suggestions: Serve them stacked high with a pat of butter and warm maple syrup. Sliced bananas or a handful of chocolate chips are also fantastic toppings.
- Tips & Tricks: For extra smooth batter, microwave the peanut butter for about 20 seconds before mixing. Also, using room temperature milk and eggs helps everything combine more easily.
- Storage & Reheating: Store cooled leftovers in an airtight container in the fridge for up to 3 days. To freeze, place them on a baking sheet in a single layer until solid, then transfer to a freezer bag for up to 2 months. Reheat in a toaster or microwave until warm.