I’ll let you in on a little secret: I’m obsessed with Chinese bakeries. The smell of fresh bread, the sweet aroma of buns, and the vibrant displays of treats… it’s pure magic. And for me, that magic is all wrapped up in one thing: Pineapple Buns.
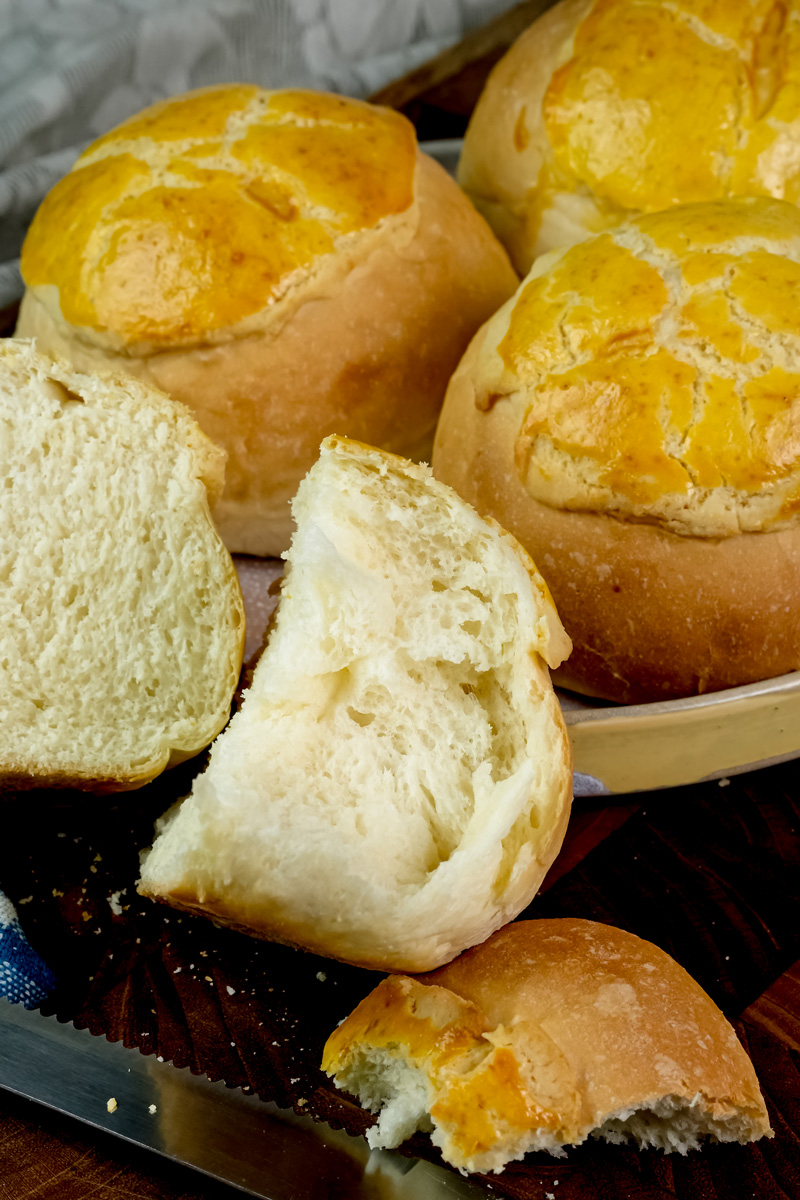
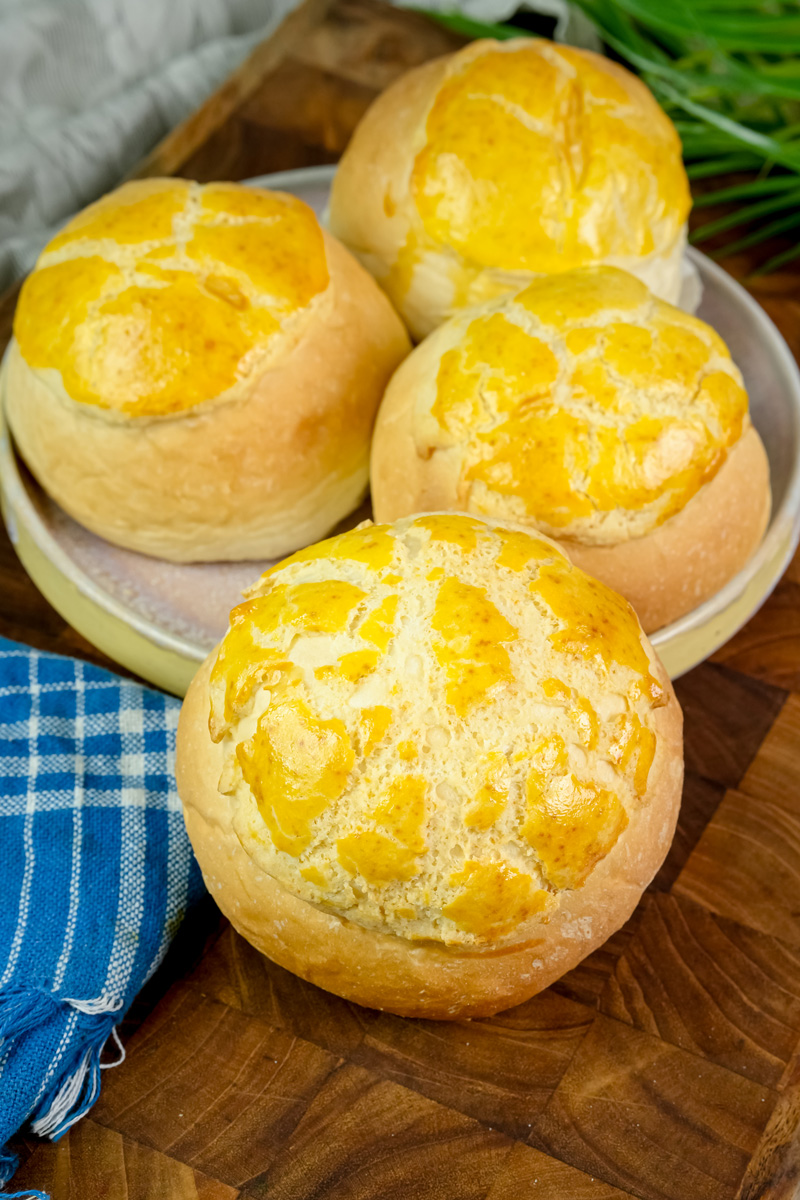
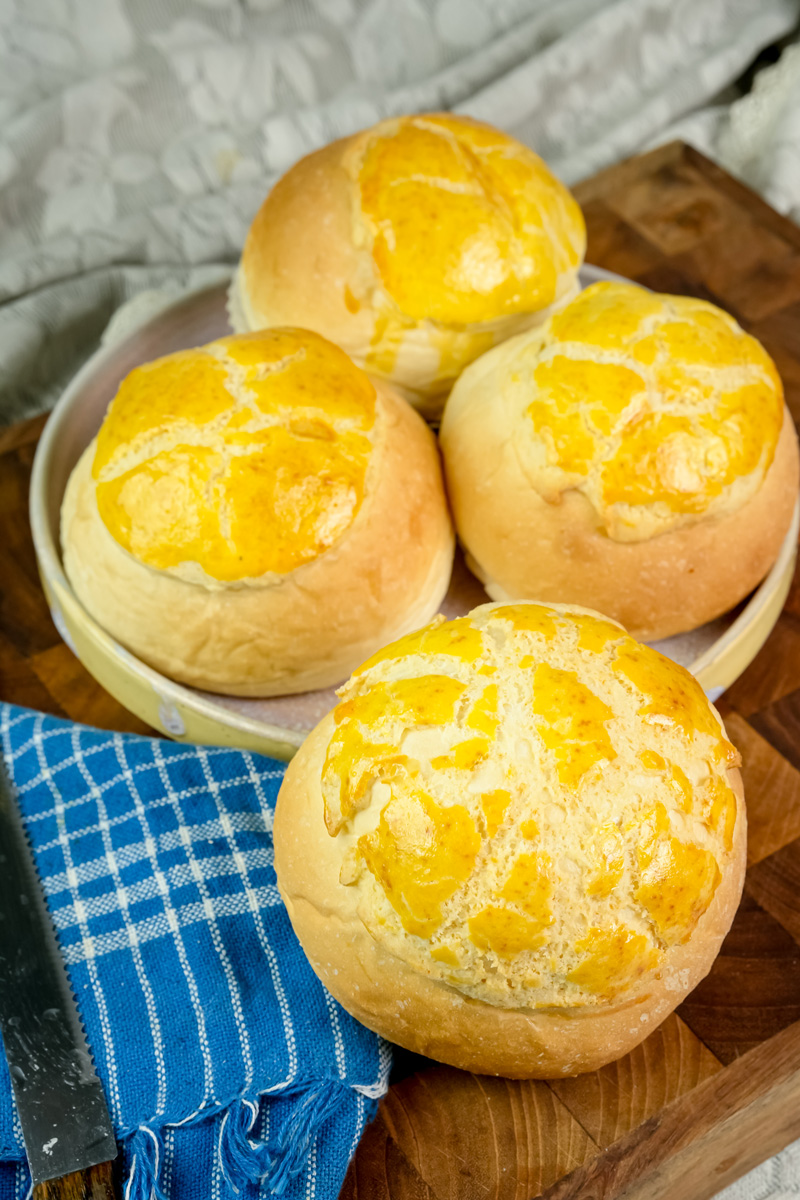
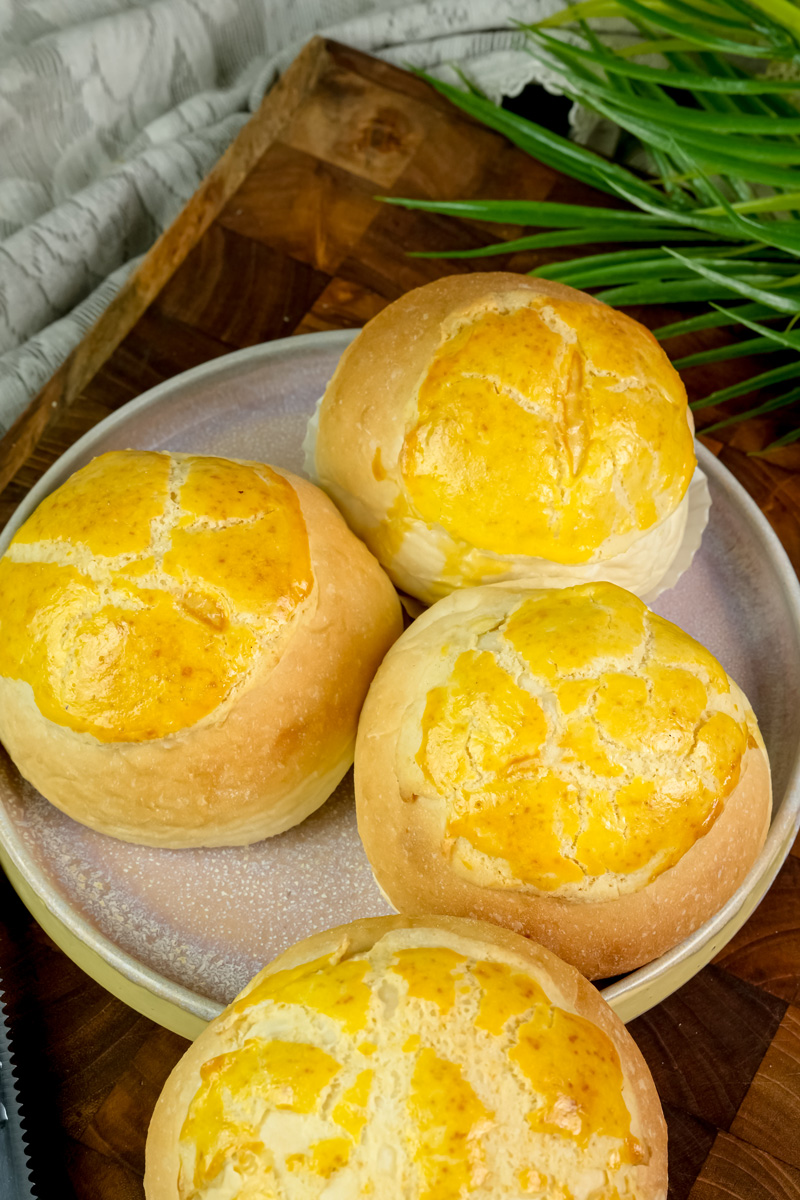
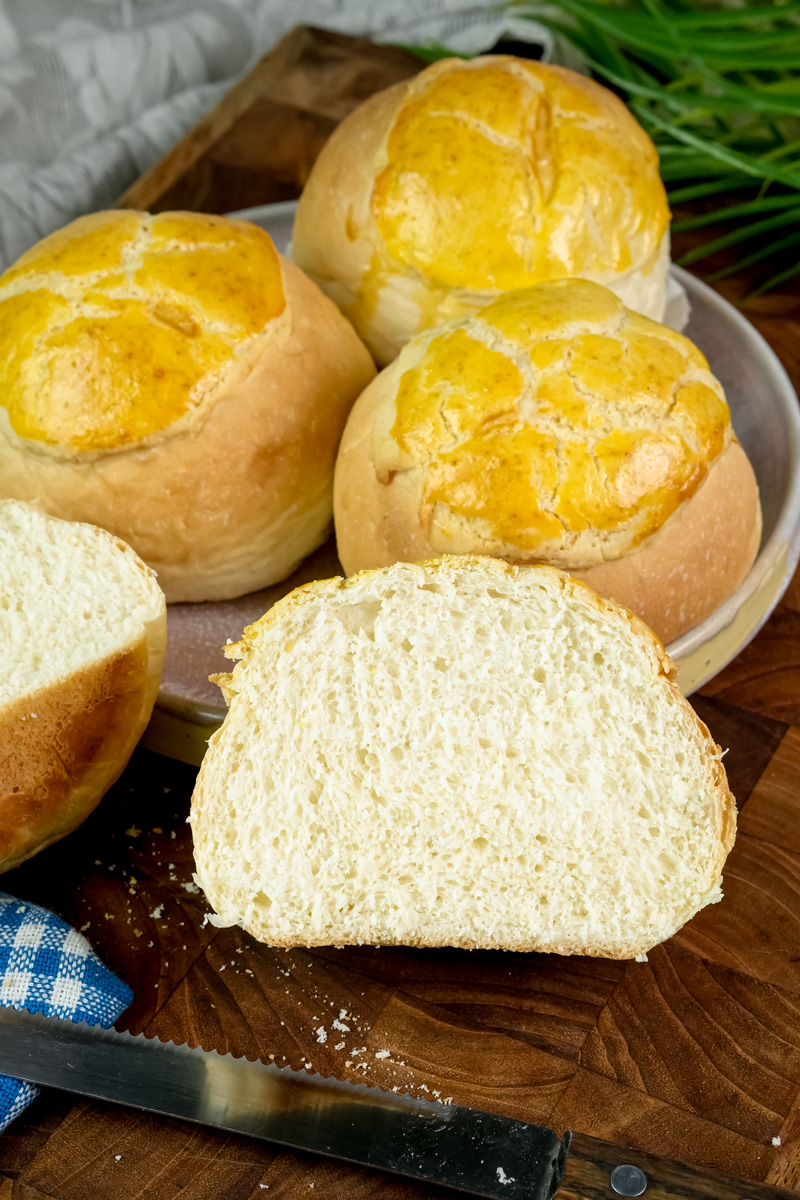
You might know them as Bolo Bao. And despite the name, there’s not a single piece of pineapple in them! The name comes from the beautiful, crunchy, golden crust on top. Once baked, it looks just like the skin of a pineapple. The best part? The incredible texture. You get a soft, fluffy bun and a sweet, cookie-like topping all in one bite. It’s a texture explosion, not a fruit explosion.
I’m so excited to share this recipe with you. It’s the one I use to get that perfect bakery-style bun right in my own kitchen. I promise, you’ll feel like a pro after making them.
Before You Start
This recipe is a labor of love. It takes time, so be prepared to hang out and chill.
- Prep and Cook Time: The full recipe takes about 2 hours and 42 minutes, but don’t freak out. Most of that time is just waiting for the dough to rise. The active part—the mixing and shaping—is actually super quick. Baking is a breeze, just 12 minutes.
- Servings: This recipe makes 12 buns. You can easily double or halve the recipe if you need more or fewer.
| To Make | Bread Dough Ingredients | Topping Dough Ingredients | Baking Temp & Time |
| 6 Buns | Halve all measurements | Halve all measurements | 350°F (175°C) for 10-12 mins |
| 12 Buns | As written | As written | 350°F (175°C) for 12-13 mins |
| 24 Buns | Double all measurements | Double all measurements | 350°F (175°C) for 12-13 mins |
- Difficulty: I’d say this is a recipe for someone who’s baked before. There are a few steps, and you’ll be working with two separate doughs. But trust me, it’s not as hard as it sounds. Just follow the steps, and you’ll be golden.
- What You’ll Need: An electric mixer with a dough hook is a lifesaver. Seriously, it makes kneading so much easier. If you don’t have one, no worries—you can do it by hand. You’ll also need a couple of baking sheets, a big mixing bowl, and a damp kitchen towel. For the topping, a hand mixer or even a simple bowl and spoon works great.
- A Pro-Tip: You can make the dough the night before and let it rise slowly in the fridge. This is called a cold ferment, and it gives the buns an even richer flavor. You can also make the topping dough ahead of time and store it in the fridge. This splits up the work and makes the final bake day so much more relaxing.
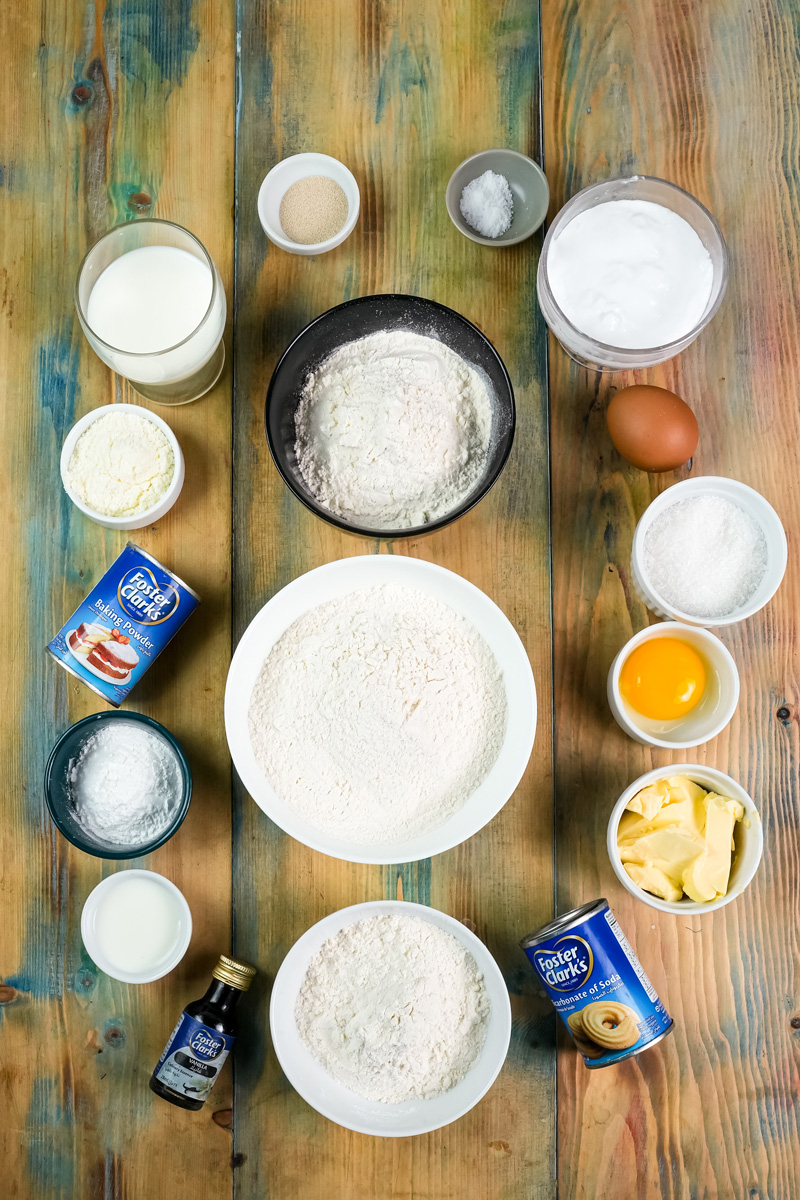
The Ingredients
The magic of these buns comes down to a few key ingredients. For the bread, a mix of heavy cream and milk keeps them super soft. We’ll also use a little cake flour to make the texture incredibly tender. For that signature crunchy topping, superfine sugar is the secret.
For the Bread Dough:
- ⅔ cup heavy cream (at room temperature)
- 1 cup milk (at room temperature)
- 1 large egg (at room temperature)
- ⅓ cup sugar
- ½ cup cake flour
- 3 ½ cups bread flour
- 1 tablespoon active dry yeast
- 1 ½ teaspoons salt
For the Topping Dough:
- ¼ cup dry milk powder
- 1 ¼ cups all-purpose flour
- ½ teaspoon baking soda
- ¼ teaspoon baking powder
- ⅔ cup superfine sugar
- ¼ cup vegetable shortening (or lard/butter)
- 2 tablespoons milk
- 1 egg yolk
- ⅛ teaspoon vanilla extract
To Finish the Buns:
- 1 egg yolk
A few notes on ingredients:
- For the bread dough, make sure your cream, milk, and egg are at room temperature. This helps the yeast do its job and gives you a nice, consistent dough.
- For the topping, superfine sugar is key. It dissolves easily and gives you a smooth, delicate topping instead of a gritty one. Can’t find it? Just pulse regular sugar in a food processor for a few seconds.
- The recipe calls for vegetable shortening for a tender, crumbly crust. You can totally use butter instead; it just gives the topping a richer flavor.
Step-by-Step Method
This is the fun part! I’ll walk you through each step, from mixing the dough to pulling those gorgeous buns from the oven.
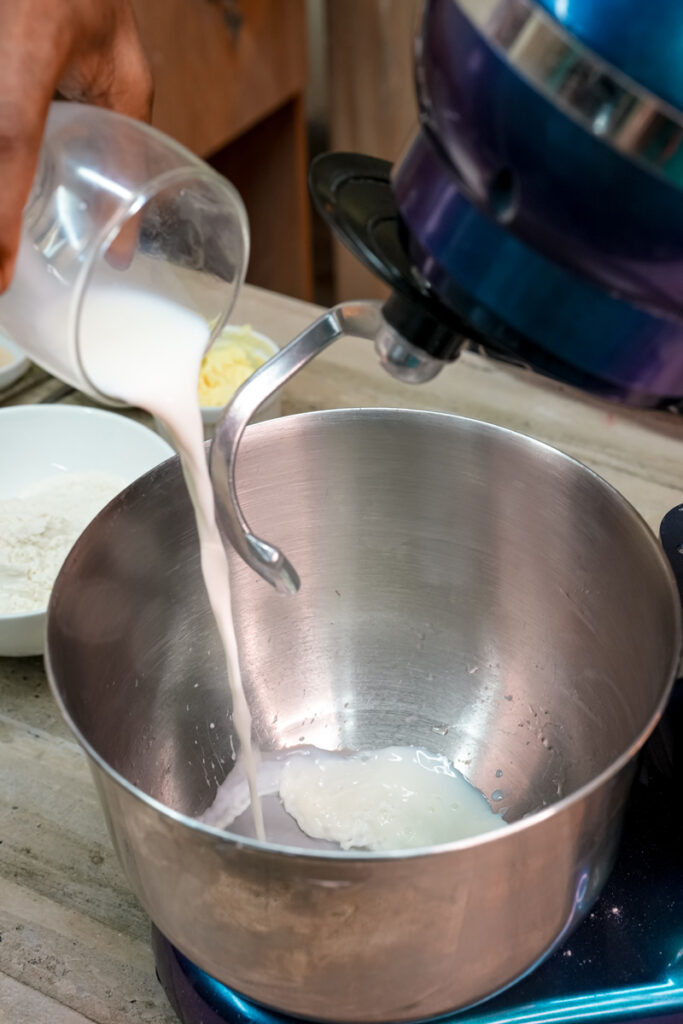
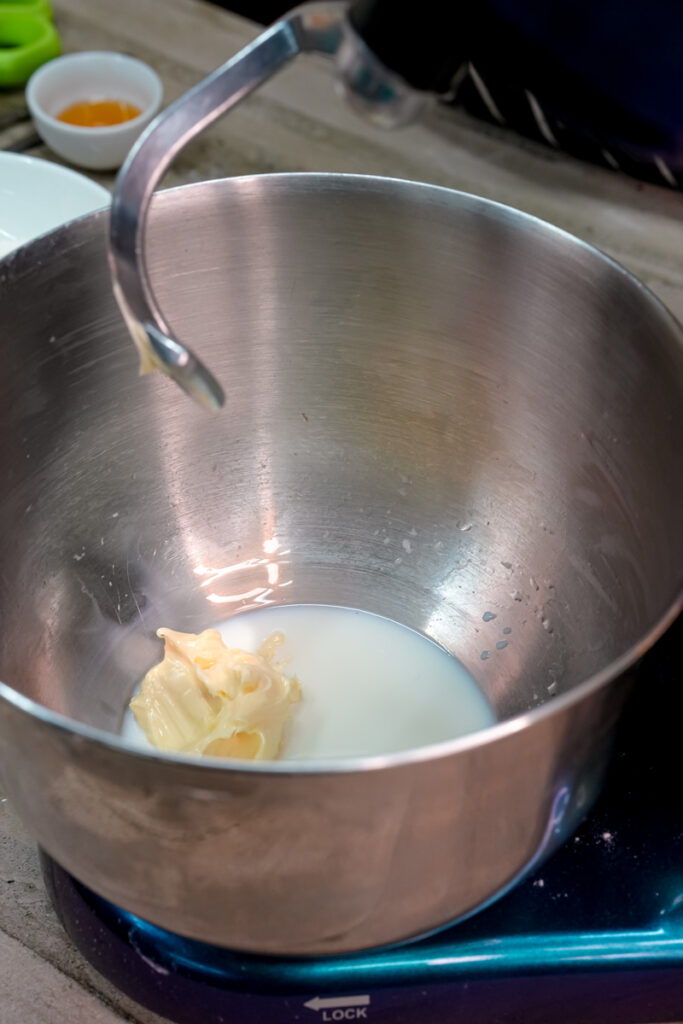
Stage 1: The Bread Dough (The Heart of the Bun)
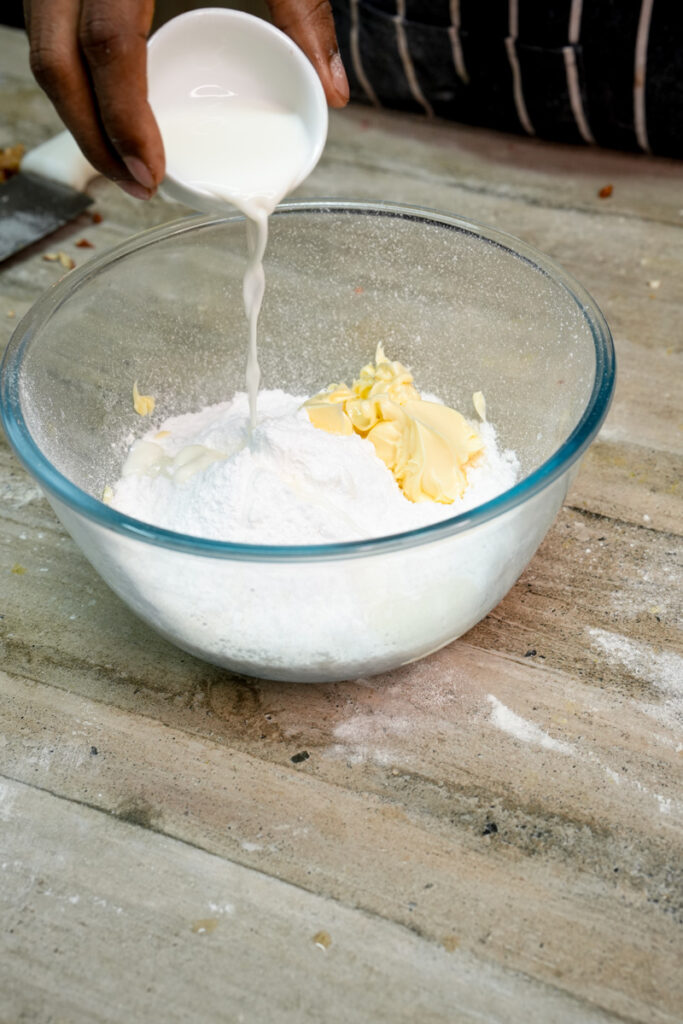
First, grab your mixer bowl and throw in the heavy cream, milk, egg, sugar, cake flour, bread flour, yeast, and salt. Now, turn your mixer on low with the dough hook attachment. Let it go for a full 15 minutes. It might look a little messy at first, but don’t add more flour or liquid. Just stop the mixer every now and then to scrape the dough from the sides. After 15 minutes, you’ll have a smooth, stretchy dough. It should be a little sticky but not stick to your fingers. This is exactly what you want!
Stage 2: The First Rise (The Proof of the Pudding)
Once you’ve kneaded the dough, cover the bowl with a damp towel. Put it in a warm, cozy spot—a slightly warm oven with the light on works perfectly. Let the dough hang out and rise for 1 hour. It should grow to about 1.5 times its original size. It will look plump and feel light and airy.

Stage 3: The Second Rise (Building Structure)
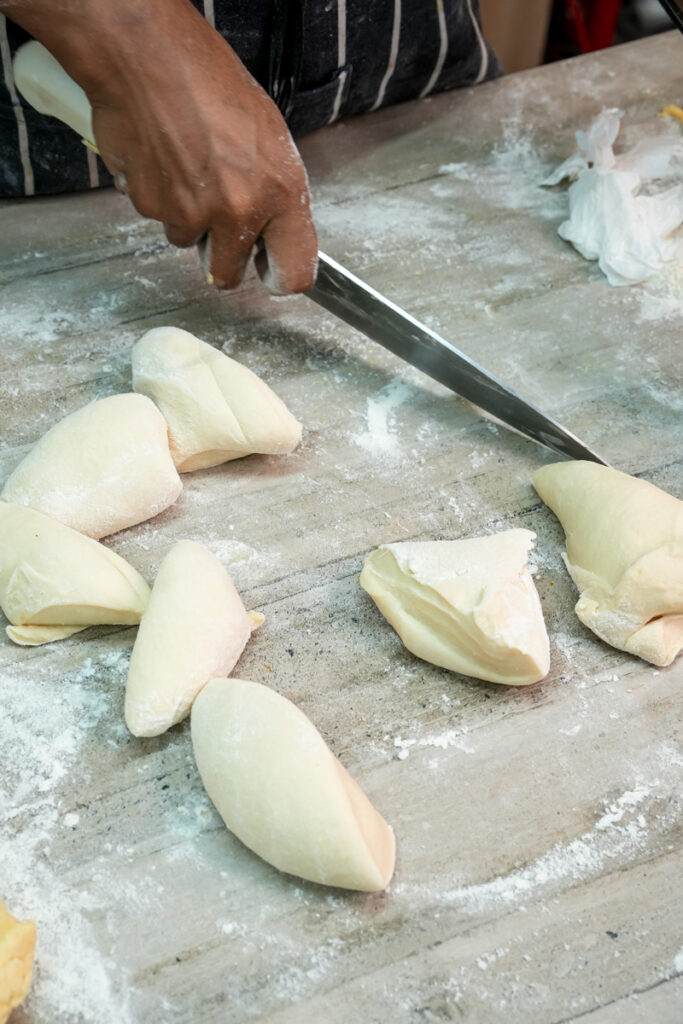
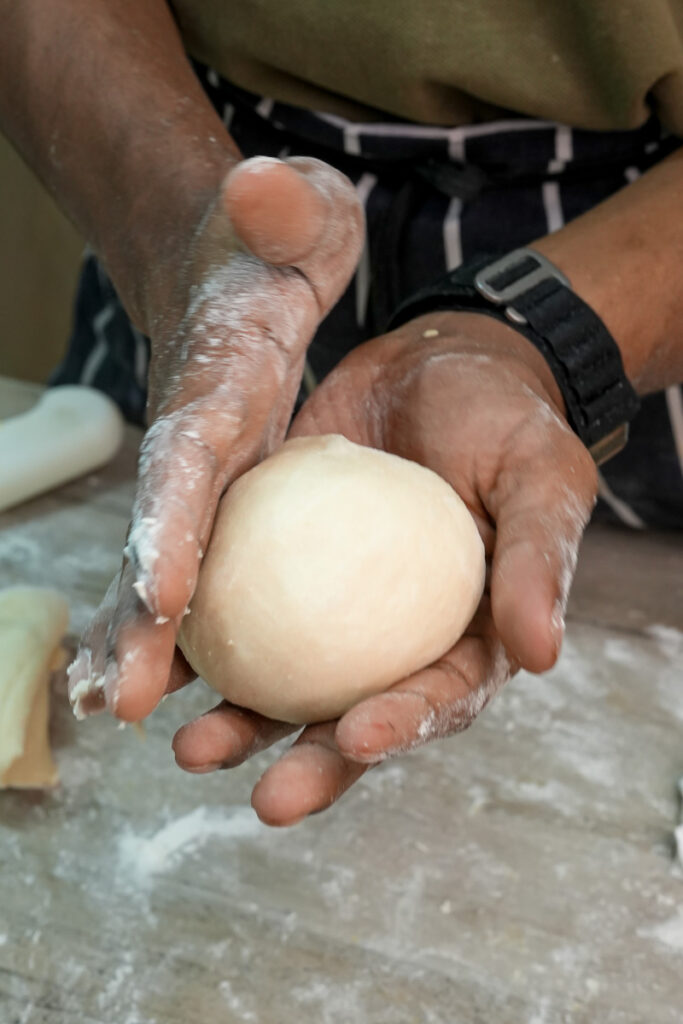
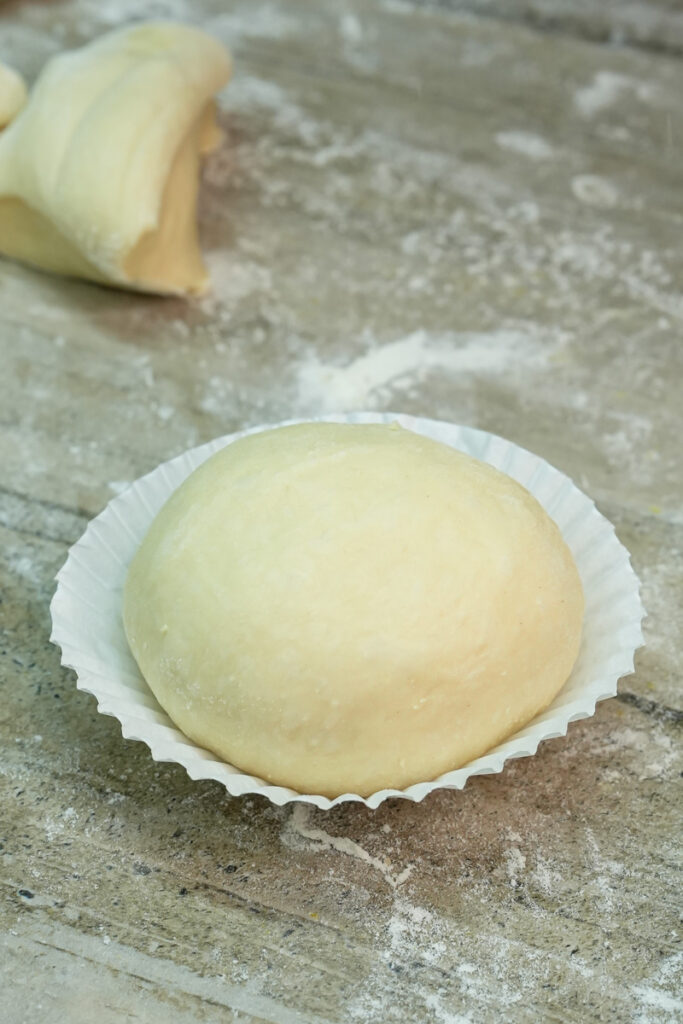
Gently put the dough back in the mixer and mix for 5 minutes to get rid of the air pockets. This makes the bread super tender. Once it’s deflated, turn the dough out onto a lightly floured surface. Use a bench scraper or a sharp knife to divide it into 12 equal pieces. Shape each piece into a smooth, tight ball by tucking the sides underneath. Place them on a baking sheet lined with parchment paper and cover them with a dry kitchen towel. Let them rise for a second time, for another hour. The buns will get puffy and swell up, ready for their topping.

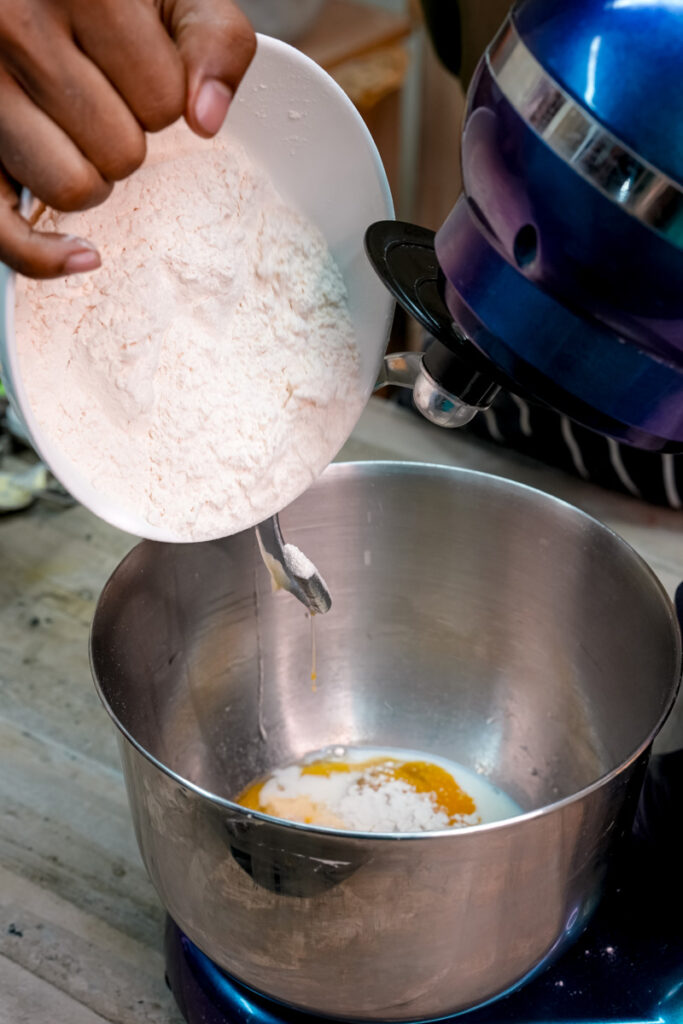
Stage 4: The Topping (The Crumbly Crown)
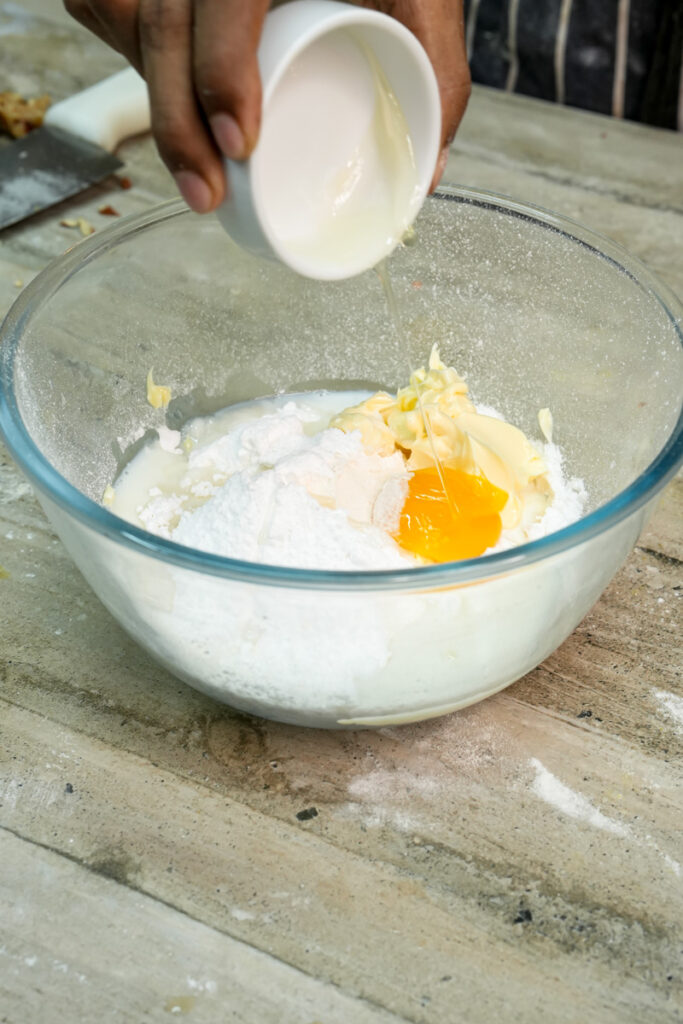
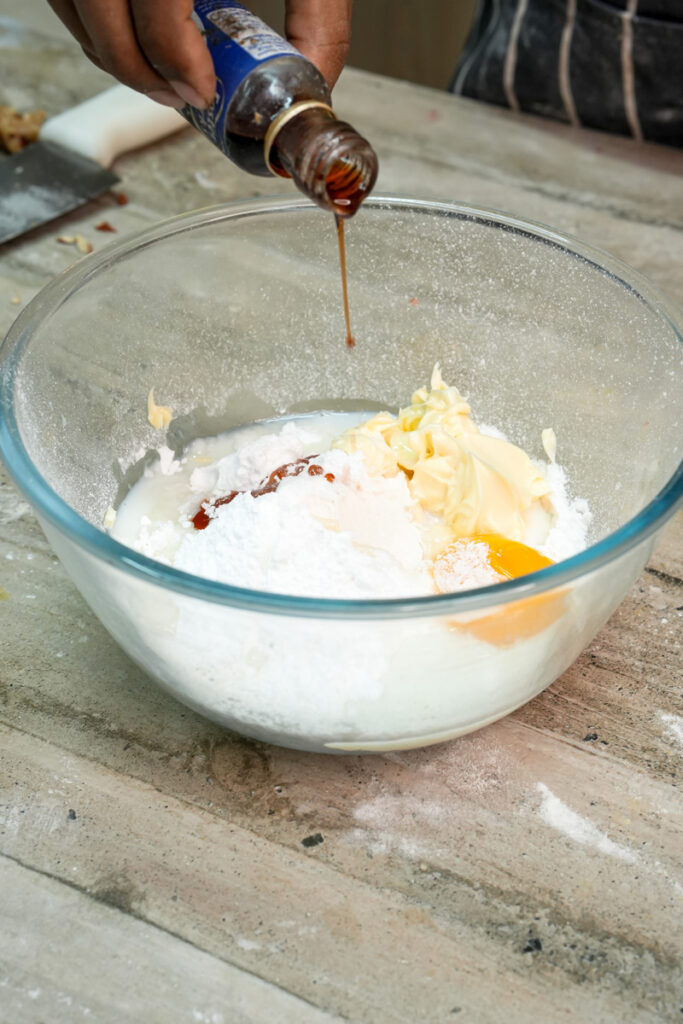
While your buns are on their second rise, it’s time to make the glorious topping. In a mixing bowl, combine the dry milk powder, flour, baking soda, baking powder, and superfine sugar. Use your fingers to break up any clumps of dry milk powder. Once combined, add the shortening, milk, egg yolk, and vanilla. Now, use your hands to mix everything together into a dough. It will feel a little crumbly at first, but just keep working it until it comes together into a ball. If it’s too dry, add a little more milk, one teaspoon at a time. The goal is to get it to come together, so don’t overwork it. Wrap it tightly in plastic wrap and set it aside at room temperature.
Stage 5: The Grand Finale
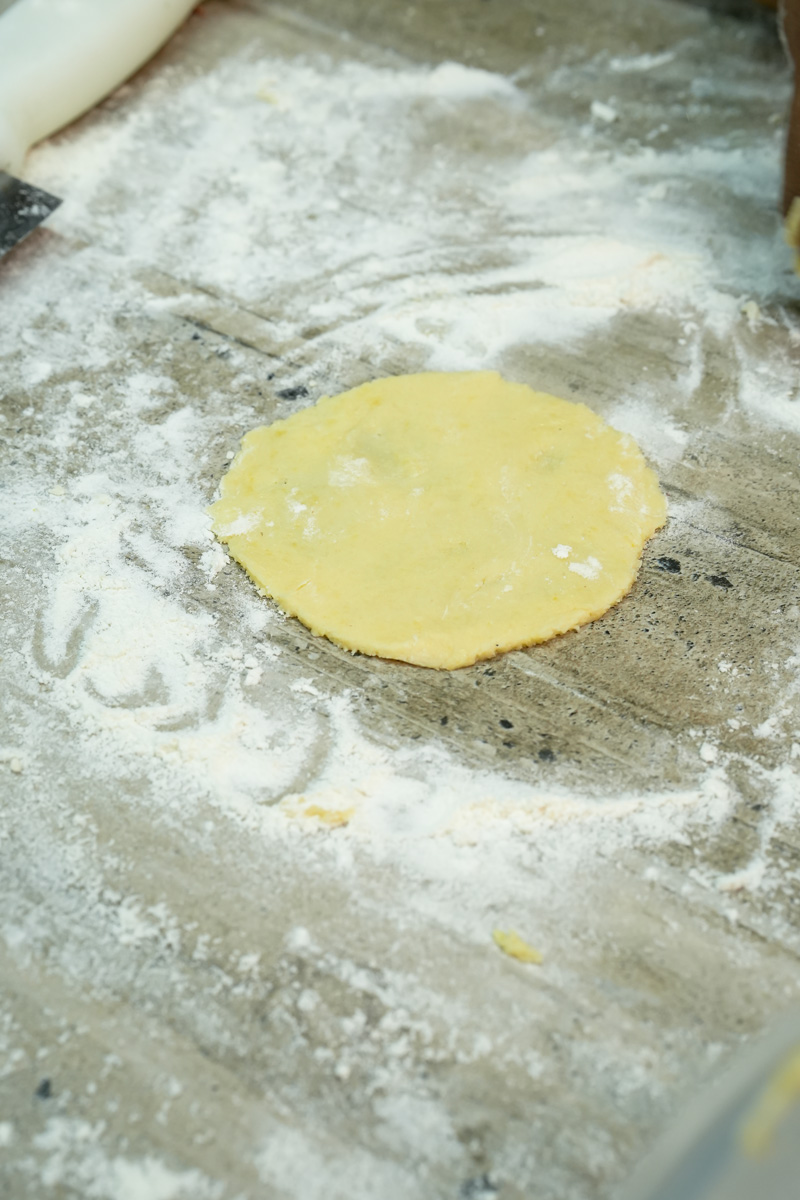
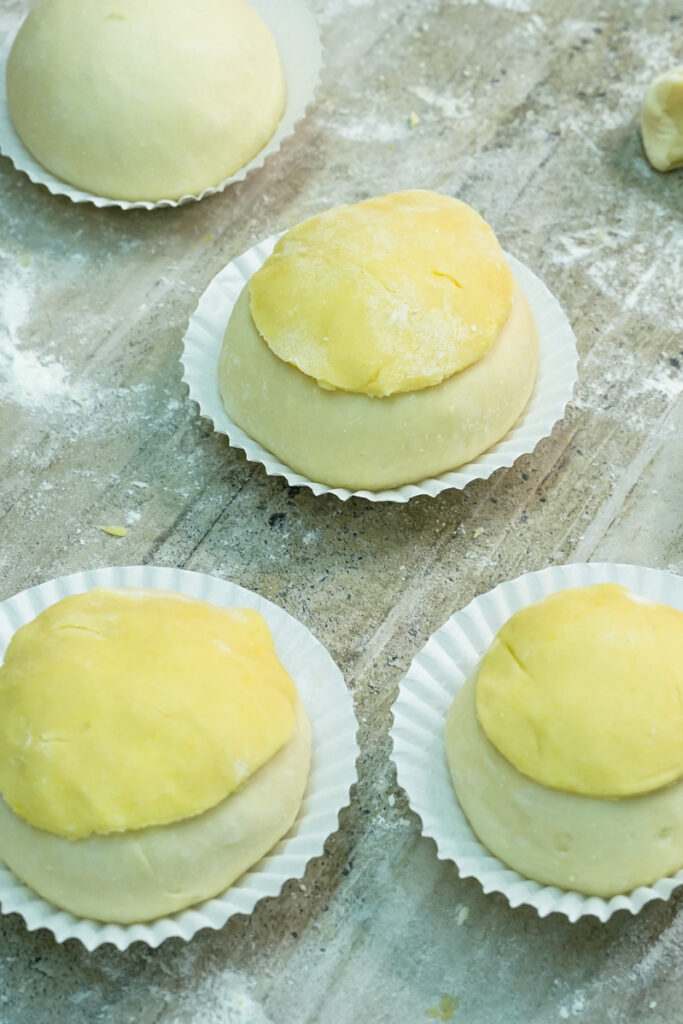
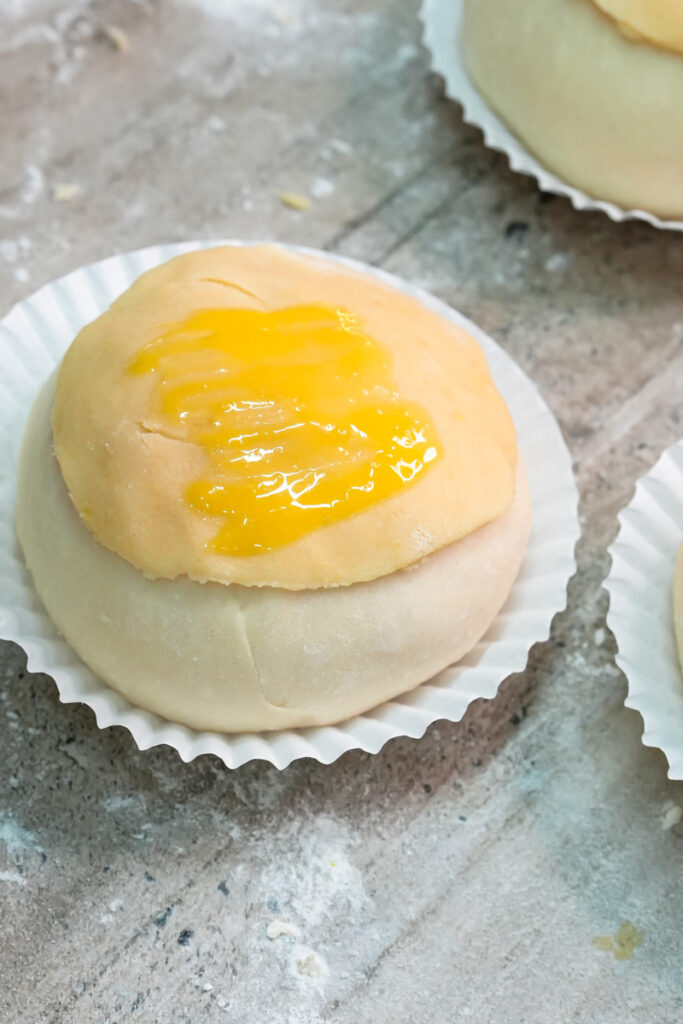
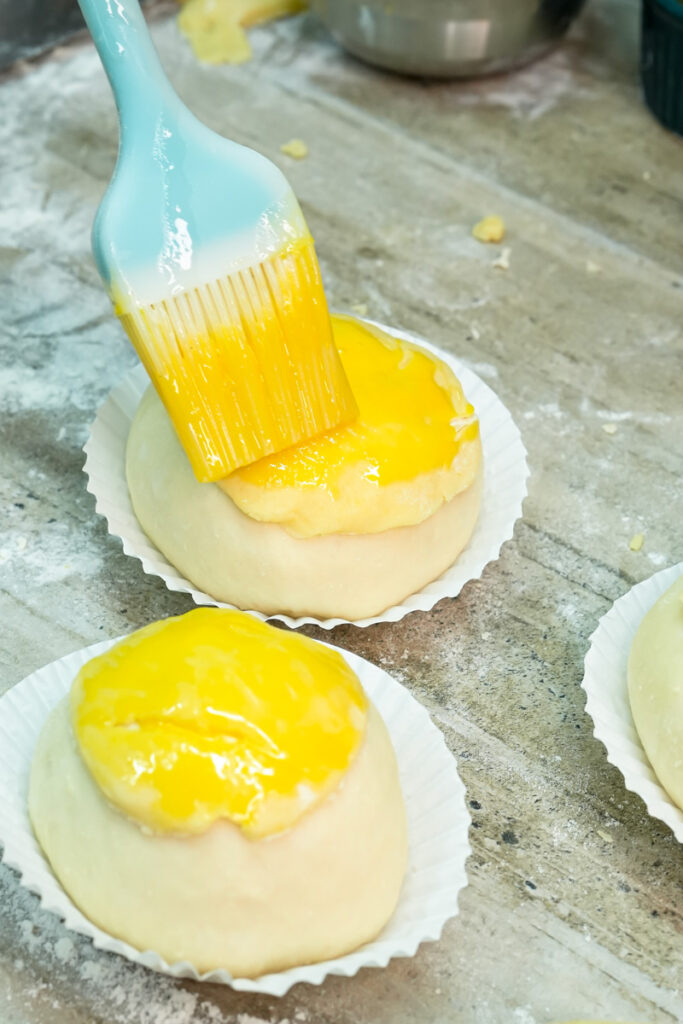
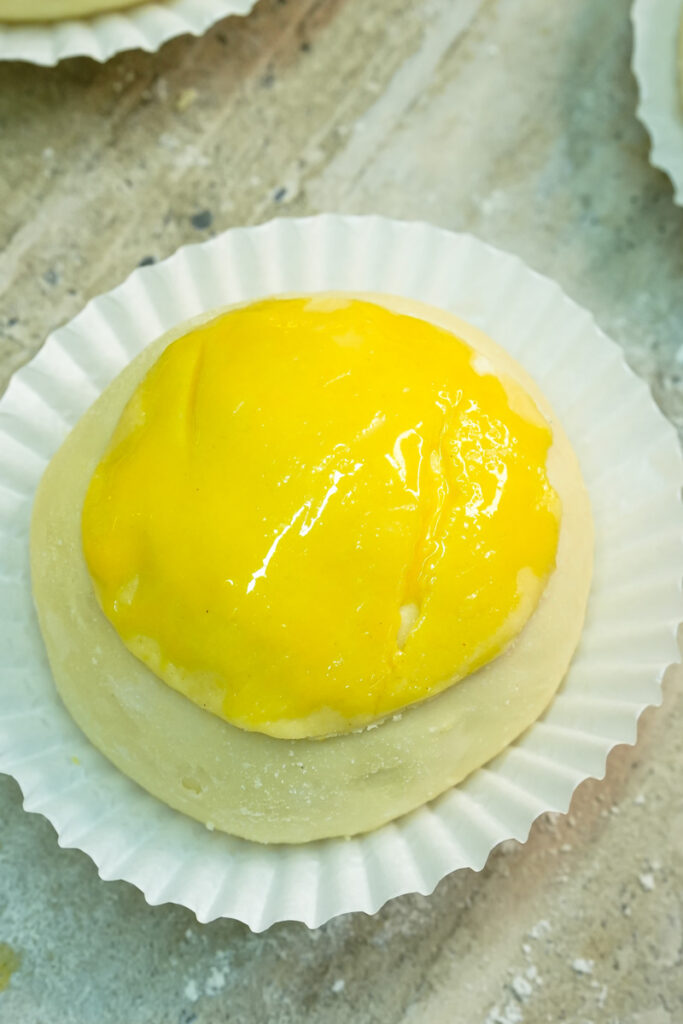
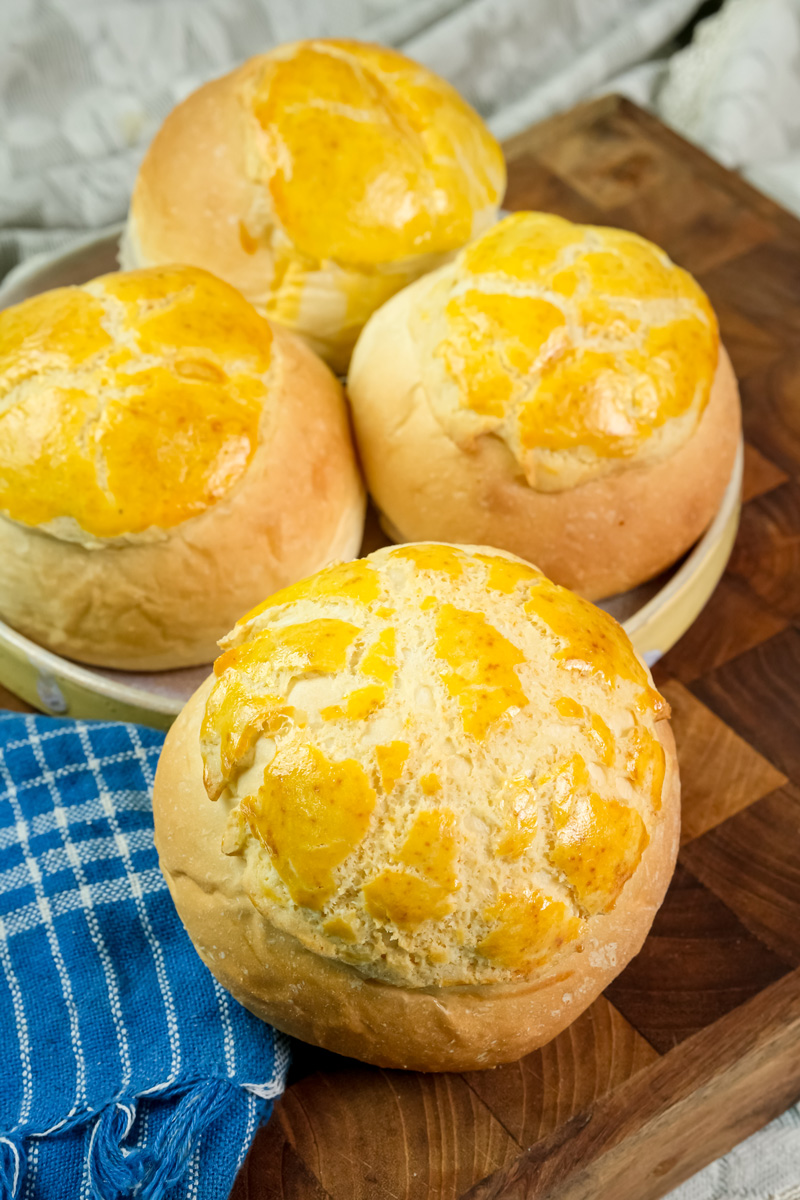
Preheat your oven to 350°F (175°C). Divide the topping dough into 12 equal pieces. On a clean surface, roll each piece into a flat circle, about 4-5 inches across. Gently lay one flat circle on top of each risen bun. Press gently to help it stick. For that authentic look, you can use a dough scraper or the back of a knife to lightly score a diamond pattern into the topping. Finish by brushing each bun with the remaining egg yolk. Bake for 12-13 minutes. You’ll know they’re ready when the tops are a beautiful golden brown and those classic cracks have appeared. And the smell! The smell alone will tell you they’re perfect.
Mix It Up!
Once you’ve nailed the basic recipe, you can get creative.
- Filling: The classic bun doesn’t have a filling, but you can add one. Try a velvety custard or a sweet pineapple jam. Just flatten the dough before the second rise, place a spoonful of filling in the center, and then wrap the dough around it before shaping it into a ball.
- Dietary Tweaks: Want to go vegan? Use a plant-based milk and substitute the egg with a flax egg. Just be sure to use vegetable shortening instead of butter.
- Spice it up: While not traditional, I’ve tried adding a pinch of cinnamon or nutmeg to the topping for a hint of warmth. It’s a game-changer if you’re into that.
Serving & Storage
The best way to eat a pineapple bun? Warm, right out of the oven! The contrast between the crunchy topping and the warm, fluffy bread is an experience you won’t forget. A lot of people also slice the bun in half and slide a thick slab of cold butter inside. This “Bo Lo Yau” is a must-try!
- Storage: Store any leftovers in an airtight container at room temperature for up to 2 days. The topping will get softer over time, but the bun will still be delicious.
- Reheating: To get that perfect texture back, pop them in the microwave for 15 seconds to soften the bread, then transfer to a toaster oven or air fryer for a minute or two to re-crisp the topping.
- Freezing: You can freeze the baked buns for up to a month. To thaw, just leave them at room temperature for a few hours and then reheat.

I hope you have a fantastic time baking these. You’ll soon be filling your home with the incredible aroma of this Chinese bakery classic!
PrintPineapple Buns (Bolo Bao)
You know that feeling when you walk into a Chinese bakery and the smell of freshly baked goods hits you? That’s the feeling of a Pineapple Bun. These buns are a classic for a reason. The secret? A soft, fluffy bun and a sweet, crunchy, cookie-like topping. The name comes from the pattern on the crust, which looks like a pineapple—no actual fruit involved! This recipe will show you how to get that perfect bakery taste and texture right at home.
- Prep Time: 1 hr 30 mins
- Cook Time: 12 mins
- Total Time: 2 hrs 42 mins (Included Chill Time)
- Yield: 12 buns 1x
- Category: Bread, Pastry
- Cuisine: Chinese
Ingredients
For the Bread Dough:
- ⅔ cup heavy cream, room temperature
- 1 cup milk, room temperature
- 1 large egg, room temperature
- ⅓ cup sugar
- ½ cup cake flour
- 3 ½ cups bread flour
- 1 tablespoon active dry yeast
- 1 ½ teaspoons salt
For the Topping Dough:
- ¼ cup dry milk powder
- 1 ¼ cups all-purpose flour
- ½ teaspoon baking soda
- ¼ teaspoon baking powder
- ⅔ cup superfine sugar
- ¼ cup vegetable shortening (or butter)
- 2 tablespoons milk
- 1 egg yolk
- ⅛ teaspoon vanilla extract
To Finish the Buns:
- 1 egg yolk
Instructions
- Make the Bread Dough: In a mixer, combine all bread dough ingredients. Mix with a dough hook on a low setting for 15 minutes until smooth and elastic. It will be slightly tacky.
- First Rise: Cover the bowl with a damp towel and let the dough rise in a warm, draft-free spot for 1 hour. It should be about 1.5 times its size.
- Shape the Buns: Gently deflate the dough by mixing for 5 minutes. Turn it onto a floured surface and divide it into 12 equal pieces. Roll each piece into a smooth ball. Place them on a baking sheet, cover, and let them rise for a second time for 1 hour.
- Prepare the Topping: While the buns rise, mix all topping dough ingredients by hand until a cohesive ball forms. Don’t overmix. Wrap it tightly in plastic wrap.
- Add the Topping & Bake: Preheat oven to 350°F (175°C). Divide the topping dough into 12 pieces. Roll each piece into a flat, 4-5 inch circle. Gently press one circle onto each risen bun. Score a diamond pattern into the topping. Brush with the remaining egg yolk. Bake for 12-13 minutes, until the tops are golden brown and cracked.
Notes
- Serving Suggestions: The buns are best served warm, fresh from the oven. For a classic treat, slice the bun in half and slide in a thick piece of cold butter.
- Tips & Tricks: Using room temperature ingredients for the bread dough is crucial for activating the yeast. For the topping, superfine sugar is the secret to that delicate, non-grainy crunch.
- Storage & Reheating: Store leftovers in an airtight container for up to 2 days. To reheat, microwave for 15 seconds to soften, then pop them in a toaster oven or air fryer for a minute to re-crisp the topping.