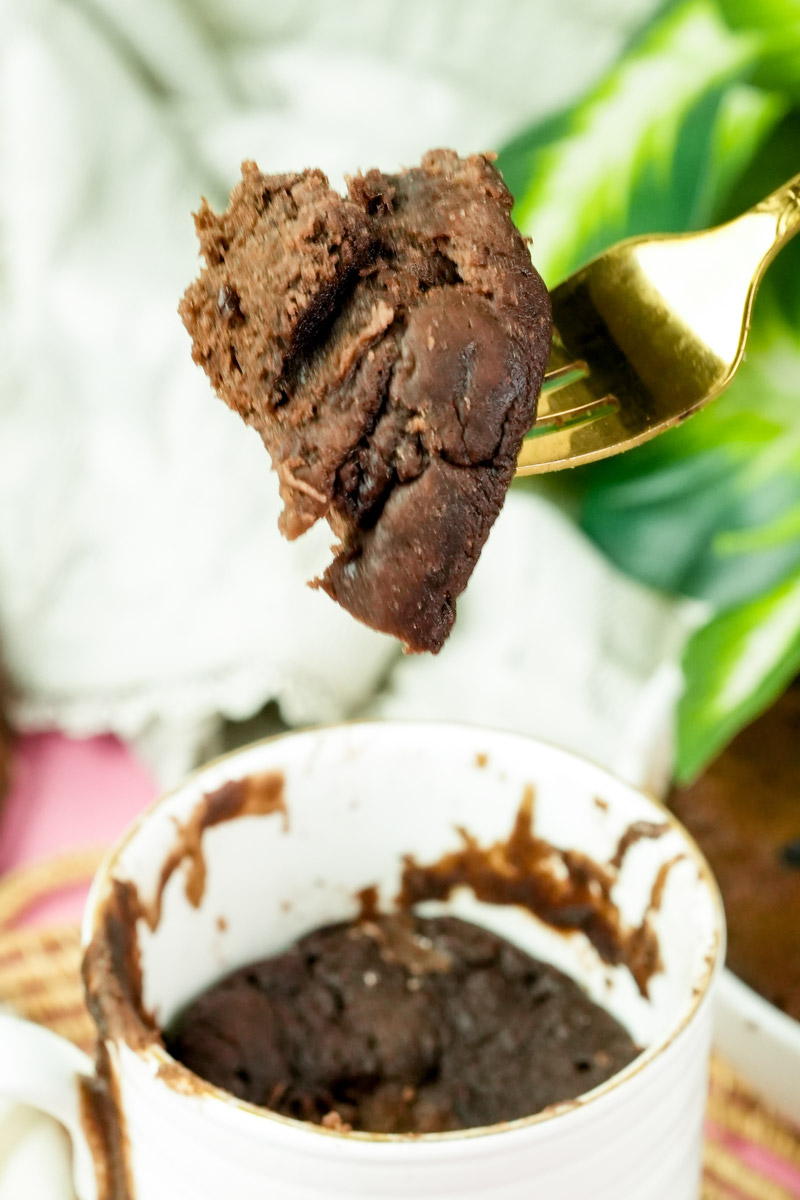
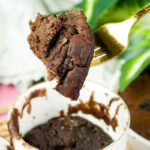
Let’s be honest: sometimes you just want cake. And you want it right now.
Maybe you just finished a brutal workout, or maybe you’re just trying to be good with your diet. A giant slice of sugary bakery cake usually doesn’t fit the vibe. That’s where this healthy protein mug cake comes in to save the day.
I remember the first time I tried making a mug cake. It was back in the early internet days. I ended up with something that looked—and tasted—like a wet kitchen sponge. Not great. But things have changed!
What we’re making today is the real deal. It’s flourless, low-carb, and tastes super rich. We use a whole egg instead of just water. It’s a little trick borrowed from fancy soufflés. It gives the cake actual structure and makes it feel like real food, not a science experiment. It’s the perfect fix for a late-night sweet tooth.
The Quick Rundown
You don’t need to preheat the oven or make a mess of your kitchen. I call this “commercial break cooking.” You can literally start and finish it before your show comes back on.
| Metric | Details |
| Total Time | 5 Minutes (3 min prep, 2 min cook) |
| Skill Level | Beginner (if you can use a fork, you’re good) |
| Yield | 1 Big Mug Cake |
| Calories | About 180-250 kcal (depends on your powder) |
| Texture | Soft, dense, and moist |

What You’ll Need
You don’t need fancy gadgets. Just grab your favorite microwave-safe mug. Pro tip: Use a wide mug, like a soup mug, rather than a tall, skinny one. The wider space helps it cook evenly. If the mug is too narrow, you get a lava-hot center and raw edges.
You’ll also need:
- A fork for mixing
- Some measuring spoons
Quick Tip: If you’re busy like me, you can “meal prep” the dry parts. I usually toss the protein powder, baking powder, cocoa, and sweetener into a little snack bag. When I’m craving a treat, I just dump the bag in a mug, add the egg and water, and zap it.
The Ingredient Breakdown
Since there aren’t many ingredients, what you pick matters.
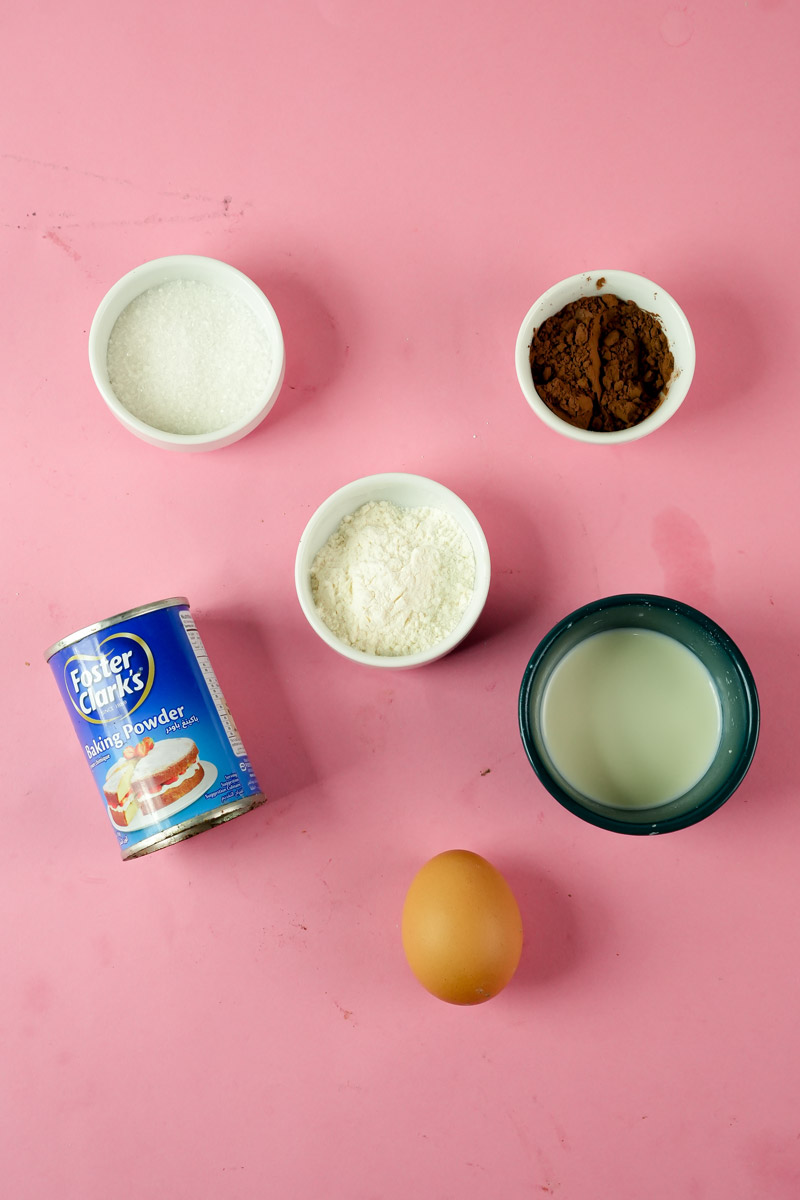
- The Protein: You need 1 scoop. This is the “bones” of your cake. Vanilla and Chocolate are the easy choices. Whey/Casein blends are the secret to a moist cake because they stay thick. If you use vegan protein (pea or hemp), you’ll need more water because those powders are thirsty!
- The Lift: Use 1/2 teaspoon of baking powder. Don’t skip this. Without it, your cake will be a hard hockey puck.
- The Binder: Use 1 large egg. This is the game-changer. Most recipes use water, which makes the cake rubbery. The egg makes it feel like it actually came from a bakery.
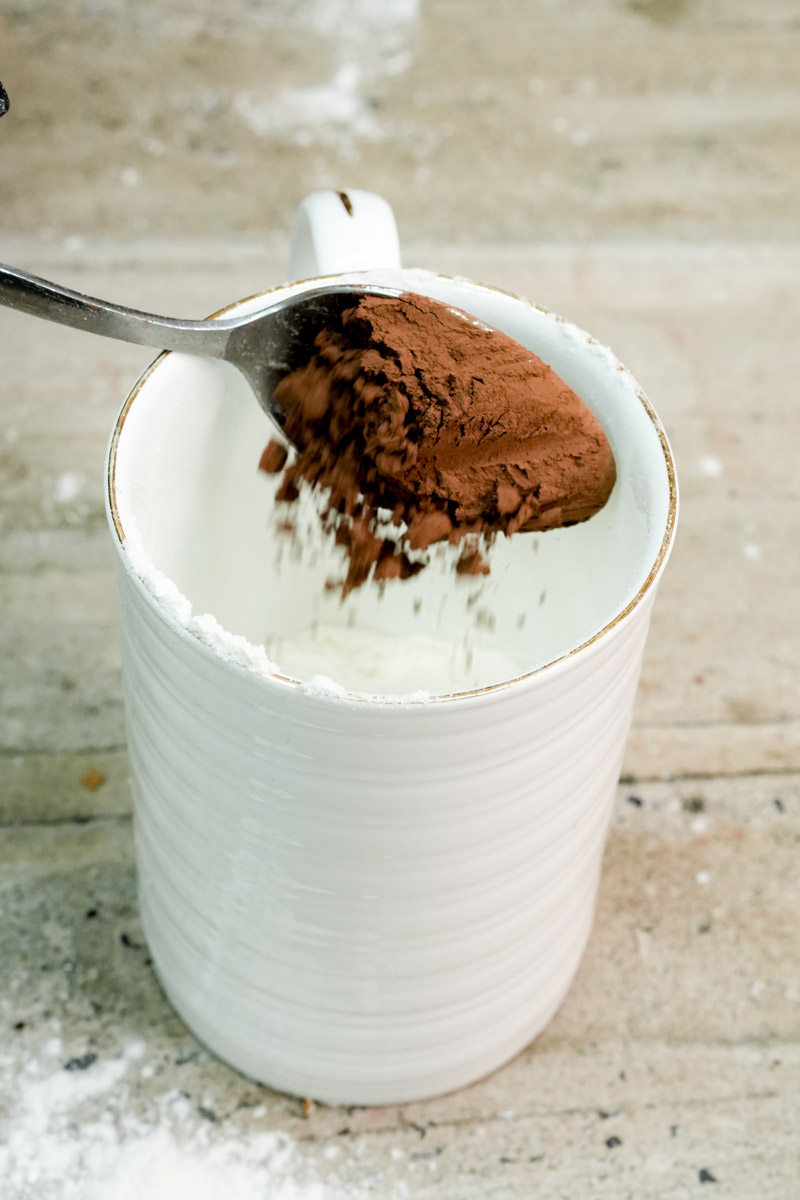
- The Flavor: Add 2 teaspoons of unsweetened cocoa powder. This makes it extra chocolatey.
- The Sweetness: Add 1-2 teaspoons of sweetener (like Stevia or Maple Syrup). Most protein powders are already sweet, so taste the batter first. You might not even need it.
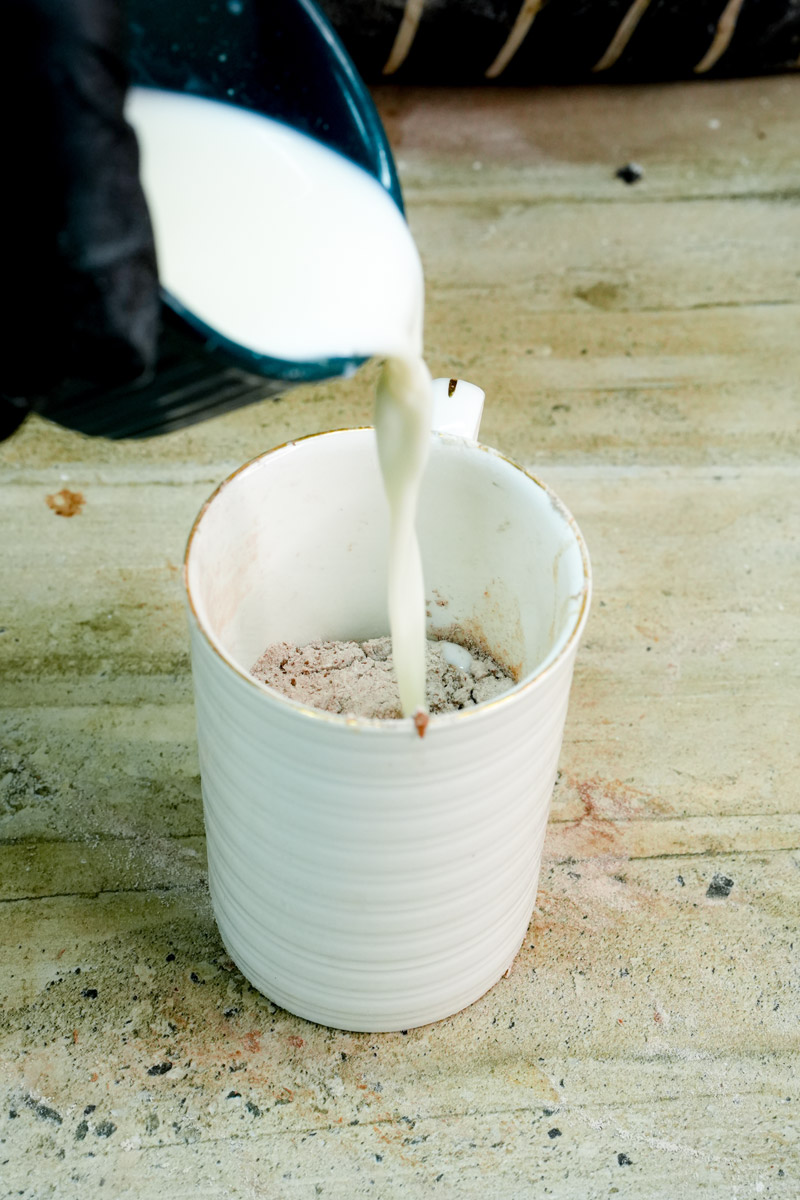
- The Liquid: Keep 1-2 tablespoons of water or milk nearby. We use this to get the texture just right.
How to Make It (Step-by-Step)
Let’s get cooking. Grab your mug and follow along.
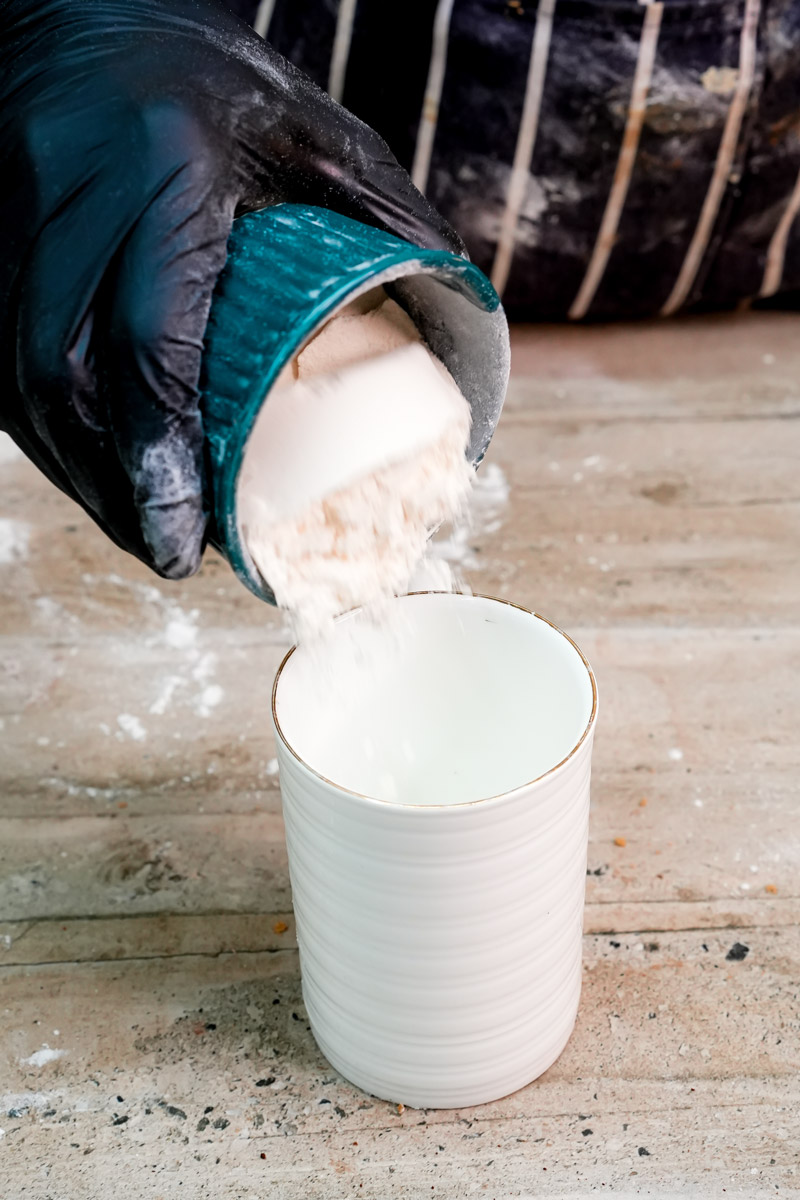
Step 1: Mix the Dry Stuff
Dump your protein, baking powder, cocoa, and sweetener into the mug. Use your fork to break up any clumps. You know those annoying chalky bits in shaker bottles? You don’t want to bite into those later. Get it looking like a fine dust.
Step 2: Add the Egg
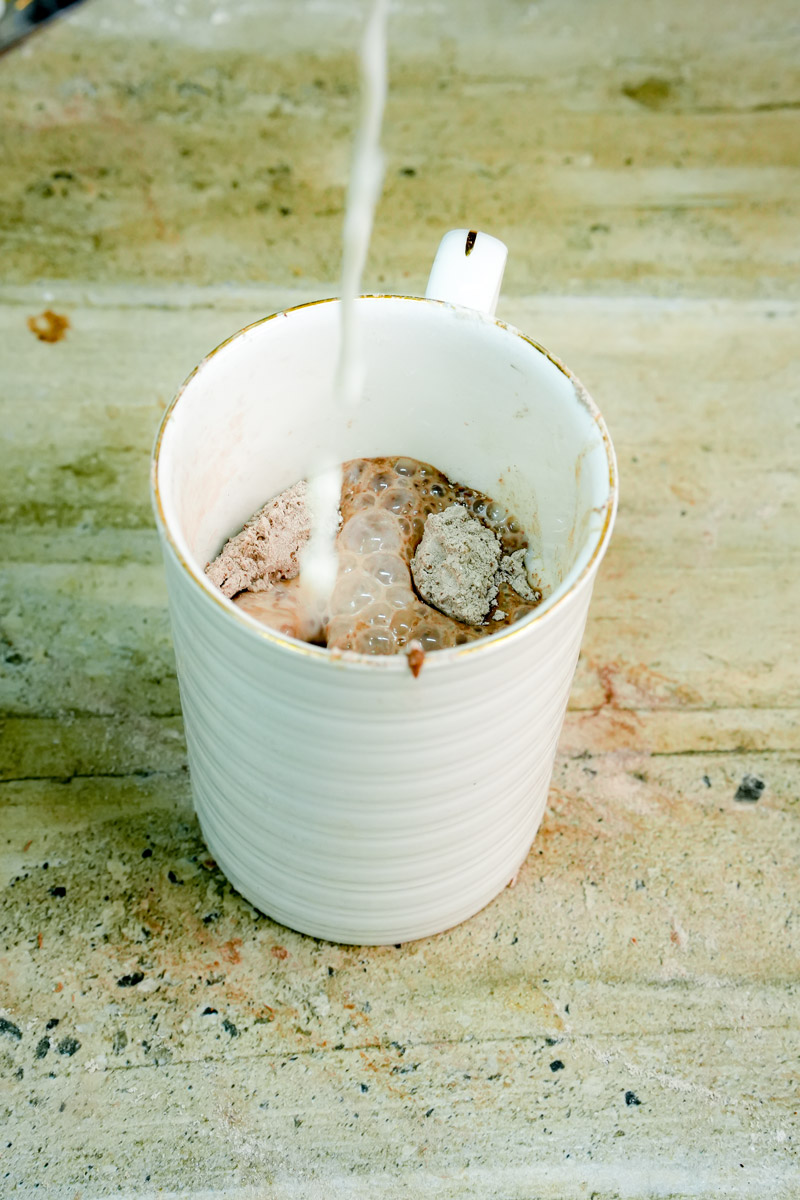
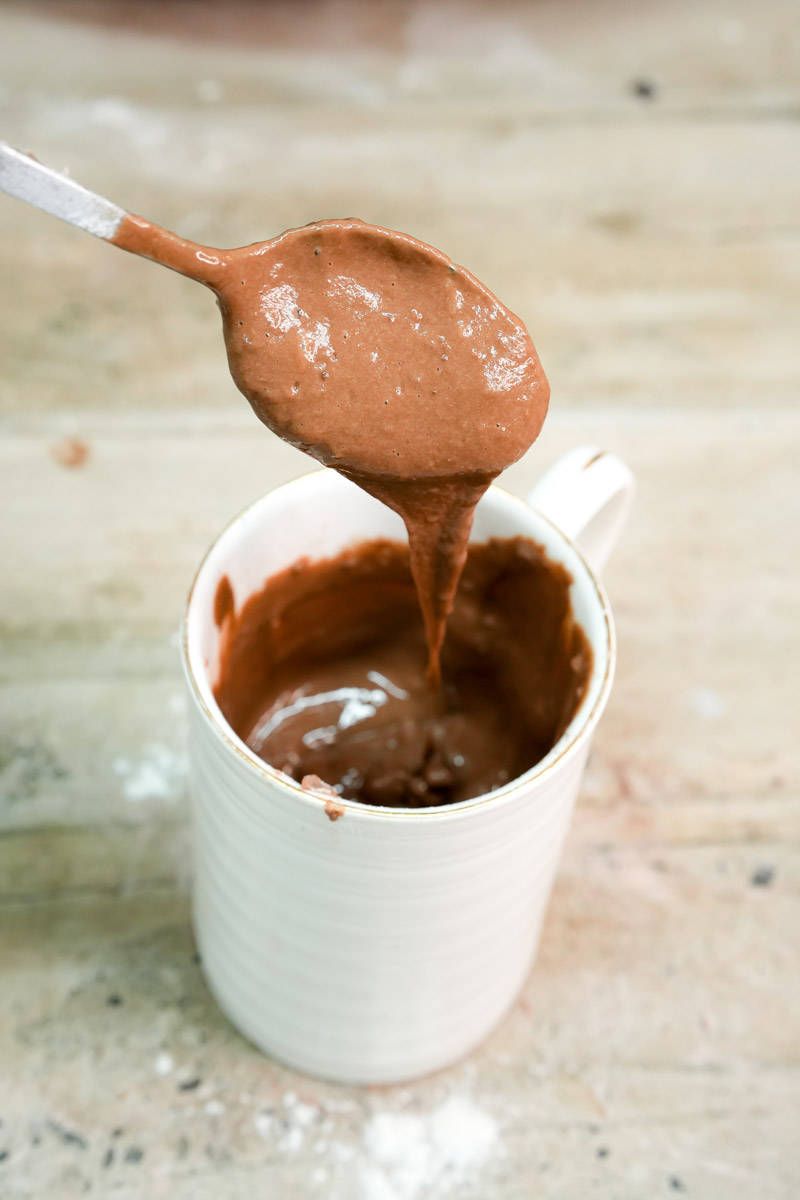
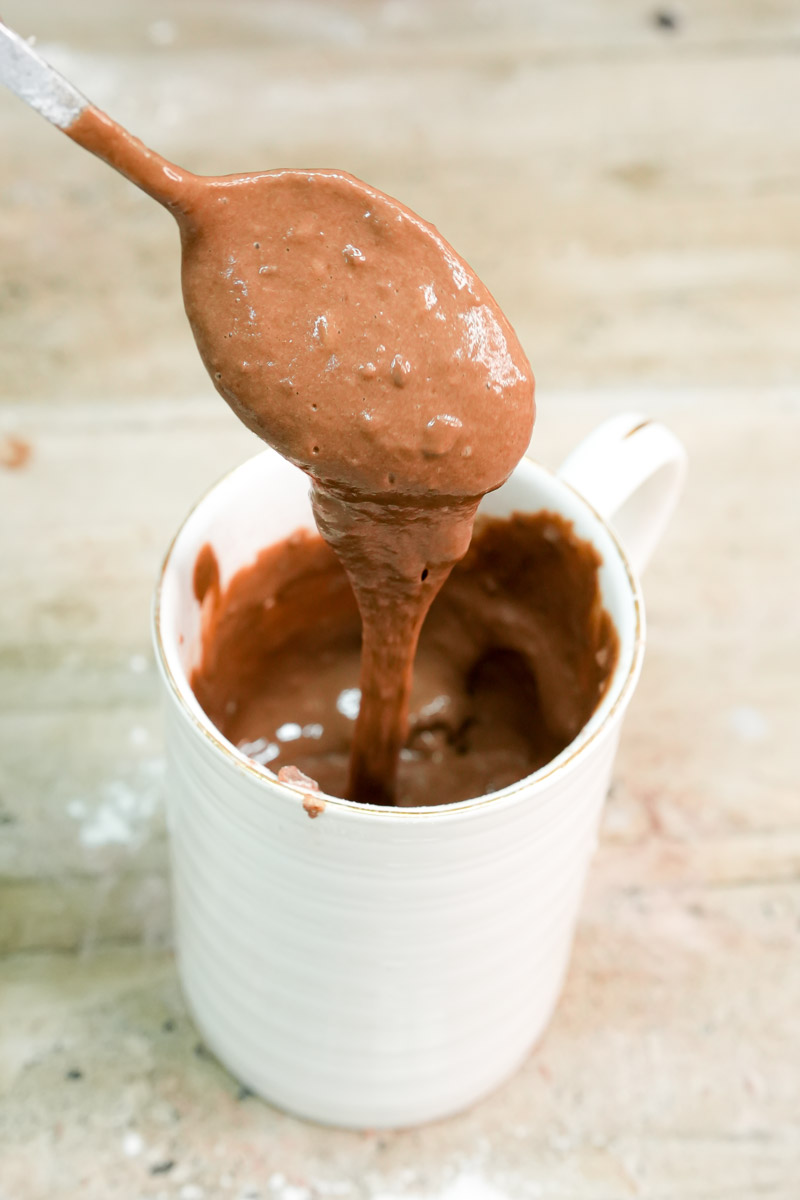
Crack the egg right into the mug. Whisk it hard with your fork. At first, it’s going to look like a gross, clumpy sludge. Don’t panic. Keep going. It will eventually turn glossy and thick, like brownie batter.
Step 3: The “Goldilocks” Moment
Check your batter. Is it stiff like cookie dough? Add water, one teaspoon at a time. You want it to look like pancake batter or melted peanut butter. If it’s too thin, it won’t rise. If it’s too thick, it’ll be dry.
Step 4: The Microwave Dance
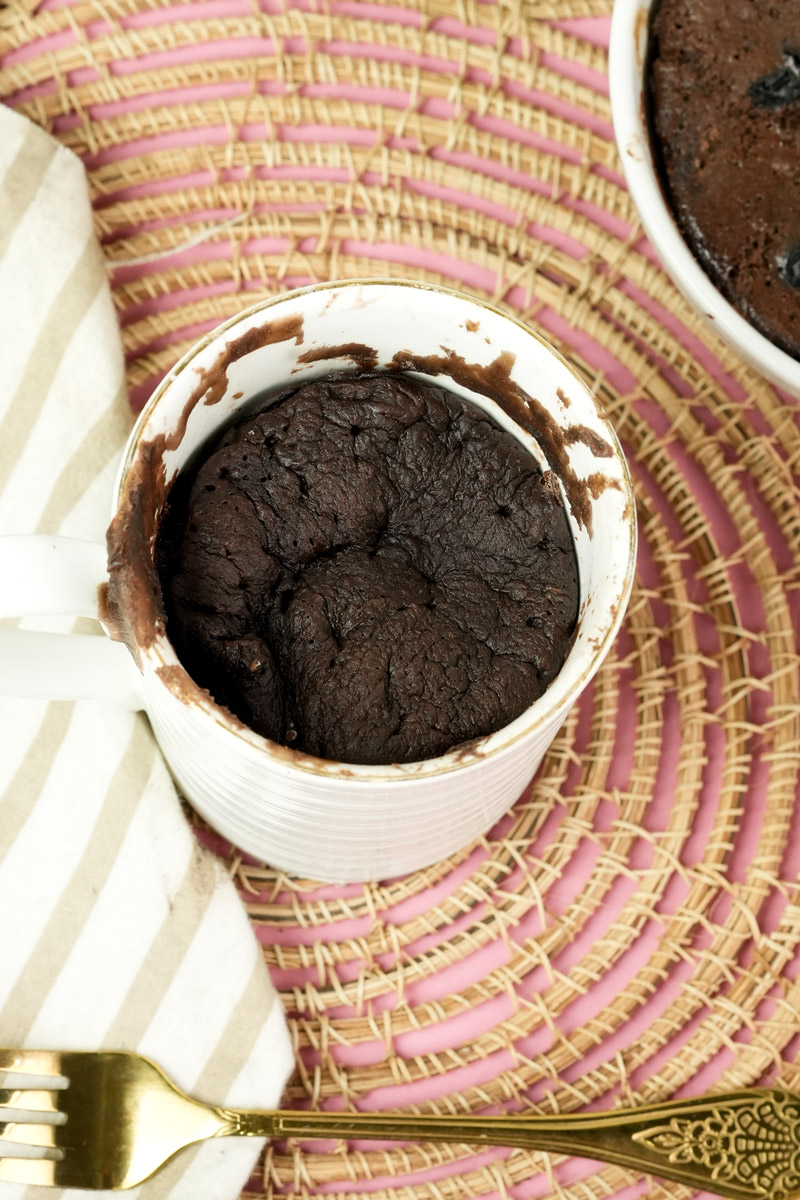
Put your mug in the microwave on High. Start with 30 seconds.
- Watch it: The cake will rise fast and might even pop over the top. That’s fine!
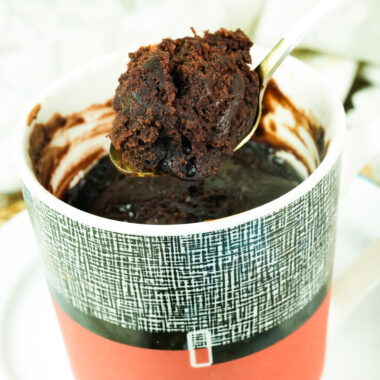
- The Touch Test: Open the door and poke the top. It should feel dry but a little sticky.
- The 5-Second Rule: If it still looks wet, add 5 seconds at a time. Don’t just set it for 2 minutes and walk away, or you’ll be eating a rubber tire. Mine usually takes 40 seconds.
Make it Your Own
Once you get the hang of it, you can get creative. Because making the same thing every day is boring.
| Craving | The Twist |
| Birthday Cake | Use Vanilla protein, no cocoa, add sprinkles and almond extract. |
| Mocha Fix | Use Chocolate protein and use cold coffee instead of water. |
| Peanut Butter Cup | Add 1 tbsp PB powder to the mix or drop a glob of PB in the middle. |
| Cinnamon Roll | Use Vanilla protein, no cocoa, add cinnamon and nutmeg. |
Got special diet needs?
- Dairy-Free: Use plant protein and almond milk. Just remember to add more liquid!
- Extra Fluffy: If the egg feels too heavy, use half an egg white and a spoonful of Greek yogurt instead.
Serving and Saving
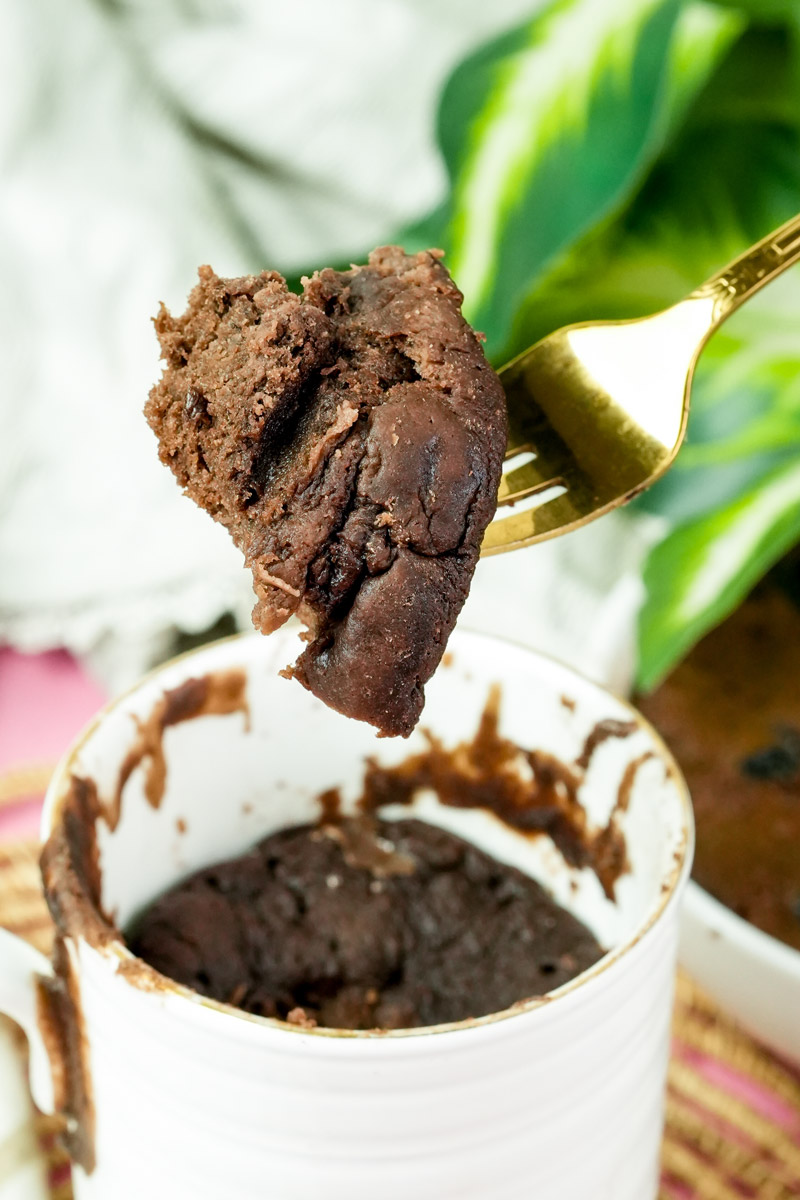
You can eat this right out of the mug while you’re on the couch. That’s the best way. But if you want to be fancy, run a knife around the edge and flip it onto a plate. It should slide right out.
Topping Ideas:
- Creamy: Greek yogurt or a splash of cold milk.
- Crunchy: Cacao nibs or walnuts.
- Fresh: Sliced strawberries or bananas.
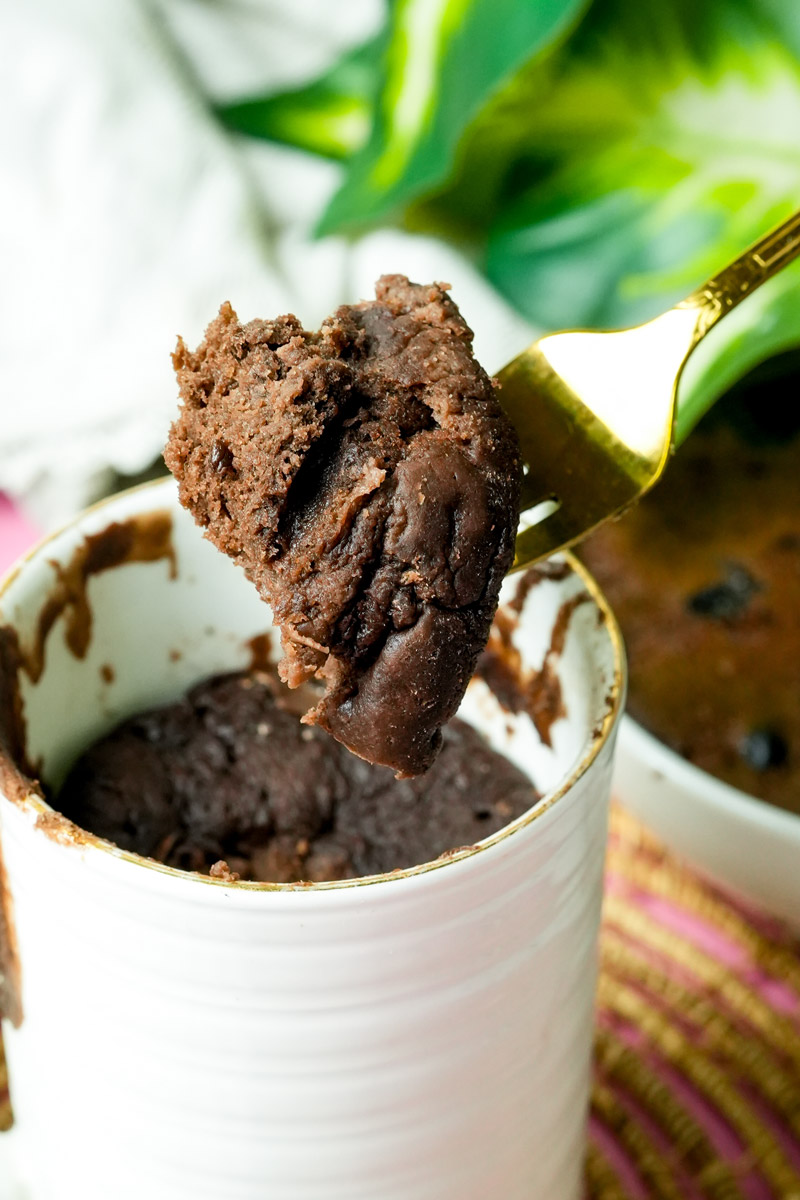
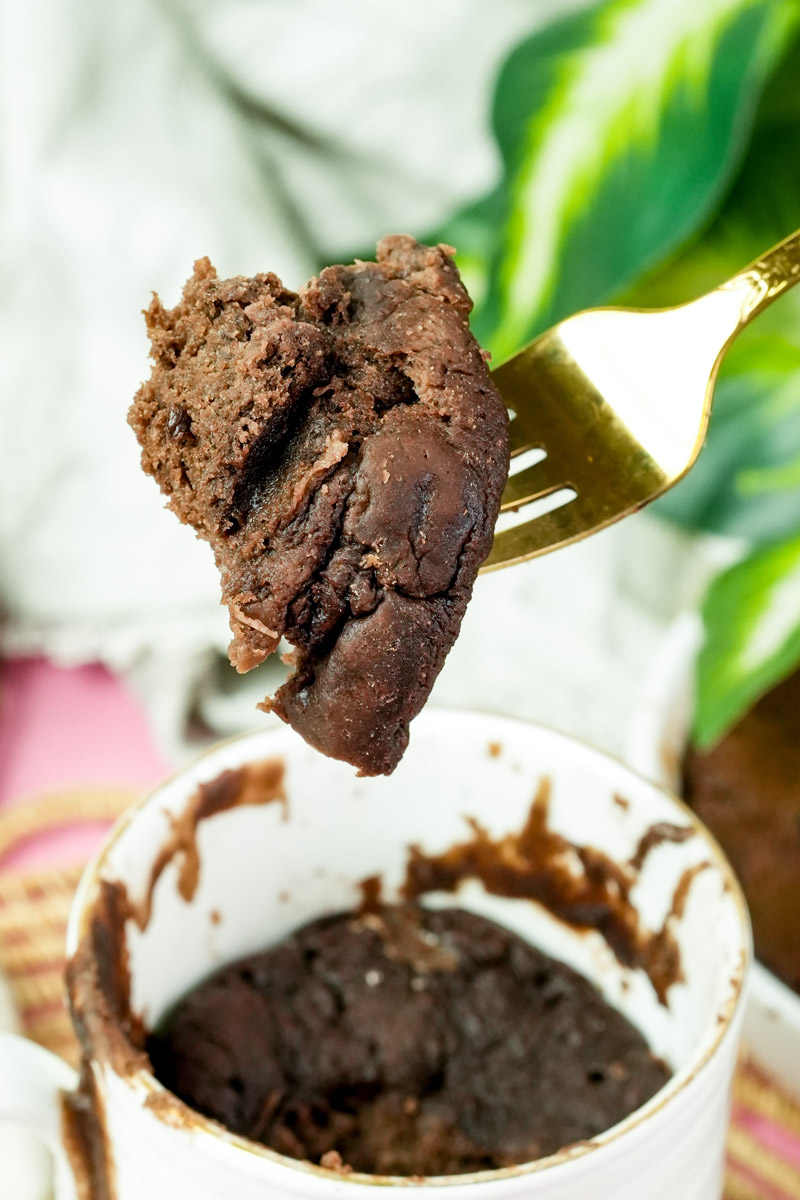
One final warning: Eat this immediately! Protein cakes are like divas—they only look good for about 10 minutes. As they cool down, they get tough and chewy. If you absolutely have to save it, wrap it tight and put it in the fridge. To reheat, add a drop of water and zap it for 10 seconds.
Enjoy your treat! You just made a dessert that’s actually good for you.
PrintProtein Mug Cake
We’ve all been there. You just crushed a workout, your macros are looking good, but your sweet tooth is screaming for a treat. This isn’t your average rubbery microwave sponge. It’s a rich, flourless, and high-protein dessert that actually tastes like it came from a bakery. By using a whole egg instead of just water, we get a moist, cake-like texture that makes protein powder actually enjoyable.
- Prep Time: 3 minutes
- Cook Time: 1 minutes
- Total Time: 4 minutes
- Yield: 1 large mug cake
- Category: Healthy Dessert / Snack
- Cuisine: American / Fitness
Ingredients
- Protein Powder: 1 scoop (Whey/Casein blend works best for texture)
- Unsweetened Cocoa Powder: 2 tsp
- Baking Powder: ½ tsp
- Sweetener: 1-2 tsp (Stevia, Erythritol, or Maple Syrup)
- Large Egg: 1
- Water or Milk: 1-2 tbsp (added as needed)
Instructions
- Whisk the Dry Stuff: Grab a wide, microwave-safe mug. Toss in the protein powder, cocoa, baking powder, and sweetener. Use a fork to break up any stubborn clumps until you have a fine, even powder.
- Add the Binder: Crack the egg right into the mug. Whisk it vigorously with your fork. It’ll look like thick sludge at first—just keep going until it’s glossy and smooth like brownie batter.
- Adjust the Texture: Check your consistency. It should look like melted peanut butter. If it’s too stiff, add your water or milk one teaspoon at a time until it’s pourable but still thick.
- The Big Zap: Microwave on High for 30 seconds. Check the top; it should be mostly dry. If it’s still wet, add 5-10 more seconds. Warning: Every microwave is different. Don’t overcook it or it’ll turn into a rubber tire!
- Cool and Devour: Let it sit for a minute so you don’t burn your tongue. It’s best eaten warm!
Notes
Serving Suggestions
- The Elite Topping: A dollop of Greek yogurt and a few fresh strawberries.
- For the PB Lovers: Stir a spoonful of peanut butter into the center before cooking for a molten core.
- Extra Crunch: Sprinkle some cacao nibs or crushed walnuts on top for texture.
Tips & Tricks
- Mug Choice: Always use a wide soup-style mug. Tall, skinny mugs tend to cook unevenly, leaving you with a raw middle.
- The Powder Factor: Vegan powders (pea/hemp) soak up way more liquid. Be ready to add an extra splash of milk to prevent dryness.
- Check Early: Start checking at the 30-second mark to catch that perfect, moist crumb before it toughens up.
Storage & Reheating
- Eat It Fast: These are “diva” cakes—they’re spectacular for about 10 minutes, then they start to get tough as they cool.
- Saving for Later: If you must, wrap it tightly in plastic to keep the moisture in.
- The Refresh: To reheat, sprinkle a few drops of water on top and microwave for 10 seconds to “wake up” the texture.