I used to think making thin pancakes was impossible. I’d watch chefs flip them perfectly and think, “Yeah, right.” But then I tried making Blini.
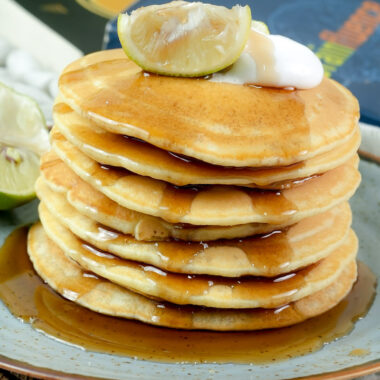
In Russia, these aren’t just breakfast. They represent the sun. People eat them like crazy during a festival called Maslenitsa to say goodbye to winter and hello to spring. They are golden, buttery, and honestly? A total crowd-pleaser.
Whether you want a fancy brunch or just a quiet Sunday morning, this recipe is a lifesaver. It’s fast, simple, and makes you look like a pro.
The Game Plan
Before we start, let’s look at the numbers. You don’t need a whole afternoon for this. It only takes about 5 minutes to prep and 30 minutes at the stove.
This recipe feeds about 4 people. But here is a tip from my own kitchen: always make more. Whenever I make these, they disappear before they even hit the table. If you’re having a party, just double the ingredients.
| Feature | Details |
| Difficulty | Moderate (The flip takes practice!) |
| Total Time | 35 Minutes |
| Servings | 4 People |
| Key Tools | 10-inch Skillet, Whisk, Ladle |
| Storage | Fridge for 3 days or Freeze for 3 months |
I’d call this “Intermediate-Light.” The batter is a breeze. The only tricky part is the swirl and flip.
For gear, grab a non-stick pan or a well-seasoned cast-iron skillet. A 10-inch pan is perfect for standard pancakes. If you want those tiny appetizers you see at fancy parties, use a 5-inch pan. You’ll also need a whisk and a ladle to keep the sizes even.
What You’ll Need
The best part about blini? You probably have everything in your pantry right now.
- 2 large eggs
- 1 ¼ cups (300ml) milk (Whole milk is best for flavor)
- ¾ cup (100g) all-purpose flour
- A pinch of salt
- Butter or oil (For the pan)
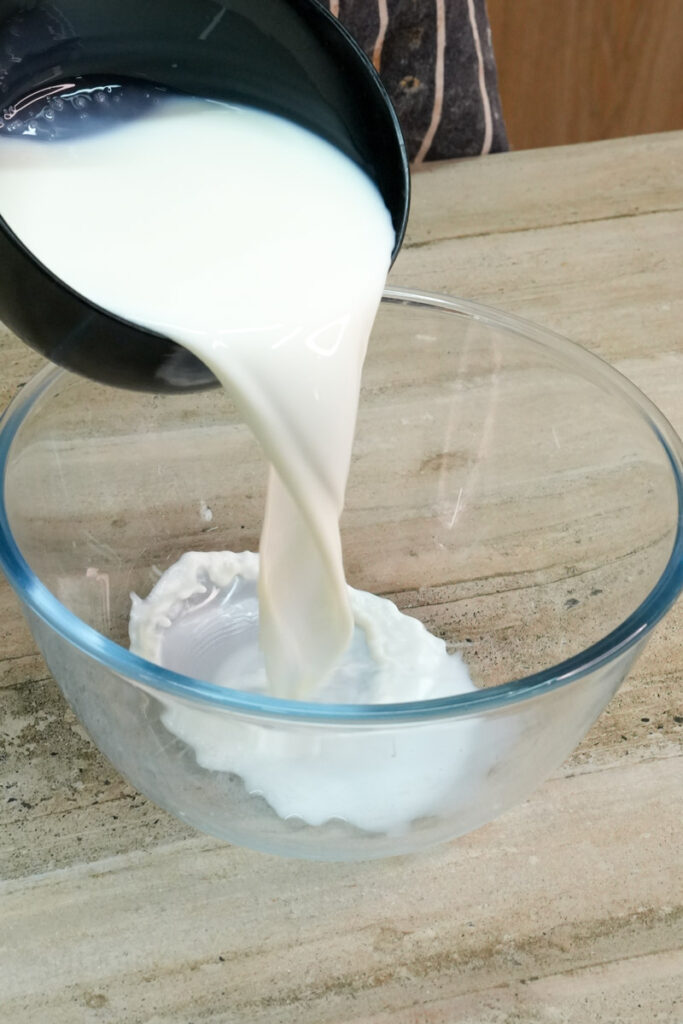
I learned the hard way that using cold eggs and milk makes the batter lumpy. Try to let them sit on the counter for a bit first. It helps everything mix smoothly.
If you’re out of milk, you can use buttermilk or kefir. It gives them a little tang. For the pan, I love the smell of unsalted butter. But if you’re worried about burning, a little sunflower or avocado oil works great too.
How to Make Them
1. Mix the Batter
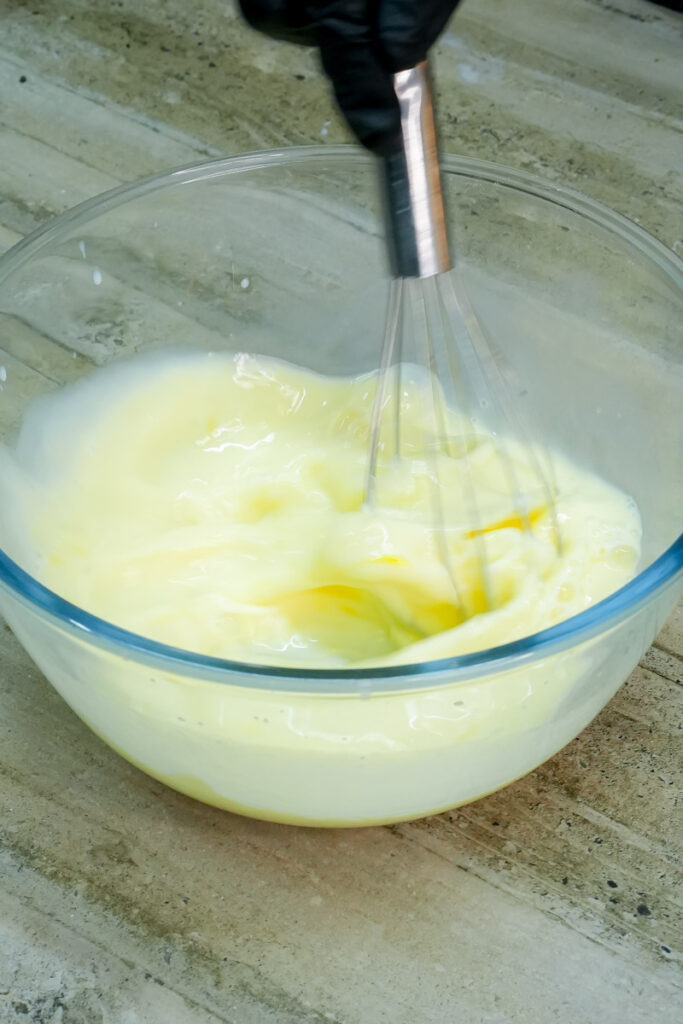
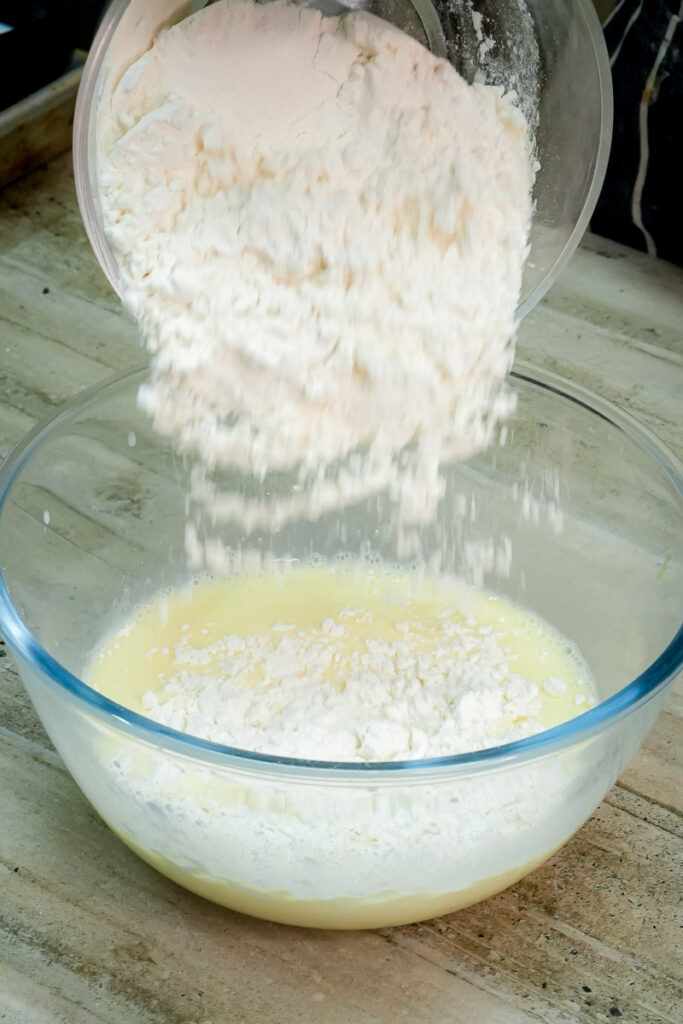
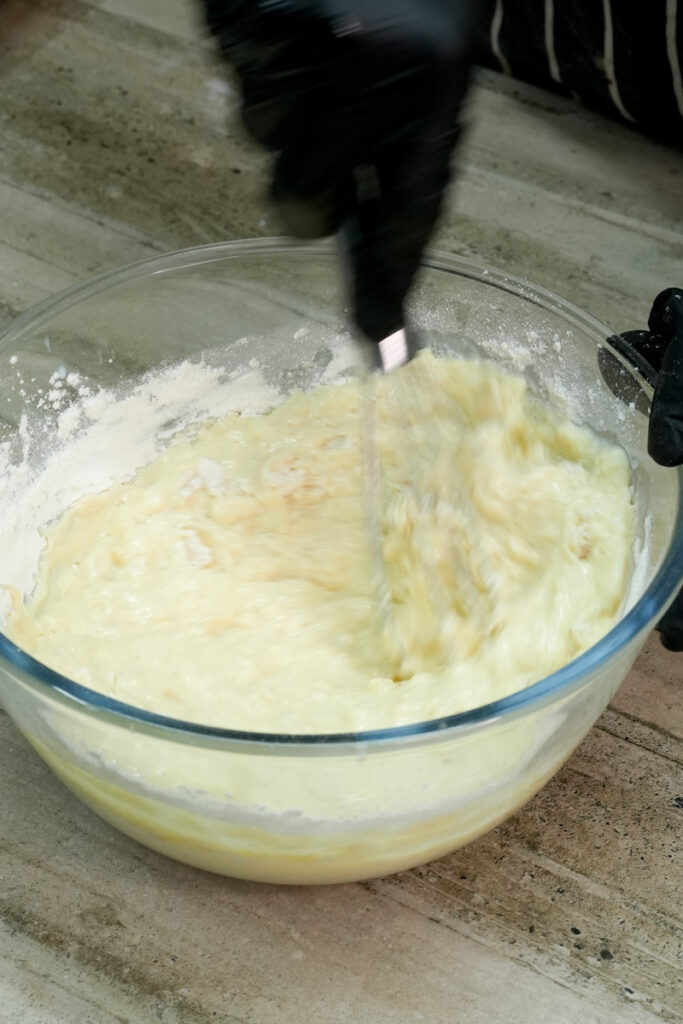
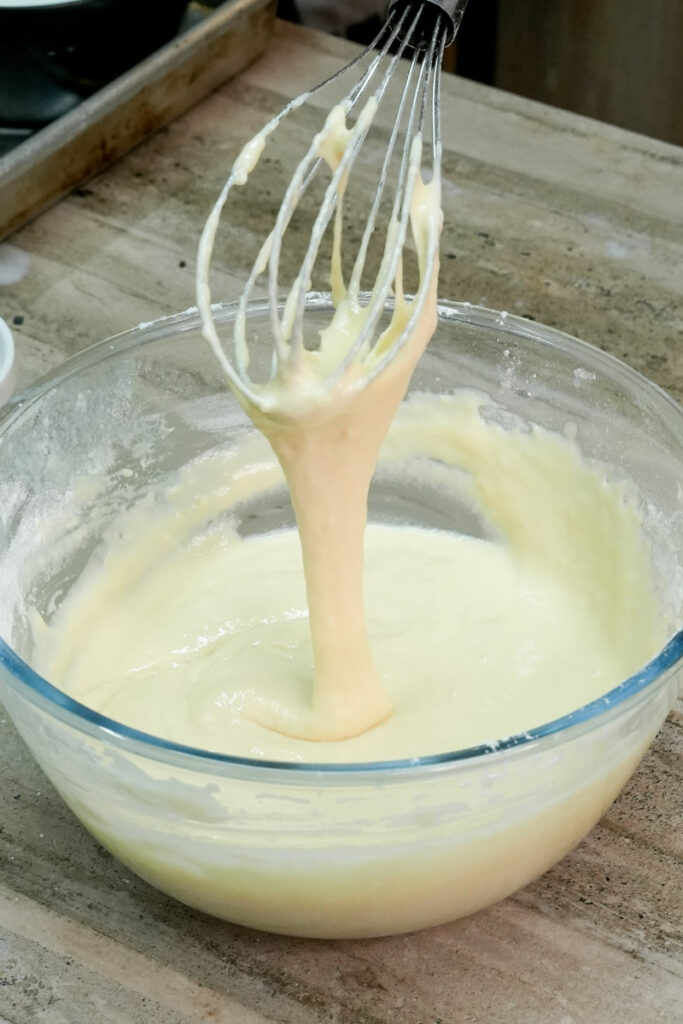
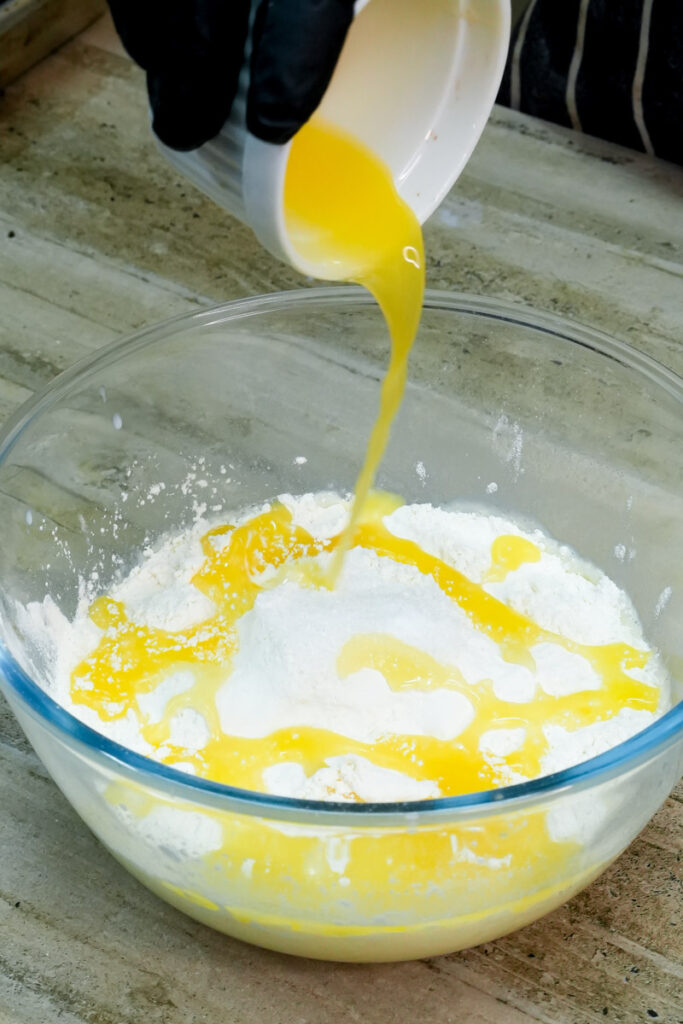
Grab a bowl. Beat the eggs, milk, and salt together. Slowly add the flour. I usually use an electric mixer because I hate flour clumps.
The batter should be very thin. Think of heavy cream, not thick American pancake mix. If it looks too thick, just add a splash of milk.

2. The Sizzle and Swirl
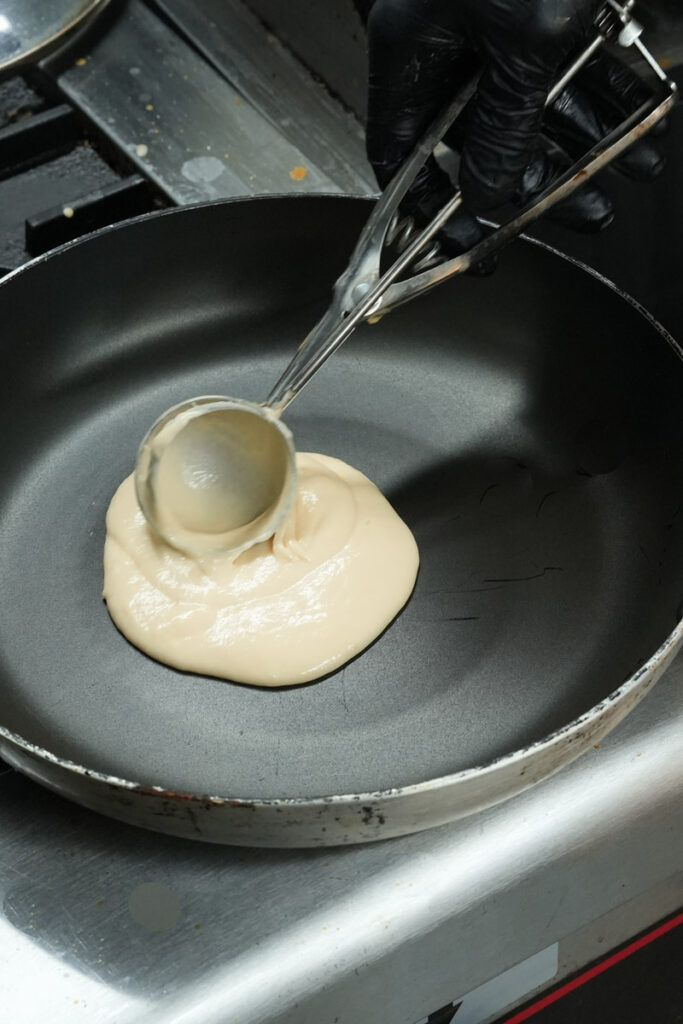
Get your pan hot over medium-high heat. Toss in a tiny bit of butter.
Now, the “pro move.” Pick the pan up. Pour in a ladle of batter. Quickly tilt and rotate the pan so the batter coats the whole bottom before it sets. You want it paper-thin.

3. The Flip
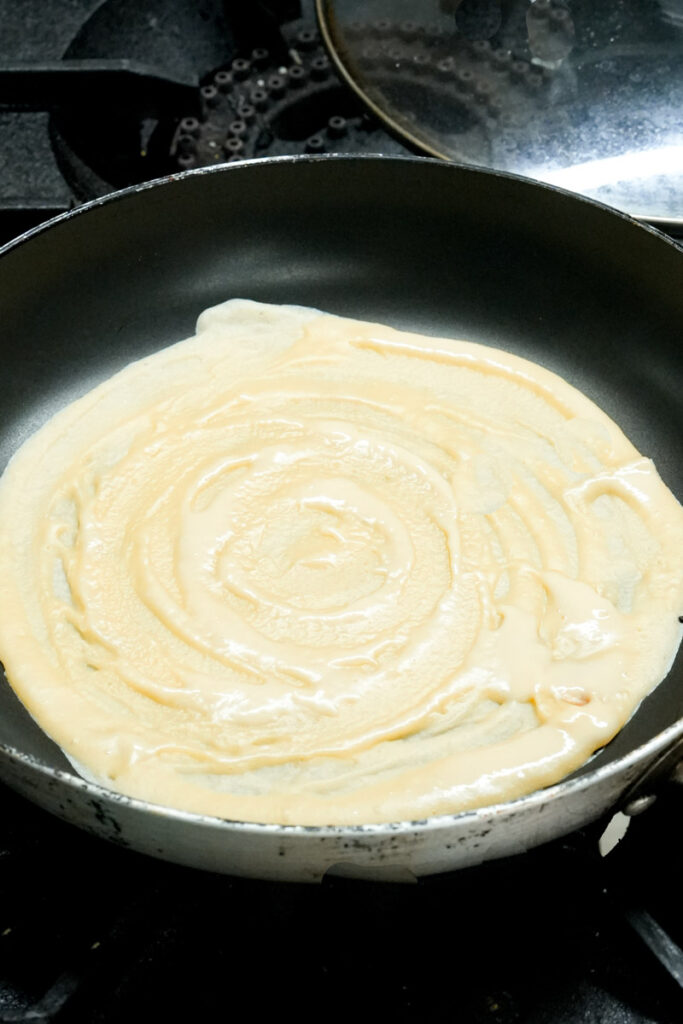
Wait about 60 to 90 seconds. The top should look dry, not shiny. The edges will look like golden lace.
Slide a thin spatula under there. If you’re feeling gutsy, use your fingers! Flip it over. The second side only needs about a minute. You’re looking for those pretty “leopard spots” of brown.
My Advice: Don’t panic if the first one looks like a mess. There’s an old Russian saying: “The first pancake is always a lump.” It’s basically a test run for the heat. Just eat it and keep going!

Make It Your Own
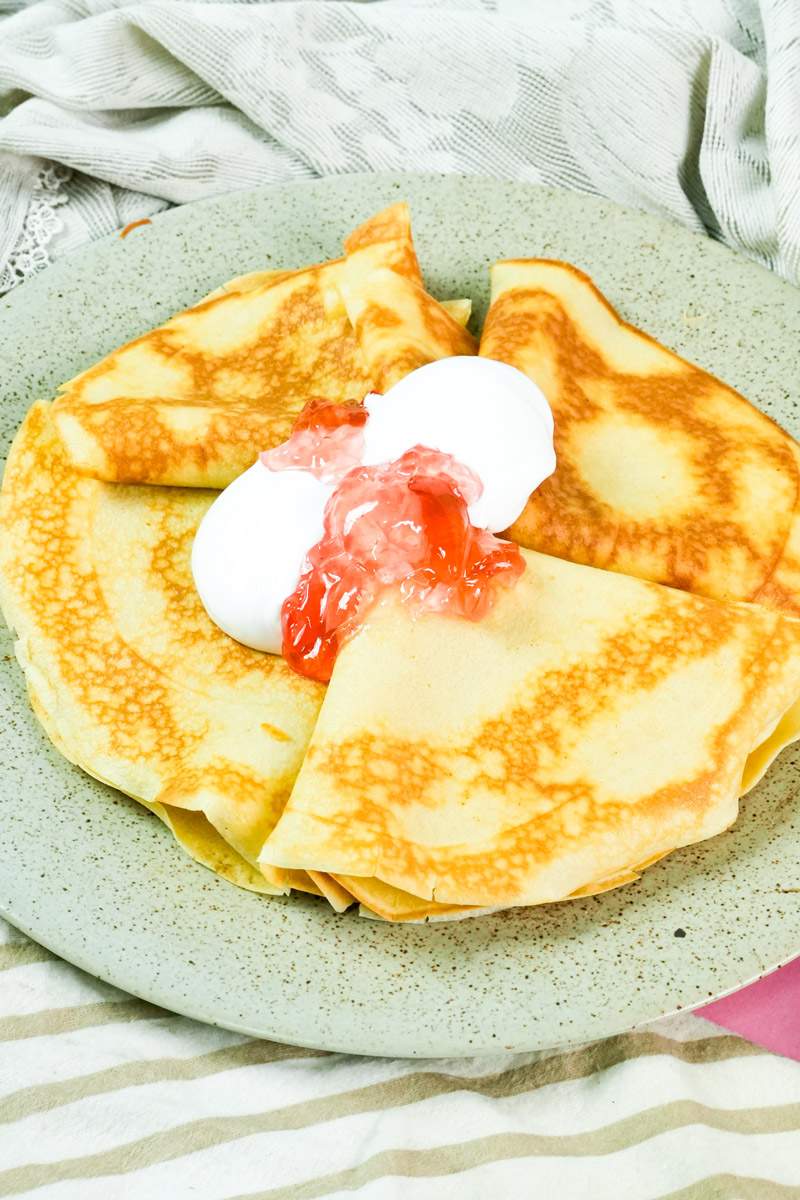
You can eat these with just butter and sugar for a quick snack. But if you want to feel fancy? Go for the classic savory toppings.
Because when you have a stack of blini, people usually love to add:
- Sour cream
- Smoked salmon
- Caviar
- Fresh dill
If you can’t do gluten, a 1-to-1 gluten-free flour works fine. In the summer, I like to add lemon zest and ricotta. In the winter, warm apples and cinnamon are amazing.
Serving and Leftovers
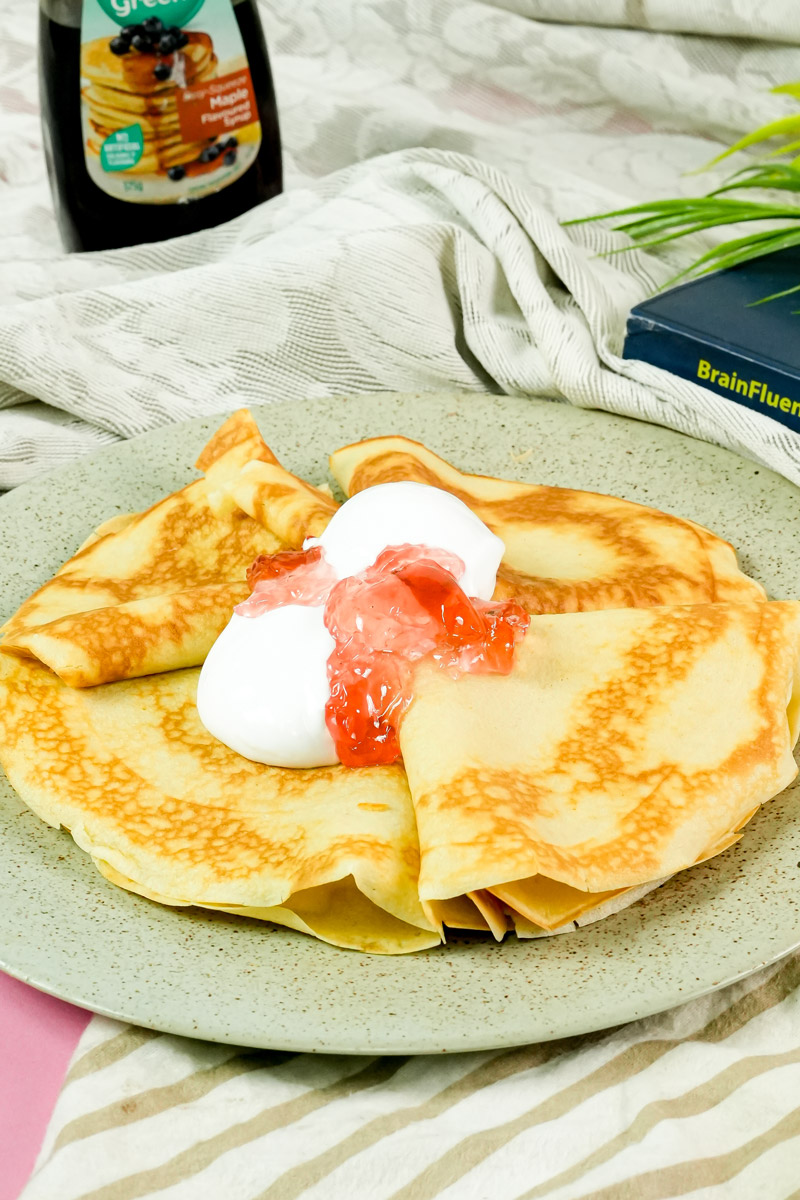
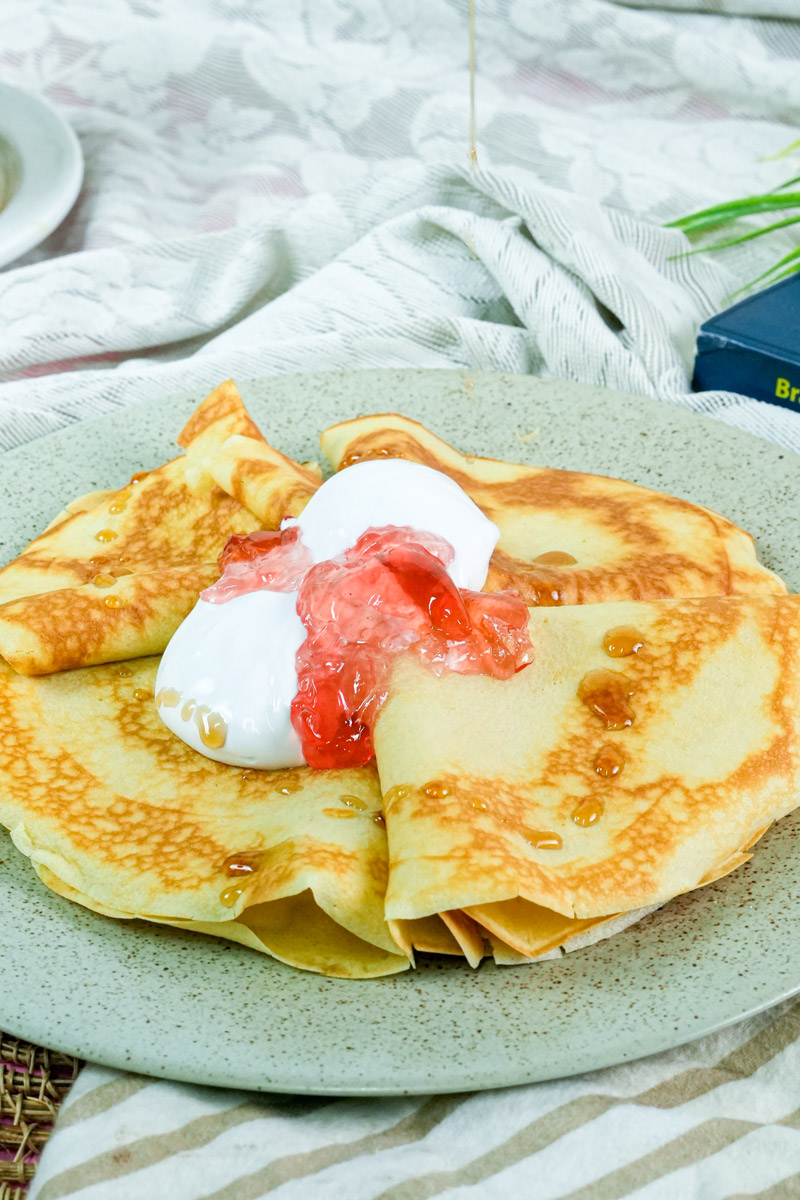
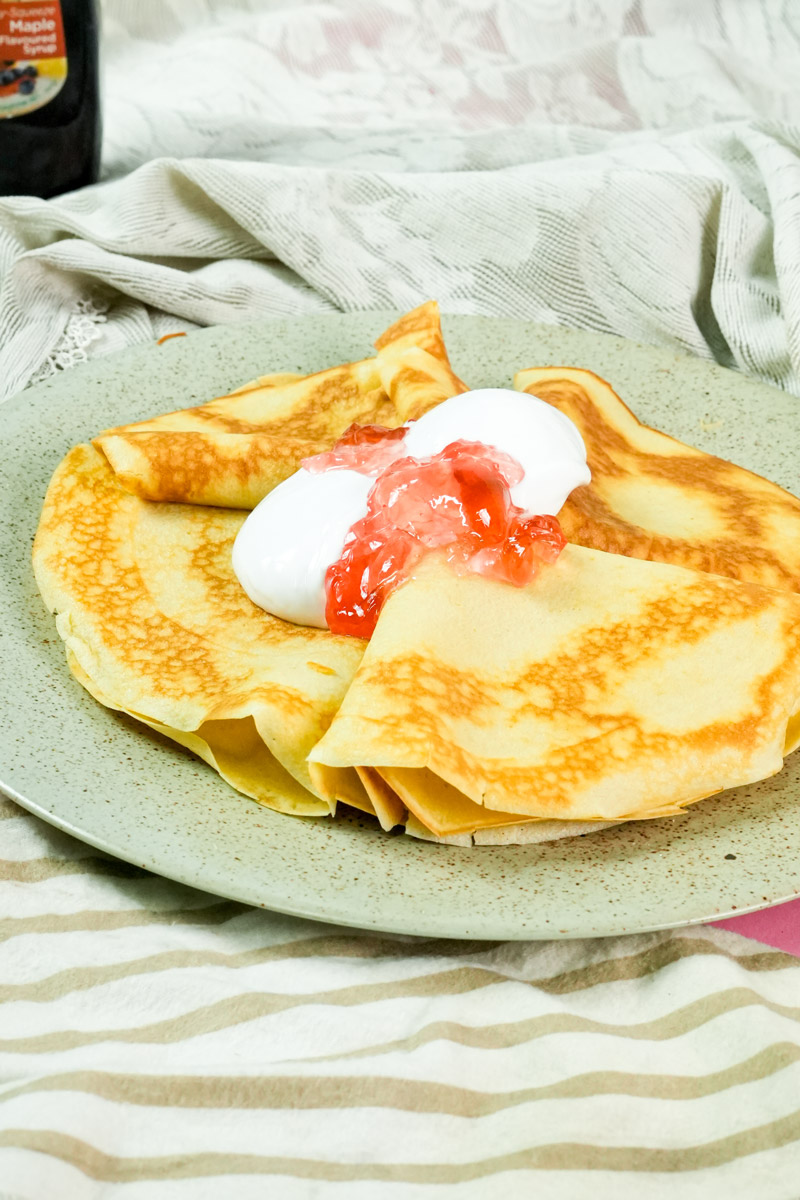
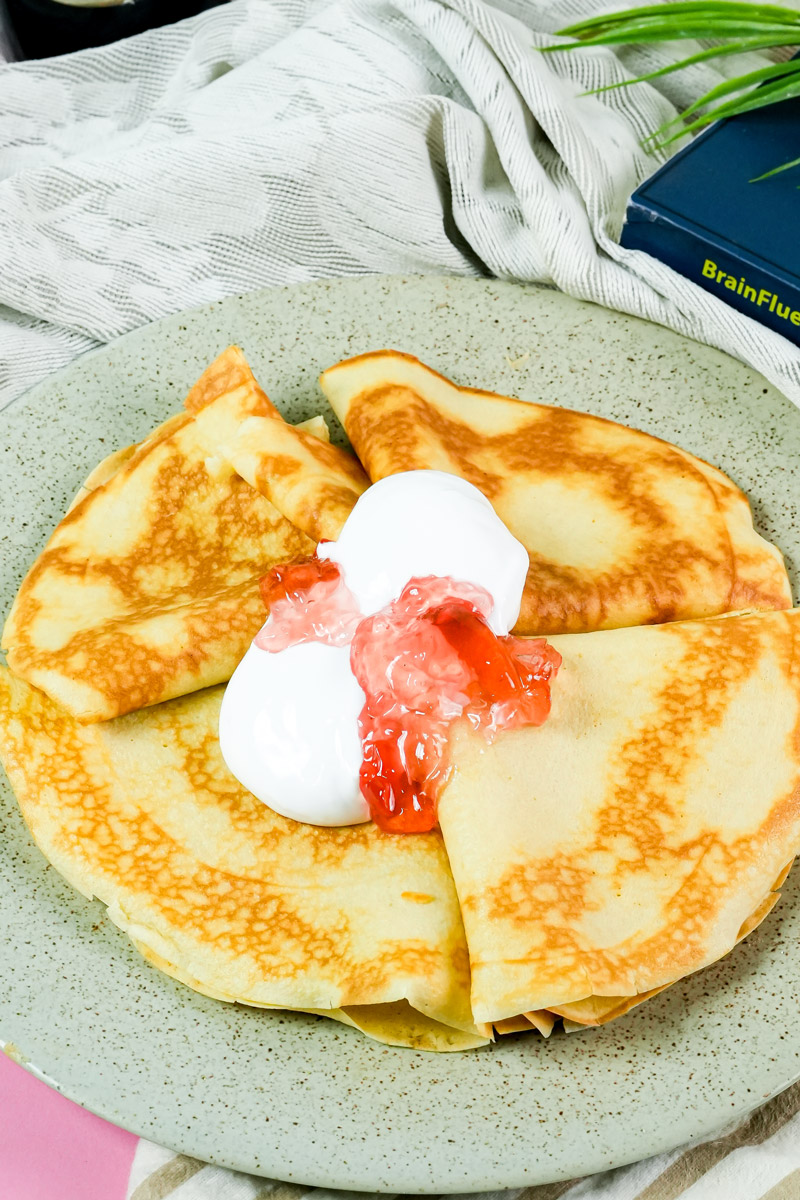
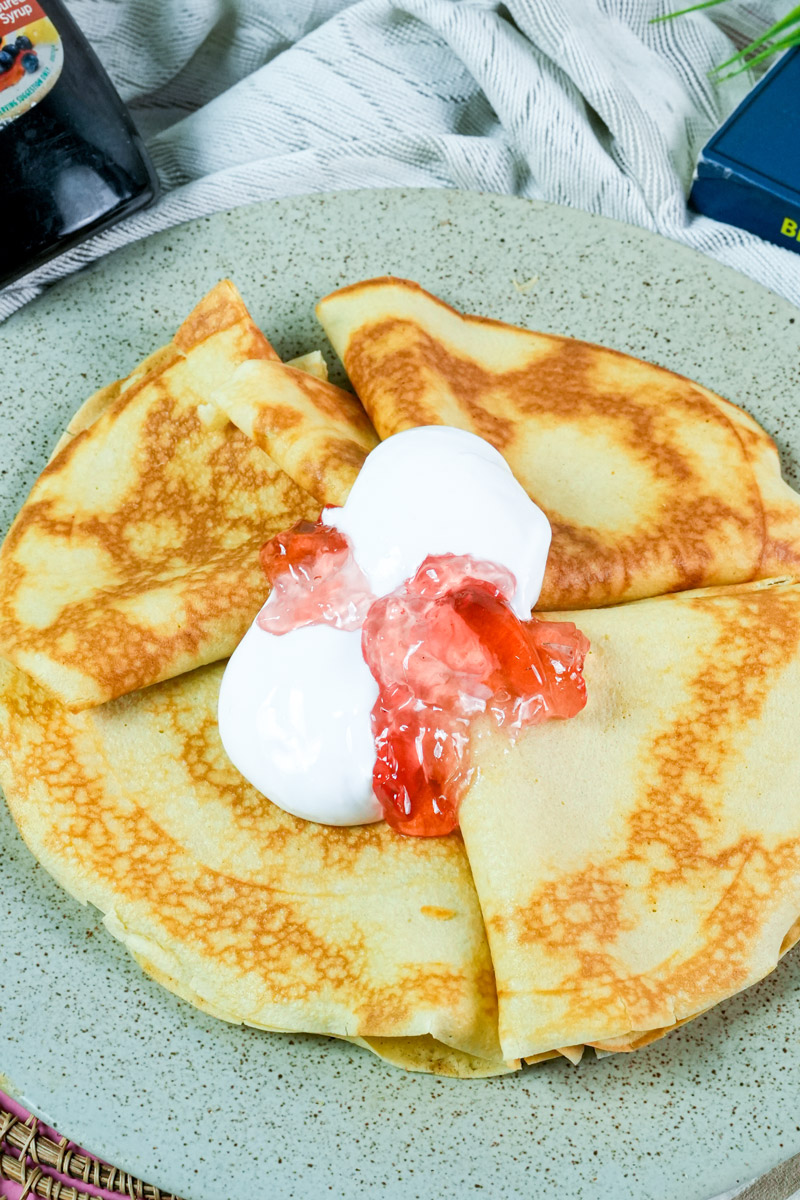
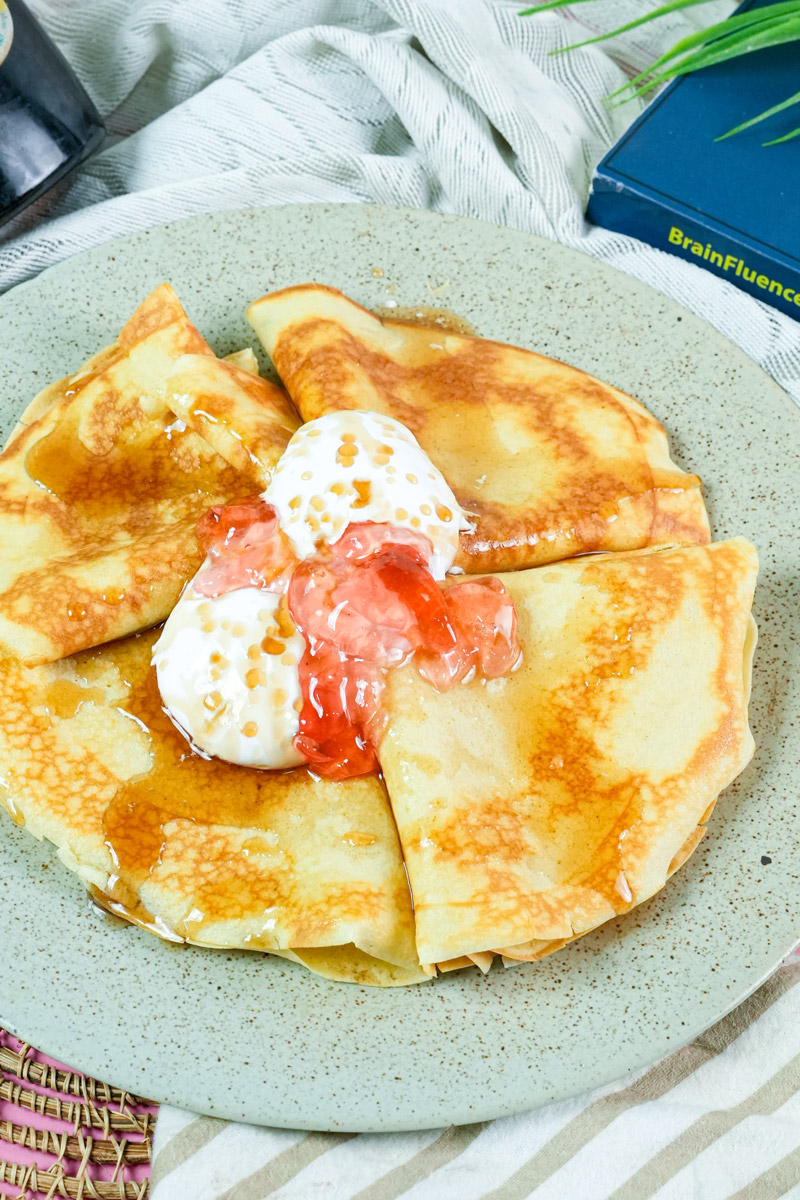
To serve them like a pro, you have two choices. You can do the “Triangle Fold” (fold it in half twice) or the “Stuffed Tube” (roll it up like a cigar).
If you have leftovers, you’re in luck. They stay fresh in the fridge for 3 days. Just put a piece of parchment paper between them so they don’t stick together. You can even freeze them for months.
When you’re ready to eat them again, just toss them in a buttered pan for a second to get that crisp edge back. The microwave works too, but the pan is way better.
PrintTraditional Russian Pancakes

These light, buttery rounds are a staple of Slavic culture. Thinner than American pancakes but sturdier than French crepes, they are perfect for folding around savory salmon or stacking high with sweet preserves.
- Prep Time: 5 mins
- Cook Time: 30 mins
- Total Time: 35 mins
- Yield: 4 1x
- Category: Breakfast/Appetizer
- Cuisine: Russian
Ingredients
- 2 large Eggs (room temperature)
- 1 ¼ cups (300ml) Milk (whole milk preferred)
- ¾ cup (100g) All-Purpose Flour
- 1 pinch Salt
- Unsalted Butter (for frying and coating)
Instructions
- Whisk the Batter: In a large bowl, beat the eggs, milk, and salt. Gradually whisk in the flour until completely smooth. The consistency should be thin, like heavy cream.
- Heat the Pan: Set a 10-inch non-stick skillet over medium-high heat. Add a tiny pat of butter to coat the surface.
- The Swirl: Lift the pan off the heat. Pour in a small ladle of batter while quickly tilting and rotating the pan to spread it paper-thin to the edges.
- First Side: Return to heat. Cook for 60–90 seconds until the edges turn golden-brown and the top looks dry/matte.
- The Flip: Slide a spatula under the edge and flip. Cook the second side for about 60 seconds until you see golden “leopard spots.”
- Butter & Stack: Remove to a plate and immediately brush with a little melted butter. Repeat with the remaining batter.
Notes
Tips & Tricks
- The “Lump” Rule: Don’t worry if the first pancake fails! It usually acts as a “test” for pan temperature.
- Avoid Clumps: If your batter has stubborn flour lumps, give it a quick 10-second pulse in a blender or pour it through a fine-mesh strainer.
Serving Suggestions
- Savory: Fold into triangles and top with sour cream, smoked salmon, and fresh dill.
- Sweet: Roll them up with a smear of honey, berry jam, or a sprinkle of sugar.
Storage & Reheating
- Store: Stack with parchment paper between layers. Keep in an airtight container for 3 days in the fridge or 3 months in the freezer.
- Reheat: For the best texture, sear quickly in a buttered skillet. A microwave works for a softer result.