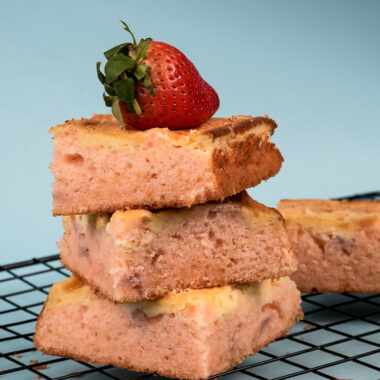
Let’s bake something amazing together! Seriously, who doesn’t love a good strawberry cheesecake? It’s that perfect mix – creamy, a little tangy, sweet, and fruity. Honestly, there’s just something special about making one from scratch. Feels like a little bit of kitchen magic.
Now, cheesecake isn’t exactly new. People say it goes way back, maybe even to ancient Greece! Wild, right? But the kind we usually drool over, the one made with cream cheese? That became popular right here in America. Think classic New York style. That’s the stuff. This recipe feels like a cozy, home-style version. It aims for that yummy balance: rich filling, crunchy crust, and bright strawberries on top. Maybe even a bit quicker and easier. Sound good? Let’s do this!
Your Guide to Deliciousness: Recipe Overview
Think of this as our quick game plan before we dive in. Here’s the lowdown:
Quick Look: Time, Servings & Difficulty
| Feature | Details |
|---|---|
| Prep Time | About 15-20 minutes. Pretty quick! Just gathering stuff, making the crust, mixing the filling. |
| Cook Time | 15-20 minutes. Heads up! This is really short for a baked cheesecake. We’ll talk more about this in the baking steps. It might mean a softer cheesecake or need a bit longer for a firmer set. |
| Chill Time | At least 4 hours, but honestly? 6+ or overnight is way better. This part is super important! |
| Total Time | Roughly 4.5 – 5 hours (if you count the minimum chill time). |
| Servings | 7-8 slices. Perfect for sharing! |
| Difficulty | Easy to Medium. The steps aren’t tricky, but getting that perfect texture takes a little care. Think room temp ingredients and proper chilling. This is a great Easy strawberry baked cheesecake to try! |
Need More (or Less) Cheesecake?
This recipe makes a nice 7-8 slice cheesecake, great for a family treat or having a few friends over.
- Need a bigger crowd-pleaser? You could double everything and use a bigger pan (like a 10-inch). But be warned: the baking time will need to be much longer. Probably closer to 60-90 minutes, like traditional recipes. Keep an eye on it!
- Just baking for one or two? Halving it might work in a tiny 6-inch pan. You’d likely need to bake it for a little less time than the 15-20 minutes here. Checking for doneness will be key.
Tools of the Trade
You don’t need a professional kitchen setup, but the right tools definitely make baking smoother. It’s like trying to paint a wall with a toothbrush – possible, but not ideal!
- Springform Pan: An 8 or 9-inch one is your best friend here. Why? That removable side makes getting the cheesecake out so much easier. No flipping needed! A deep-dish pie plate could work in a pinch, but slicing neatly will be a challenge.
- Electric Mixer: A stand mixer or a hand mixer. Trust me on this one. While you could mix by hand, getting cream cheese truly smooth without lumps is a lot easier with some electric help. My arms thank me every time I use mine!
- Mixing Bowls: Grab a few different sizes. One for crust, one for filling, maybe one for topping.
- Spatula: Don’t underestimate a good spatula! You need it for scraping the bowl (super important!) and smoothing things out.
- Measuring Cups & Spoons: Baking is a bit like science. Accuracy helps!
- Saucepan: For cooking up that yummy strawberry topping.
- Food Processor (Optional): This makes quick work of crushing cookies for the crust. But hey, a zip-top bag and a rolling pin also work great and are good for getting out a little frustration!
Plan Ahead Perfection
Here’s the good news: Cheesecake loves being made ahead. Actually, it needs that chill time.
- 1-2 Days Before: Bake the whole cheesecake. Let it cool completely (like, really completely). Cover it well. I sometimes put plastic wrap right on the surface to stop condensation, then maybe foil over that. Stick it in the fridge. Make the strawberry topping too, and keep it in a separate airtight container in the fridge.
- Right Before Serving: Grab that chilled cheesecake and cool topping. Spoon the strawberries over the top just before you slice and serve. Looks prettier and tastes better!
Gathering Your Ingredients
Okay, ingredient time! What goes into this deliciousness? Using good quality stuff really does make a difference, especially since the recipe is fairly simple.
The Foundation: Cheesecake Base
We’re starting with a classic crumb crust. Simple and tasty.
You’ll need 110g of Digestive cookies. I like these because they have a nice, slightly wheaty taste that’s not too sweet. Perfect with cheesecake.
- Can’t find Digestives? No worries! Graham crackers are the go-to swap. Vanilla wafers or shortbread cookies could also work, but they’ll change the flavor a bit.
To hold those crumbs together: 5 Tablespoons of unsalted butter, melted. Using unsalted lets you control the saltiness. If you only have salted butter, maybe skip any salt later (though this recipe doesn’t add salt to the filling). Make sure the butter is melted, but let it cool slightly – you don’t want it piping hot.
The Heart: Creamy Filling
This is where the real magic happens. The star of the show!
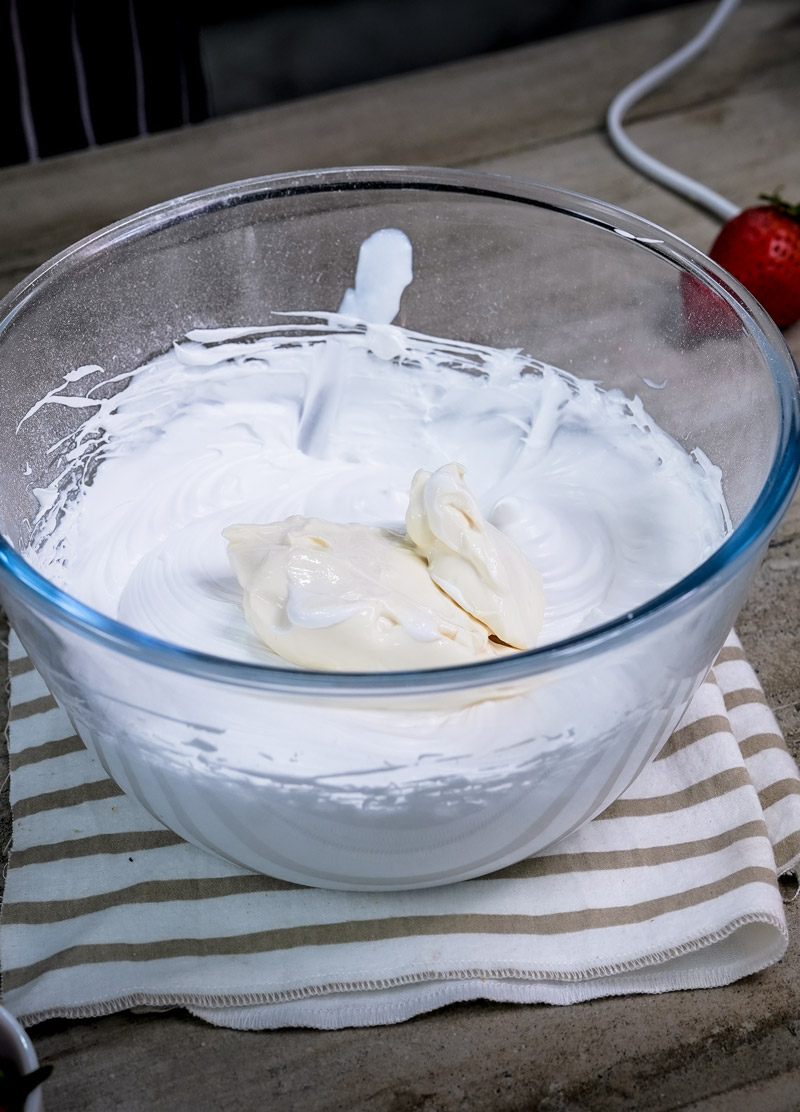
- 400g of softened, full-fat cream cheese. Okay, listen up: use the block kind, not the spreadable stuff in a tub. Please! The tub kind has extra water and things that can make your cheesecake weep or not set right. And softened is crucial. Let it hang out on your counter for at least an hour (maybe longer if your kitchen is cool) until it’s truly soft. Like, easy to poke. This helps avoid lumps! Nobody wants lumpy cheesecake.
- 1 cup (170g) of granulated sugar. Just regular white sugar works perfectly.
- 1/2 cup of sour cream. The recipe says optional, but I highly recommend it. It adds a lovely tang and makes the texture even better. Again, go for full-fat, and make sure it’s room temperature too.
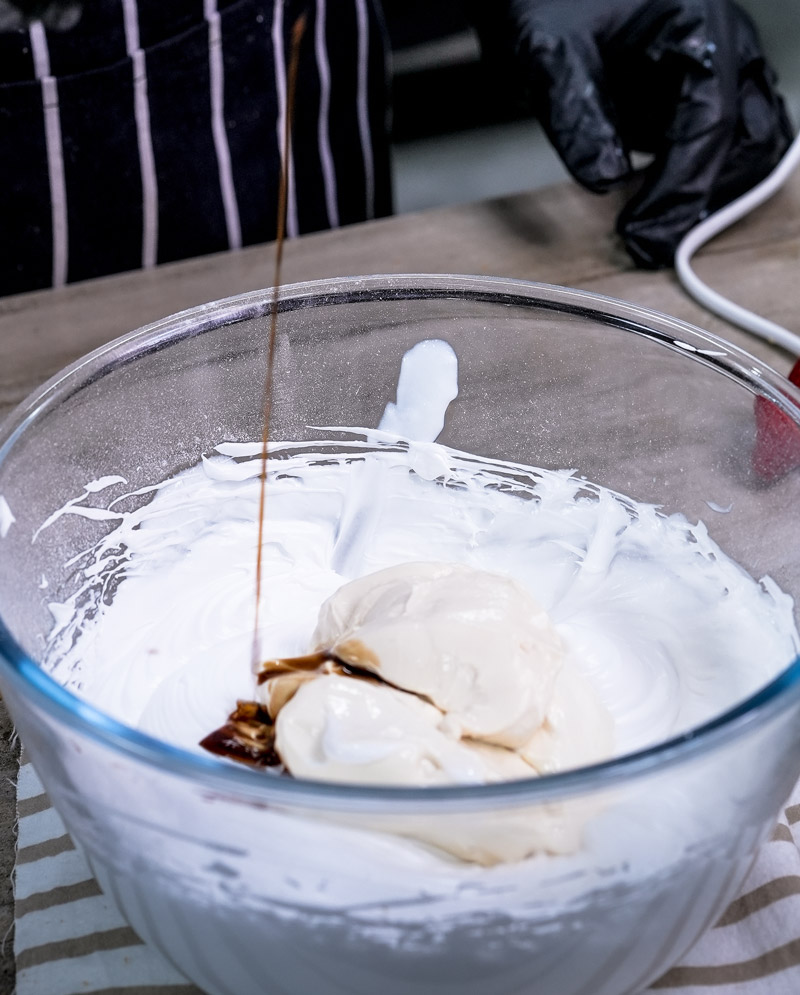
- 1 teaspoon of vanilla extract. This adds that cozy, warm flavor in the background. Pure vanilla extract is best if you have it.
- 3 large eggs. These guys give the cheesecake structure. Having them at room temp helps them mix in nicely without making the cream cheese cold and clumpy. I usually crack them into a small bowl and give them a quick whisk before adding.
The Crown: Luscious Strawberry Topping
This bright, fruity topping is the perfect counterpoint to the rich cheesecake.
- 200g of strawberries. Fresh or frozen both work fine! If you’re using frozen, no need to thaw them first. Easy peasy.
- 200g of granulated sugar. Hmm, that’s quite a bit of sugar compared to the strawberries! This will make a very sweet topping. If you like things a little less sweet, you might want to cut back on the sugar a bit. Maybe start with 150g and see?
- 1 Tablespoon of lemon juice. Freshly squeezed gives the best zing!
- 2 Tablespoons of water.
- 1/2 Tablespoon of cornstarch. This thickens the topping into a nice sauce. Pro tip: Mix the cornstarch with the water or lemon juice before adding it to the pot. This helps prevent lumps.
- 1 Tablespoon of butter. Stir this in right at the end. Salted or unsalted is fine here. It adds a nice shine and a little richness.
Substitution Station
Got allergies or missing an ingredient? Let’s see…
- Cookies: Graham crackers, vanilla wafers, or shortbread instead of Digestives. Need a gluten free Strawberry baked cheesecake? Just use certified gluten-free cookies! Easy swap.
- Sour Cream: Full-fat Greek yogurt could work, adding a slightly different tang. Or just leave it out if you prefer.
- Sugar in Topping: Like I mentioned, feel free to adjust the sugar down if you want it less sweet. Maple syrup could work, but it’ll change the flavor and how thick it gets.
- Lemon Juice: Lime juice would also work for a citrus kick.
Let’s Bake! Step-by-Step Guide
Alright, ready to turn these ingredients into cheesecake? Maybe put on some tunes? Let’s get cooking!
Prepping the Stage
First things first. Get that oven heating up to 325°F (163°C). While it’s warming up, grab your 8 or 9-inch springform pan. I like to give the bottom and sides a quick spray or rub with butter, then line the bottom with a circle of parchment paper. It’s like extra insurance against sticking!
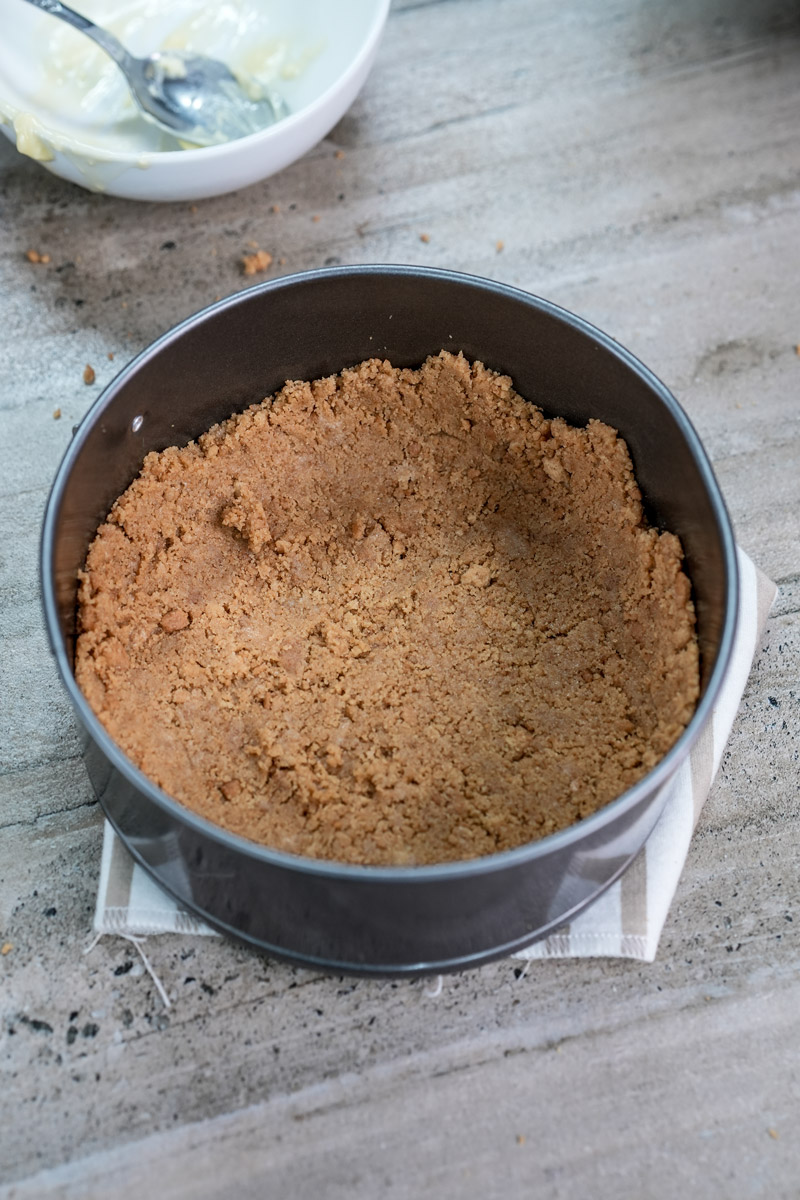
Crafting the Crust
Time for the base. If your 110g Digestive cookies aren’t crumbs yet, make it happen! A food processor is fast. Or, put them in a sturdy zip-top bag and have some fun whacking them with a rolling pin. You want mostly fine crumbs, but a few bigger bits are okay for texture. Pour in the 5 Tablespoons of melted unsalted butter. Mix it up until all the crumbs are damp. It should look kind of like wet sand. Dump these buttery crumbs into your prepared pan. Use the flat bottom of a glass or measuring cup to press the crumbs down firmly and evenly across the bottom. You can push them slightly up the sides too, maybe half an inch or so, if you like that look. Now, stick this crust in the fridge to chill and get firm while you make the filling. Give it at least 10-15 minutes.
Mixing the Magic Filling
Okay, this part is key for a smooth texture. Pay attention here!
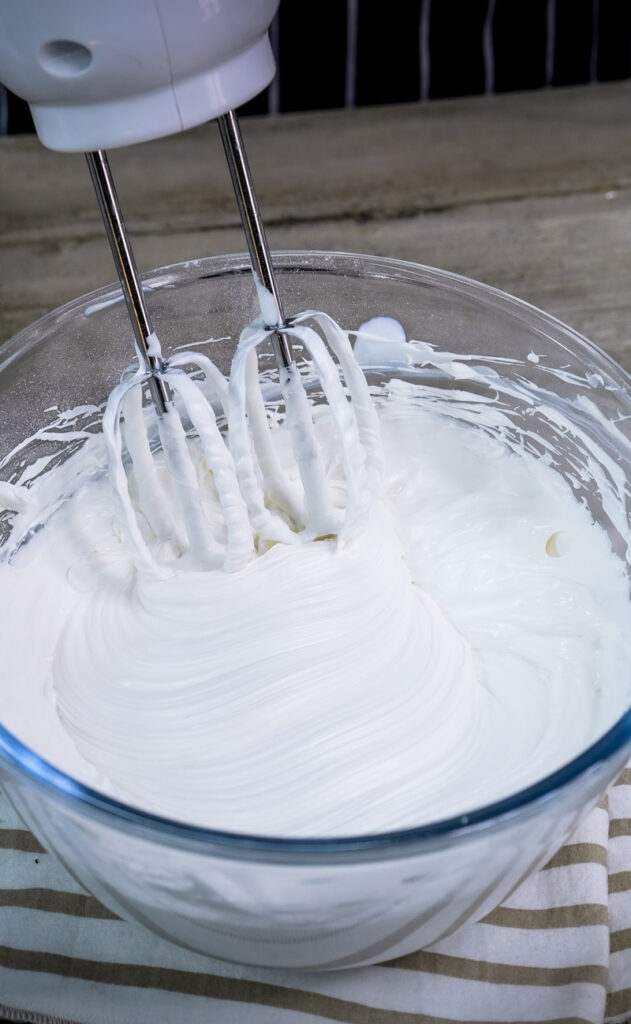
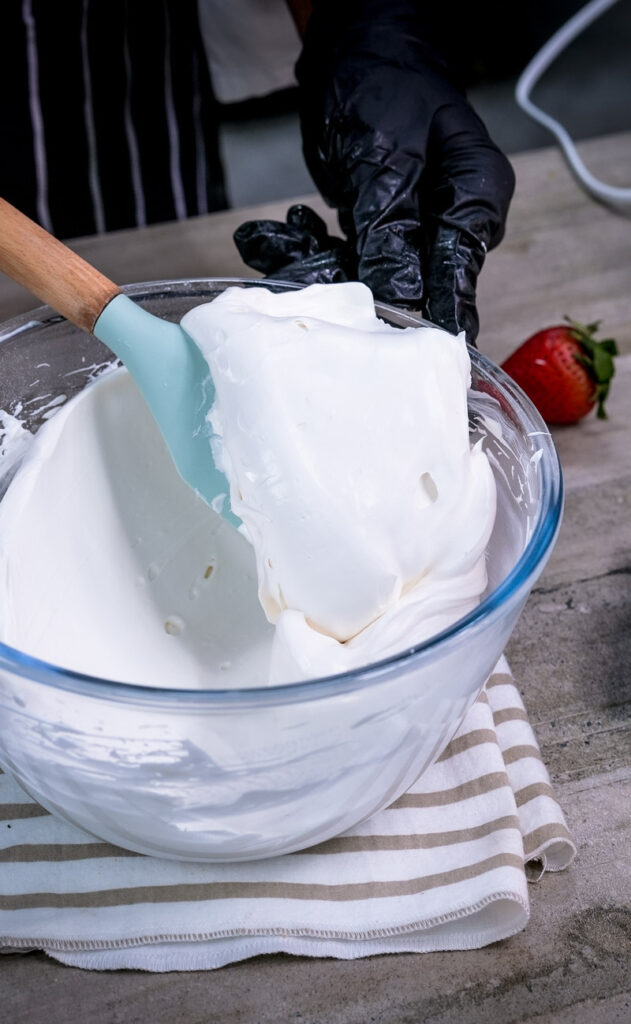
In a large bowl, use your electric mixer on medium speed. Beat the 400g of softened cream cheese until it’s totally smooth and creamy. And I mean it! Scrape down the sides and bottom of the bowl often with your spatula. No lumps allowed! Lumps are the enemy of good cheesecake.
Once it’s smooth, add the 1 cup (170g) granulated sugar. Beat again until it’s all mixed in and the mixture looks lighter and maybe a bit fluffy.
Now, if you’re using it, add the 1/2 cup room temperature sour cream and 1 teaspoon vanilla extract. Mix on low speed just until they disappear into the batter. Scrape that bowl again!
Finally, add the 3 lightly beaten large eggs. Mix on the lowest possible speed just until you don’t see yellow streaks anymore. Seriously, don’t overmix! Beating in too much air makes the cheesecake puff up like crazy in the oven, and then… crack. Sadness. Stop mixing as soon as the eggs are just combined. The batter should look smooth, thick, and yummy.
Baking to Perfection
Get your chilled crust out of the fridge. Pour that glorious cream cheese filling over the crust. Use your spatula to spread it out evenly.
Now, for the baking. Put the pan into your preheated 325°F (163°C) oven. The recipe says 15-20 minutes.
Okay, important note time! Like we mentioned, 15-20 minutes is super short for a baked cheesecake. Most take closer to an hour.
- What you might get: After 15-20 minutes, the edges might look a little set, but the center will probably still be very wobbly, almost liquidy. This short bake could give you a very soft, intensely creamy cheesecake. Maybe more like a baked custard in the middle once it’s chilled. Could be delicious, just different!
- What’s typical: Usually, you bake cheesecake until the edges are set and puffed a bit, but the very center (like a 2-3 inch circle) still has a little jiggle, like Jell-O, when you gently nudge the pan. This often takes 50-90 minutes.
- My two cents: Check it at 15-20 minutes like the recipe says. See how it looks. If you want that firmer, more traditional “baked” cheesecake texture, you’ll definitely need to bake it longer. Maybe check it every 10-15 minutes after the initial time until you get that slight jiggle in the middle. Don’t bake it until it’s totally firm, or it’ll be dry and maybe rubbery.
Also, this recipe doesn’t mention a water bath (bain-marie). That’s often used for cheesecakes, especially with longer baking times, because it helps them cook gently and prevents cracks. If you do decide to bake longer, you might want to think about using one. Just wrap the bottom of your springform pan tightly in a couple of layers of heavy-duty foil, place it in a bigger roasting pan, and pour about an inch of hot water into the bigger pan around the cheesecake.
Cooling is Key
So, you’ve baked your cheesecake (whether for 15 minutes or longer!). Now what? Turn off the oven. Crack the oven door open just a bit – prop it with a wooden spoon. Let the cheesecake cool down slowly inside the turned-off oven for about an hour. This is another trick to help prevent cracks! It hates sudden temperature changes.
After an hour in the cooling oven, take the cheesecake out and put it on a wire rack. Let it cool all the way to room temperature. Don’t rush this part! Once it’s cool, cover it loosely with plastic wrap (or more tightly if it’s going in overnight) and put it in the refrigerator. It needs to chill for at least 4 hours. But honestly? 6 hours, or even better, overnight, makes it taste so much better and gives it the perfect firm texture. Patience, grasshopper!
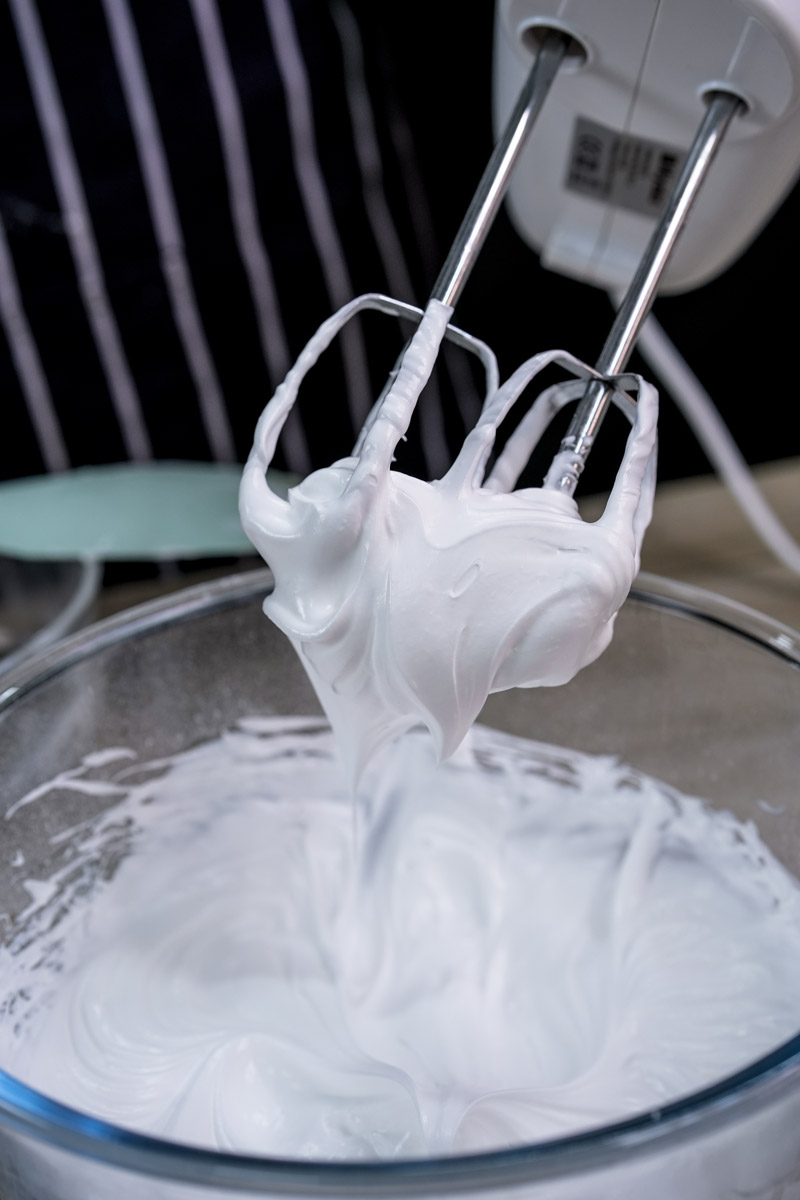
Whipping Up the Strawberry Dream
While the cheesecake is chilling its heart out, let’s make the topping.
In your saucepan, combine the 200g strawberries (cut them up if they’re big), 200g sugar (or less, if you prefer!), 1 Tablespoon lemon juice, 2 Tablespoons water, and the 1/2 Tablespoon cornstarch (remember my tip about mixing it with the water/lemon juice first?).
Put the pan over medium heat. Stir it pretty often while the sugar dissolves and it starts to bubble gently. Once it’s bubbling, turn the heat down a bit and let it simmer for 5-10 minutes. Stir it now and then. The strawberries will get soft, and the sauce will thicken up. How thick? It should coat the back of your spoon.
Take it off the heat and stir in that 1 Tablespoon of butter. Keep stirring until the butter melts right in. Now, let this topping cool down completely before you put it on the cheesecake. You can pop it in the fridge to speed things up once it’s not steaming hot.
The Grand Finale
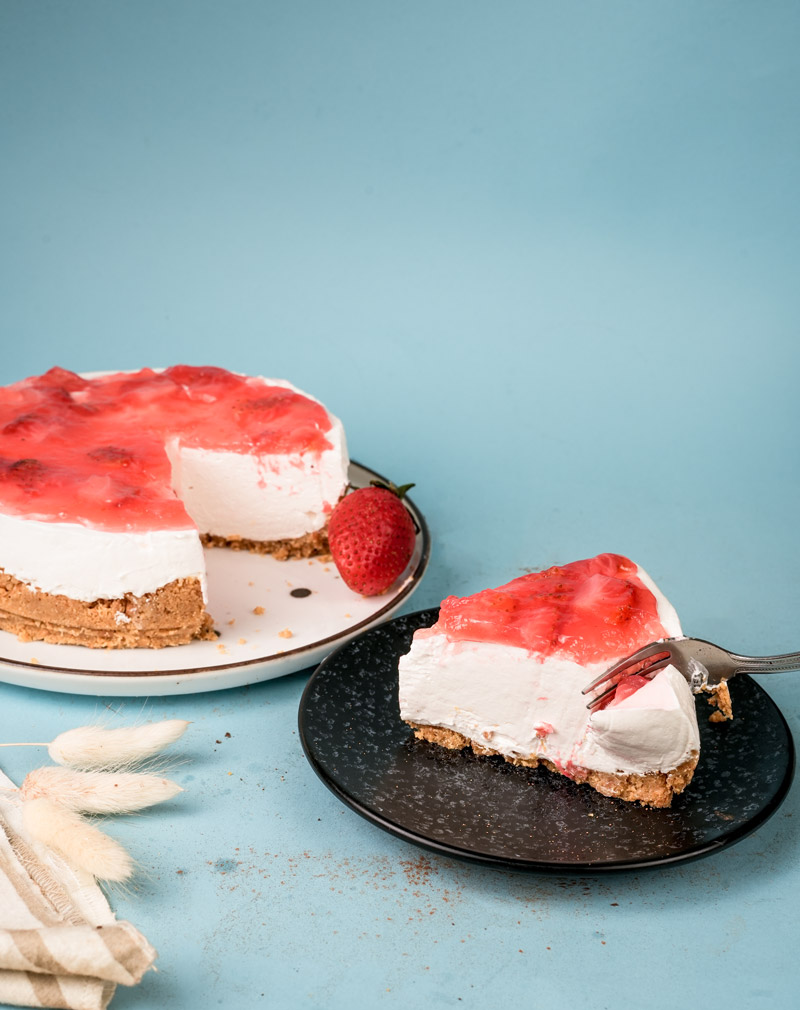
Okay, the moment we’ve been waiting for! Is your cheesecake fully chilled? Is your topping totally cool? Awesome!
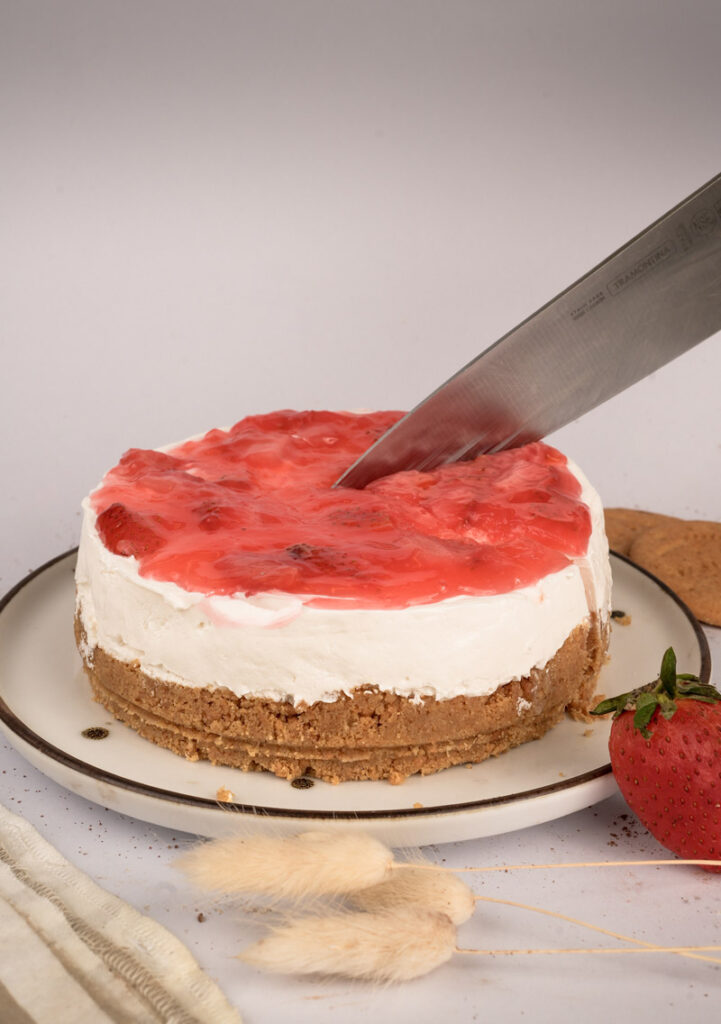
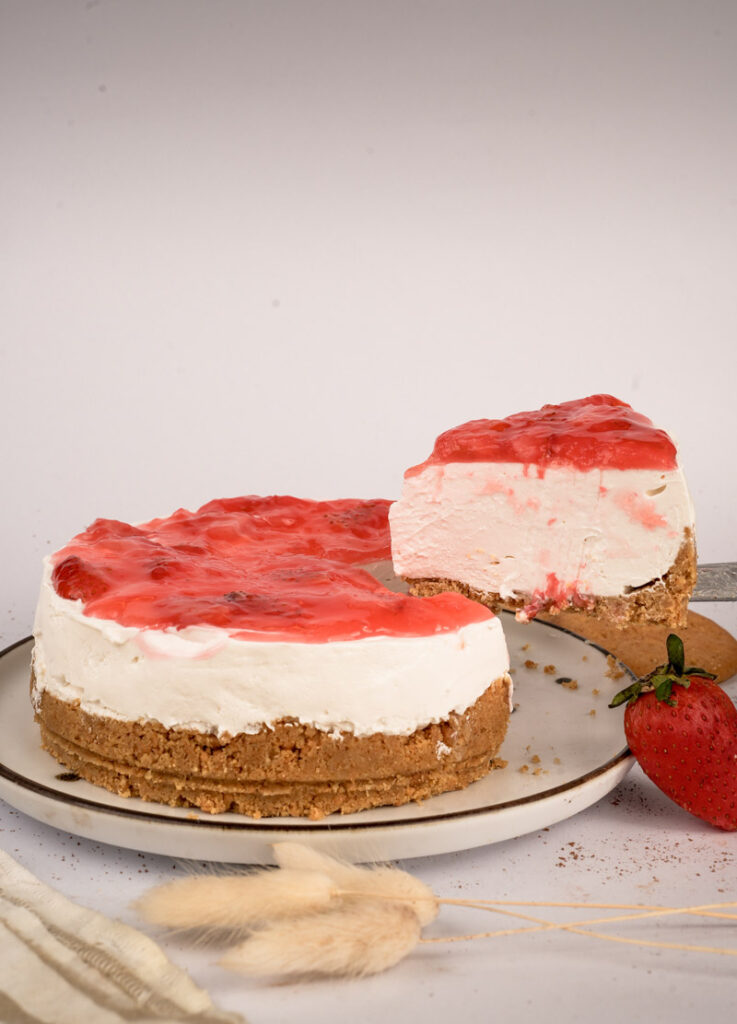
Carefully run a thin knife around the edge of the cheesecake if needed, then unbuckle and remove the outer ring of the springform pan. If you used parchment on the bottom, you might be able to carefully slide the cheesecake onto a pretty serving plate.
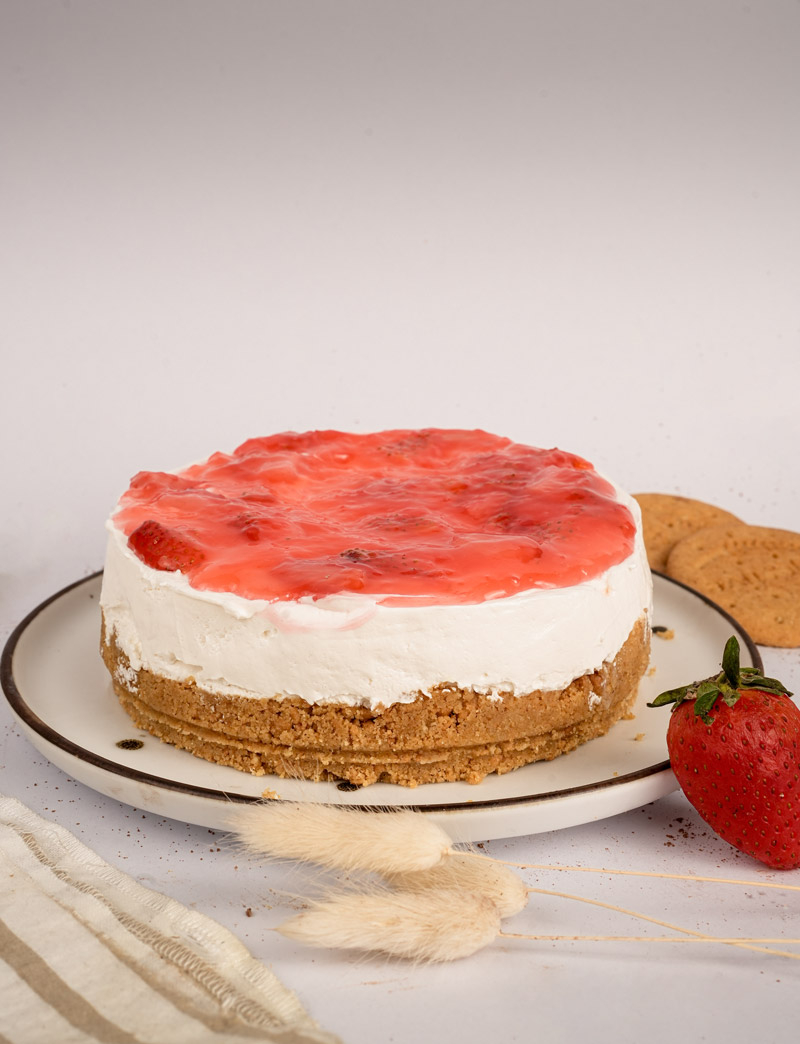
Spoon that beautiful, cool strawberry topping over the top. Cover the whole thing, make a pretty pattern, pile it in the middle… whatever looks good to you!
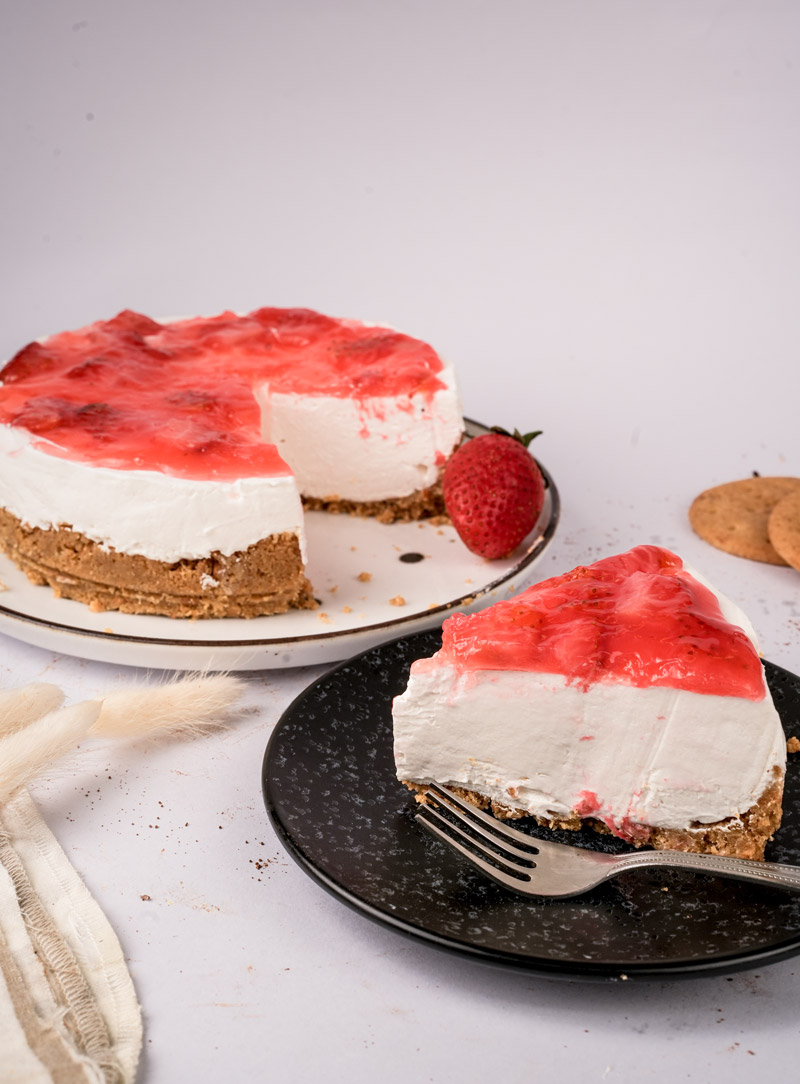
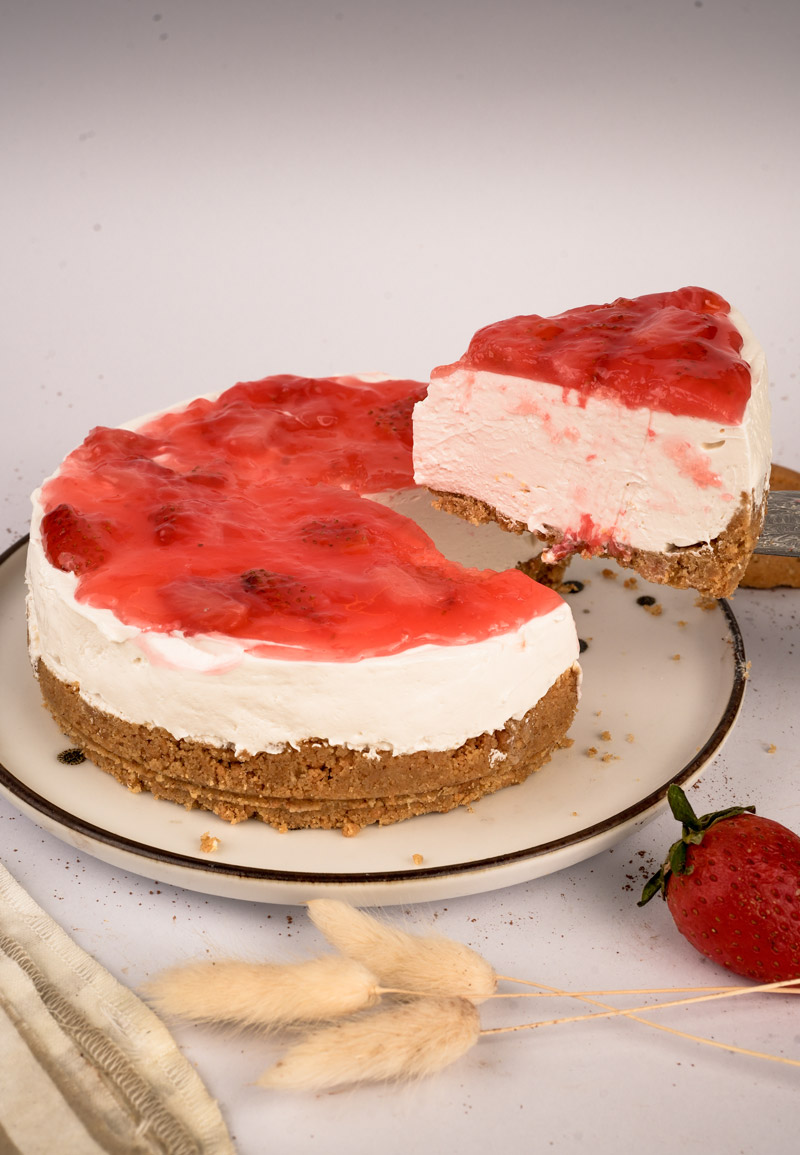
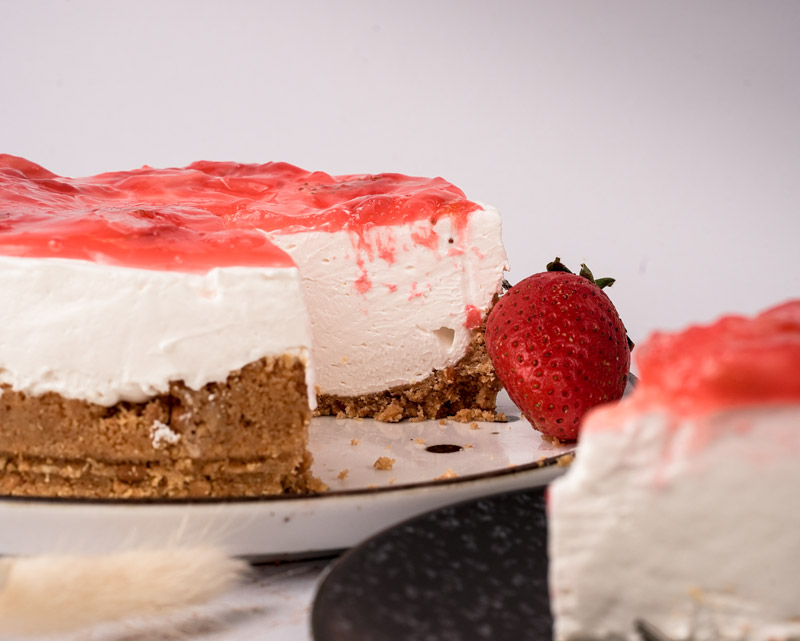
And… ta-da! You did it! Your very own homemade Strawberry Baked Cheesecake. Doesn’t it look amazing?
Making It Your Own: Variations & Customizations
One of the best parts of baking is playing around and making things yours. Here are a few ideas:
- Dietary Tweaks:
- Gluten-Free: Easy peasy! As we talked about, just use your favorite gluten free cookies for the crust. Check your other ingredients like vanilla to be sure they’re GF if necessary. Boom: gluten free Strawberry baked cheesecake!
- Vegan: Oof, baked cheesecake is a tough one to make vegan and have it taste the same. Usually, vegan recipes need totally different ingredients like soaked cashews, tofu, or special vegan cream cheese. This recipe probably wouldn’t convert well just by swapping things.
- Flavor Twists:
- Extra Zing: Add the zest (the finely grated peel) of half a lemon or orange to the filling when you add the vanilla. Brightens things up!
- Warm Spices: A pinch of cinnamon or cardamom mixed into the crust crumbs adds a cozy flavor.
- Different Extracts: Try almond extract instead of vanilla in the filling, or maybe a tiny drop of rosewater in the strawberry topping? Fancy!
- Dressing It Up (or Down):
- Feeling Fancy? Before baking, take a few spoonfuls of the strawberry topping (before it’s fully cooked, maybe just the purée part) and swirl it into the cheesecake batter. Pretty! Garnish the finished cheesecake with fresh mint leaves, curls of white chocolate, or serve with a dollop of whipped cream.
- Keeping it Simple? Honestly, the cheesecake and topping are fantastic just as they are. Sometimes simple is best!
- Seasonal Swaps: Strawberries are great, but other fruits work too!
- Summer: Raspberries, blueberries, peaches (peeled and chopped), or cherries would be delicious for the topping.
- Fall: How about a warm, spiced apple or pear topping? Cook ’em down like the strawberries.
- Winter: A cranberry-orange topping sounds festive!
Serving & Storing Your Masterpiece
You baked a beauty! Let’s make sure you serve and store it right.
Presentation Perfection
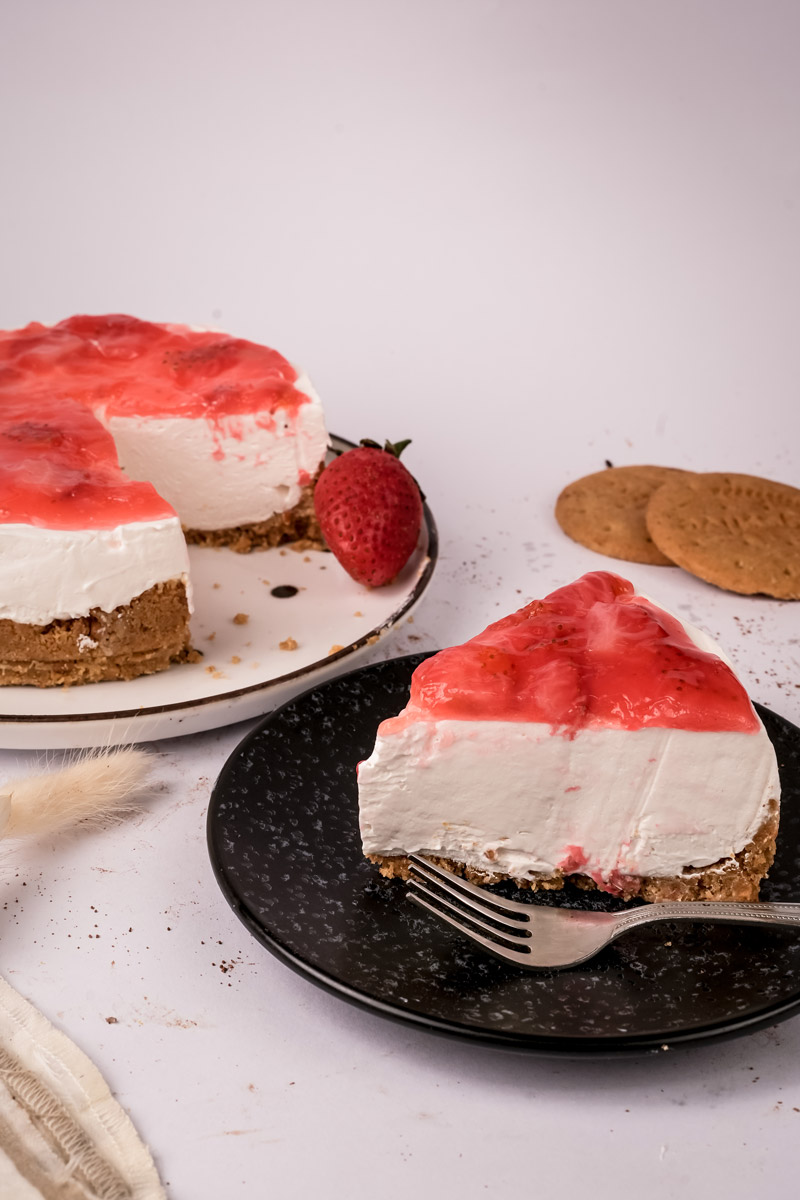
Want those nice, clean slices like you see in bakeries? Here’s the trick: use a big, sharp knife. Dip the knife blade into a tall glass of hot water, then wipe it clean with a paper towel. Make one cut. Then, dip, wipe, and cut again. Repeat for every single slice. It stops the creamy filling from smearing and keeps the slices looking sharp. Plate ’em up and make sure everyone gets plenty of that yummy topping!
Perfect Pairings
This cheesecake is pretty rich, so you don’t need much alongside it.
- Drinks: A good cup of coffee or tea is always a winner. Or, if you’re feeling fancy, a small glass of dessert wine like a sweet Riesling could be nice.
- Sides: Honestly? It doesn’t need anything! But a little blob of freshly whipped cream (maybe not too sweet) is never a bad idea.
Keeping it Fresh
Got leftovers? Lucky you! Store the cheesecake in the fridge. Cover it well – plastic wrap works, or put it in an airtight container. It should stay tasty for about 3-5 days. Just know the crust might get a little less crunchy over time.
A Note on Reheating
Yeah… don’t do that. Baked cheesecake is meant to be eaten cold. Heating it up will make the texture weird. Just… no.
Freeze Frame
Can you freeze cheesecake? Yes, you can! It actually freezes pretty well. Here’s how:
- Make sure the baked cheesecake is completely cooled and chilled. Freeze it without the strawberry topping.
- Pop the uncovered cheesecake into the freezer for about an hour, just until it’s firm to the touch.
- Take it out and wrap it super well. I mean tightly. Use several layers of plastic wrap, then wrap it again in aluminum foil. Like you’re mummifying it for freshness!
- It should keep in the freezer for 1-2 months.
- To thaw: Take off the foil and plastic wrap (this stops condensation from making it soggy). Let it thaw slowly overnight in the refrigerator.
- Make the strawberry topping fresh (or thaw frozen topping separately) and add it just before serving. The texture after freezing might be a tiny bit denser, but it’ll still be delicious!
And there you have it! Your complete guide to baking an incredible Strawberry Baked Cheesecake. I really hope you have fun making it – and even more fun eating it! Happy baking!
PrintStrawberry Baked Cheesecake
Whip up this dreamy homemade strawberry cheesecake! It’s creamy, tangy, topped with sweet strawberries, and surprisingly straightforward. A perfect treat to impress yourself or your friends. Let’s bake some happiness!
- Prep Time: 15-20 minutes
- Cook Time: 15-20 minutes
- Total Time: Approx. 4.5 – 5 hours (includes chilling) (minimum)
- Yield: 7–8 slices 1x
- Category: Dessert
- Cuisine: American
Ingredients
For the Crust:
- 110g Digestive cookies (or graham crackers)
- 5 Tbsp unsalted butter, melted
For the Creamy Filling:
- 400g full-fat block cream cheese, very softened (Seriously, let it sit out!)
- 1 cup (170g) granulated sugar
- 1/2 cup sour cream (optional, but recommended!), room temperature
- 1 tsp vanilla extract
- 3 large eggs, room temperature, lightly beaten
For the Strawberry Topping:
- 200g strawberries (fresh or frozen)
- 200g granulated sugar (Note: quite sweet, adjust if desired)
- 1 Tbsp lemon juice
- 2 Tbsp water
- 1/2 Tbsp cornstarch (Mix with water/lemon juice first!)
- 1 Tbsp butter
Instructions
- Prep Oven & Pan: Preheat oven to 325°F (163°C). Lightly grease an 8 or 9-inch springform pan (line bottom with parchment for extra ease).
- Make Crust: Crush cookies into fine crumbs. Stir in melted butter until combined (like wet sand). Press firmly onto the bottom of the prepared pan. Chill in the fridge while you make the filling.
- Mix Filling: Beat softened cream cheese with an electric mixer until completely smooth. Scrape the bowl often! Beat in sugar until fluffy.
- Add Wet Ingredients: Gently mix in sour cream (if using) and vanilla on low speed. Add beaten eggs slowly, mixing on the lowest speed just until combined. Do not overmix!
- Bake: Pour filling over the chilled crust. Spread evenly. Bake for 15-20 minutes. (See Notes about bake time!)
- Cool Down: Turn off the oven. Prop the door open slightly. Let cheesecake cool in the oven for 1 hour. Then, cool completely on a wire rack at room temperature.
- Chill Out: Cover loosely and refrigerate for at least 4 hours, but preferably 6+ hours or overnight. This step is crucial!
- Make Topping: While cheesecake chills, combine strawberries, sugar, lemon juice, water, and cornstarch slurry in a saucepan. Cook over medium heat, stirring, until bubbling and thickened (5-10 min simmer). Stir in butter off-heat. Cool completely.
- Serve: Remove cheesecake from pan. Top with the cooled strawberry sauce. Slice (dip knife in hot water & wipe between cuts!) and enjoy!
Notes
- Room Temp is Key! Seriously, make sure your cream cheese, sour cream, and eggs are not cold. This prevents lumps and helps everything mix smoothly. I usually leave mine out for at least an hour.
- Bake Time Heads-Up: 15-20 minutes is very short for a baked cheesecake. This might result in a much softer, creamier center. For a more traditional, firmer texture, you’ll likely need to bake longer (maybe 50-70 mins total?), until the center has just a slight jiggle. Keep an eye on it! Consider a water bath if baking longer to prevent cracks.
- Sweetness Check: The topping uses a lot of sugar! Feel free to reduce it to 150g or even 100g if you prefer a less sweet, more tart berry flavor.
- Serving: Delicious plain, or add a dollop of whipped cream.
- Storage: Cover leftovers well and store in the fridge for 3-5 days. The crust will soften slightly over time.
- Freezing: Freeze without the topping! Wrap the chilled cheesecake tightly (plastic wrap then foil). Thaw overnight in the fridge before adding fresh topping. Best enjoyed within 1-2 months. Do not reheat.