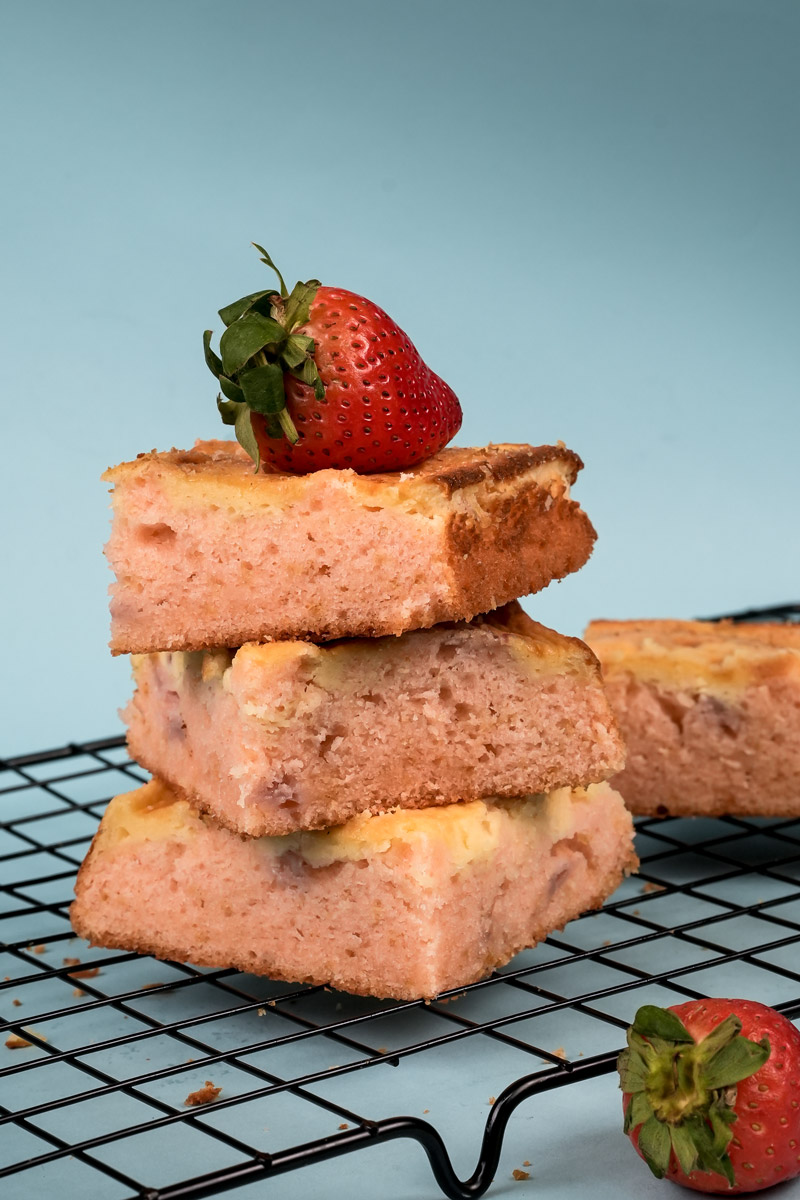
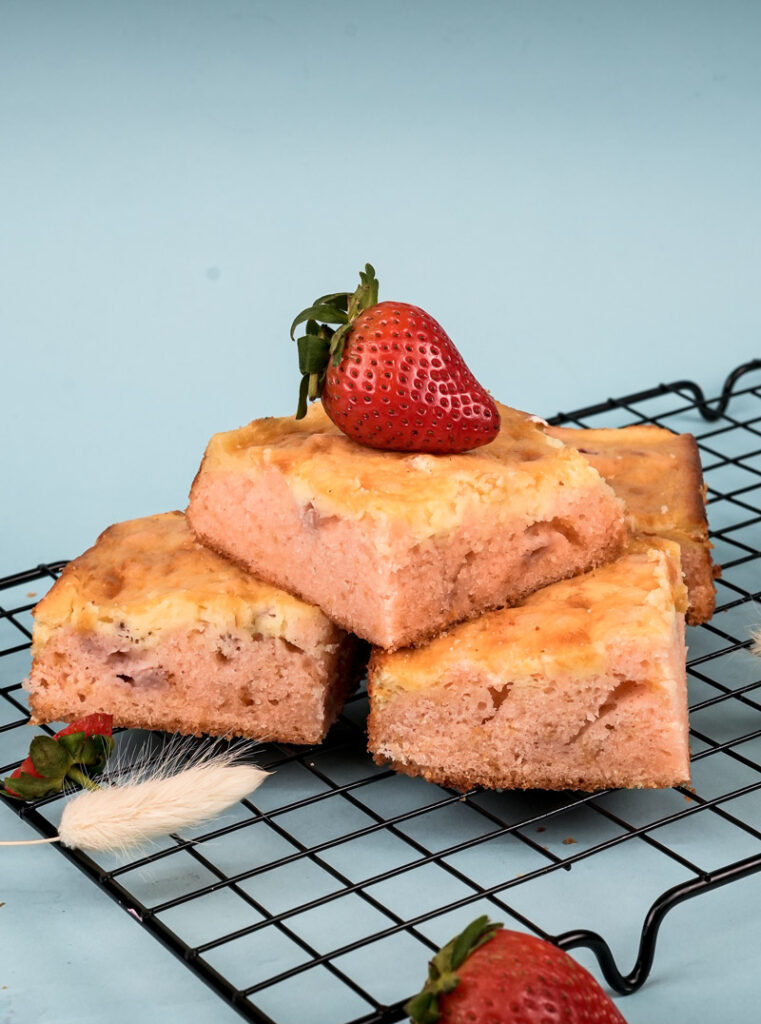
Hey everyone! Ready to bake something amazing? We’re making Strawberry Cheesecake Brownies today. Seriously, these things are like the best dessert mashup ever.
Imagine a super fudgy brownie base. Got it? Now picture creamy, tangy cheesecake layered on top. And then? Swirls of bright red strawberry goodness running through it all. It sounds fancy, but trust me, you can totally make this.
This isn’t some ancient recipe passed down for generations. Nope, this is pure modern baking fun! We’re taking two things people love – brownies and cheesecake – and mixing them with strawberries. Why? Because it’s delicious! These easy Strawberry Cheesecake Brownies hit all the right notes. Rich chocolate. Creamy cheesecake. Sweet strawberries. It’s a perfect combo that looks impressive but is surprisingly simple to whip up. Let’s grab those aprons!
So, What’s Involved? Here’s the Lowdown
Making these treats is a fun little project. Here’s what you’re looking at:
- Hands-On Time: You’ll probably spend about 30-35 minutes actually mixing things up. Easy peasy.
- Baking Time: They bake pretty fast, around 20-25 minutes. Keep an eye on them!
- The Hard Part? Waiting! Cooling is key. Like, really important. They need time to set properly so you can slice ’em neat. Plan for at least a few hours of chill time.
- How Many Does it Make? You’ll get about 10-12 squares. They’re pretty rich, so a small square goes a long way!
- Need more? Double everything and use a 9×13 inch pan. Just add maybe 10-15 minutes to the baking time.
- Need fewer? Halving is tricky. Maybe try a loaf pan? You’ll have to watch the baking time really closely.
- Is it Hard? Nah. I’d say Easy to Medium. If you’ve made brownies from a box, you can handle this. The swirling looks cool but is simple. The main thing is don’t overbake them!
- Stuff You’ll Need: Nothing too crazy!
- An 8×8 inch square baking pan (metal works best)
- Parchment paper (Trust me. This makes getting them out so much easier.)
- Mixing bowls (you’ll need at least two)
- Whisk or electric mixer (handheld is fine!)
- A spatula or wooden spoon
- Measuring cups and spoons
- Small pot (if melting butter on the stove)
- A knife or skewer (for swirling!)
- Don’t have a mixer? A whisk and some arm power work too! No parchment? Grease and flour the pan really well, but the edges might be a bit crumbly.
- Make Them Ahead? Totally! These are actually better the next day. Bake them, let them cool, then chill them in the fridge. Perfect for prepping before a party.
Let’s Get Our Ingredients Together
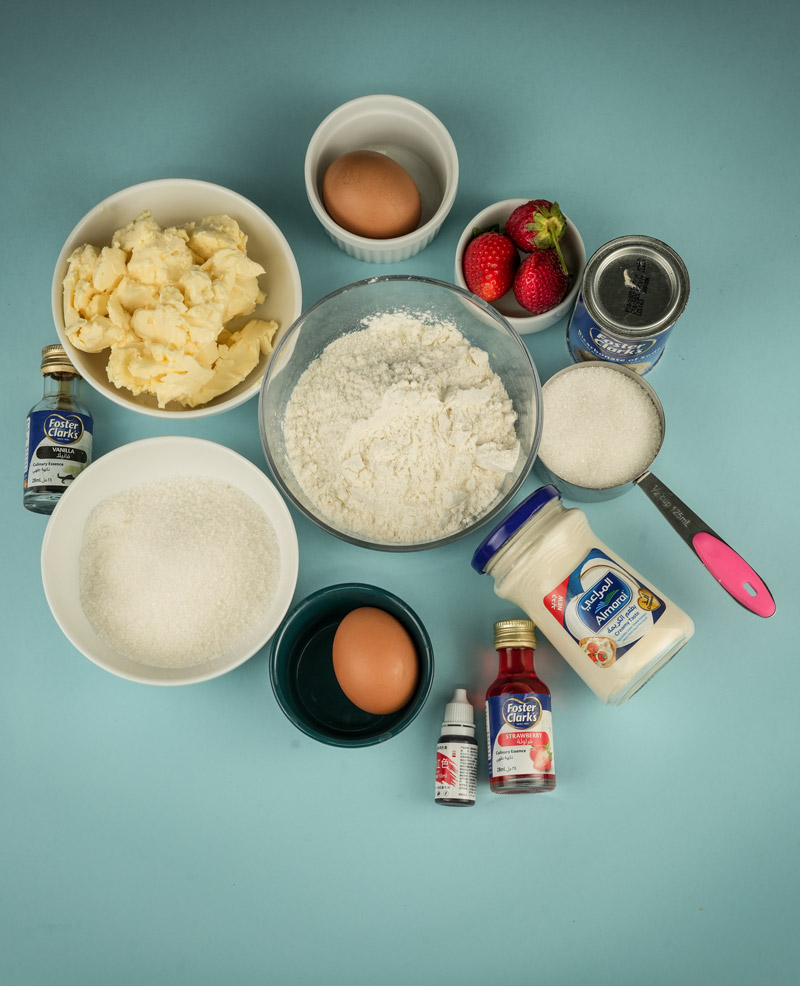
Okay, ingredient time! Good quality stuff helps, but your regular pantry items will work just fine. Here’s what we need, based on your list plus a couple of must-haves I added for flavour and texture:
| Ingredient | Amount | Notes |
|---|---|---|
| For the Brownie | ||
| Unsalted Butter | 145g (⅔ cup) | Melted. Use unsalted to control saltiness. |
| Granulated Sugar | 110g (½ c + 1T) | For sweetness and fudgy texture. |
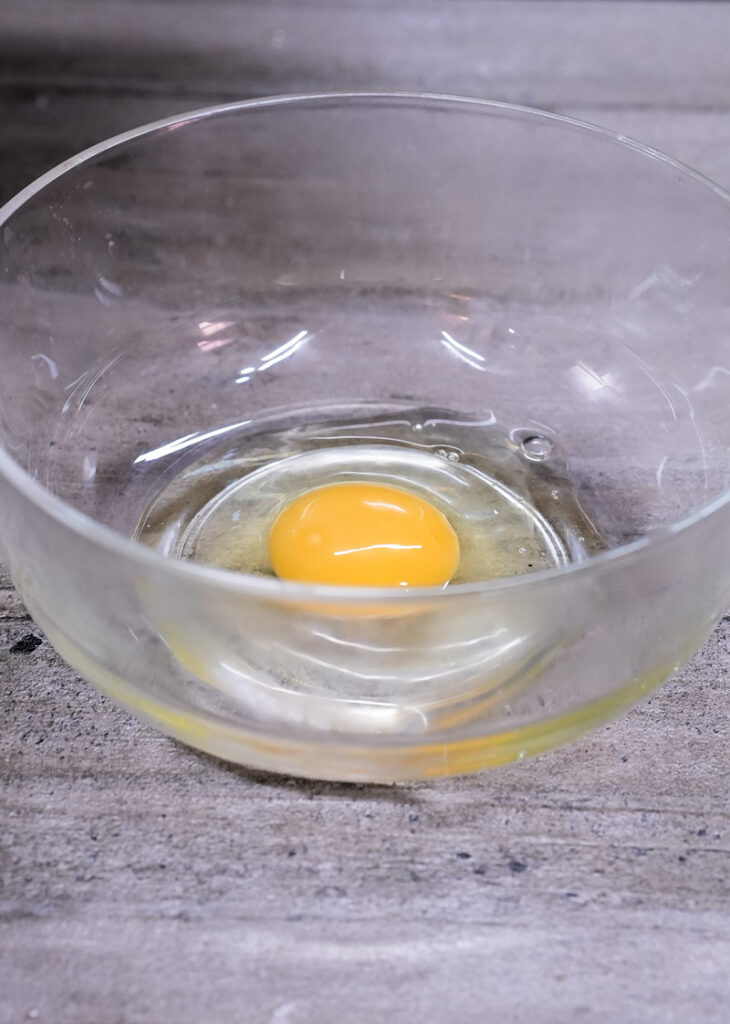
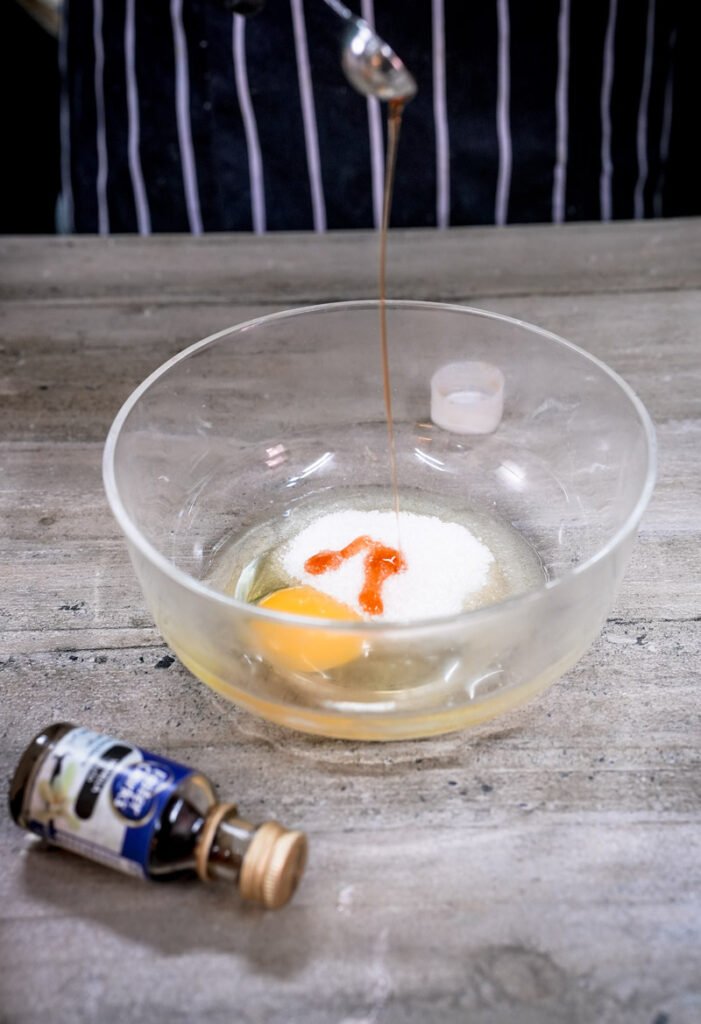
| Large Egg | 1 | Room temp helps it mix in better! |
| Strawberry Essence | 1 tsp | Gives that strawberry kick. Use one you like the taste of. |
| Red Food Colouring | 1 tsp (optional) | Gel colour is best for bright pink/red without adding liquid. |
| All-Purpose Flour | 100g (¾ cup) | Spoon into the cup, don’t pack! |
| Unsweetened Cocoa | ~30g (¼ cup) | Highly Recommended! Needed for that brownie flavour. Dutch-process is nice. |
| Salt | ¼ tsp | Don’t skip! Balances the sweetness. |
| For Cheesecake | ||
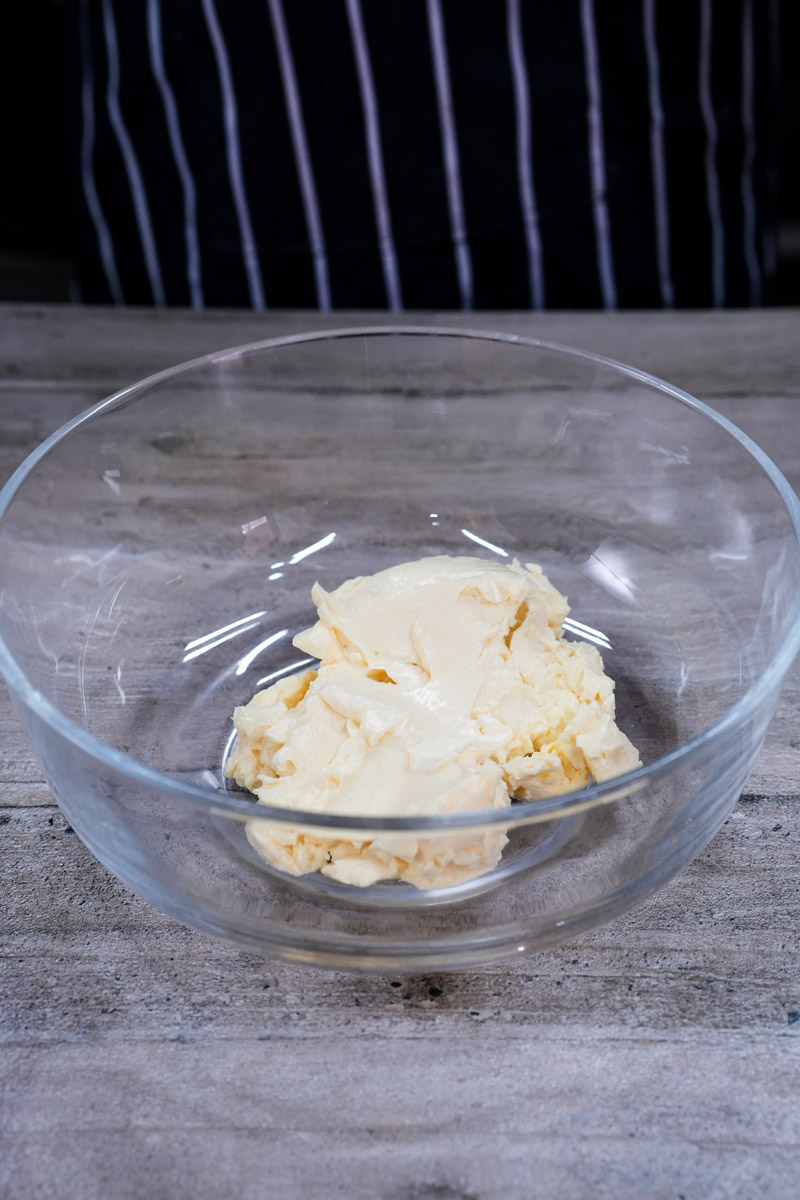
| Cream Cheese | 200g (~1 block) | Must be softened! Full-fat, brick-style works best. Sit it out early. |
| Granulated Sugar | ⅓ cup (~65-70g) | Sweetens the tang. |
| Large Egg | 1 | Room temp again, please! |
| Vanilla Essence | 1 tsp | Pure vanilla extract if you have it. Yum. |
| For Strawberry Swirl | ||
| Strawberry Jam | ~¼ cup | Also Recommended! Adds real strawberry bits and flavour. Seedless or not, your call! |
Quick Ingredient Tips:
- Room Temp Matters: Seriously, let the cream cheese and eggs sit out for about an hour. It makes the cheesecake so much smoother. Cold cream cheese = lumpy cheesecake. No fun.
- Flour Trick: Don’t scoop flour straight from the bag! Spoon it into your measuring cup, then level it off. Scooping packs it down, and too much flour makes dry brownies. Blech.
- Cocoa Power: If you skip the cocoa, you’ll have more of a strawberry blondie. Still tasty, but not really a brownie! Dutch-process gives that deep, dark chocolate look.
- Jammin’: If your jam is super thick, just give it a good stir. Maybe warm it for like, 5 seconds in the microwave to make it easier to swirl.
Let’s Bake! Step-by-Step Fun
Alright, let’s do this easy Strawberry Cheesecake Brownies recipe! It’s less complicated than it sounds.
Get Ready: First, crank your oven up to 350°F (175°C). Line your 8×8 pan with parchment paper. Leave some paper hanging over the sides like little handles – you’ll thank me later when you lift the whole thing out easily! Maybe give the paper a quick spray with non-stick spray too.
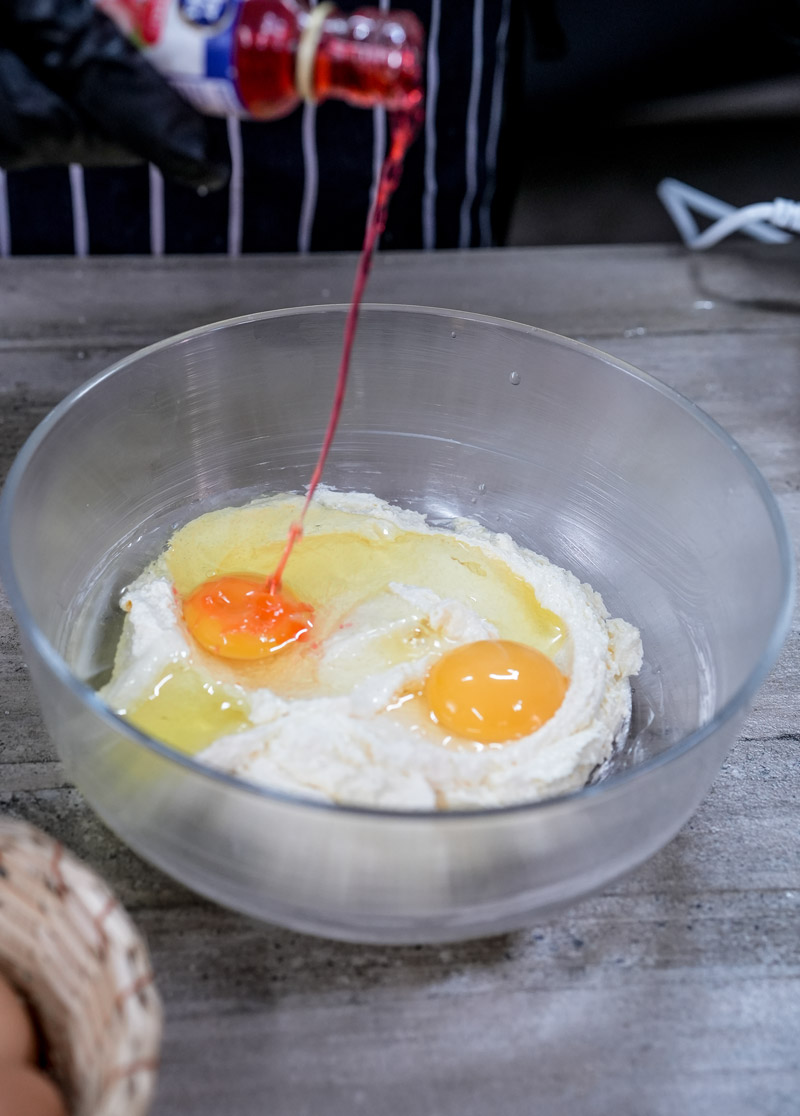
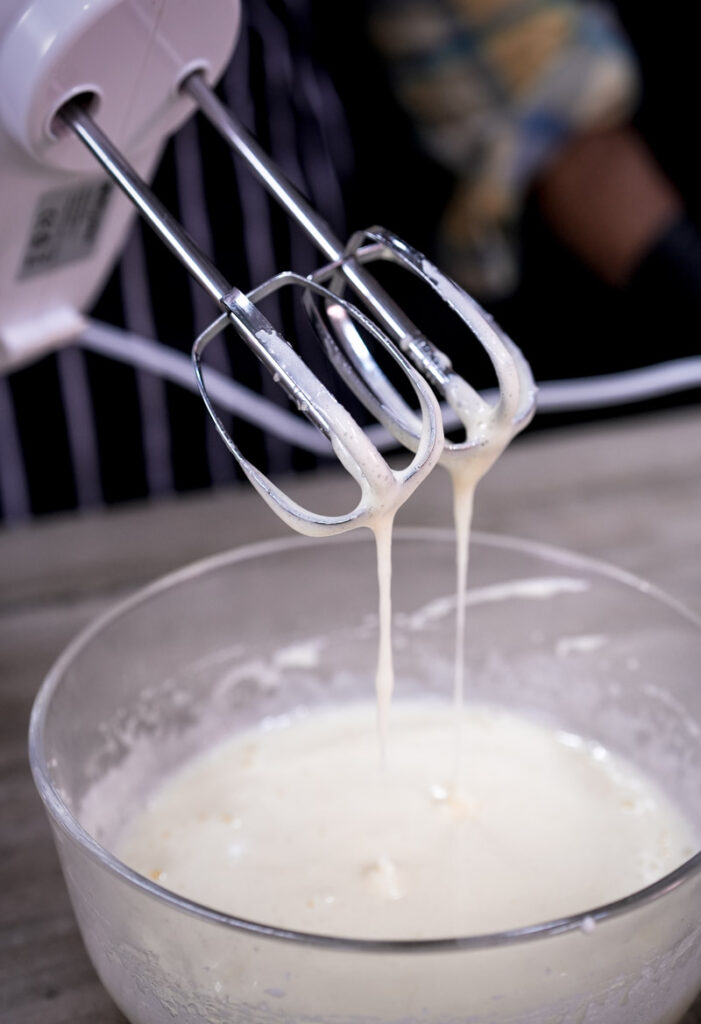
Brownie Time: Grab a bowl. Melt the 145g butter (microwave or stovetop). Whisk in the 110g sugar. Then whisk in the egg (remember, room temp!) and 1 tsp strawberry essence. Add the red food colouring now if you’re using it, just a bit at a time ’til it looks nice and pink. In a separate small bowl, whisk the 100g flour, ¼ cup cocoa powder (use it!), and ¼ tsp salt. Dump the dry stuff into the wet stuff. Now, gently fold it all together with a spatula. Stop mixing as soon as you don’t see dry flour streaks. Overmixing = tough brownies. We want fudgy! The batter will be thick. Like, really thick.

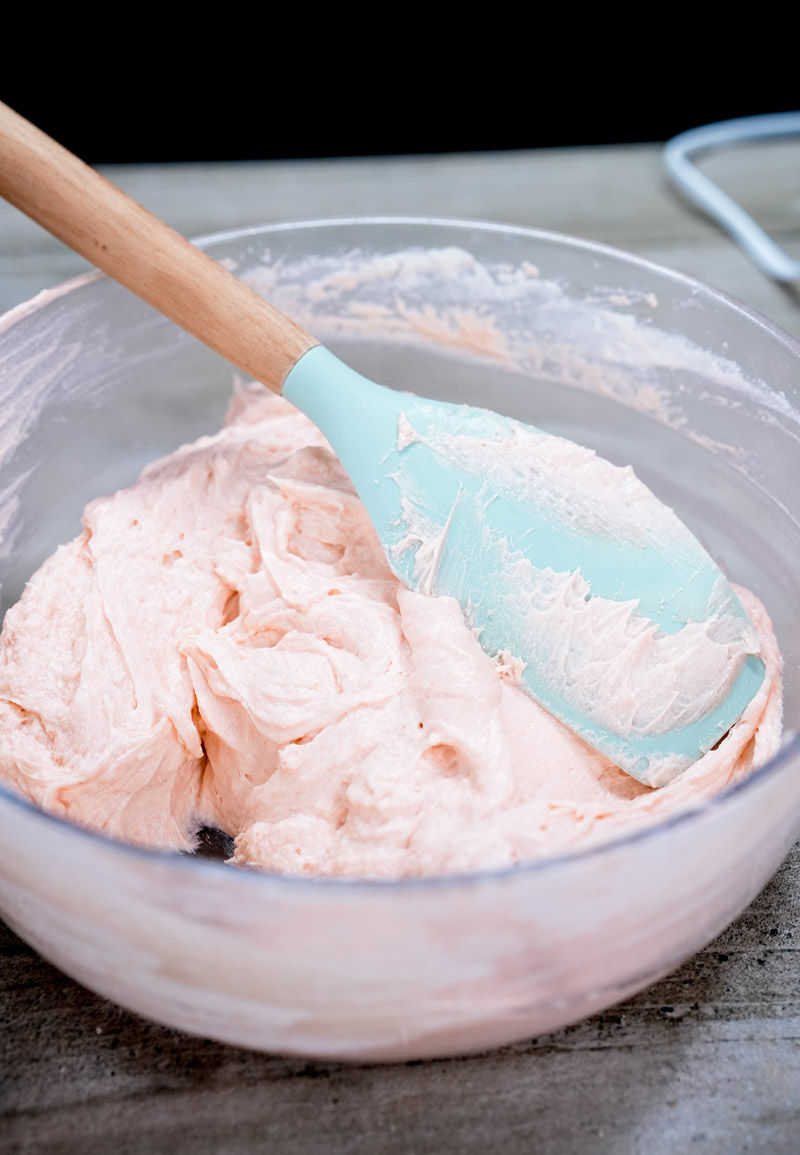
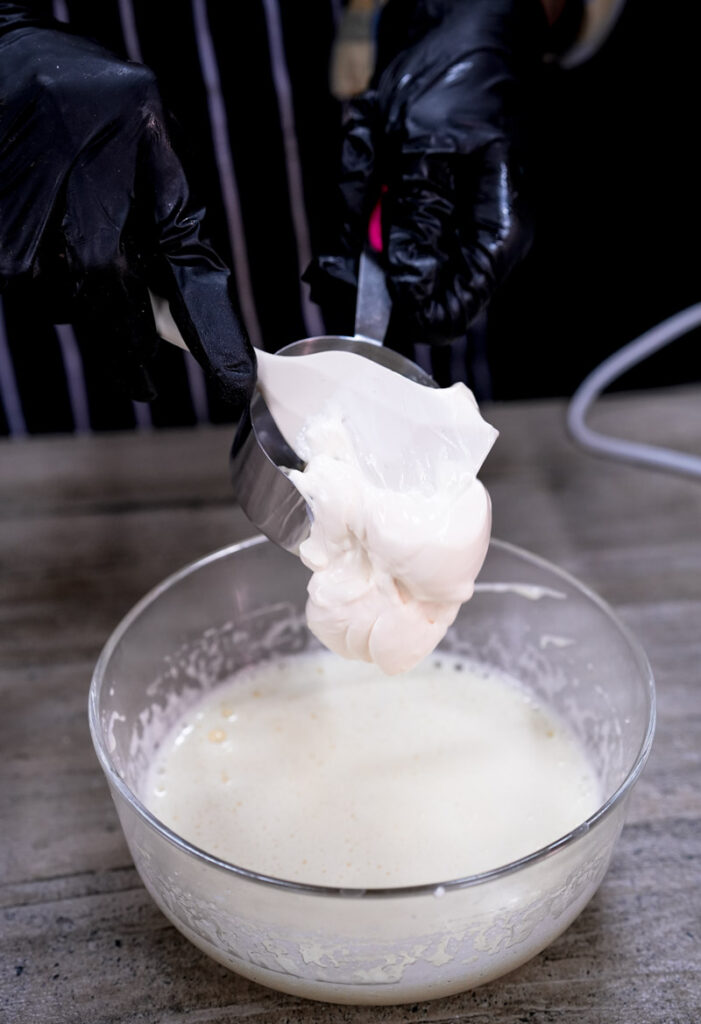
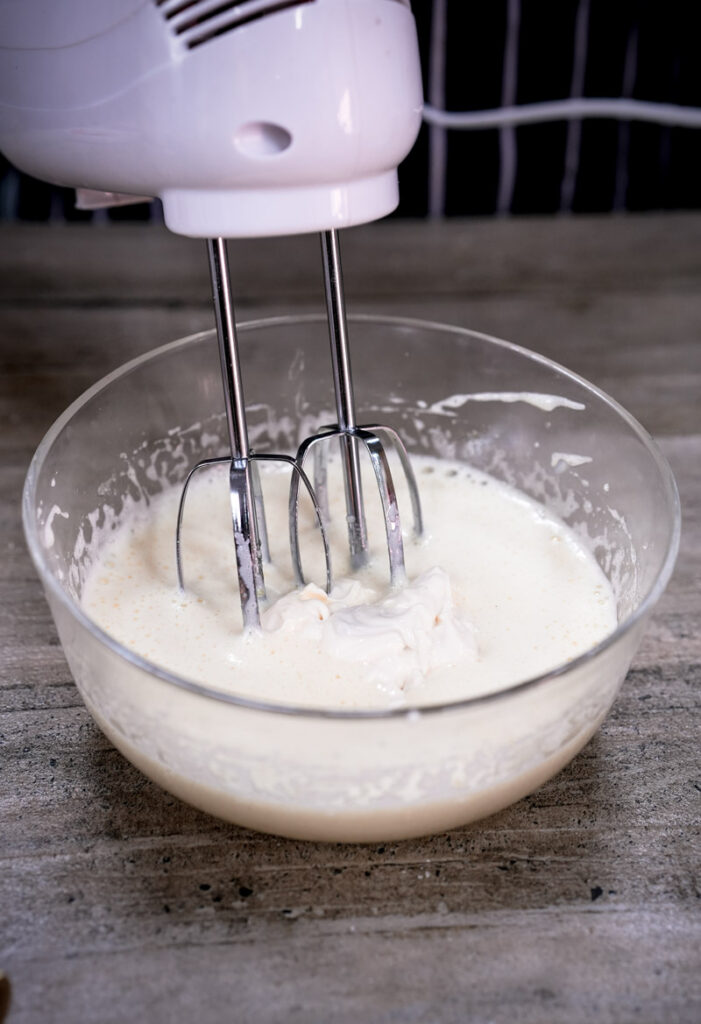
Cheesecake Time: Get a clean bowl. Beat the 200g softened cream cheese with your mixer (or by hand if you’re feeling strong!) until it’s totally smooth. Like, zero lumps. Beat in the 1/3 cup sugar. Then add the egg (room temp!) and 1 tsp vanilla. Mix just until it’s combined. Don’t beat too much air into this, or it might crack later. It should look smooth and yummy.
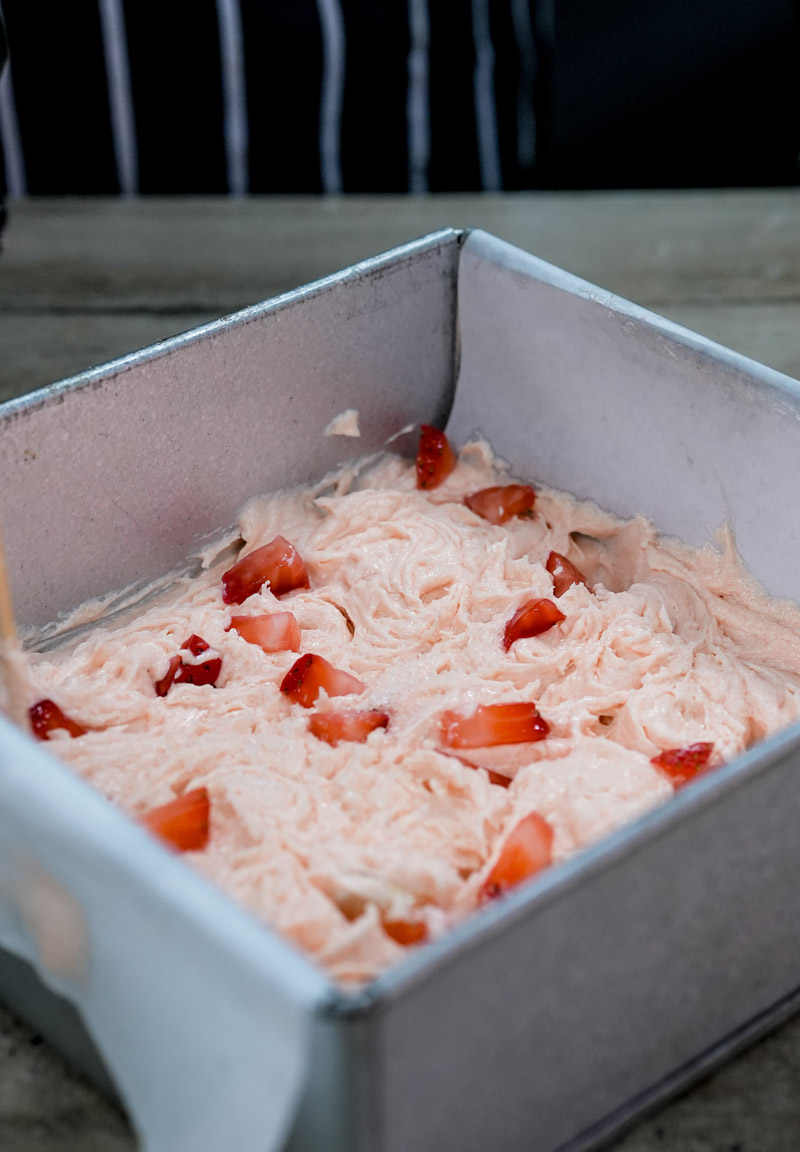
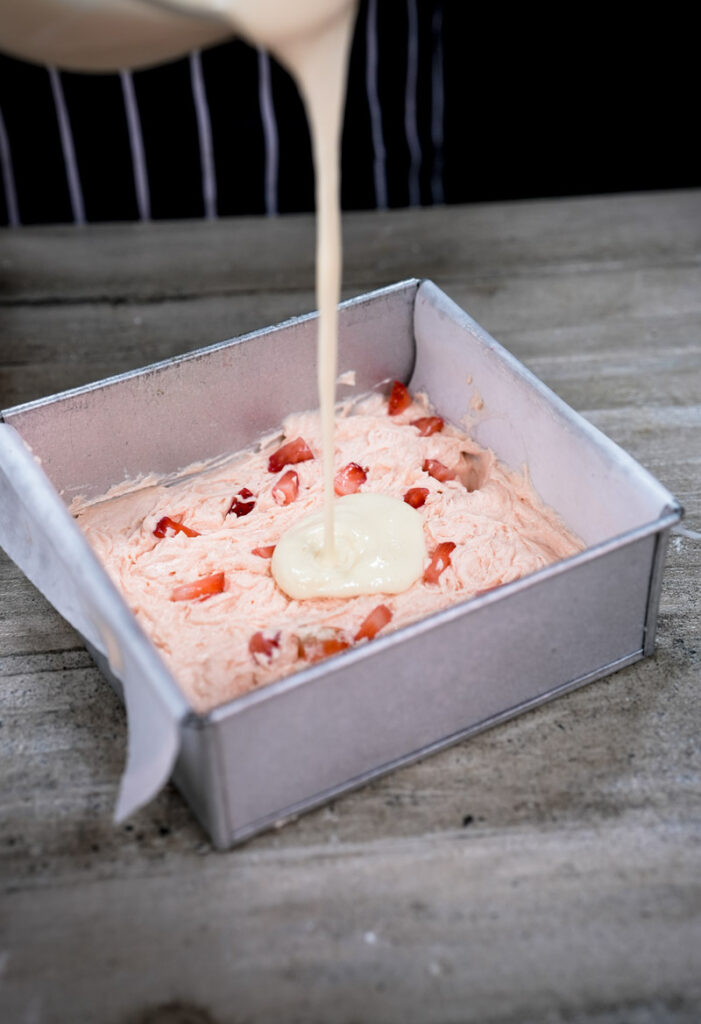
Layer Up: Spread about two-thirds of that thick brownie batter into your pan. Use a spoon or spatula to spread it evenly. Pour the lovely cheesecake batter right over the brownie layer.
Dollop and Swirl (The Fun Part!): Take spoonfuls of the rest of the brownie batter and plop them on top of the cheesecake. Drop little spoonfuls of the strawberry jam (if using) in the empty spots. Now, grab a butter knife or a skewer. Gently drag it through the batters to create swirls. Think figure-eights, or just zig-zags. Don’t overdo it! You want pretty swirls, not a muddy mess. I learned this the hard way once – ended up with pinkish-brown mush. Still tasted okay, but wasn’t pretty! Less is more here.
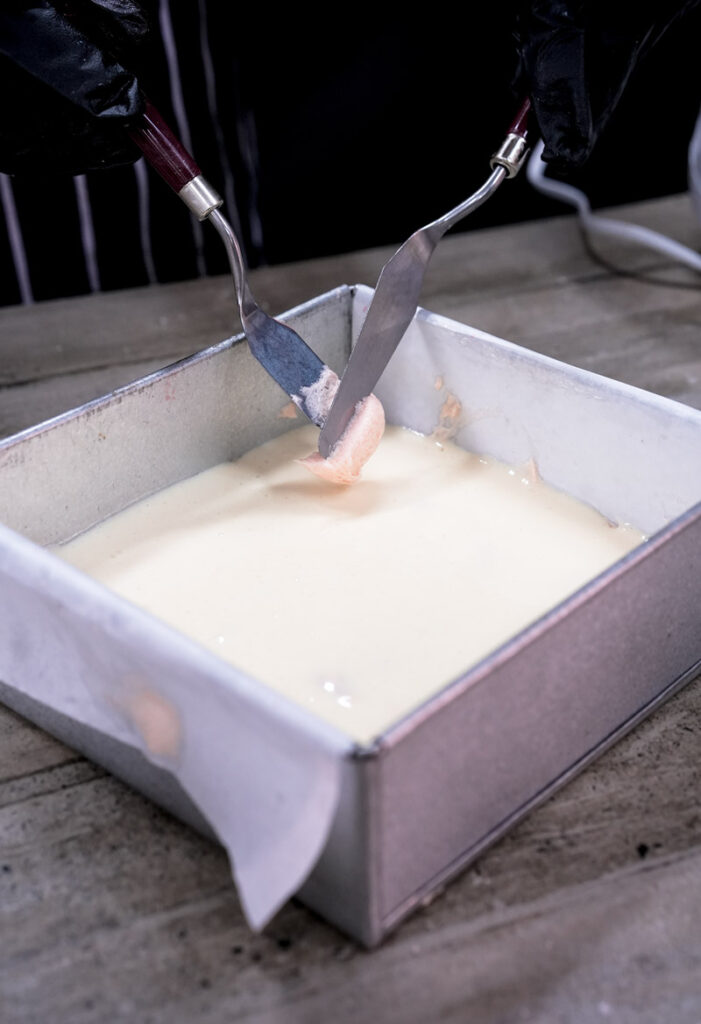

Into the Oven: Bake for 20-25 minutes. This seems fast, so start checking around 20 minutes. How to tell? The edges should look set. The cheesecake part might still jiggle just a tiny bit right in the middle (like jelly). If you stick a toothpick into a brownie part, it should come out with moist crumbs, not wet batter. If you stick it in the cheesecake, it should be mostly clean. Seriously, don’t overbake. Dry brownies and rubbery cheesecake are sad.
Cool Down – Super Important! Okay, deep breaths. Patience time. Let the pan cool on a wire rack until it’s completely room temperature. This takes at least 1-2 hours. Then, cover it loosely and stick it in the fridge for at least 2-3 hours. Overnight is even better! Why? Chilling makes the cheesecake firm and lets you cut perfect squares. Try cutting them warm, and you’ll have a gooey (but still tasty) disaster.
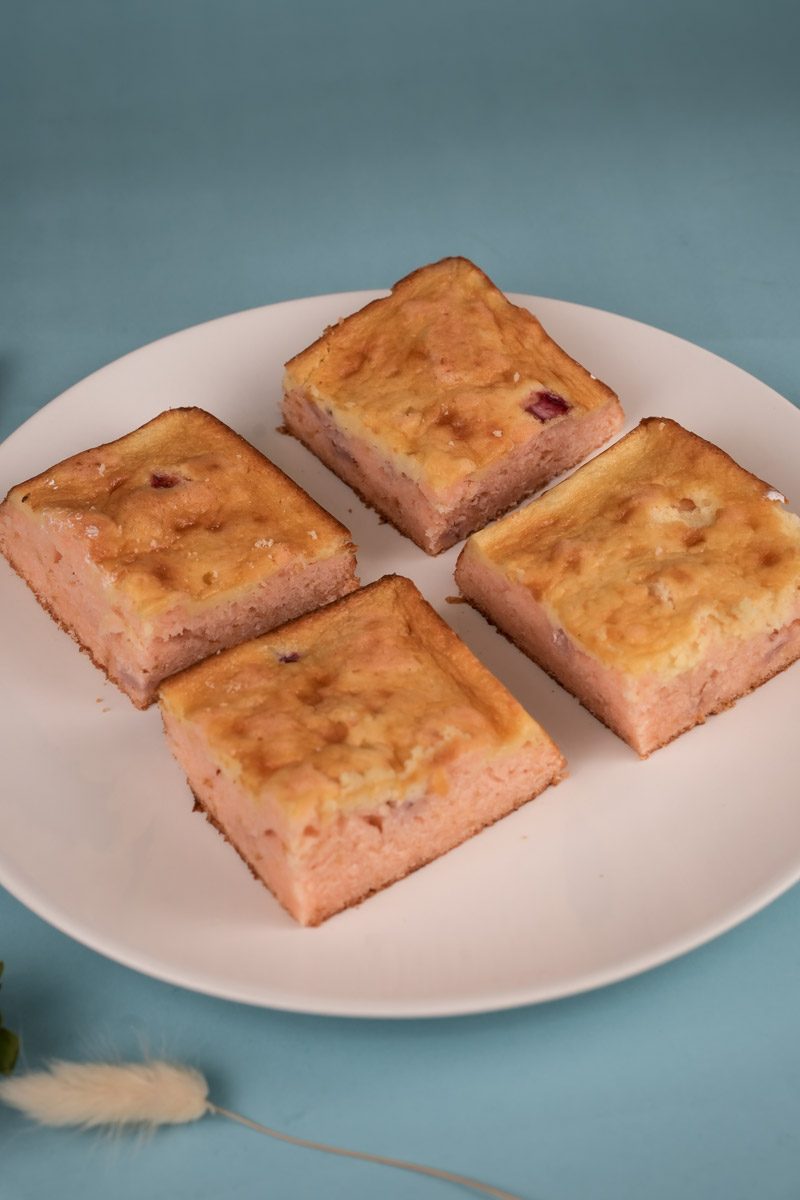
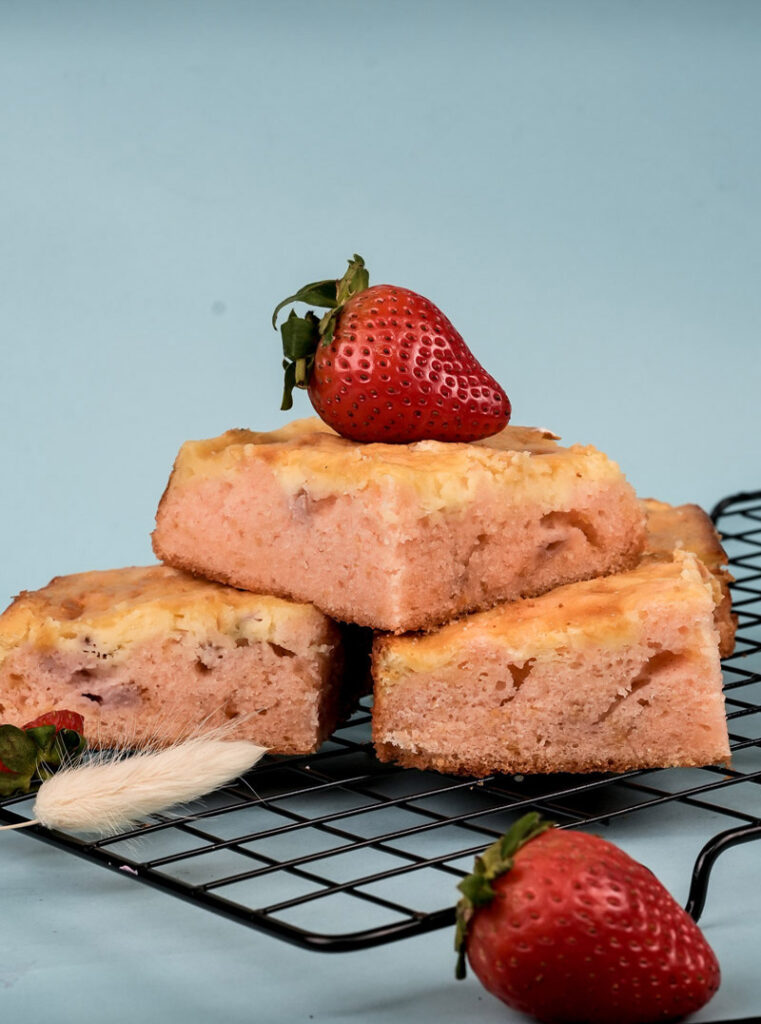
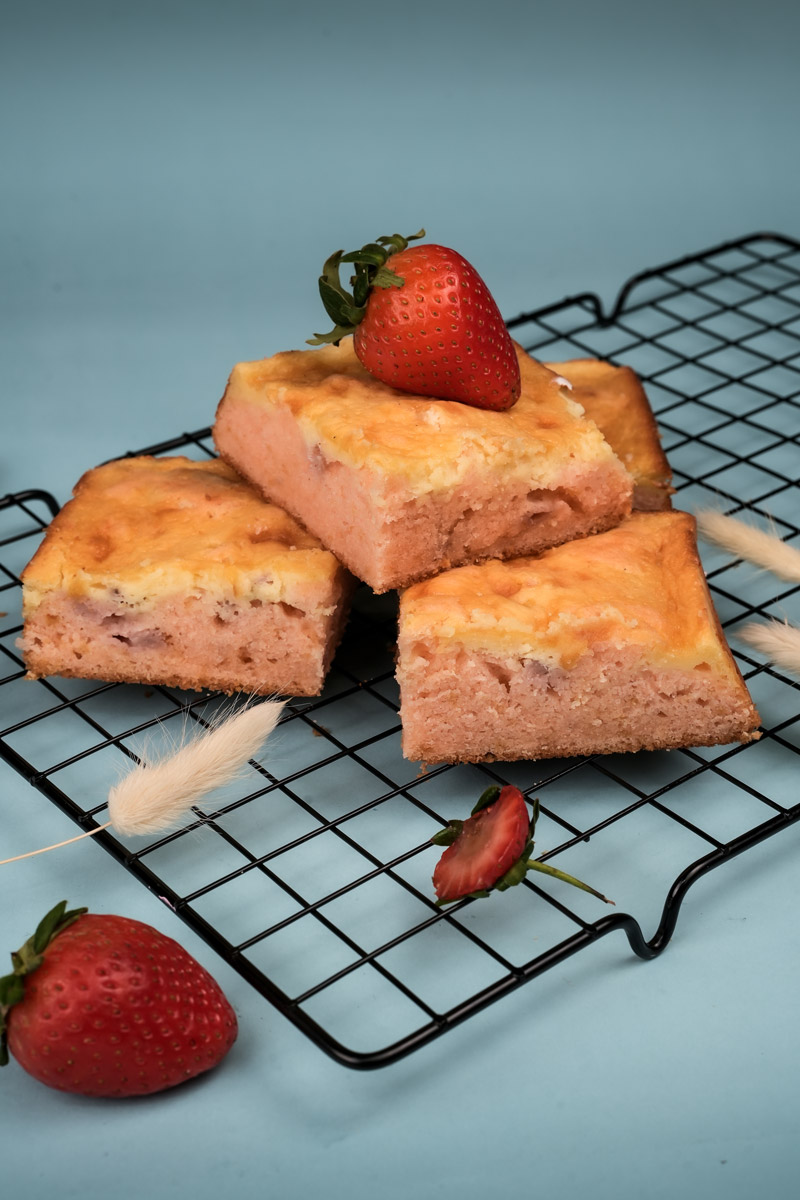
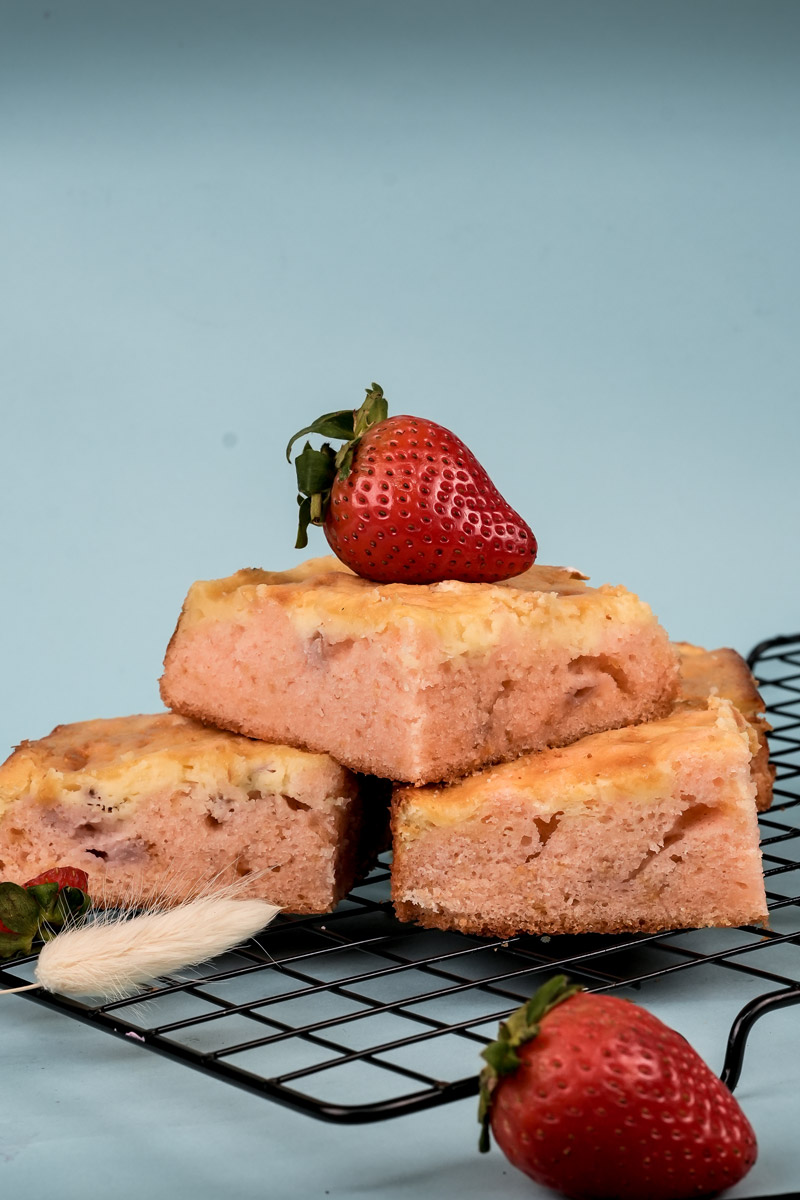
Slice and Admire: Once they’re really chilled, use those parchment paper handles to lift the whole block out. Put it on a cutting board. Use a big, sharp knife. For super clean cuts, wipe the knife clean after every cut. Hot tip: run the knife under hot water, dry it quickly, then slice. Makes it glide right through!
Mix It Up! Fun Ideas and Swaps
Want to play around with the recipe? Go for it! Baking should be fun.
- Need it Gluten-Free? Easy swap! Use a good gluten-free flour blend that says “1-to-1” or “measure for measure” on the bag (like Bob’s Red Mill in the blue bag). Texture might be slightly different, but still yummy.
- Trying Vegan? This is trickier. You’ll need vegan butter, a “flax egg” (1 Tbsp flaxseed meal + 3 Tbsp water, let it sit 5 mins) for each egg, vegan cream cheese (brands vary a lot in taste/texture!), and make sure your sugar/cocoa are vegan. Check the strawberry essence too. It’s a project, but doable!
- More Chocolate? Um, yes please! Stir ½ cup of chocolate chips (any kind!) into the brownie batter.
- Different Berry? Use raspberry jam! Or cherry! Go wild.
- Go Nuts: Add ½ cup of chopped walnuts or pecans to the brownie batter for some crunch.
- Citrus Twist: A little lemon or orange zest (like ½ tsp) in the cheesecake batter adds a nice brightness.
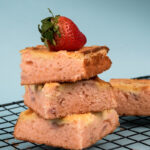
- Keep it Casual or Get Fancy: They’re great as is! For a party? Drizzle some melted chocolate (white or dark) over the cut squares. Or top with a fresh strawberry slice. Looks pro!
- Seasonal Fun: Use whatever jam is in season! Peach jam in summer? Cranberry jam with orange zest around the holidays? Fun!

Serving, Storing, and Enjoying Your Masterpiece
You baked them! Now what?
- How to Serve: Serve them chilled, straight from the fridge, or let them sit out for maybe 15-20 minutes. They look great on their own! A little dusting of powdered sugar is always nice. Or maybe a tiny dollop of whipped cream?
- What Goes With Them? A cold glass of milk is classic. Coffee works too. Feeling extra? A small scoop of vanilla ice cream. Chef’s kiss
- Storing Leftovers: Because of the cream cheese, these must live in the fridge. Keep them in an airtight container. They’ll taste great for 4-5 days. Maybe even better on day two!
- Reheat Them? Nope. Don’t do it. They’re meant to be cool and creamy. Heating will just melt the cheesecake weirdly.
- Can You Freeze Them? Yep! Let them chill completely, then slice ’em up. Wrap each square tightly in plastic wrap, then maybe foil. Or layer them in a freezer container with parchment paper between layers. They’ll be good in the freezer for 2-3 months. Just thaw them in the fridge overnight before eating. The texture might be a tiny bit softer, but still delicious.
And that’s it! Everything you need to know to make awesome Strawberry Cheesecake Brownies. I really hope you have fun baking these – and even more fun eating them! Happy Baking!
PrintStrawberry Cheesecake Brownies
Get ready for the best combo: rich, fudgy brownies swirled with creamy cheesecake and sweet strawberry flavor. Looks fancy, tastes amazing, but is surprisingly simple to make!
- Prep Time: 30 mins
- Cook Time: 20-25 mins
- Total Time: ~ 4 hrs (includes chilling)
- Yield: 10–12 squares 1x
- Category: Dessert Bar
- Cuisine: American Fusion
Ingredients
For the Brownie Base:
- 145g Unsalted Butter (about 10 Tbsp), melted
- 110g Granulated Sugar (about ½ cup + 1 Tbsp)
- 1 Large Egg, room temp
- 1 tsp Strawberry Essence
- 1 tsp Red Food Colouring (optional, for pink color)
- 100g All-Purpose Flour (about ¾ cup)
- 30g Unsweetened Cocoa Powder (about ¼ cup)
- ¼ tsp Salt
For the Cheesecake Swirl:
- 200g Full-Fat Cream Cheese (slightly less than one 8oz block), softened!
- ⅓ cup Granulated Sugar (about 65-70g)
- 1 Large Egg, room temp
- 1 tsp Vanilla Essence
For the Strawberry Swirl:
- ¼ cup Strawberry Jam or Preserves
Instructions
- Prep: Heat oven to 350°F (175°C). Line an 8×8 inch pan with parchment paper, leaving overhangs. Lightly grease the paper.
- Mix Brownie Batter: Whisk melted butter and 110g sugar. Whisk in 1 egg and strawberry essence. Add food coloring if using. In a separate bowl, whisk flour, cocoa, and salt. Gently fold dry into wet ingredients just until combined. Don’t overmix! Batter will be thick.
- Mix Cheesecake Batter: Beat softened cream cheese until smooth (no lumps!). Beat in ⅓ cup sugar, then 1 egg and vanilla just until combined. Don’t overmix!
- Layer: Spread about ⅔ of the brownie batter in the pan. Pour cheesecake batter over it evenly.
- Dollop & Swirl: Drop spoonfuls of remaining brownie batter and the strawberry jam over the cheesecake. Use a knife or skewer to gently swirl the layers together. Less is more!
- Bake: Bake for 20-25 minutes. Edges should be set, center cheesecake might have a slight wobble. A toothpick in a brownie part should have moist crumbs. Don’t overbake!
- COOL COMPLETELY: Let pan cool on a wire rack (1-2 hrs). Then cover & chill in fridge for at least 3 hours (overnight is best!). This is crucial for texture and slicing.
- Slice: Lift brownies out using parchment paper. Use a sharp knife (wiped clean between cuts) to slice into squares.
Notes
- Serving: Delicious chilled! Perfect with milk, coffee, or ice cream.
- Tips:
- Room temp eggs & softened cream cheese are key for smooth batters!
- Don’t overmix batters (keeps brownies fudgy, cheesecake smooth).
- Chilling is essential for clean slices and best texture.
- Run knife under hot water & dry for super neat cuts.
- Storage: Keep leftovers in an airtight container in the fridge for up to 5 days.
- Freezing: Freeze cooled, sliced squares (wrapped well or layered with parchment) for up to 2-3 months. Thaw in the fridge. Do not reheat.