Hey friends, have you ever made a cake that’s meant to be messy? If not, you are in for such a treat.
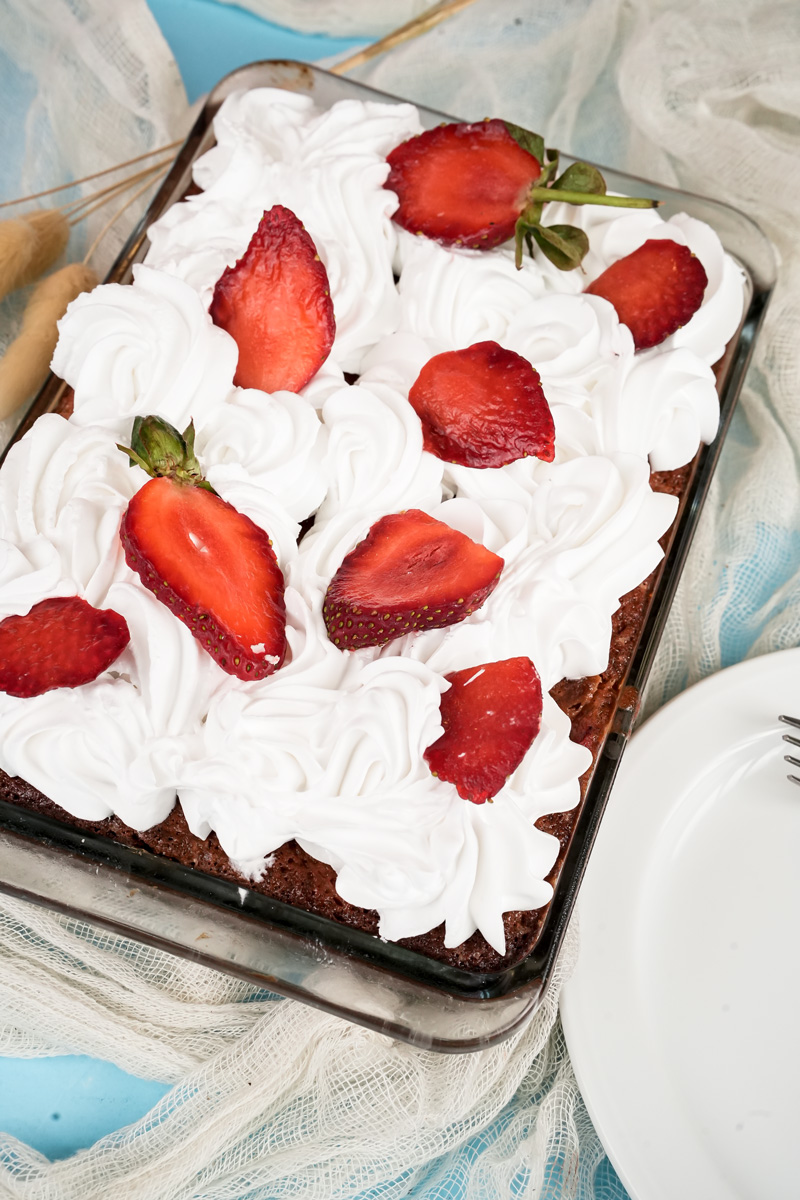
Today, I’m sharing one of my all-time favorite desserts: the Strawberry Earthquake Cake. It’s gooey, it’s ridiculously delicious, and it’s so much easier to make than it looks.
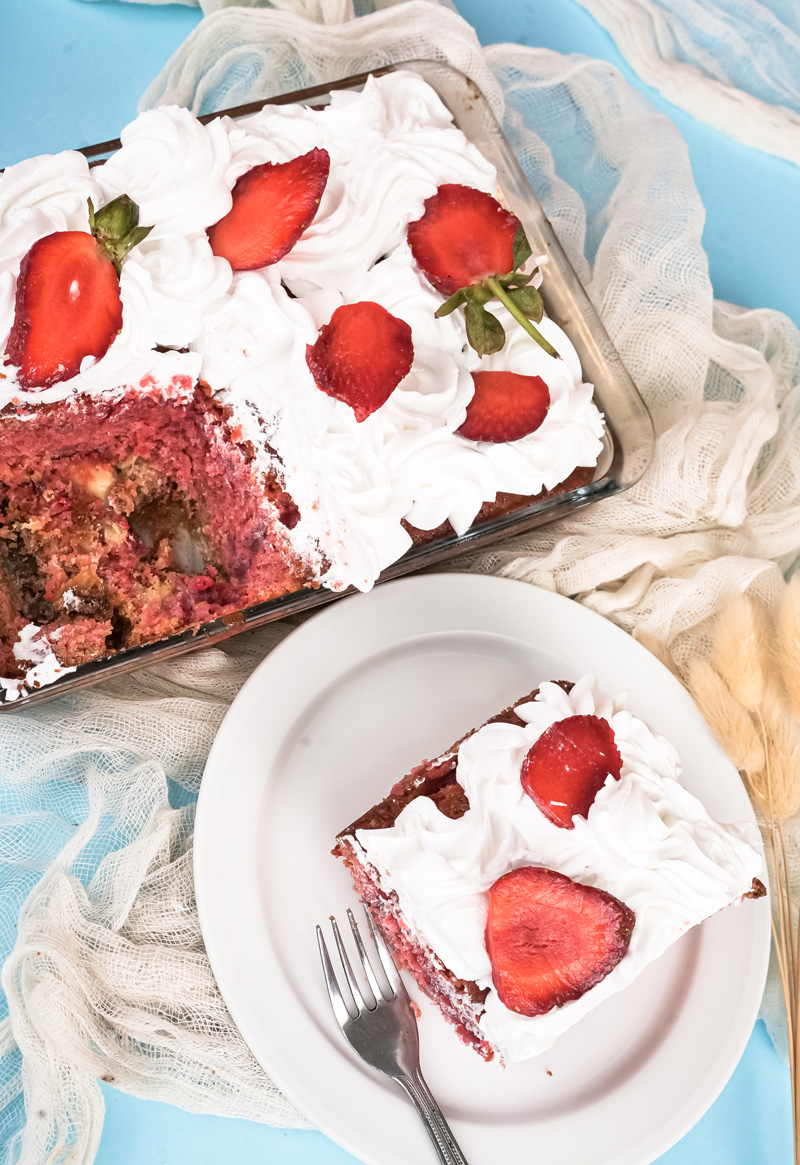
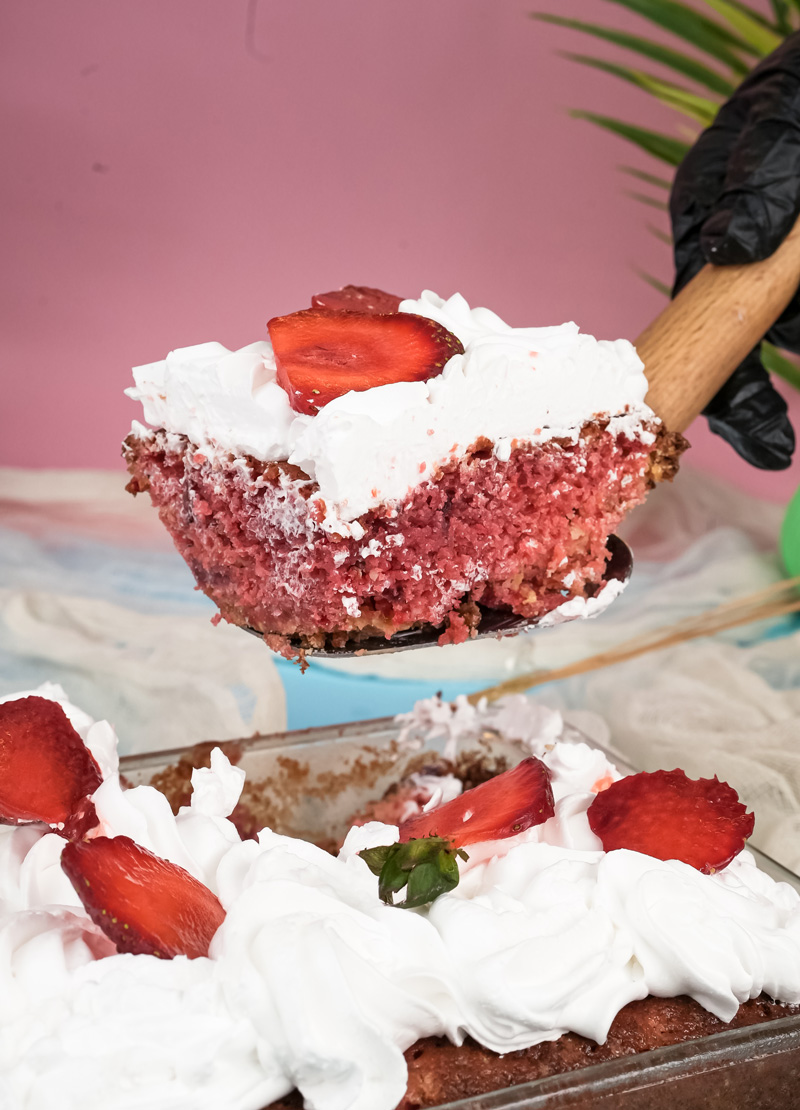
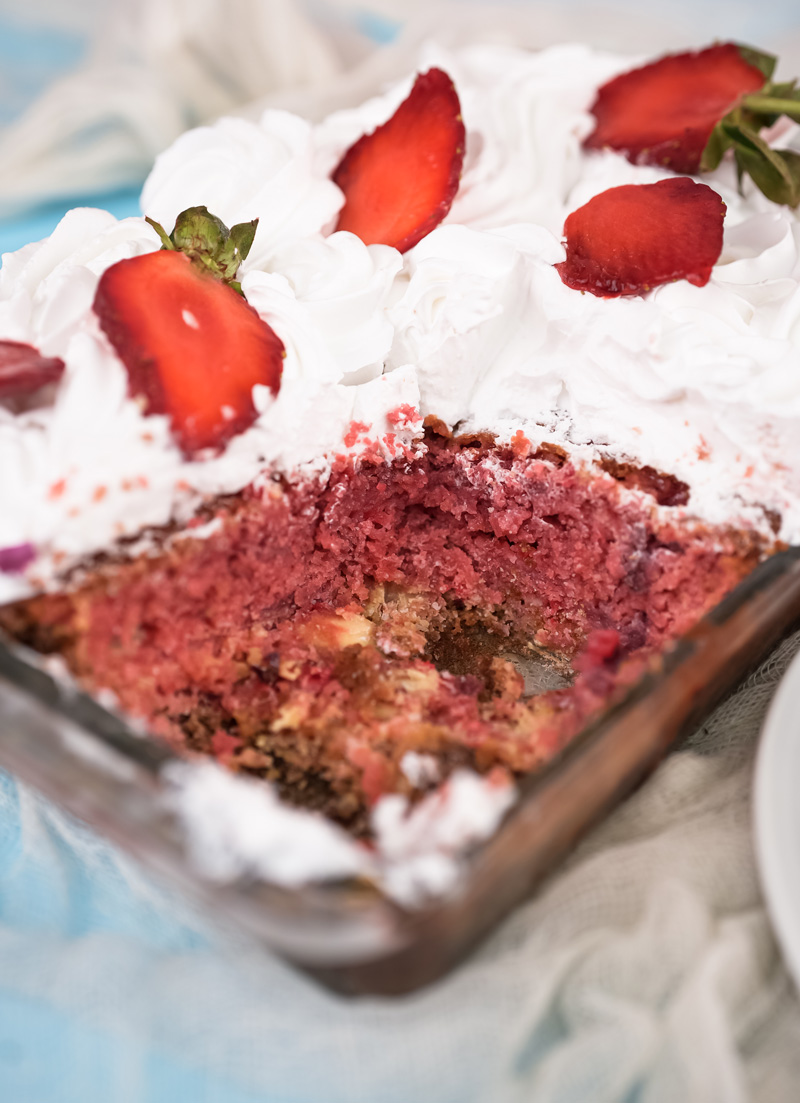
Picture this: a super moist strawberry cake. But wait, it’s cracked all over. And peeking through those cracks are these glorious rivers of rich, gooey cream cheese filling and little pockets of melted white chocolate. Every single bite is a different, wonderful surprise.
Why the funny name? It comes from the way it looks after baking—all cracked and cratered, like a mini earthquake hit your pan. It’s those cracks that let the cheesecake-like filling sink in and create the magic. I’ve made this for potlucks and family get-togethers more times than I can count, and it’s always the first dessert to disappear.
This isn’t just any recipe; it’s the one I’ve perfected over time. It has the perfect pop of fresh strawberry flavor, the rich creaminess of a cheesecake, and sweet little bursts of white chocolate. It’s way more than just a cake. It’s a whole mood.
Let’s Talk Game Plan
Before we start measuring and mixing, let’s quickly huddle up. Knowing the plan makes everything go smoothly.
- How much time? You’ll need about 15 minutes to prep everything and 45 minutes for it to bake. The hardest part? You have to let it cool for at least 30 minutes. I know, the temptation to dig in right away is real!
- How many servings? This makes one 9×13-inch cake, which is perfect for about 12 people. If you need less, you can totally cut the recipe in half and bake it in an 8×8-inch pan. Just start checking it for doneness a few minutes earlier.
- How hard is it? This is my favorite part. It’s so easy. If you can make a cake from a box mix, you can absolutely nail this recipe. Seriously.
- Can I prep ahead? You sure can! I love getting a head start. You can whip up the cream cheese filling a day ahead and keep it in the fridge. Just let it sit on the counter for about 20 minutes to soften up before you need it. You can also wash and chop your strawberries in advance. Easy peasy.
The Tools for the Job
You don’t need a bunch of high-tech gadgets for this. We’re keeping it simple. Here’s what you’ll want to have handy.
| Essential Tool | Possible Substitute | Why It’s Used |
| 9×13-inch Baking Pan | Two 8-inch round pans or one 8×8-inch pan (for a half batch). | Gives the cake the perfect depth for the batter and filling to bake up just right. |
| Electric Mixer | A stand mixer, or a whisk and a little muscle. | Gets that cream cheese filling perfectly smooth and lump-free. |
| Large & Medium Bowls | Any mixing bowls you have. | You’ll need one for the cake batter and one for that amazing filling. |
| Spatula / Knife | A regular butter knife works great. | For swirling the filling into the batter to create that cool marbled look. |
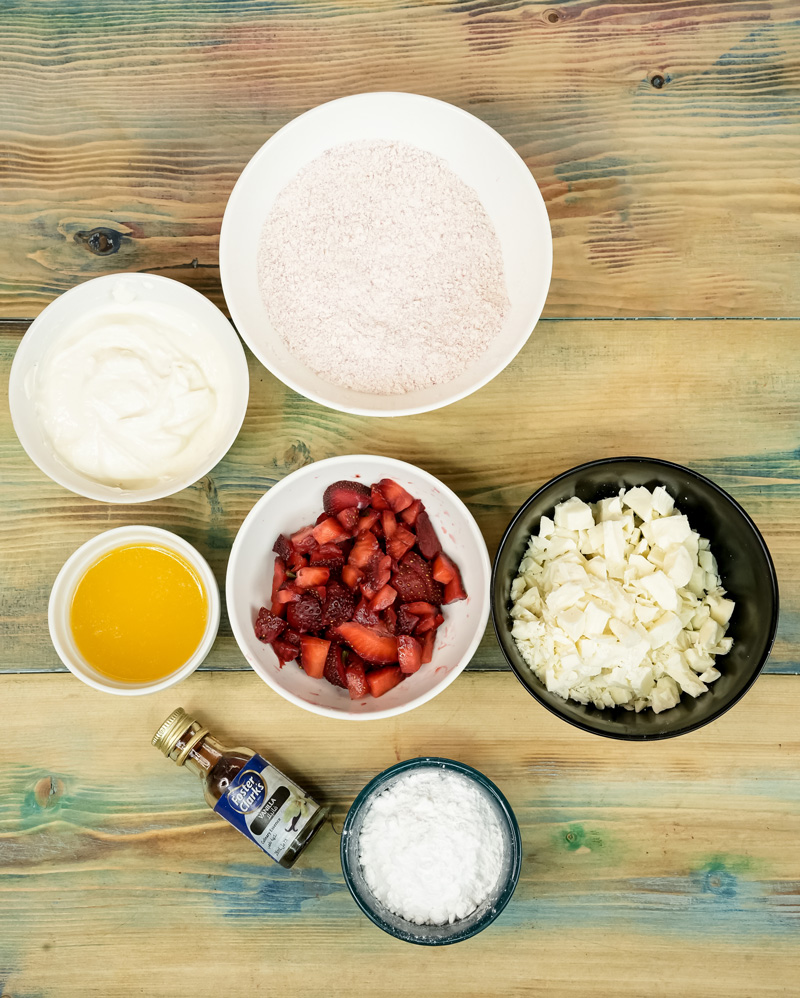
Our All-Star Ingredients
The real secret to this cake is how a few simple ingredients come together to create something so decadent. Let’s break down the cast of characters.
We’re starting with a box of strawberry cake mix. I know, I know, but trust me. It’s our shortcut to a fluffy, perfectly pink, and delicious base. You’ll also need the things the box calls for, usually eggs, oil, and water.
For the “earthquake” part, you’ll need:
- Cream Cheese: One 8-ounce block of the full-fat stuff. Please use the block, not the whipped kind in a tub. The block gives the filling the rich structure it needs. Make sure it’s softened to room temperature so you don’t get lumps. Nobody wants lumpy filling.
- Unsalted Butter: Half a cup, melted. It makes the filling extra luscious. If you only have salted butter, that’s fine—just don’t add any extra salt.
- Powdered Sugar: Two cups of this will sweeten the filling and give it an almost fudge-like texture.
- Vanilla Extract: Just a splash for that warm, deep flavor.
- Fresh Strawberries: One cup, diced up.1 Fresh is definitely best here for that bright, summery taste. If you have to use frozen, thaw them first and pat them really, really dry with a paper towel. Otherwise, you’ll add too much water to the mix.
- White Chocolate Chips: One cup sprinkled on top. These melt into sweet little pools throughout the cake. It’s just heavenly.
Step-by-Step: Let’s Make Some Magic
Alright, ready for the fun part? Let’s get baking. I’ll walk you through every step.
Step 1: Get Your Foundation Ready
First up, get your oven preheating to 350°F (175°C).2 A hot oven is key to getting an even bake. While it heats up, grab your 9×13-inch pan and grease it well. Butter, baking spray—whatever you like to use.
Now, in a big bowl, prepare the strawberry cake mix just like the box tells you to. Mix it up until it’s just combined. A few little lumps are totally fine! If you over-mix, the cake gets tough, and we want it to be super tender.
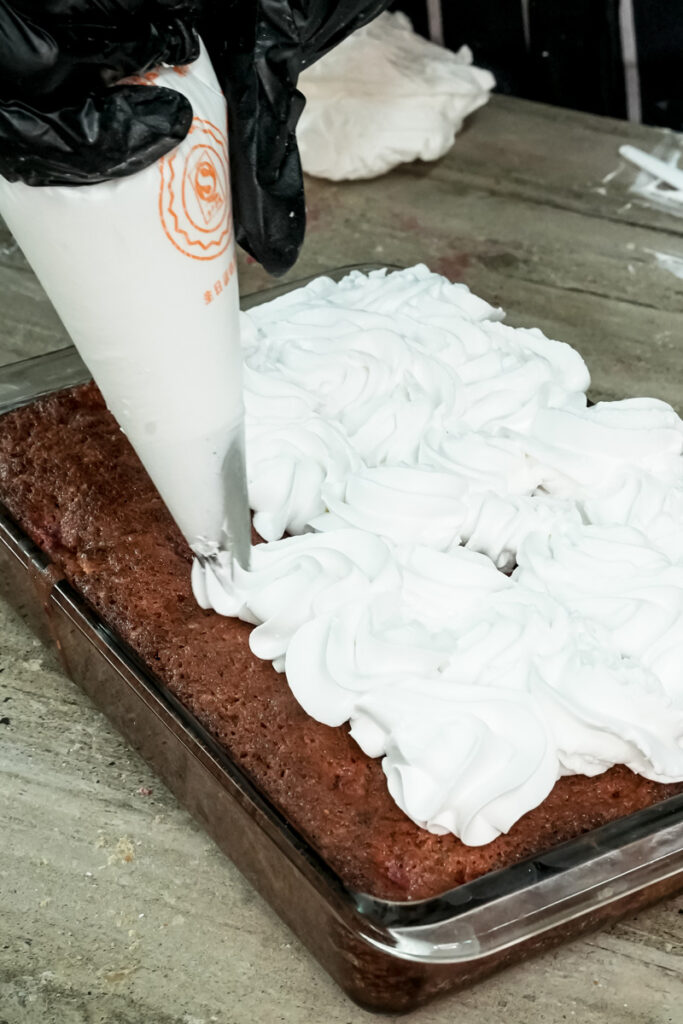
Pour that pretty pink batter into your pan and spread it out. Then, go ahead and sprinkle the white chocolate chips all over the top. This is the first layer of yum.
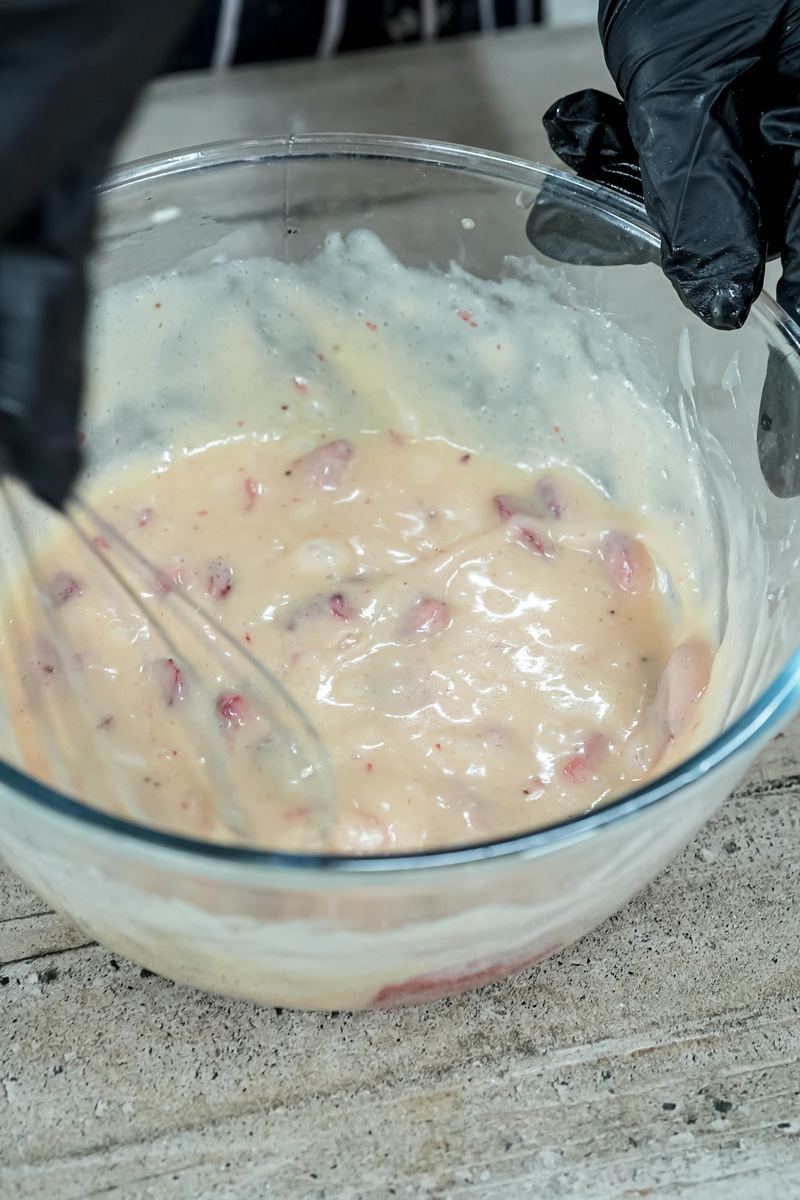
Step 2: Make That Creamy, Dreamy Filling
Grab another bowl. It’s time to make the good stuff.
Combine your softened cream cheese, melted butter, and vanilla. Use an electric mixer on medium speed to beat everything together until it’s perfectly smooth. Seriously, hunt down any lumps and get rid of them.
Now, turn the mixer down to low and slowly add the powdered sugar. Mix just until it disappears. A little pro tip: don’t go crazy beating it here, or the filling can get a little grainy. Once the sugar is mixed in, switch to a spatula and gently fold in your diced strawberries. You’re looking for pretty red streaks in the white filling.
Step 3: Let’s Make an Earthquake!
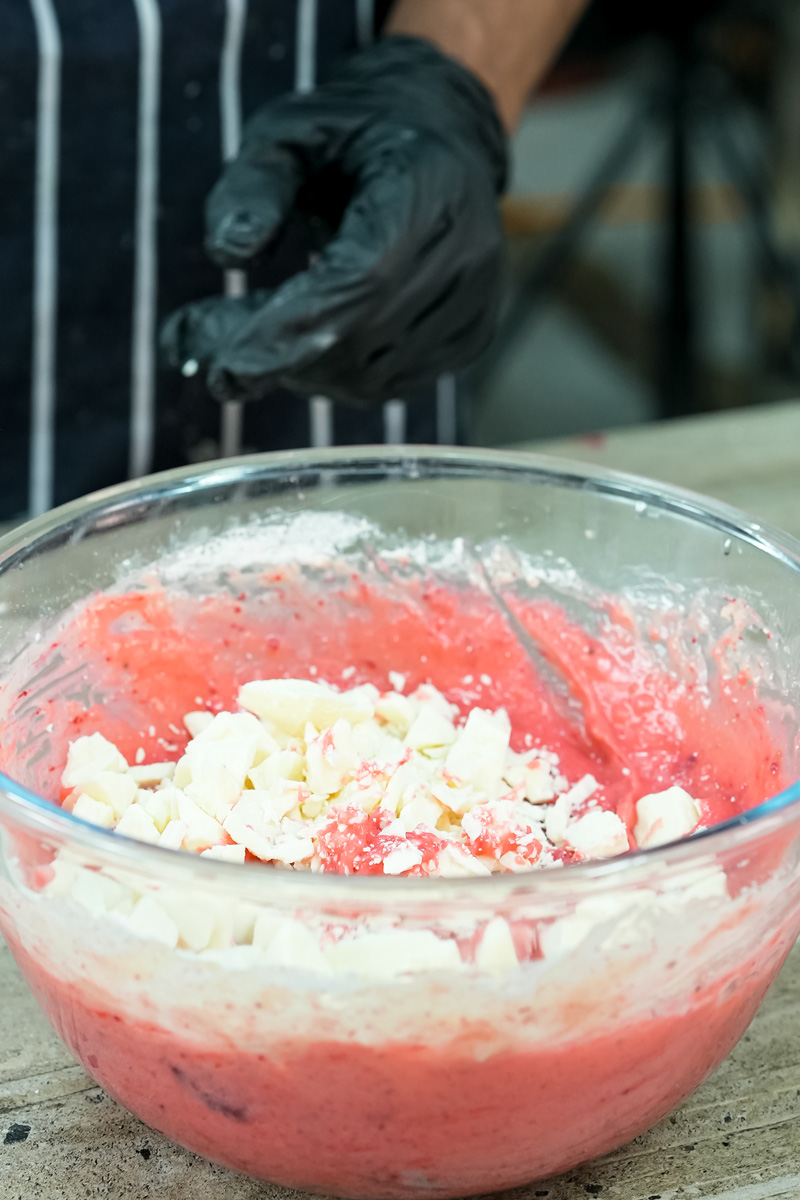
This is the best part. Take that glorious cream cheese mixture and drop it by the spoonful all over the cake batter. Don’t try to be neat. Random blobs are exactly what you want.
Once all the filling is on there, take a butter knife and give it a gentle swirl. I mean gentle. Just a few figure-eight motions is all you need. The idea is to marble it, not mix it all together. If you overdo it, you’ll lose those gooey pockets that make the cake so special.
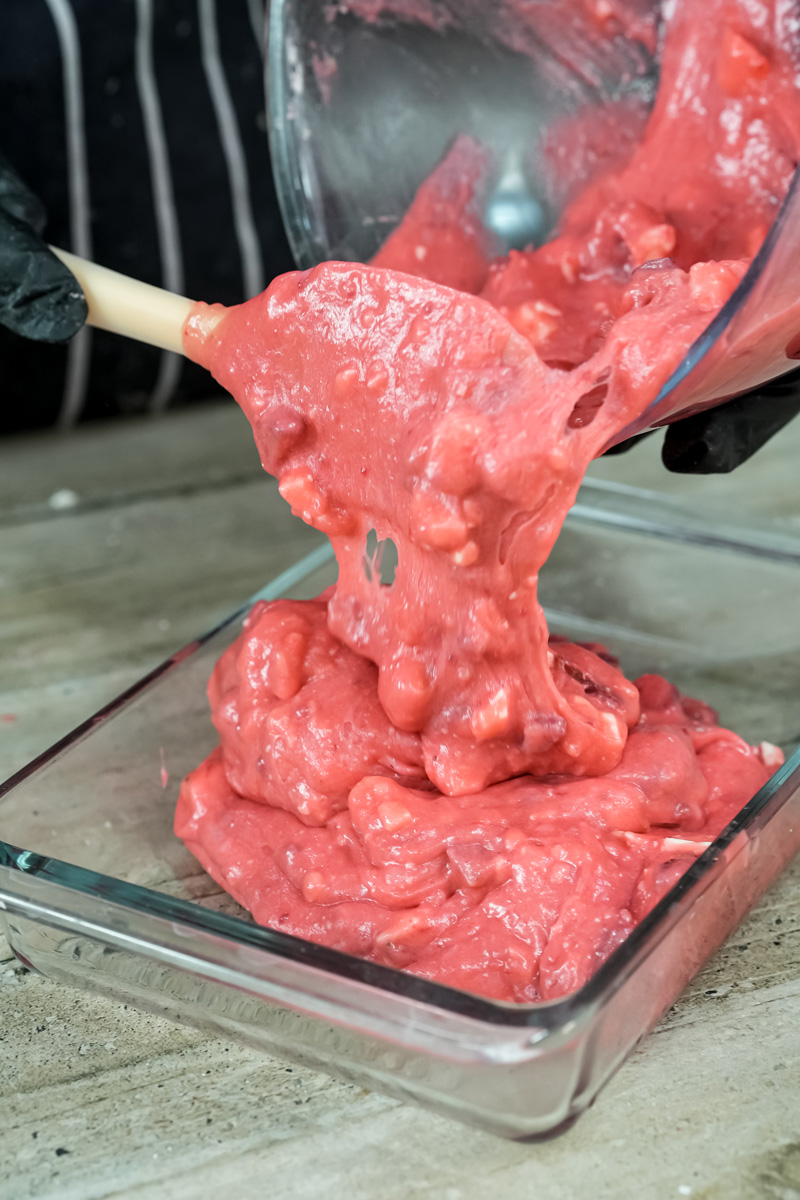

Step 4: Bake It to Perfection
Slide that pan into your hot oven and bake for 40 to 45 minutes.
You’ll know it’s done when the cakey parts look set and the edges are turning a light golden brown. The cream cheese spots will still have a little jiggle to them, and that’s perfect. If you stick a toothpick into a cakey part, it should come out with moist crumbs, not wet batter. Oh, and your kitchen is going to smell absolutely incredible.
Let it cool on a wire rack. This part requires patience, I know, but it helps the cake set up properly.
Want to Mix It Up? Fun Variations
Once you get the hang of this recipe, it’s so much fun to customize. Here are a few ideas I’ve played with:
- Lemon-Berry: Add the zest of one lemon to the cream cheese filling. It adds a bright, zesty flavor that’s amazing with the strawberries.
- For the Chocolate Fanatic: Use a chocolate cake mix instead of strawberry, and swap the white chocolate chips for semi-sweet. So. Good.
- A Tropical Twist: Fold about half a cup of sweetened shredded coconut into the batter along with the chocolate chips.
- Use What’s in Season: This cake is great with other fruits! Try a spice cake mix with diced apples in the fall, or a yellow cake mix with fresh peaches in the summer.
Serving and Storing Your Masterpiece
You did it! Now, how should you serve this work of art?
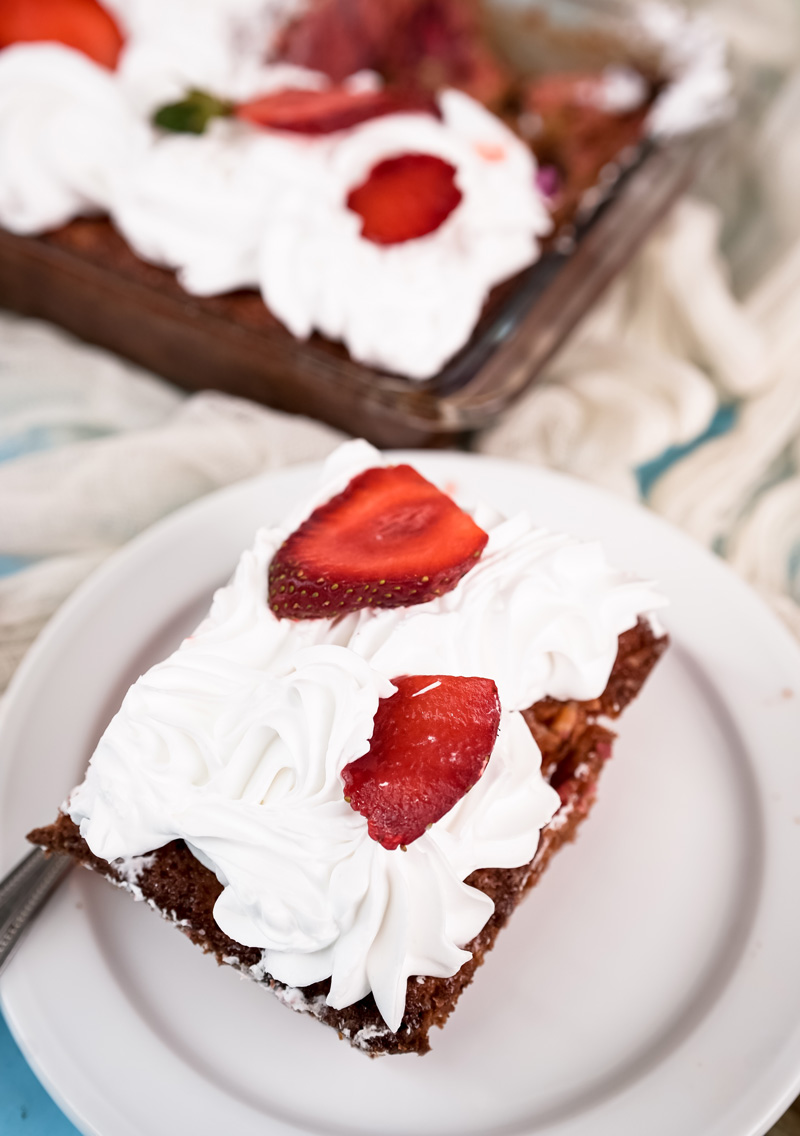
For the best experience, serve it slightly warm. The melty chocolate and gooey filling are just out of this world. I highly recommend a scoop of vanilla ice cream or a dollop of whipped cream on top.
- Storage: You can keep the cake covered at room temperature for a day. If you need to store it longer, cover it up and pop it in the fridge for up to 4 days.
- Reheating: Want to get that fresh-out-of-the-oven feeling back? A quick 15-20 seconds in the microwave for a single slice does the trick.
- Freezing: This cake freezes beautifully. You can freeze the whole thing or individual slices. Just wrap them well in plastic wrap and then foil. They’ll be good for up to 3 months. Just thaw it in the fridge overnight when you’re ready for a treat.
I really hope you have as much fun making this cake as I do. Happy baking!
PrintSTRAWBERRY EARTHQUAKE CAKE
A wonderfully messy and delicious cake, with a moist strawberry base, rivers of gooey cream cheese filling, and pockets of melted white chocolate. It’s a guaranteed crowd-pleaser that’s surprisingly simple to make!
- Prep Time: 15 minutes
- Cook Time: 45 minutes
- Total Time: 1 hour
- Yield: 12 slices 1x
- Category: Dessert
- Cuisine: American
Ingredients
For the Cake:
- 1 box Strawberry Cake Mix
- Ingredients listed on the cake mix box (usually eggs, oil, and water)
- 1 cup White Chocolate Chips
For the Cream Cheese Filling:
- 1 (8-ounce) block full-fat cream cheese, softened
- ½ cup unsalted butter, melted
- 2 cups powdered sugar
- 1 teaspoon vanilla extract
- 1 cup fresh strawberries, diced
Instructions
- Prep: Heat your oven to 350°F (175°C). Grease a 9×13-inch baking pan.
- Make Cake Batter: In a large bowl, prepare the strawberry cake mix according to the package directions. Pour the batter into your prepared pan and spread evenly. Sprinkle the white chocolate chips over the top.
- Mix Filling: In a separate bowl, use an electric mixer to beat the softened cream cheese, melted butter, and vanilla until smooth and creamy. Gradually mix in the powdered sugar on low speed until just combined. Gently fold in the diced strawberries with a spatula.
- Create the “Earthquake”: Drop spoonfuls of the cream cheese mixture randomly over the cake batter. Use a butter knife to make a few gentle swirls—don’t overmix!
- Bake: Bake for 40-45 minutes. The cakey parts should look set, and the cream cheese areas will still be slightly jiggly. A toothpick inserted into the cake part should come out with moist crumbs.
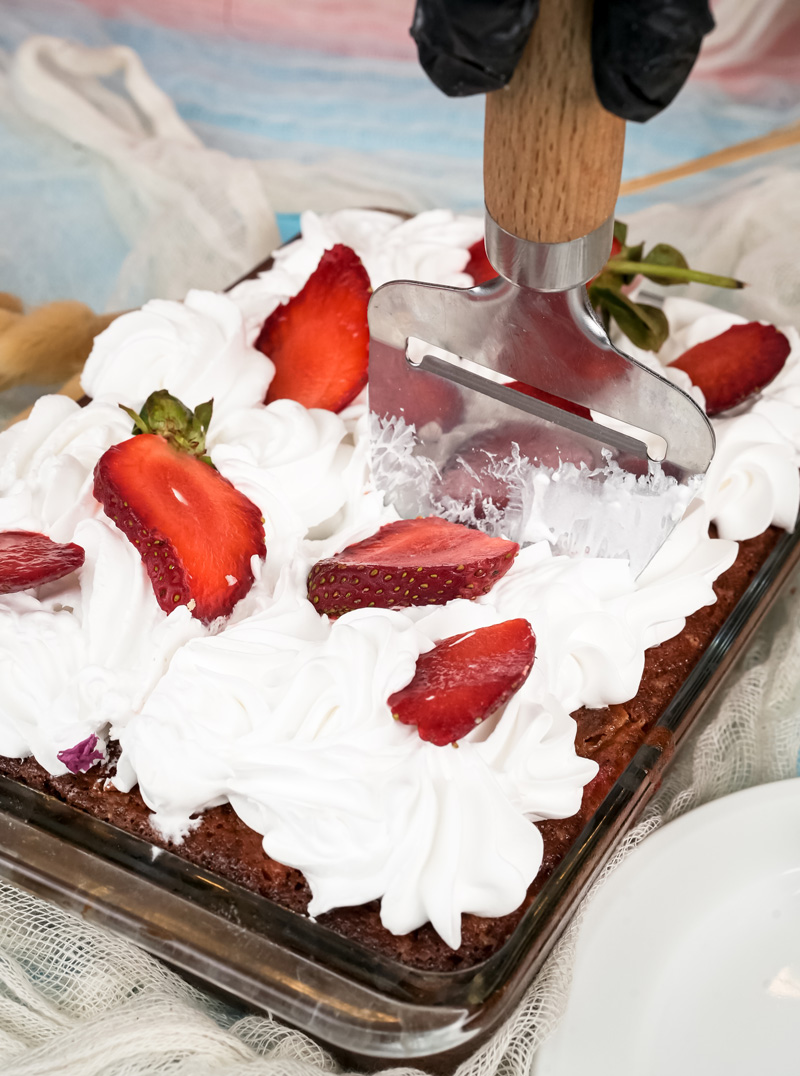
- Cool: Let the cake cool on a wire rack before slicing and serving.
Notes
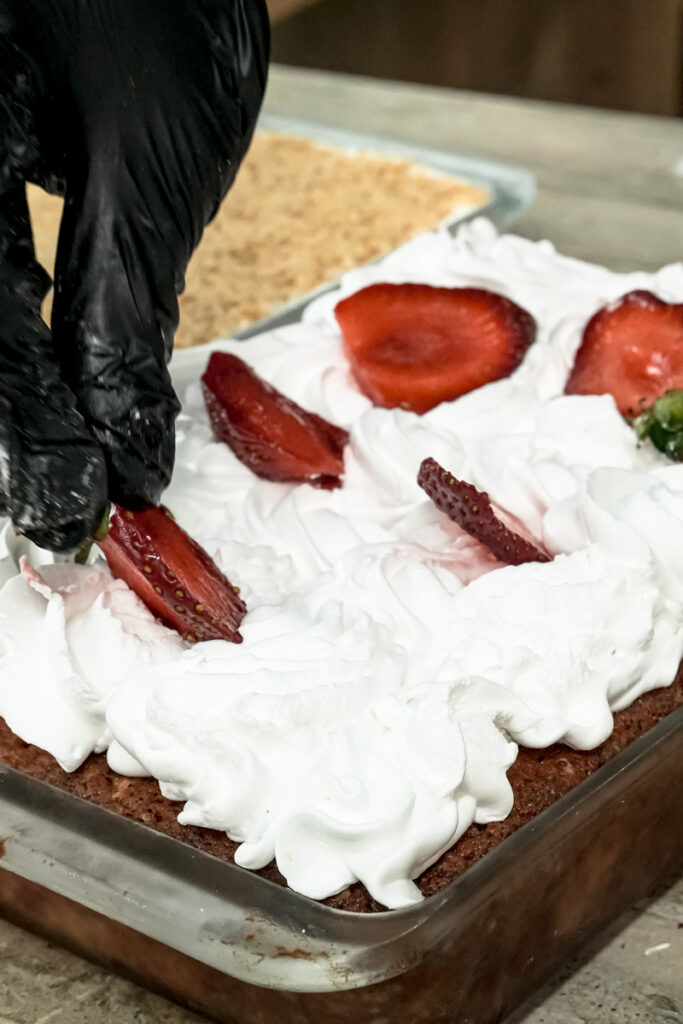
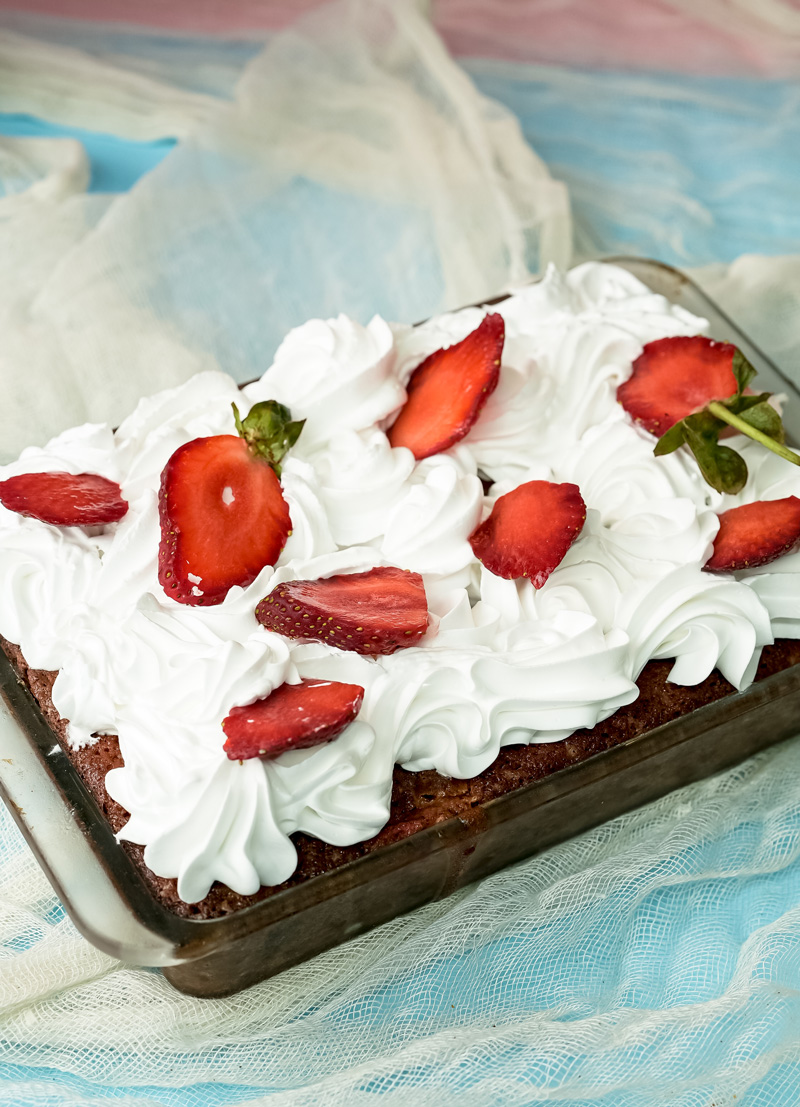
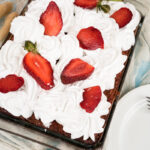
- Serving Suggestion: This cake is amazing served warm, on its own or with a scoop of vanilla ice cream. Garnish with extra fresh strawberry slices for a beautiful presentation.
- Tips & Tricks: For the best filling, make sure your cream cheese is at room temperature to avoid lumps. When swirling the filling, less is more! This creates those distinct, gooey pockets.
- Storage & Reheating: Store the cake covered in the refrigerator for up to 4 days. To reheat a slice, microwave for 15-20 seconds for that fresh-from-the-oven warmth. It also freezes wonderfully for up to 3 months.